8 Plywood Interior Hacks for Modern Homes
Plywood, with its versatile grain, affordability, and durability, is a go-to material for creating stylish, modern interiors. Its layered wood composition offers strength and a natural aesthetic, making it ideal for DIY projects that add warmth and character to homes. Given your interest in elegant, practical design solutions (seen in your requests for wood tile floors, aesthetic light bulbs, and creative bulb projects), plywood is a perfect fit for crafting budget-friendly, contemporary looks that align with your sophisticated taste (like marble flooring and cozy garden setups). These hacks are beginner-friendly, requiring minimal tools, and focus on modern, functional aesthetics.
This guide presents 8 plywood interior hacks for modern homes, each designed to enhance style and utility while keeping costs low. Drawing from DIY trends and your preference for timeless, charming designs, these projects include step-by-step instructions, materials, and budget considerations. Whether you’re aiming for minimalist elegance or rustic charm, these plywood hacks will transform your space with a warm, modern vibe.
1. Plywood Accent Wall for Textured Drama
Create a striking accent wall with plywood sheets for a warm, modern focal point.
- Materials: 4×8-foot birch plywood sheets (1/4-inch thick), table saw or circular saw, wood stain (e.g., walnut), paintbrush, construction adhesive, finishing nails, sandpaper (120-grit).
-
Steps:
- Measure the wall; cut plywood into 6-inch-wide planks using a table saw for clean edges.
- Sand planks lightly to smooth surfaces; apply wood stain and let dry for 4 hours.
- Apply construction adhesive to the wall; press planks vertically or horizontally, staggering seams for a shiplap effect.
- Secure with finishing nails; fill nail holes with wood filler and sand smooth.
- Best Placement: Living room, bedroom, or dining area behind a console, complementing your love for bold patterns (like wood tile floors).
- Tip: Use a matte sealant for a natural look; pair with neutral furniture to highlight the wood grain, echoing your aesthetic bulb choices.
- Budget Consideration: Plywood ($20–$30 per sheet), stain ($8–$15), adhesive/nails ($5–$10). Total cost: $60–$100 for a 10×10-foot wall.
- Safety Note: Wear gloves and safety glasses when cutting; ensure proper ventilation when staining.
Inspired by Scandinavian design, this accent wall adds warmth and texture to minimalist spaces.
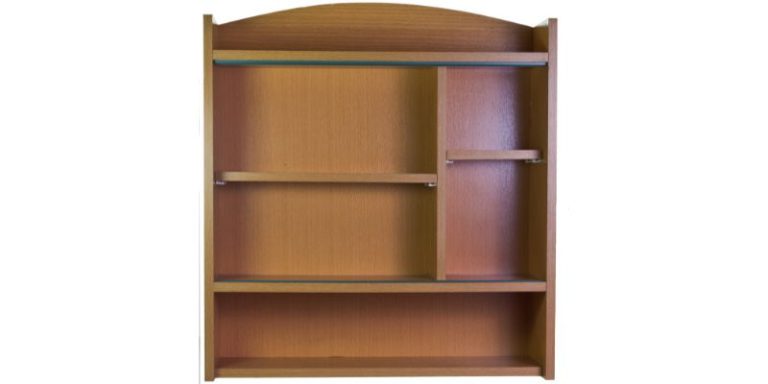
2. Floating Plywood Shelves for Sleek Storage
Craft modern floating shelves with plywood for stylish, space-saving storage.
- Materials: 3/4-inch birch plywood (4×4-foot sheet), miter saw, wood glue, L-brackets (2 per shelf), screws, wall anchors, white paint or clear sealant, level.
-
Steps:
- Cut plywood into 8×24-inch shelves (adjust size as needed); sand edges smooth.
- Glue two 3/4-inch pieces together for a thicker look (1.5 inches); clamp and dry for 2 hours.
- Paint or seal shelves; let dry for 4 hours.
- Mount L-brackets to the wall with screws and anchors, ensuring level placement; attach shelves to brackets.
- Best Placement: Kitchen, home office, or bathroom for books, plants, or decor, tying into your quirky bulb project displays.
- Tip: Space shelves 12–18 inches apart for a clean look; style with ceramic vases or your painted bulb crafts for a cohesive aesthetic.
- Budget Consideration: Plywood ($15–$25), brackets ($5–$10 for 4), paint/sealant ($5–$10). Total cost: $25–$45 for 2–3 shelves.
- Safety Note: Use a stud finder to secure brackets; check weight capacity (up to 50 lbs per shelf).
Drawing from mid-century modern trends, these shelves offer functional elegance, perfect for small spaces.
3. Plywood Headboard with Built-In Storage
Build a sleek headboard with hidden storage using plywood for a modern bedroom upgrade.
- Materials: 3/4-inch maple plywood (4×8-foot sheet), circular saw, wood screws, wood glue, stain or paint, hinges, sandpaper (120-grit), drill.
-
Steps:
- Cut plywood to fit your bed (e.g., 62×36 inches for a queen); cut two 12×36-inch side panels for storage cubbies.
- Sand all pieces; stain or paint and let dry for 4 hours.
- Assemble cubbies by gluing and screwing side panels to the main panel; add a top shelf (62×12 inches) with hinges for hidden storage.
- Attach to the bed frame or wall with screws and brackets.
- Best Placement: Bedroom, ideal for storing books or decor, complementing your cozy aesthetic interests.
- Tip: Add LED strip lights (like your aesthetic bulbs) inside cubbies for a warm glow; style with plants or your DIY bulb projects.
- Budget Consideration: Plywood ($25–$40), stain/paint ($8–$15), hinges/screws ($5–$10). Total cost: $40–$65 for one headboard.
- Safety Note: Secure to studs to prevent tipping; sand edges to avoid splinters.
Inspired by minimalist bedroom designs, this headboard blends style and practicality.
4. Plywood Coffee Table with Geometric Base
Create a modern coffee table with a plywood top and crisscross legs for a warm, open look.
- Materials: 3/4-inch oak plywood (4×4-foot sheet), miter saw, wood glue, screws, wood stain (e.g., ebony), clear sealant, sandpaper (120-grit).
-
Steps:
- Cut a 36×24-inch top and four 18-inch legs (angled at 45 degrees for a geometric X-shape).
- Sand all pieces; stain and let dry for 4 hours; apply sealant.
- Glue and screw legs into an X-shape (two per side); attach to the underside of the top with screws.
- Ensure stability by checking levelness.
- Best Placement: Living room or den, perfect for showcasing your painted bulb vases or plants.
- Tip: Pair with a shag rug and brass accents for a modern vibe, echoing your wood tile floor looks.
- Budget Consideration: Plywood ($15–$25), stain/sealant ($10–$15), screws/glue ($5). Total cost: $30–$45 for one table.
- Safety Note: Wear a dust mask when sanding; ensure legs are evenly cut for stability.
Drawing from contemporary furniture trends, this table adds a warm, sculptural touch.
5. Plywood Room Divider for Open-Plan Style
Craft a folding plywood screen to define spaces while adding modern warmth.
- Materials: Three 1/4-inch birch plywood sheets (4×6 feet), hinges (4), wood stain (e.g., natural oak), paintbrush, sandpaper, screws.
-
Steps:
- Sand plywood panels; cut to desired height (e.g., 5 feet) if needed.
- Apply stain and let dry for 4 hours; seal for durability.
- Attach panels with hinges, ensuring they fold accordion-style.
- Stand upright, adjusting angles for stability.
- Best Placement: Studio apartments, living-dining areas, or home offices to create zones, complementing your practical design preferences.
- Tip: Paint one side with chalkboard paint for a functional twist, inspired by your chalkboard bulb project; decorate with hanging plants.
- Budget Consideration: Plywood ($20–$30 per sheet), stain/sealant ($10–$15), hinges ($5–$10). Total cost: $75–$115 for one screen.
- Safety Note: Ensure hinges are securely fastened; place on a flat surface to prevent tipping.
Inspired by Japanese shoji screens, this divider adds warmth and flexible style.
6. Plywood Wall Art with Laser-Cut Patterns
Create modern wall art by cutting geometric or nature-inspired patterns into plywood, aligning with your love for intricate designs (like etched bulbs).
- Materials: 1/4-inch birch plywood (2×2-foot sheet), jigsaw or access to a laser cutter, wood stain, clear sealant, picture hanging kit, sandpaper.
-
Steps:
- Sketch or download a pattern (e.g., leaves, hexagons); cut plywood using a jigsaw or laser cutter for precision.
- Sand edges; stain and let dry for 4 hours; apply sealant.
- Attach hanging hardware to the back.
- Hang on a wall with proper anchors.
- Best Placement: Entryway, hallway, or above a sofa, perfect for displaying alongside your bulb decor projects.
- Tip: Paint the wall behind in a bold color (e.g., navy) to make patterns pop; pair with minimalist frames for a gallery effect.
- Budget Consideration: Plywood ($10–$15), stain/sealant ($8–$12), hanging kit ($3–$5). Total cost: $21–$32 for one piece. Laser cutting service: $10–$20 extra.
- Safety Note: Wear protective goggles when cutting; use a steady surface to avoid slips.
Drawing from modern art trends, this plywood art adds a warm, custom focal point.
7. Plywood Kitchen Island Top for Rustic Charm
Replace or cover a kitchen island top with plywood for a warm, modern update, tying into your wood tile floor hacks.
- Materials: 3/4-inch oak plywood (4×8-foot sheet), circular saw, wood glue, screws, butcher block oil, sandpaper (80- and 120-grit), edge banding.
-
Steps:
- Measure the island; cut plywood to size (e.g., 36×60 inches), adding a 1-inch overhang if desired.
- Sand surfaces and edges; apply edge banding to conceal layers.
- Secure to the island base with glue and screws from underneath.
- Apply butcher block oil; let cure for 24 hours.
- Best Placement: Kitchen island for food prep or casual dining, enhancing your functional design aesthetic.
- Tip: Pair with bar stools and pendant lights (like your spiral filament bulbs) for a cohesive look; add a cutting board section for practicality.
- Budget Consideration: Plywood ($25–$40), oil ($8–$15), edge banding/screws ($5–$10). Total cost: $38–$65 for one top.
- Safety Note: Ensure the island base is sturdy; sand thoroughly to avoid splinters.
Inspired by farmhouse kitchen trends, this plywood top adds warm, durable style.
8. Plywood Pegboard Organizer for Functional Art
Build a wall-mounted pegboard with plywood for modern, customizable storage, perfect for small spaces.
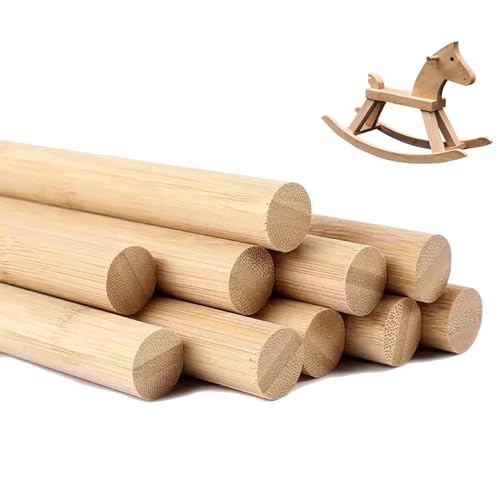
- Materials: 1/2-inch birch plywood (4×4-foot sheet), drill, 1-inch dowels, wood stain, clear sealant, screws, wall anchors, sandpaper.
-
Steps:
- Cut plywood to desired size (e.g., 3×3 feet); sand smooth.
- Drill 1-inch holes in a grid pattern (4 inches apart) for dowels.
- Stain and seal plywood; let dry for 4 hours.
- Insert dowels as pegs; mount to the wall with screws and anchors.
- Best Placement: Home office, craft room, or entryway for keys, tools, or decor, complementing your floating shelf hack.
- Tip: Hang baskets or your painted bulb magnets for a quirky touch; paint dowels in accent colors for flair, inspired by your colored bulb aesthetic.
- Budget Consideration: Plywood ($15–$25), dowels ($5–$10), stain/sealant ($8–$12). Total cost: $28–$47 for one pegboard.
- Safety Note: Secure to studs for weight support; ensure dowels fit snugly to hold items.
Drawing from utilitarian design trends, this pegboard blends warmth with modern functionality.
Additional Tips for Success
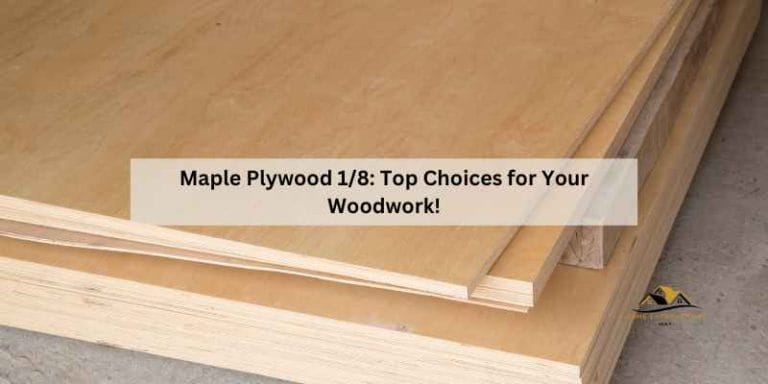
- Choosing Plywood: Opt for birch or oak plywood for a smooth, attractive grain; use 1/4-inch for lightweight projects (walls, art) and 3/4-inch for structural ones (tables, shelves). Check for “A” or “B” grade for fewer imperfections.
- Tools: Basic tools (circular saw, drill, sander) suffice for most projects; rent a table saw ($20–$50/day) for precise cuts if needed. Borrow tools from friends to save costs, aligning with your budget-conscious approach (seen in bulb projects).
- Finishing: Sand all surfaces (start with 80-grit, finish with 120-grit) for a smooth feel; use water-based stains and sealants for easy cleanup and low fumes. Test stains on scraps to match your wood tile floor tones.
- Safety: Always wear safety glasses, gloves, and a dust mask when cutting or sanding; work in a well-ventilated area for staining. Check weight limits for shelves or pegboards to prevent accidents.
- Aesthetic Cohesion: Match plywood finishes to your decor (e.g., light stains with blonde maple tiles, dark stains with ebony tiles) to create a unified look, complementing your elegant aesthetic (like marble flooring and aesthetic bulbs).
- Budget Savings: Buy plywood from local lumberyards for better prices than big-box stores; repurpose scraps from one project (e.g., wall planks) for another (e.g., art). Shop clearance for stains and hardware, echoing your gardening and decor hacks.
- Enhancing Warmth: Pair plywood projects with warm lighting (2700K LEDs, from your bulb requests) and soft textiles (rugs, throws) to amplify coziness, especially in colder climates like Zone 3 (from your gardening requests).
Conclusion
Plywood is a versatile, budget-friendly material that transforms modern homes with warm, stylish interiors, perfectly aligning with your passion for elegant, practical designs (from wood tile floors to creative bulb projects). From accent walls to pegboard organizers, these 8 DIY hacks offer beginner-friendly ways to add character and functionality to your space. With simple tools, affordable materials, and a touch of creativity, you can craft a modern, inviting home that reflects your sophisticated taste.


