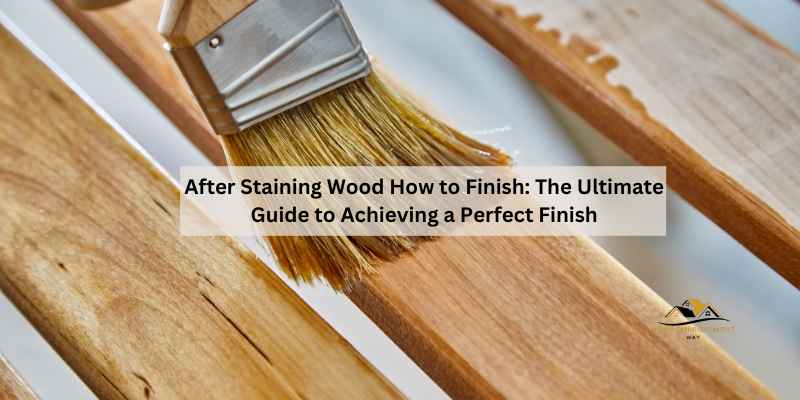
After Staining Wood How to Finish: The Ultimate Guide to Achieving a Perfect Finish
After staining wood, apply a clear finish or topcoat to protect and enhance the wood’s appearance, typically using varnish or lacquer for a high gloss finish. Applying the finish too soon after staining may lead to poor bond between the two layers, so allow the stain to dry thoroughly before adding the topcoat.
Staining wood is a popular way to enhance its natural beauty and bring out the grain. Once the wood is stained, it’s important to apply a finish to protect the stained surface and provide a desired level of sheen. This finishing process also creates a barrier against moisture, dirt, and wear, ensuring the longevity of the stained wood.
By following the appropriate finishing steps, you can achieve a professional-looking and durable result that preserves the stunning appearance of your stained wood. Whether you’re a DIY enthusiast or a woodworking professional, knowing how to finish stained wood effectively is essential for achieving a polished and long-lasting result.
Preparation
Before applying a finish to your stained wood, it is essential to prepare the surface properly. This includes organizing your workspace, inspecting the surface, and selecting the right tools and stain for the job.
Organizing The Workspace
- Clear the work area of any clutter or obstacles.
- Ensure proper ventilation to allow for adequate drying time.
- Have all your tools and materials within reach for easy access.
Inspecting The Surface
- Check for any imperfections or rough spots on the wood surface.
- Ensure that the wood is clean and free of any dust or debris.
- Make any necessary repairs or sanding before proceeding with the finish.
Selecting The Right Stain And Tools
- Choose a stain color that complements the wood and your desired finish.
- Use high-quality brushes or cloths for applying the stain evenly.
- Consider using a sealer or protective finish to enhance the longevity of the stain.
By following these steps in the preparation process, you can ensure a smooth and successful finish for your stained wood project.
Staining Process
When it comes to the staining process, it’s important to understand the crucial steps to achieve a professional and polished finish. The staining process involves applying the stain, optimizing the staining results, and dealing with any imperfections that may arise. By taking a strategic approach to each step, you can ensure a flawless and lasting finish for your wood project. Here’s a breakdown of the key components of the staining process.
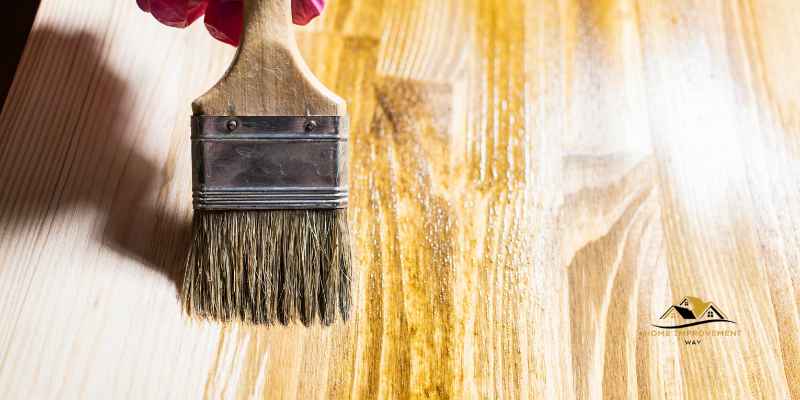
Applying The Stain
Applying the stain is a critical step in the wood finishing process. Before you begin, it’s essential to prep the wood by sanding it to create a smooth and even surface. Once the wood is prepared, apply the stain using a brush or cloth, working in the direction of the wood grain to ensure even coverage. Take care to apply the stain evenly, avoiding any excessive buildup that could lead to blotching or uneven coloring. Let the stain penetrate the wood for the recommended time before wiping off any excess to achieve the desired color intensity.
Optimizing The Stain Results
To optimize the stain results, it’s important to consider the type of wood and the desired finish. Some wood species may require a pre-stain wood conditioner to promote an even absorption of the stain and prevent blotching. Comparing the results on a test piece of wood can help you gauge the final color and make adjustments if necessary. Additionally, applying a top coat such as oil-based wipe-on poly can enhance the depth and luster of the stained wood, providing a lasting and protective finish.
Dealing With Imperfections
Even with careful application, imperfections such as mill marks or uneven staining may arise. In such cases, sanding the wood can help to smooth out any irregularities before applying an additional coat of stain, if needed. For a glossy and refined finish, consider applying a varnish or lacquer to achieve a high gloss look, providing a shiny finish that enhances the natural beauty of the wood.
Protective Finish
Once you have stained your wood, it is crucial to apply a protective finish to ensure its longevity and durability. A protective finish acts as a barrier between the wood and external elements, such as moisture, UV rays, and daily wear and tear. Not only does it enhance the natural beauty of the wood, but it also provides added protection against scratches, stains, and fading.
Choosing The Best Finish Type
When it comes to selecting the best finish type for your stained wood, there are several options to consider:
- Lacquer: Lacquer finishes provide a glossy and smooth appearance. They are ideal for indoor furniture and decorative woodwork.
- Varnish: Varnish finishes offer a durable and shiny surface. They are commonly used on floors, outdoor furniture, and high-traffic areas.
- Polyurethane: Polyurethane finishes come in oil-based or water-based formulations. They provide excellent protection and are suitable for a wide range of wood surfaces.
- Shellac: Shellac finishes give a warm and traditional look. They are often used on antique furniture and interior woodwork.
- Wax: Wax finishes provide a soft and natural sheen. They are easy to apply and maintain, making them a popular choice for small wood projects.
Application Techniques
Applying a protective finish requires proper techniques to achieve a flawless result. Here are some tips to keep in mind:
- Prepare the wood surface by sanding it gently to remove any roughness or imperfections.
- Clean the surface thoroughly to remove dust, debris, and any residual stain.
- Apply the finish using a high-quality brush, foam brush, or sprayer, following the grain of the wood.
- Ensure even coverage by applying thin and smooth coats. Avoid heavy application, as it can lead to drips and uneven drying.
- Allow each coat to dry completely before applying the next one. Refer to the manufacturer’s instructions for the recommended drying time.
- Lightly sand the surface between coats to promote adhesion and smooth out any imperfections.
- Remove any sanding dust before applying subsequent coats.
Ensuring Durability
To ensure the durability of your protective finish, consider the following tips:
- Apply multiple coats of the finish for enhanced protection. Two to three coats are usually sufficient, but additional coats may be necessary for high-traffic areas.
- Avoid using the wood immediately after applying the finish. Allow it to cure according to the manufacturer’s instructions to achieve maximum durability.
- Regularly inspect the wood for any signs of wear or damage. Touch up the finish as needed to maintain its protective properties.
- Protect the wood from excessive moisture, direct sunlight, and extreme temperatures, as these can deteriorate the finish over time.
By choosing the right finish type, applying it correctly, and taking proper maintenance measures, you can ensure that your stained wood remains protected and beautiful for years to come.
Sealing Wood After Staining
Sealing wood after staining is a crucial step in the finishing process. It not only enhances the appearance of the wood but also provides protection against moisture, UV rays, and other environmental factors. Here, we’ll delve into the importance of sealing wood after staining and the different methods of applying sealers.
Sealing Purposes
The main purpose of sealing wood after staining is to protect it from damage and degradation. The sealer forms a protective barrier, preventing moisture from penetrating the wood and causing warping, rot, or mildew. Additionally, it helps to enhance the wood’s natural color and grain, giving it a beautiful, long-lasting finish.
Sealer Application Methods
Several application methods can be used to apply sealer to stained wood. The most common methods include brush application, spraying, and wiping. Each technique has its own advantages and is chosen based on the type of wood, the desired finish, and the sealer’s characteristics. It’s essential to follow the manufacturer’s instructions for the best results.
Signs Of Overlooking Sealing
Neglecting to seal wood after staining can lead to various issues such as discoloration, reduced durability, and susceptibility to damage. Unsealed wood is prone to moisture intrusion, which can result in mold or mildew growth. It’s important to recognize the signs of overlooking sealing, such as dullness in the wood’s appearance or changes in texture, and take necessary corrective measures.
Applying Clear Coat
After staining wood, it is important to apply a clear coat to protect the stain and enhance the wood’s appearance. Most clear finishes can be applied with a brush, and for added durability, multiple coats can be applied. Sanding lightly between coats can help achieve a smooth finish.
Benefits Of Clear Coating
Clear coating is an essential step in finishing wood after staining. It offers several benefits that enhance the overall appearance and durability of the wood. Some of the key benefits include:
- Protection: Clear coat provides a protective layer that shields the wood from scratches, stains, and moisture damage.
- Enhanced Color: Clear coating helps to accentuate the color and richness of the wood stain, bringing out its natural beauty.
- Longevity: The clear coat acts as a barrier against wear and tear, extending the lifespan of the wood.
- Smooth Finish: It creates a smooth and consistent surface, hiding imperfections and giving the wood a professional look.
Techniques For Clear Coat Application
When it comes to applying clear coat on wood, there are a few tried-and-tested techniques:
- Clean Surface: Before applying the clear coat, ensure the wood surface is clean and free from dust or debris. This will ensure a smooth and even application.
- Brush Application: Most clear finishes are applied with a brush, as it allows for better control and coverage. Apply the clear coat in the direction of the wood grain for a more natural look.
- Light Sanding: Once the first coat is dry, lightly sand the surface to remove any imperfections. This helps to create a smoother finish for subsequent coats.
- Second Coat: After sanding, remove all the sanding dust and apply a second coat of clear coat. This enhances the durability and adds an extra layer of protection.
Enhancing Wood Shine
If you’re looking to achieve a shiny finish on your stained wood, there are a few options you can consider:
- Varnish or Lacquer: Applying a varnish or lacquer can give the wood a high gloss finish. These finishes can be sprayed or brushed on, with spraying being recommended for a smoother surface.
By following these techniques and using the right clear coat products, you can achieve a beautiful and long-lasting finish on your stained wood. Whether you’re working on a DIY project or a professional woodworking venture, clear coating is an essential step that shouldn’t be overlooked.
Achieving A Glossy Finish
Varnish: Can be sprayed or brushed on for a high gloss finish.
Lacquer: Best applied through spraying to achieve a finer surface.
For a glossy finish, professionals recommend utilizing lacquer for a superior sheen.
- Ensure the wood surface is clean and free of any dust particles.
- Apply the varnish or lacquer in thin, even coats to prevent drips.
- Allow each coat to dry completely before applying the next layer.
Final Steps And Recommendations
After staining wood, the final step is to apply a clear finish or topcoat to protect the stain and enhance the wood’s appearance. This can be done using varnish, lacquer, or clear wood finishes, which provide durability and a glossy finish.
Applying the finish in the direction of the wood grain and using multiple coats ensure a professional-looking result.
Finalizing With Topcoat
After staining wood, the final crucial step is applying a topcoat to protect and enhance the finish. Choose a high-quality topcoat that suits your project and follow the manufacturer’s instructions for application.
Post-staining Sanding Tips
Lightly sand the stained wood surface with fine-grit sandpaper to smooth out any imperfections or rough spots. Ensure the surface is clean and dust-free before applying the topcoat for a flawless finish.
Common Mistakes To Avoid
- Skipping the sanding step before applying the topcoat can result in a less polished finish.
- Using the wrong type of topcoat for your project may lead to lackluster results and reduced durability.
- Not allowing sufficient drying time between coats can compromise the overall finish quality.
Frequently Asked Questions
What Is The Best Finish After Staining Wood?
For the best finish after staining wood, apply a clear coat for protection and shine. Use varnish or lacquer for a glossy look.
Do You Need To Seal Wood After Staining?
Sealing wood after staining is necessary for protection and durability. Sealers prevent bleeding and ensure a cohesive finish.
How To Apply Clear Coat On Wood After Staining?
To apply clear coat on wood after staining, use a brush along the wood grain. After drying, lightly sand, remove dust, and apply a second coat for durability. A third coat can be added for extra protection and shine. Consider using varnish or lacquer for a high gloss finish.
What Do You Put On Wood After You Stain It To Make It Shiny?
To make wood shiny after staining, apply a varnish or lacquer for a high gloss finish. Varnish can be brushed or sprayed on, while lacquer is best applied by spraying. It leaves a smooth surface without visible brush strokes.
Conclusion
To achieve the perfect finish after staining wood, it is crucial to apply a clear coat to protect and enhance the wood’s appearance. Whether using varnish, lacquer, or polyurethane, the application should be consistent with the grain for optimal results.
By following these steps and selecting the right finish, you can achieve a professional and glossy look for your stained wood projects.