Best Floor Varnish Wooden Floors Top Picks
Picking the Best Floor Varnish for Wooden Floors: Top Picks can feel a bit tricky at first. You want your floors to look amazing and last for years, but all the choices can be confusing. Don’t worry!
We’ll make this super simple. We’ll walk you through everything, step by step, so you can pick the perfect varnish. Get ready to make your wooden floors shine.
Choosing the Best Floor Varnish for Your Wooden Floors
Selecting the right finish for your wooden floors is a key decision. It impacts not just the look but also how well your floors hold up to daily life. Different varnishes offer varying levels of protection and sheen, making the “best” choice depend on your specific needs and the type of wood you have.
A good floor varnish will protect against scratches, spills, and general wear and tear. It also enhances the natural beauty of the wood, bringing out its grain and color. When you’re looking for the Best Floor Varnish for Wooden Floors: Top Picks, you’ll want to consider durability, ease of application, and the desired aesthetic.
This guide will help you understand the different types of varnishes available. We’ll explore what makes a varnish suitable for high-traffic areas. We will also touch on eco-friendly options.
You’ll learn how to match the finish to your home’s style.
Types of Floor Varnishes
There are several main types of wood floor varnishes, each with its own set of properties. Understanding these differences is crucial for making an informed choice.
Polyurethane varnishes are very popular. They are known for their durability and resistance to water and chemicals. Polyurethane comes in two main forms: oil-based and water-based.
Oil-based polyurethane is known for its hardness and amber tone. It often requires more drying time and can have strong fumes due to its solvent content. Water-based polyurethane dries faster, has less odor, and stays clear over time, resisting yellowing.
Other types include lacquers and varnishes containing aluminum oxide for extra hardness. Some modern finishes use ceramic particles for enhanced scratch resistance.
The surface of your wood floor is its first line of defense. The varnish you choose will form this protective layer.
Oil-Based Polyurethane
Oil-based polyurethane is a traditional choice for wood floors. It creates a very tough and durable finish that can withstand heavy foot traffic and the rigors of daily life. This type of varnish contains alkyd resins and petroleum distillates, which give it its strength.
One of the notable characteristics of oil-based polyurethane is its tendency to impart a warm, amber hue to the wood. This can enhance the natural color and grain of many wood species, giving them a richer, deeper look. However, this ambering effect can also be a drawback if you prefer a completely clear, natural finish, as it may cause lighter woods to appear more yellow over time.
Application of oil-based polyurethane usually involves multiple thin coats. It requires good ventilation due to its strong fumes. The drying time between coats can be quite long, often 24 hours, which means projects can take several days to complete.
Cleanup of brushes and applicators requires mineral spirits.
Oil-based finishes are generally thicker and more forgiving during application than water-based ones. They can fill minor imperfections more easily. Their excellent resistance to wear makes them a reliable option for busy households.
Pros of Oil-Based Polyurethane
- Durability: Offers superior hardness and resistance to scratches and abrasion.
- Warm Tone: Enhances wood color with a rich amber glow, which many find appealing.
- Repairability: Easier to spot-repair minor damage than some other finishes.
- Cost: Often less expensive upfront than high-end water-based options.
The durability of oil-based polyurethane is a major selling point for many homeowners. It creates a protective barrier that is very effective against the everyday wear and tear that wooden floors experience. Imagine kids playing, pets running, and furniture being moved; an oil-based finish can handle it all with relative ease.
This makes it a practical choice for areas with high foot traffic.
The warm tone it provides can be particularly attractive for certain types of wood. Oak, for example, can look exceptionally rich and inviting with an oil-based finish. This subtle coloring adds depth and character, making the floor a beautiful feature of the room.
It’s a classic look that stands the test of time and complements many interior design styles.
Repairing small scratches or scuffs on an oil-based finish is often straightforward. You can typically abrade the area lightly and apply a new coat of varnish without needing to refinish the entire floor. This convenience can save time and effort down the line.
It’s a finish that’s designed to be maintained and enjoyed for many years.
Cons of Oil-Based Polyurethane
- Odor and VOCs: Produces strong fumes with high volatile organic compounds (VOCs), requiring excellent ventilation and protective gear.
- Drying Time: Takes significantly longer to dry between coats, potentially extending project timelines.
- Yellowing: Tends to yellow over time, especially on lighter woods, altering the original color.
- Cleanup: Requires mineral spirits or other solvents for cleaning tools and spills.
The strong fumes associated with oil-based polyurethane are a significant consideration. These fumes can be unpleasant and even harmful if proper precautions aren’t taken. Adequate ventilation is absolutely essential.
This means opening windows and doors, and potentially using fans to circulate air. Respirator masks are also highly recommended for anyone applying the finish.
The extended drying time is another factor to plan for. If you need your floors to be usable quickly, oil-based polyurethane might not be the best choice. The need to wait 24 hours or more between coats, and for the finish to fully cure, can mean living with an unfinished floor for an extended period.
This can be inconvenient, especially in busy households.
The yellowing effect can be a concern for those who want their wood floors to maintain their natural, light color. Over time, the ambering quality of oil-based finishes can become more pronounced. While some people like this aged look, others find it undesirable.
It’s important to test the finish on a small, inconspicuous area first.
Water-Based Polyurethane
Water-based polyurethane, also known as waterborne polyurethane, offers a modern alternative to traditional oil-based finishes. It uses water as its primary solvent, which results in a much milder odor and lower VOC content. This makes it a more user-friendly option for DIY projects and for homes where strong chemical smells are a concern.
One of the most significant advantages of water-based polyurethane is its clarity. It dries crystal clear and typically does not yellow over time, preserving the natural color of the wood. This is especially beneficial for floors made from light-colored woods like maple or birch, where the ambering of oil-based finishes can be quite noticeable and undesirable.
Application is generally easier and faster. Water-based finishes dry much more quickly than their oil-based counterparts, often within 2-4 hours between coats. This allows for projects to be completed in a shorter timeframe.
Cleanup is also simpler, as tools can be cleaned with soap and water.
While historically less durable than oil-based finishes, modern water-based polyurethanes have significantly improved in performance. Many now offer excellent scratch and abrasion resistance, making them competitive for even high-traffic areas. Some formulations incorporate ceramic or aluminum oxide for enhanced durability.
Pros of Water-Based Polyurethane
- Low Odor and VOCs: Significantly less fumes and healthier to apply, requiring less protective gear.
- Fast Drying Time: Dries quickly, allowing for multiple coats in a single day and quicker return to normal use.
- Clarity and Non-Yellowing: Stays clear and does not yellow over time, maintaining the wood’s original color.
- Easy Cleanup: Tools and spills can be cleaned easily with soap and water.
The low odor and VOC levels of water-based polyurethane are a huge benefit for anyone sensitive to chemical smells or concerned about indoor air quality. This makes it ideal for use in occupied homes, especially in bedrooms or living areas where people spend a lot of time. You can work with it without needing to evacuate the house or wear a heavy-duty respirator for extended periods.
The fast drying time is another major advantage. Imagine being able to apply three coats in one day, with the floor ready for light use by the next morning! This speed is a game-changer for busy families or individuals who can’t afford to have their living space out of commission for days.
It allows for quicker renovations and easier maintenance.
The clear, non-yellowing nature of water-based finishes is perfect for showcasing the natural beauty of your wood. If you have a light-colored wood floor and want it to remain looking bright and natural, this is the finish to choose. It doesn’t hide the wood’s grain or add an unwanted tint, allowing the wood’s inherent character to shine through.
Cons of Water-Based Polyurethane
- Durability Concerns: Some older or lower-quality formulations may not be as durable as oil-based options.
- Application Finesse: Can be more prone to showing lap marks if not applied carefully and evenly.
- Cost: High-performance water-based finishes can sometimes be more expensive than standard oil-based ones.
- May Raise Grain: Water can slightly raise the wood grain, sometimes requiring an extra light sanding.
While modern water-based polyurethanes are very durable, it’s still wise to check reviews and product specifications. For extremely high-traffic areas, some users might still prefer the proven resilience of oil-based finishes or specific heavy-duty water-based formulations. Choosing a reputable brand designed for floors is key.
Application requires a bit more attention to detail. Because it dries so fast, you need to work methodically and avoid going back over areas you’ve already coated. This can lead to visible lines or marks if you’re not careful.
Using the right applicator and maintaining a consistent pace are important for a smooth finish.
While many water-based finishes are now competitively priced, some of the premium, super-durable formulas might come with a higher price tag. However, the benefits of faster drying and easier cleanup can often offset the initial cost. It’s a trade-off to consider based on your budget and project timeline.
Other Floor Finish Options
Beyond the common polyurethane finishes, other options exist for treating wooden floors. These may offer unique aesthetics or performance characteristics.
Varnishes with aluminum oxide additives are designed for extreme durability. Aluminum oxide is a very hard ceramic material that significantly increases a finish’s resistance to scratches and abrasion. These are often used in commercial settings but are also available for residential use.
Hardwax oils are another popular choice. They penetrate the wood rather than forming a film on top. This provides a more natural look and feel, often described as “in the wood.” Hardwax oils are typically easier to repair and maintain.
They can be spot-treated without obvious patchiness.
Traditional varnishes, while less common now for floors, can still be found. They offer good protection but might not be as flexible or durable as polyurethanes in high-traffic areas.
The choice of finish profoundly affects the floor’s appearance and longevity.
Aluminum Oxide Finishes
Aluminum oxide is a synthetic material known for its exceptional hardness and wear resistance. When incorporated into a floor finish, such as polyurethane, it creates a surface that is significantly more durable than standard finishes. This makes it an excellent choice for areas that experience heavy foot traffic, such as hallways, entryways, and even commercial spaces.
Floors treated with aluminum oxide finishes are highly resistant to scratches, scuffs, and abrasion. This means they can withstand the rigors of daily life, including moving furniture, pet claws, and general wear, with minimal damage. The finish remains looking newer for longer, reducing the need for frequent refinishing or touch-ups.
While highly durable, aluminum oxide finishes can sometimes be more challenging for DIY application. They are often found in high-performance commercial-grade products. It’s important to follow manufacturer instructions precisely.
The trade-off for this superior durability is often a slightly higher cost and potentially more demanding application process.
When considering the Best Floor Varnish for Wooden Floors: Top Picks, especially for maximum resilience, finishes fortified with aluminum oxide are definitely worth exploring. They offer a robust protective layer that can extend the life and beauty of your wooden floors for many years.
Hardwax Oils
Hardwax oils offer a distinct approach to finishing wood floors. Unlike film-forming finishes like polyurethane, hardwax oils penetrate the wood’s pores. This nourishes and protects the wood from within, creating a natural, matte appearance.
The surface feels warm and smooth to the touch, often described as being “part of the wood” rather than sitting on top of it.
A key advantage of hardwax oils is their ease of maintenance and repair. If your floor develops a scratch or a worn spot, you can usually sand down just that area and reapply the oil. This spot repair blends in seamlessly with the surrounding finish, unlike film finishes where patching can be noticeable.
This makes them ideal for homes with pets or children.
Hardwax oils typically have low VOC content and are generally considered more environmentally friendly. They also don’t yellow over time, maintaining the wood’s natural color. However, they may not offer the same level of superior scratch and water resistance as high-quality polyurethanes.
Regular reapplication of a maintenance coat might be necessary to keep the wood fully protected.
The aesthetic appeal of hardwax oils is a major draw for many. They provide a sophisticated, natural look that highlights the wood’s inherent beauty and grain patterns. If you prefer a less “plastic-like” finish and value ease of repair, hardwax oils are a strong contender.
Factors to Consider When Choosing
Choosing the right floor varnish involves looking at several important factors. Your decision will depend on your lifestyle, the type of wood, and your desired outcome.
Traffic level is crucial. A busy family with pets needs a highly durable finish. A quiet study might allow for a less robust option.
The look you want is also important. Do you prefer a high gloss or a subtle matte finish? Do you want the wood to look natural or have a warmer tone?
Application ease is another consideration, especially for DIY projects. Some finishes are more forgiving than others. Finally, budget plays a role.
Higher-end finishes often come with a higher price tag, but their longevity can make them more cost-effective in the long run.
Let’s break down these key decision points in more detail.
Durability and Traffic Levels
The durability of a floor varnish is perhaps the most critical factor to consider, especially in homes with significant daily activity. If you have children, pets, or entertain frequently, your floors will be subjected to considerable wear and tear. A varnish that is not durable enough will quickly show scratches, scuffs, and dull spots, diminishing the appearance of your beautiful wooden floors.
For high-traffic areas like entryways, hallways, and main living spaces, you need a finish that offers superior resistance to abrasion and impact. Polyurethane finishes, particularly those with aluminum oxide additives or high-solids content, are excellent choices. These create a tough, protective layer that can withstand heavy use without significant damage.
Even in lower-traffic areas like bedrooms, choosing a reasonably durable varnish is still advisable. Wood is a natural material, and all finishes will eventually show some signs of wear over time. Opting for a finish that offers good longevity will reduce the frequency of future refinishing projects, saving you time and money in the long run.
When researching the Best Floor Varnish for Wooden Floors: Top Picks, always look at the manufacturer’s specifications regarding wear resistance and suitability for different traffic levels. This information is usually readily available on the product packaging or the company’s website.
Aesthetic Appeal and Sheen Levels
The aesthetic appeal of your wooden floors is a major part of your home’s overall design. The varnish you choose will significantly influence how the wood looks. Sheen level is a key aspect of this aesthetic.
Options range from ultra-matte to high gloss.
Matte finishes offer a natural, understated look. They reflect very little light, so imperfections and dust are less noticeable. This can be ideal for a minimalist or rustic style.
Satin finishes provide a soft sheen. They offer a good balance between a natural look and a bit of shine, reflecting some light without being overly reflective. This is a very popular choice for its versatility.
Semi-gloss finishes are noticeably shinier. They reflect more light, making the floor appear brighter and potentially highlighting the wood grain more. They can also be slightly easier to clean.
High-gloss finishes are the most reflective. They create a mirror-like surface that can make a room feel more dramatic and spacious. However, they also show every speck of dust, scratch, and scuff mark, requiring frequent cleaning.
Consider the wood species itself. Some woods look better with a certain sheen. For example, exotic woods might shine beautifully with a semi-gloss, while a more traditional oak might look stunning in a matte or satin finish.
Always test a sample on a scrap piece of your actual flooring to see how the finish interacts with the wood’s color and grain under your home’s lighting conditions.
Ease of Application for DIYers
If you plan to tackle the varnishing of your wooden floors yourself, ease of application is a paramount consideration. Some finishes are much more forgiving than others, making the difference between a professional-looking result and a frustrating DIY disaster.
Water-based polyurethanes are generally considered easier for DIYers to apply than oil-based ones. This is primarily due to their faster drying times and lower odor. You can often apply multiple coats in a single day, and the mild smell means you don’t need to leave your home for extended periods.
Cleanup with soap and water is also a significant convenience.
However, the fast drying time of water-based finishes means you need to work quickly and methodically. Lap marks can form if you’re not careful about maintaining a wet edge. Practice on a scrap piece of wood is highly recommended before starting on your main floor.
Oil-based polyurethanes are thicker and have a longer open time, meaning they stay wet for longer. This can give you more time to spread the product evenly and correct any mistakes. However, the strong fumes and longer drying times present their own challenges.
Proper ventilation and patience are essential.
Hardwax oils are often considered among the easiest to apply. They typically go on with a cloth or a special applicator pad. They are very forgiving, and mistakes can usually be wiped away or easily corrected.
The repair process is also very simple, making them a great choice for those prioritizing ease of maintenance.
Top Picks for Best Floor Varnish
Finding the Best Floor Varnish for Wooden Floors: Top Picks involves looking at brands that consistently deliver quality and performance. While personal preference and specific needs vary, some brands and product lines stand out for their durability, ease of use, and excellent finishes.
For overall durability and a classic finish, oil-based polyurethanes from brands like Minwax or Varathane are popular choices. They offer robust protection and a warm, amber glow.
If you prioritize low odor, fast drying, and a clear finish, consider water-based options. Brands such as Bona, General Finishes, and Rust-Oleum offer high-performance water-based floor finishes that are well-regarded by professionals and DIYers alike.
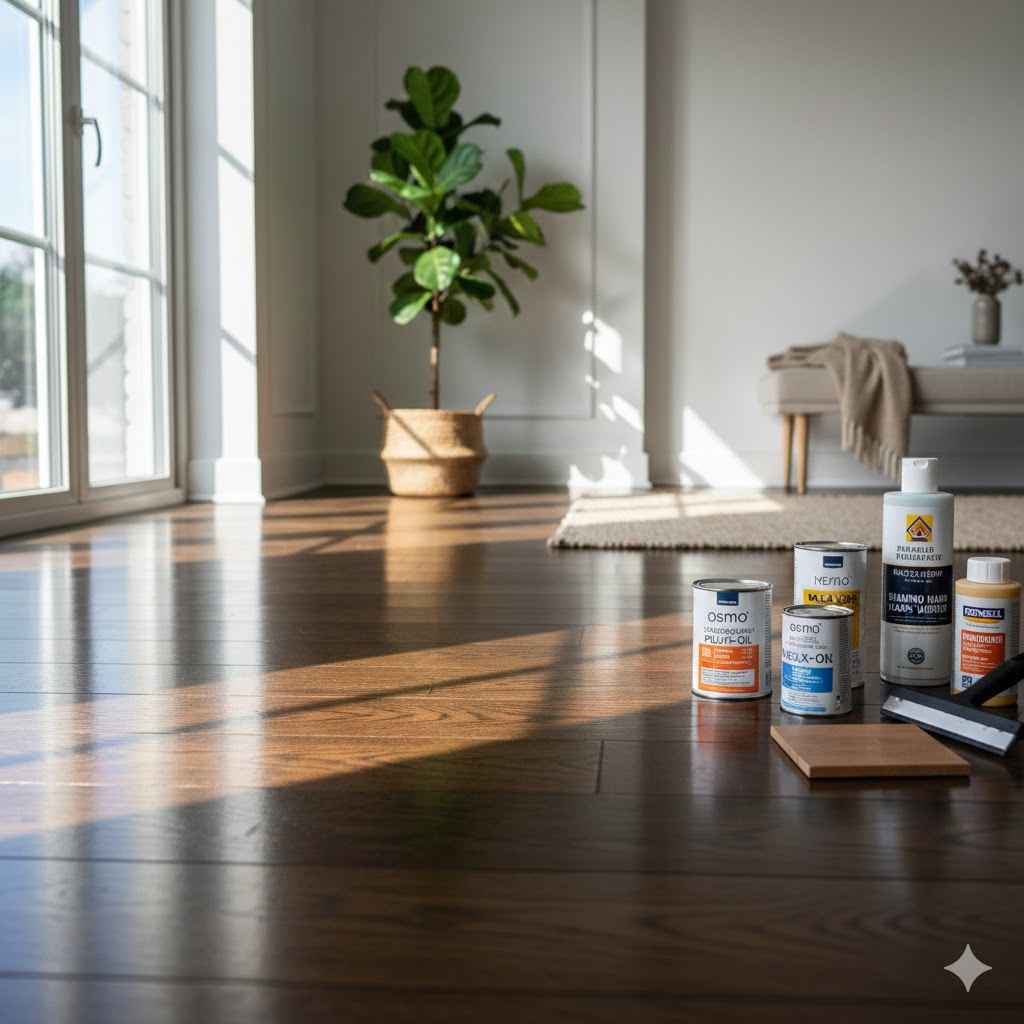
For a natural look and easy repairs, look into hardwax oils from companies like Rubio Monocoat or Osmo. These offer a unique feel and aesthetic that many homeowners adore.
The “best” will ultimately depend on your specific situation, but these brands provide a great starting point for your research.
High-Performance Polyurethane Options
When seeking the utmost in protection and longevity, high-performance polyurethane finishes are often the go-to choice. These products are formulated to withstand the most demanding conditions, making them ideal for busy households and heavy-traffic areas.
One standout is Minwax Helmsman Spar Urethane. While originally designed for outdoor use, its exceptional durability, water resistance, and UV protection make it a robust option for interior wood floors. It offers a classic amber tone that enriches wood.
Application is straightforward, but it does require good ventilation due to its oil-based nature.
Another strong contender is Varathane Diamond Wood Polyurethane. This product is known for its scratch and abrasion resistance. It comes in various sheen levels, from satin to gloss, allowing you to achieve the desired look.
It’s a reliable choice for general interior wood finishing, including floors.
For those who prefer a water-based option with enhanced durability, Bona Traffic HD is a highly respected professional-grade finish. It’s exceptionally resistant to wear, chemicals, and abrasions. Bona is known for its focus on water-based, low-VOC products, making it a healthier choice for your home.
When comparing these high-performance options, consider the specific VOC content, drying times, and recommended application methods. Always test a small area first to ensure satisfaction with the appearance and performance.
Eco-Friendly and Low-VOC Choices
The environmental impact and indoor air quality of home improvement projects are increasingly important. Fortunately, many manufacturers now offer eco-friendly floor varnish options with low or zero volatile organic compounds (VOCs).
Water-based polyurethanes are inherently a greener choice due to their water solvent. Brands like Bona excel in this area, with many of their floor finishes being water-based and having extremely low VOC levels. These products are designed to be safe for use in occupied homes, minimizing exposure to harmful fumes.
Hardwax oils also fall into the eco-friendly category. They are often made from natural plant oils and waxes. Companies like Rubio Monocoat offer finishes with minimal to zero VOCs, which is a significant advantage for those concerned about indoor air quality.
These finishes are often biodegradable as well.
When looking for low-VOC options, always check the product label. Certifications like GREENGUARD can indicate that a product has been tested for low chemical emissions. Choosing these options not only benefits the environment but also contributes to a healthier living space for you and your family.
The shift towards more sustainable and healthier finishes doesn’t mean compromising on performance. Many eco-friendly options offer excellent durability and a beautiful appearance.
Specialty Finishes for Unique Needs
Sometimes, standard finishes don’t quite meet specific requirements. For those unique situations, specialty floor finishes come into play. These are designed to address particular challenges or achieve distinct aesthetic goals.
For instance, if you have floors that are subject to extreme moisture, like in a basement or a workshop, you might look for a high-solids polyurethane with superior water resistance. Some formulations are specifically engineered to repel water and prevent damage from spills.
In areas with intense sunlight, a UV-inhibiting varnish can be beneficial. Prolonged sun exposure can fade and degrade wood over time. A finish with UV blockers helps to protect the wood’s color and integrity.
For a very modern or industrial look, some specialty finishes offer unique textures or effects. Beyond traditional sheens, you might find options that create a subtle textured feel or a more pronounced matte appearance that diffuses light exceptionally well.
When exploring the Best Floor Varnish for Wooden Floors: Top Picks, don’t overlook these specialty products if your floors have particular demands. They can provide tailored solutions that standard finishes might not offer, ensuring optimal protection and appearance.

Applying Floor Varnish for a Lasting Finish
Applying varnish correctly is just as important as choosing the right product. A good application ensures maximum protection and a beautiful, smooth finish. This process involves careful preparation, precise application, and adequate drying time.
Before you begin, ensure your floor is clean and properly prepared. Any dust, grease, or old finish must be removed. The type of applicator you use also matters.
Brushes are good for edges, while rollers or pads are best for larger areas.
Following the manufacturer’s instructions for drying and recoating is essential. Rushing the process can lead to premature failure of the finish. Proper application guarantees your floors will look great for years.
Surface Preparation is Key
The success of any floor varnish application hinges on thorough surface preparation. This is the most critical step, and skipping or rushing it will almost certainly lead to a subpar finish and reduced durability. Think of it as building a strong foundation for your varnish to adhere to.
First, the floor must be immaculately clean. This means sweeping or vacuuming thoroughly to remove all loose dirt and debris. Then, it needs to be washed with a suitable wood floor cleaner.
For stubborn grease or wax, you might need a degreaser. Ensure the floor is completely dry after washing, which can take 24-48 hours depending on humidity.
If there are any old finishes, such as wax or previous varnish, they must be completely removed. This often involves sanding. For a full refinish, sanding down to bare wood is necessary.
This removes imperfections and creates a uniform surface for the new varnish to grip. For a recoat, a light scuff sand with fine-grit sandpaper (around 180-220 grit) is usually sufficient to create a surface the new varnish can adhere to.
After sanding, vacuum up all dust. Then, wipe the floor down with a tack cloth or a slightly damp (not wet) cloth to pick up any remaining fine dust particles. Any dust left behind will be trapped in the varnish, creating a gritty texture and a less attractive finish.
Inspect the wood for any gouges or deep scratches. These should be filled with a wood filler that matches the color of your wood. Allow the filler to dry completely and then sand it smooth before proceeding.
Sanding and Cleaning
Sanding is a vital part of preparing your wooden floors for a new varnish. If your floors are old, have deep scratches, or are covered in a worn-out finish, a thorough sanding is often required. This process removes the old top coat and any imperfections, creating a clean, smooth canvas for the new varnish.
For a complete refinish, you’ll typically start with a coarser grit sandpaper (e.g., 60 or 80 grit) to remove old finishes and level the wood. Then, you’ll progress to finer grits (e.g., 120, then 180 or 220 grit) to smooth the surface. A floor sander, which can be rented from hardware stores, is highly recommended for this task.
For edges and smaller areas, an orbital sander or detail sander might be needed.
If you are simply recoating an existing, intact varnish layer, a light scuff sanding with a fine-grit sandpaper (around 220 grit) is usually sufficient. The goal is not to remove the old finish but to lightly abrade its surface so the new varnish can adhere properly. This is a much less labor-intensive process than a full refinish.
After sanding, the most crucial step is cleaning. You must remove absolutely all dust. Use a shop vacuum with a brush attachment to get into crevices.
Follow up with a dry tack cloth or a slightly damp microfiber cloth to pick up any remaining fine dust. Failing to remove all dust will result in a gritty, uneven varnish finish.
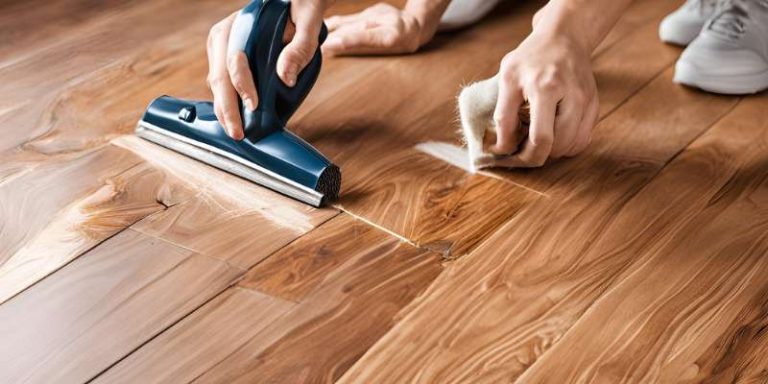
Choosing the Right Applicator
The tool you use to apply varnish significantly impacts the final look of your floors. Using the wrong applicator can lead to streaks, uneven coverage, and an overall unprofessional finish.
For edges, corners, and areas around furniture legs or trim, a high-quality natural bristle brush or a synthetic brush is often best. Brushes allow for precise application and help you get into tight spots. Ensure the brush is designed for oil-based or water-based products, depending on the varnish you are using.
For larger, open floor areas, a good quality applicator pad or a short-nap roller is recommended. These tools are designed to spread varnish evenly and smoothly over a wider surface. Look for applicator pads specifically made for floor finishing.
These often have a T-bar handle for easy maneuverability.
Avoid using standard paint rollers, as they can leave a bubbly or uneven texture. If using a roller, opt for a dense, short-nap roller cover designed for applying finishes. Some professionals prefer a lambswool applicator for a very smooth finish, especially with oil-based products.
Whichever applicator you choose, make sure it’s clean and free of debris before you start. Always follow the varnish manufacturer’s recommendations for the best application tools.
Application Techniques for a Smooth Finish
Applying varnish is a process that requires patience and a steady hand. The goal is to create a uniform, smooth, and durable layer of protection for your wooden floors. Paying attention to technique will yield significantly better results.
Always apply varnish in thin, even coats. Thick coats can lead to drips, uneven drying, and a gummy surface that is prone to damage. It is much better to apply three thin coats than two thick ones.
Work in one direction, following the grain of the wood. If using an applicator pad or roller, try to maintain a wet edge. This means overlapping each stroke slightly with the previous one while the varnish is still wet.
This prevents the formation of lap marks, which are visible lines where one application of varnish ends and the next begins.
For oil-based polyurethanes, work relatively slowly to allow the varnish to flow out. For water-based polyurethanes, you need to work a bit faster due to their quick drying time. Avoid overworking the product, as this can introduce air bubbles.
After each coat, allow it to dry completely according to the manufacturer’s instructions. This is crucial. Applying subsequent coats too soon can trap solvents and prevent proper curing, leading to a weak finish.
Lightly sand between coats with very fine-grit sandpaper (220-320 grit) or a synthetic steel wool pad. This is not to remove varnish but to knock down any small dust particles or imperfections that may have settled on the surface. After sanding, wipe down with a tack cloth to remove dust.
This step significantly improves the smoothness and clarity of the final finish.
Coating and Drying Times
Understanding and adhering to coating and drying times is paramount for achieving a durable and attractive floor finish. Rushing this process can compromise the integrity of the varnish, leading to issues like peeling, chipping, or a gummy surface that never fully hardens.
Manufacturers provide specific guidelines for how long you should wait between coats. These times vary depending on the type of varnish, the temperature, and humidity levels in your home. Oil-based polyurethanes typically require longer drying times, often 24 hours or more, between coats.
This is because the solvents need time to evaporate and the oils to cure.
Water-based polyurethanes dry much faster, usually requiring only 2-4 hours between coats. This speed is one of their major advantages for DIY projects. However, fast drying doesn’t mean fully cured.
The floor might feel dry to the touch, but it will take days, or even weeks, for the varnish to reach its maximum hardness and durability. This is known as the curing process.
During the curing period, it’s essential to be gentle with your floors. Avoid heavy furniture placement, high heels, or abrasive cleaning. Many finishes take 7 to 30 days to fully cure.
Always refer to the product’s technical data sheet for precise information on drying and curing times.
If you notice dust particles or minor imperfections after a coat has dried, lightly sand with very fine-grit sandpaper (220-320 grit) before applying the next coat. Always clean with a tack cloth after sanding to remove all dust.
Dealing with Imperfections
Even with careful application, minor imperfections can sometimes appear on your newly varnished floors. Fortunately, most of these can be addressed with simple techniques.
Dust Nibs: These are small specks of dust that get trapped in the wet varnish. If they are prominent after drying, you can gently sand them down with a very fine-grit sandpaper (320 grit or higher) or a synthetic steel wool pad. Then, wipe the area with a tack cloth.
For the final coat, being extra diligent about cleanliness is key.
Lap Marks: These appear as visible lines where one section of varnish was applied after another had already started to dry. If they are minor, light sanding and a very careful application of the next coat, maintaining a wet edge, can often help blend them in. For severe lap marks, you might need to lightly sand the entire affected area and reapply the coat.
Runs or Drips: These happen when too much varnish is applied. Once dry, carefully scrape them off with a sharp blade held at a low angle. Then, lightly sand the area smooth and reapply a thin coat of varnish.
Ensure you are using thin coats from the start to prevent this.
Uneven Sheen: Sometimes, one area might appear duller or shinier than another. This can be due to uneven application or inconsistent drying. Light sanding of the entire surface and applying an additional, thin, even coat of varnish can often help even out the sheen.
Testing on a scrap piece first is always a good idea.
Maintaining Your Varnished Floors
Once your wooden floors are beautifully varnished, proper maintenance is key to keeping them looking their best for years to come. Regular care prevents premature wear and preserves the protective qualities of the varnish.
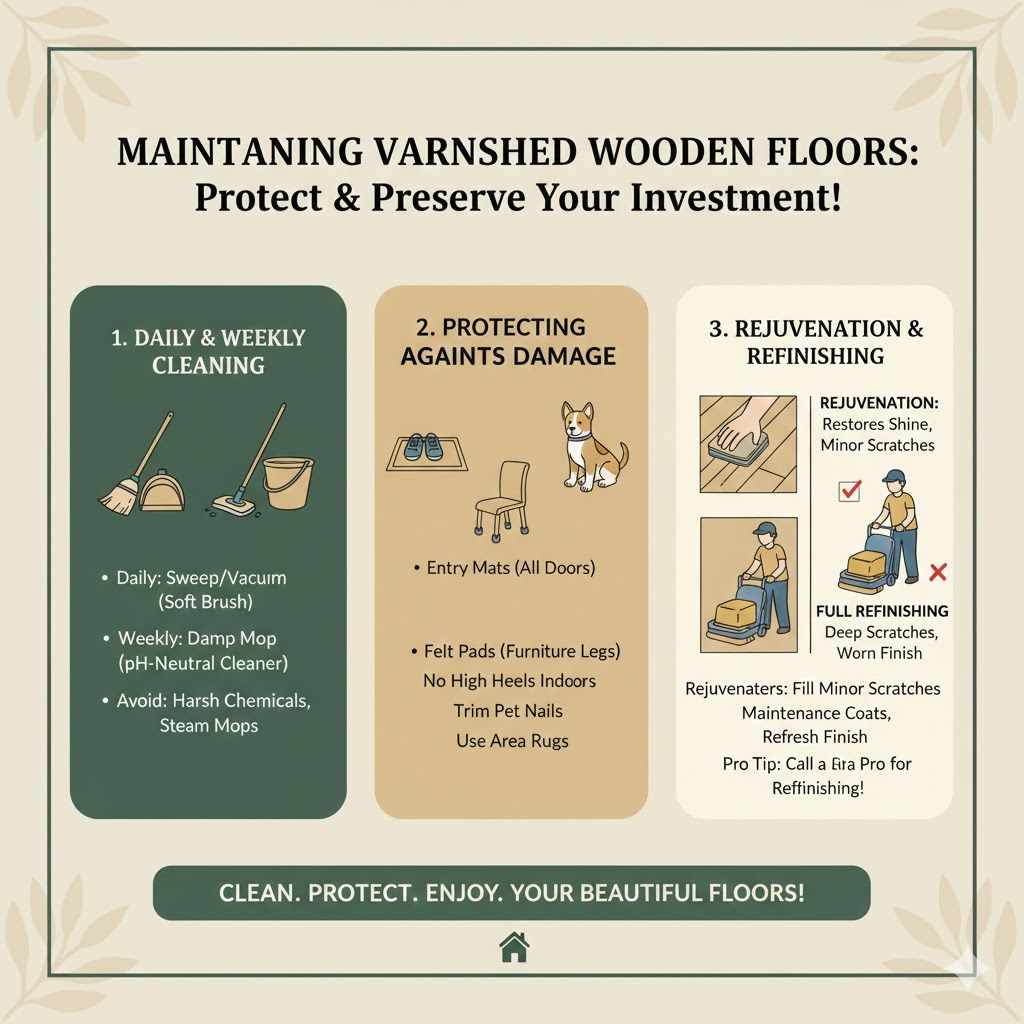
Regular cleaning is essential. Sweeping or vacuuming with a soft brush attachment will remove grit and dust that can scratch the surface. For spills and occasional deeper cleaning, use a pH-neutral cleaner recommended for wood floors.
Avoid abrasive cleaners or excessive water, as these can damage the varnish and the wood beneath.
Placing mats at entryways and using felt pads on furniture legs are simple yet effective ways to protect your floors from scratches and dents. These small measures can significantly extend the life of your varnish.
Periodic rejuvenation, such as applying a maintenance coat of varnish or a specific wood floor restorer, can refresh the finish without requiring a full refinish.
By following these maintenance tips, you can ensure your floors remain a source of pride and beauty in your home.
Daily and Weekly Cleaning Routines
Establishing a consistent cleaning routine is the most effective way to protect your varnished wooden floors from daily wear and tear. Regular care will prevent dirt and grit from abrading the finish and dulling its shine.
Daily Routine: The most important daily task is to sweep or vacuum your floors. Use a broom with soft bristles or a vacuum cleaner with a hardwood floor attachment that has a soft brush roll. This removes surface dust, sand, and small particles that can act like sandpaper underfoot.
Pay special attention to entryways and high-traffic areas.
Weekly Cleaning: Once a week, or as needed, a more thorough cleaning is recommended. Use a wood floor cleaner specifically designed for finished wood floors. These cleaners are typically pH-neutral, meaning they won’t break down the varnish.
Dampen a microfiber mop with the cleaning solution and wipe down the floor. Avoid soaking the floor with water. The mop should be damp, not wet.
Wring it out thoroughly before use.
For tougher spots or sticky residues, you might need to apply a small amount of cleaner directly to a cloth and gently rub the spot. Always wipe the area dry afterward with a clean, dry cloth. This prevents water from sitting on the surface and potentially damaging the varnish or wood.
Never use harsh chemicals like ammonia-based cleaners, abrasive powders, or steam mops on varnished floors. These can strip the finish, leave residue, or cause damage to the wood itself.
Protecting Against Scratches and Dents
Scratches and dents are common enemies of varnished wooden floors. They not only mar the appearance but can also compromise the protective layer of the varnish, leading to quicker wear and the need for more frequent repairs. Proactive protection is the best defense.
Entryway Mats: Place doormats both outside and inside all exterior doors. These mats trap dirt, gravel, and moisture from shoes before they can be tracked onto your floors. Choose mats with a non-abrasive backing so they don’t scratch the floor underneath.
Furniture Protection: Attach felt pads to the bottom of all furniture legs – chairs, tables, sofas, and even decorative items. Regularly check these pads to ensure they are clean and not worn down. Replace them as needed.
When moving furniture, lift it rather than dragging it. If you must slide heavy items, use furniture sliders specifically designed for wood floors.
Footwear Choices: Encourage family members and guests to remove high heels, cleats, or shoes with hard, abrasive soles when walking on wood floors. These can cause indentations and scratches. Slippers or soft-soled shoes are ideal for indoor wear.
Pet Care: Keep your pets’ nails trimmed. Long, sharp nails can easily scratch varnished surfaces. Consider using rugs in areas where pets frequently play or rest.
Implementing these simple protective measures significantly extends the lifespan and beauty of your varnished floors.
Rejuvenating and Refinishing
Over time, even the best-maintained varnished floors can start to show signs of wear. This might appear as dulling of the finish, minor scratches, or worn areas in high-traffic spots. Fortunately, there are options for rejuvenation and refinishing that can restore their beauty.
Rejuvenation Products: For floors that are generally in good condition but have lost some of their luster, a wood floor rejuvenator or restorer can be a good option. These products are designed to fill in minor scratches and add a fresh layer of protective coating. They can refresh the look of the floor without requiring full sanding.
Always follow the product instructions carefully, as application methods can vary.
Maintenance Coats: Some finishes, particularly certain polyurethanes and hardwax oils, can be refreshed with a maintenance coat. This involves lightly cleaning and de-glossing the existing finish, then applying a thin new coat of the same or a compatible product. This adds a new layer of protection and can restore shine.
Full Refinishing: When the varnish is heavily worn, deeply scratched, or if you want to change the color or sheen, a full refinishing is necessary. This typically involves sanding the entire floor down to the bare wood using progressively finer grits of sandpaper. After sanding, you apply new coats of varnish, stain (if desired), and a topcoat.
This is a more labor-intensive process, often best left to professionals, but it can completely transform the look and feel of your floors.
The decision to rejuvenate or refinish depends on the current condition of your floors and your desired outcome.
Frequently Asked Questions
Question: What is the most durable type of floor varnish?
Answer: For maximum durability, especially in high-traffic areas, polyurethane finishes with aluminum oxide additives are generally considered the most robust. High-solids oil-based and water-based polyurethanes also offer excellent wear resistance.
Question: Can I varnish over existing varnish?
Answer: Yes, you can often varnish over existing varnish, provided the old finish is sound and clean. A light scuff sanding is usually required to create a surface for the new varnish to adhere to. Always test on an inconspicuous area first.
Question: How long does it take for floor varnish to fully cure?
Answer: While floor varnish may feel dry to the touch within hours, it typically takes 7 to 30 days to fully cure and reach maximum hardness. During this curing period, avoid heavy furniture placement and abrasive cleaning.
Question: Is water-based or oil-based polyurethane better for floors?
Answer: Water-based polyurethane is generally preferred for its low odor, fast drying time, and clarity. Oil-based polyurethane offers a warm amber tone and can be slightly more durable in some cases, but it has strong fumes and longer drying times.
Question: How often should I clean my varnished wood floors?
Answer: It’s best to sweep or vacuum your varnished wood floors daily to remove grit. A damp mop with a wood floor cleaner is recommended weekly, or as needed, to remove dirt and prevent buildup.
Summary
Selecting the Best Floor Varnish for Wooden Floors: Top Picks involves understanding product types, considering your lifestyle, and preparing the surface well. Whether you choose durable polyurethane, natural hardwax oil, or a low-VOC option, proper application and regular maintenance are key. Enjoy your beautifully protected and shining wooden floors for years to come.