Can You Drill Into Concrete With a Regular Drill
Many DIYers wonder, Can You Drill Into Concrete with a Regular Drill? It’s a common question when you’re looking to hang a shelf or mount something on a concrete wall. Sometimes, it feels a bit tricky to know if your regular drill can handle the job.
Don’t worry, it’s simpler than you might think! We’ll walk through exactly what you need to do, step by step, so you can get that project done with confidence.
Drilling Concrete with a Regular Drill
This section explains the fundamental capabilities and limitations of using a standard drill for concrete tasks. It’s about setting realistic expectations and understanding the basic principles involved. We’ll cover what makes concrete different from wood or drywall and why this matters for your drilling project.
Knowing these basics helps you choose the right approach.
Understanding Concrete Properties
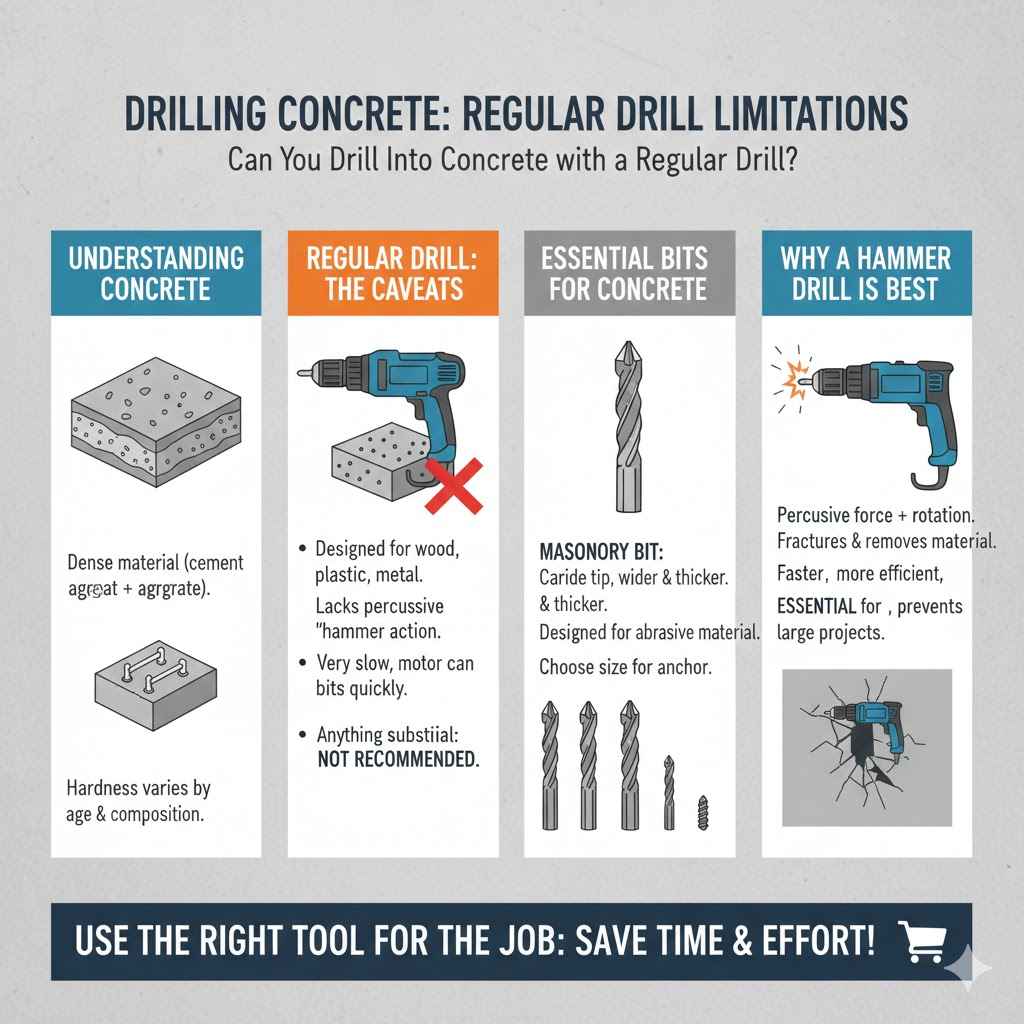
Concrete is a tough building material made from cement, aggregate (like sand and gravel), and water. When it hardens, it becomes very dense and hard. This is why drilling into it requires a bit more than just pushing a regular drill bit into soft wood.
The aggregate particles are like tiny rocks embedded in the cement paste, making the material very resistant to penetration. This resistance is what we need to overcome.
The hardness of concrete varies. Fresh concrete is softer than concrete that has cured for weeks or months. The mix proportions and the type of aggregate used also play a role in its overall density and hardness.
Older, well-cured concrete can be extremely hard, requiring specialized tools and techniques for effective drilling. This means that even with the right drill, results might differ based on the age and composition of the concrete you are working with.
Can You Drill Into Concrete with a Regular Drill
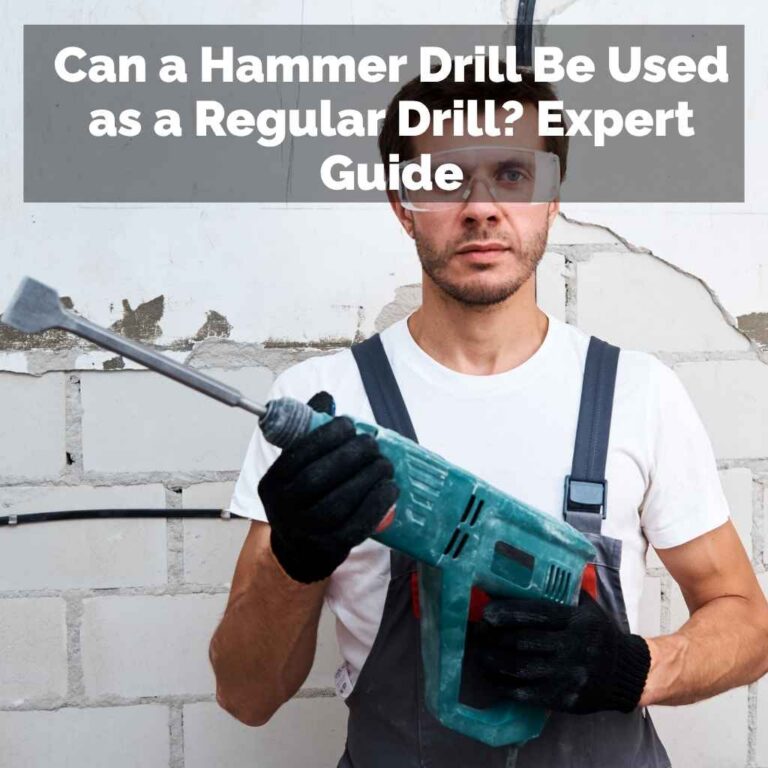
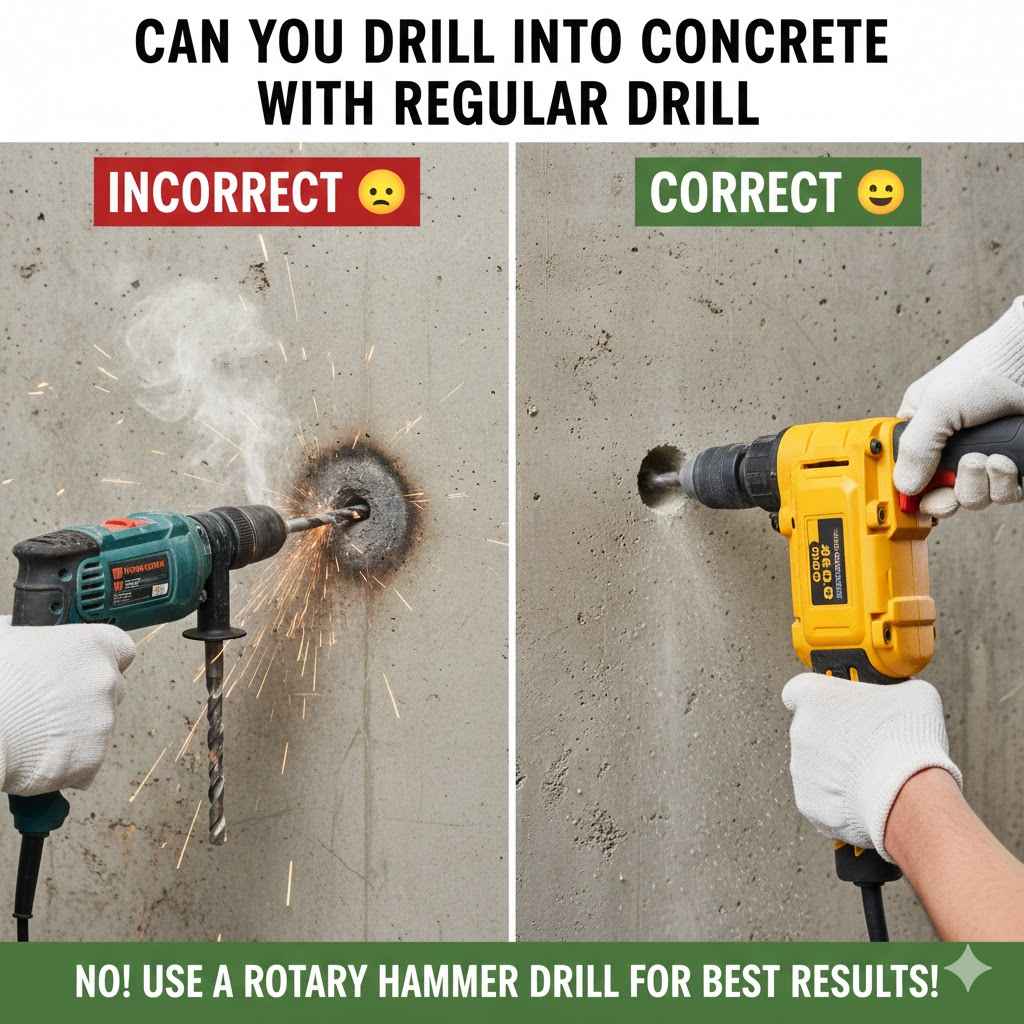
So, Can You Drill Into Concrete with a Regular Drill? The short answer is yes, but with important caveats. A standard drill, often called a drill driver, is primarily designed for softer materials like wood, plastic, and metal. It spins a bit to bore a hole.
Concrete, however, needs a different kind of action: pounding and rotating simultaneously. This is what a hammer drill does.
Without the hammer action, a regular drill will struggle significantly. It might spin a concrete bit and make very slow progress, potentially overheating the drill motor and dulling the bit quickly. It’s like trying to break a rock with a screwdriver; it’s not the right tool for the job.
However, for very small holes or very soft concrete, a powerful regular drill might manage, but it’s not the ideal or efficient way to do it.
Limitations of Standard Drills for Concrete
Standard drills lack the percussive force needed to effectively break apart concrete. They rely solely on rotational force. This means that any progress made is through abrasion rather than fracturing the material.
This is a much slower and more energy-intensive process for the drill motor. The motor can easily overheat because it’s working harder than it’s designed to.
Using a regular drill for concrete can also lead to premature wear and tear on the drill itself. The motor might burn out, or the gearbox could be damaged. Furthermore, you’ll likely find that the drill bits designed for concrete will get damaged quickly.
They are made to withstand the hammering action, and without it, they might chip or become blunt much faster than they should. This makes the process frustrating and costly in the long run.
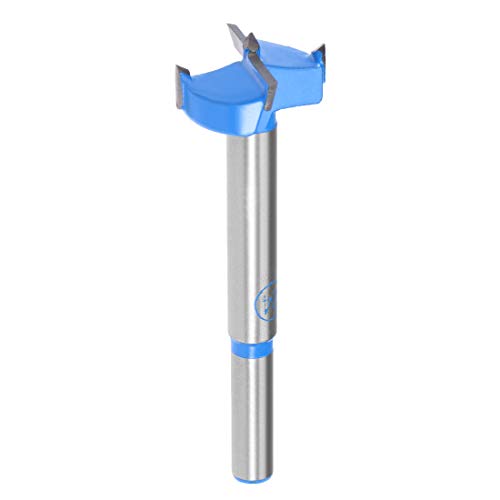
Essential Drill Bits for Concrete
When drilling concrete, the type of drill bit is crucial. You need a masonry bit. These bits have a carbide tip designed to cut through hard materials.
They are often wider and thicker than standard drill bits. For best results, especially with a regular drill if you’re trying it, you’ll want a bit specifically labeled for masonry or concrete. These are built to handle the abrasive nature of concrete.
Masonry bits come in various sizes, measured by diameter. The size you choose will depend on what you need to anchor. For most common tasks like hanging pictures or light shelves, a 1/4-inch or 3/8-inch bit is usually sufficient.
It’s important to use the correct size for the anchor or screw you plan to use. Using a bit that’s too small or too large will make the anchor ineffective or the hole unstable.
When a Regular Drill Might Suffice
There are a few situations where a regular drill might actually work for a concrete surface. If you need to drill a very small hole, perhaps for a tiny anchor or to mark a spot, a powerful regular drill might manage. Also, if the concrete is very soft, like a thin pour or an older, crumbly mixture, a standard drill might be able to make a small hole.
However, these are exceptions, not the rule. For anything substantial, like mounting heavy items, installing fixtures, or drilling multiple holes, you’ll really benefit from a hammer drill. Relying on a regular drill for these tasks will likely lead to frustration, damage to your tools, and poor results.
It’s always better to use the right tool for the job to ensure efficiency and a good outcome.
Using a Hammer Drill for Concrete
This section delves into the advantages and proper usage of a hammer drill when tackling concrete. It explains why this tool is superior for such tasks and what specific features make it effective. We will explore how the hammer action works and what benefits it offers over a standard drill.
This knowledge empowers you to make informed tool choices for your DIY projects.
What is a Hammer Drill
A hammer drill is a power tool that combines the rotational action of a standard drill with a rapid hammering motion. This hammering action is delivered by a mechanism that rapidly moves two cammed discs back and forth against each other. When you engage the hammer function, these discs cause the drill chuck (where the bit is held) to strike forward and backward very quickly, much like a tiny jackhammer.
This percussive force helps to break up the concrete as the drill bit spins, making it much easier to penetrate the hard material.
This dual action is what makes hammer drills so effective for concrete, brick, and masonry. The rotation grinds away at the material, while the hammering action chips and breaks it, allowing the spinning bit to remove the debris. Most hammer drills have a switch that allows you to turn the hammer function on or off.
This means you can use them as a regular drill for wood or metal by simply disengaging the hammer mode. This versatility makes them a valuable addition to any toolbox for a wide range of projects.
How the Hammer Action Works
The hammer action in a hammer drill is typically driven by a motor turning a series of gears. These gears engage with notched or toothed discs, often called cam discs. As the motor spins, these discs also rotate.
When the hammer function is active, the teeth on these discs interlock and then slip past each other repeatedly. This action causes the chuck and the drill bit to move forward and backward rapidly. This rapid pounding, combined with the rotation, literally pounds through the concrete.
The frequency of these hammer blows varies between models but is generally in the tens of thousands of impacts per minute. This high rate of impact is what allows the drill to break through hard surfaces efficiently. It’s this percussive force that a regular drill simply cannot replicate.
Understanding this mechanism highlights why a hammer drill is the preferred tool for drilling into concrete. It’s not just about more power; it’s about a different type of action specifically designed for tough materials.
Benefits of Using a Hammer Drill
The primary benefit of using a hammer drill for concrete is speed and efficiency. It drills holes much faster than a regular drill, saving you time and effort. The hammering action breaks up the material, making it easier for the drill bit to remove it.
This also means less strain on the drill motor, reducing the risk of overheating and prolonging the tool’s life.
Another advantage is reduced user fatigue. Because the drill is doing more of the work, you don’t have to apply as much downward pressure. This is especially important for larger holes or when drilling overhead.
The cleaner holes produced by a hammer drill also ensure that anchors fit more snugly and securely, providing a stronger hold for whatever you are mounting. This leads to more reliable and safer installations.
Choosing the Right Hammer Drill
When selecting a hammer drill, consider its power (measured in amps for corded drills or volts for cordless ones) and the maximum impact rate (Blows Per Minute or BPM). For occasional DIY use, a medium-powered drill is usually sufficient. If you plan on doing more heavy-duty work or drilling frequently, invest in a more powerful model.
Also, look at the chuck type. Keyed chucks require a chuck key to tighten the bit, while keyless chucks can be tightened by hand, which is more convenient. For concrete drilling, a metal chuck is generally preferred over plastic.
Some hammer drills offer adjustable speed settings, which can be helpful for different materials or hole sizes. Cordless hammer drills offer portability, while corded models provide consistent power.
Step-by-Step Concrete Drilling Guide
This section provides a clear, actionable guide on how to drill into concrete successfully. It breaks down the process into simple, easy-to-follow steps. We will cover everything from preparation and safety to the actual drilling and finishing.
Following these steps will ensure you can complete your concrete drilling task safely and effectively.
Safety First Always
Before you begin drilling, safety is paramount. Always wear safety glasses to protect your eyes from flying debris. Hearing protection is also recommended, especially when using a hammer drill, as they can be quite loud.
Wear sturdy work gloves to protect your hands and a dust mask to avoid inhaling concrete dust, which can be harmful over time. Ensure your work area is clear of obstacles and that any electrical cords are out of the way to prevent tripping.
For cordless tools, make sure the battery is securely attached. For corded tools, check the power cord for any damage. It’s also a good idea to have a fire extinguisher nearby, just in case, though the risk of fire from drilling concrete is very low.
Proper safety gear is not just a recommendation; it’s essential for preventing injuries and ensuring a safe DIY experience. Remember, taking a few minutes for safety precautions can save you a lot of trouble later.
Gather Your Tools and Materials
To drill into concrete, you’ll need a few key items. First, you’ll need a hammer drill and a masonry drill bit of the appropriate size for your project. If you don’t have a hammer drill, you might be able to rent one.
You’ll also need the fasteners you plan to use, like concrete screws or anchors, and a suitable drill bit for them.
Other helpful items include a tape measure and pencil for marking your drill spots, a vacuum cleaner or dustpan and brush to clean up dust, and a stud finder if you’re drilling near walls where there might be pipes or electrical wires. Having everything ready before you start will make the process much smoother and more efficient. This preparation phase is often overlooked but is key to a successful outcome.
Marking Your Drilling Spots
Use a tape measure and pencil to accurately mark where you want to drill. For consistent spacing or alignment, measure carefully and make clear marks. If you are drilling multiple holes, it’s a good idea to measure and mark them all before you start drilling any of them.
This helps ensure everything will line up correctly once your anchors or screws are in place.
If you’re installing a shelf or bracket, hold the item up to the wall and mark the hole positions through its mounting holes. Double-check your measurements and alignment. It’s much easier to correct a mark on the wall than to try and fix a hole that’s in the wrong place.
For critical placements, consider using a level to ensure your marks are perfectly straight.
Preparing the Drill Bit
Ensure your masonry drill bit is sharp and free from any damage. Insert the drill bit into the chuck of your hammer drill. If you have a keyless chuck, twist it firmly until it grips the bit securely.
If you have a keyed chuck, insert the key and tighten the chuck as much as possible, making sure the bit is centered and held tightly. A loose bit can wobble and make drilling much harder, and it’s also a safety hazard.
If you are using a hammer drill, make sure the hammer function is engaged. Most hammer drills have a selector ring or switch for this. Ensure the drill is set to the correct rotation direction (usually clockwise for drilling).
It is also a good idea to start with a smaller pilot bit if you are drilling a very large hole, gradually increasing the bit size until you reach the desired diameter. This is called “step drilling” and can make the process easier and reduce stress on the drill.
Drilling the Hole
Hold the hammer drill firmly with both hands, ensuring a stable grip. Place the tip of the drill bit directly on your marked spot. Start the drill at a slow speed to prevent the bit from “walking” or slipping.
Once the bit has a small indentation, increase the speed. Apply steady, firm pressure. Let the hammer drill do the work; don’t force it excessively.
Periodically withdraw the drill bit from the hole while it’s still spinning. This helps to clear out the concrete dust and debris, preventing it from building up and causing the bit to overheat or bind. This is often called “clearing the hole.” Continue drilling until you reach the desired depth.
You can mark your desired depth on the drill bit with tape or use the drill’s depth stop if it has one.
Cleaning Up the Hole
Once the hole is drilled to the correct depth, withdraw the drill bit. Use a vacuum cleaner or a can of compressed air to thoroughly clean out all the dust from the hole. This is very important because dust can prevent anchors from gripping properly, leading to a weak hold.
For stubborn dust, you can use a brush or even a bent piece of wire to scrape the sides.
A clean hole ensures that your anchor or screw will be seated correctly and provide the strongest possible hold. For very deep holes, you might need to repeat the cleaning process several times. If you’re installing a wall plug or anchor, make sure the hole is completely free of dust before inserting it.
This step is critical for the success of your installation.
Alternative Methods and Tips
This section explores other options and provides helpful advice for those looking to drill into concrete. It covers situations where different tools might be needed and offers practical tips to enhance the drilling experience. These insights aim to provide a comprehensive understanding beyond the basic hammer drill usage.
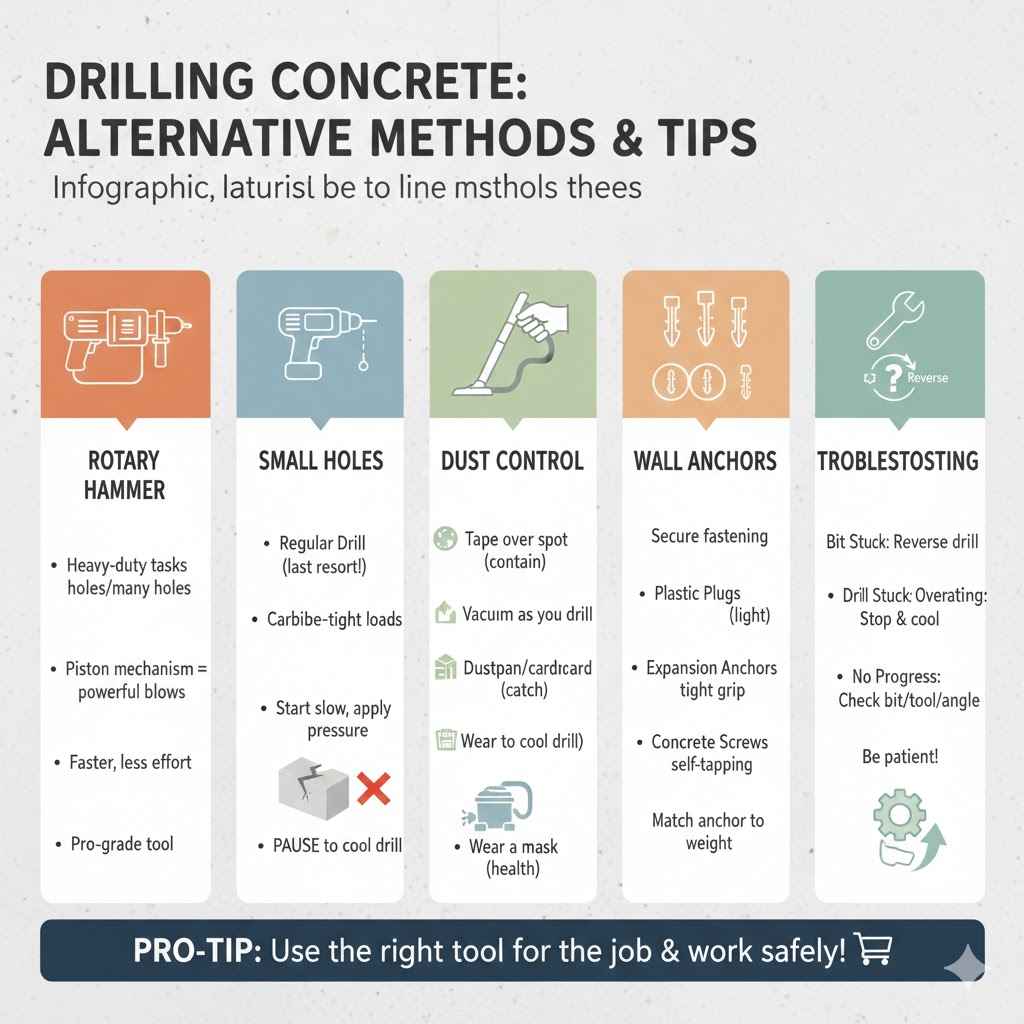
When to Consider a Rotary Hammer
For very hard concrete or when you need to drill many holes or large diameter holes, a rotary hammer is often the best tool. Unlike a hammer drill, a rotary hammer uses a piston mechanism to deliver much more powerful blows. It’s designed for heavy-duty demolition and drilling tasks.
While a hammer drill is great for most home DIY projects, a rotary hammer is a professional-grade tool for more demanding jobs.
Rotary hammers offer a significantly higher impact rate and more force per blow. This means they can drill through concrete much faster and with less effort. They are ideal for tasks like installing large anchors for machinery, breaking through concrete walls, or general construction work.
If your project involves significant concrete work, renting or using a rotary hammer can save you a lot of time and physical exertion.
Using a Regular Drill for Small Holes
If you absolutely must use a regular drill and only need to make a very small hole (say, for a small screw or a light picture hook), it might be possible. You’ll need a carbide-tipped masonry bit. Start slowly and apply moderate pressure.
Keep the drill in a straight line. Be prepared for it to take a long time and for the drill to get quite warm. You’ll need to pause frequently to let the drill cool down.
This method is not recommended for anything beyond the smallest, lightest-duty tasks. The risk of overheating and damaging your regular drill is high. It’s also much less effective and can lead to a poorly drilled hole.
For any significant anchor or fastener, always opt for a hammer drill or rotary hammer if possible. The effort involved with a regular drill can be immense, and the results often unsatisfactory.
Tips for Dust Control
Drilling concrete generates a lot of fine dust. To minimize this, you can try a few things. Before drilling, you can place a piece of tape over the drill spot to help contain some of the dust.
After drilling, use a vacuum cleaner with a brush attachment to suck up the dust as you drill. You can also hold a dustpan or a piece of cardboard behind the drill hole to catch falling debris.
Some power tools come with dust collection attachments that can be connected to a shop vacuum. If you’re drilling multiple holes, setting up a dust collection system can make a big difference. Remember that concrete dust can be harmful, so wearing a mask is always a good idea.
Good dust control makes cleanup much easier and creates a healthier work environment.
What About Wall Anchors
After drilling your hole in the concrete, you’ll likely need a wall anchor to securely fasten something. There are many types of concrete anchors. Common ones include plastic plug anchors (wall plugs), expansion anchors, and concrete screws.
Plastic plug anchors are generally used for lighter loads. You simply tap them into the drilled hole.
Expansion anchors work by expanding when you tighten a bolt or screw, gripping the concrete from the inside. Concrete screws are self-tapping and can often be screwed directly into the drilled hole without a separate anchor, though a pilot hole is still necessary. Always choose an anchor that is rated for the weight of the item you are hanging and for concrete use.
Troubleshooting Common Issues
If the drill bit gets stuck, stop drilling. Try to rotate the bit in the opposite direction (counter-clockwise) to loosen it. If it’s still stuck, you might need to carefully widen the hole slightly around the bit with a chisel and hammer, being careful not to damage the surrounding concrete.
If the drill is overheating, stop and let it cool down. Never immerse a hot drill in water.
If you’re not making progress, check if you’re using the correct bit and tool. Ensure the hammer function is engaged on your hammer drill. Sometimes, a particularly hard aggregate vein in the concrete can slow you down.
In such cases, a slight change in the drill angle might help, or you may need to use a more powerful tool. Patience is key when drilling concrete.
Frequently Asked Questions
Question: Can a regular drill make a hole in concrete?
Answer: While a regular drill can sometimes make a very small hole in softer concrete with a masonry bit, it is not designed for this and will be very slow and inefficient. It is much better to use a hammer drill.
Question: What is the difference between a hammer drill and a regular drill?
Answer: A regular drill spins a bit to make a hole. A hammer drill spins the bit and also pounds it forward rapidly, which breaks up concrete and makes drilling much faster and easier.
Question: Do I need a special drill bit for concrete?
Answer: Yes, you need a masonry drill bit with a carbide tip. These bits are designed to cut through hard materials like concrete and brick.
Question: How deep can I drill with a regular drill in concrete?
Answer: You can’t drill very deep or efficiently with a regular drill. For anything more than a tiny pilot hole, it will struggle significantly and likely overheat.
Question: Can I use a cordless drill for concrete?
Answer: Yes, many cordless drills are available as hammer drills, which are suitable for concrete. A cordless regular drill will have the same limitations as a corded regular drill for concrete.
Summary
In short, while a regular drill might manage a tiny hole in very soft concrete with the right bit, it’s not recommended. For reliable, efficient, and safe concrete drilling, a hammer drill is the tool you need. It provides the necessary percussive action to break through hard surfaces.
Always use masonry bits and follow safety guidelines.