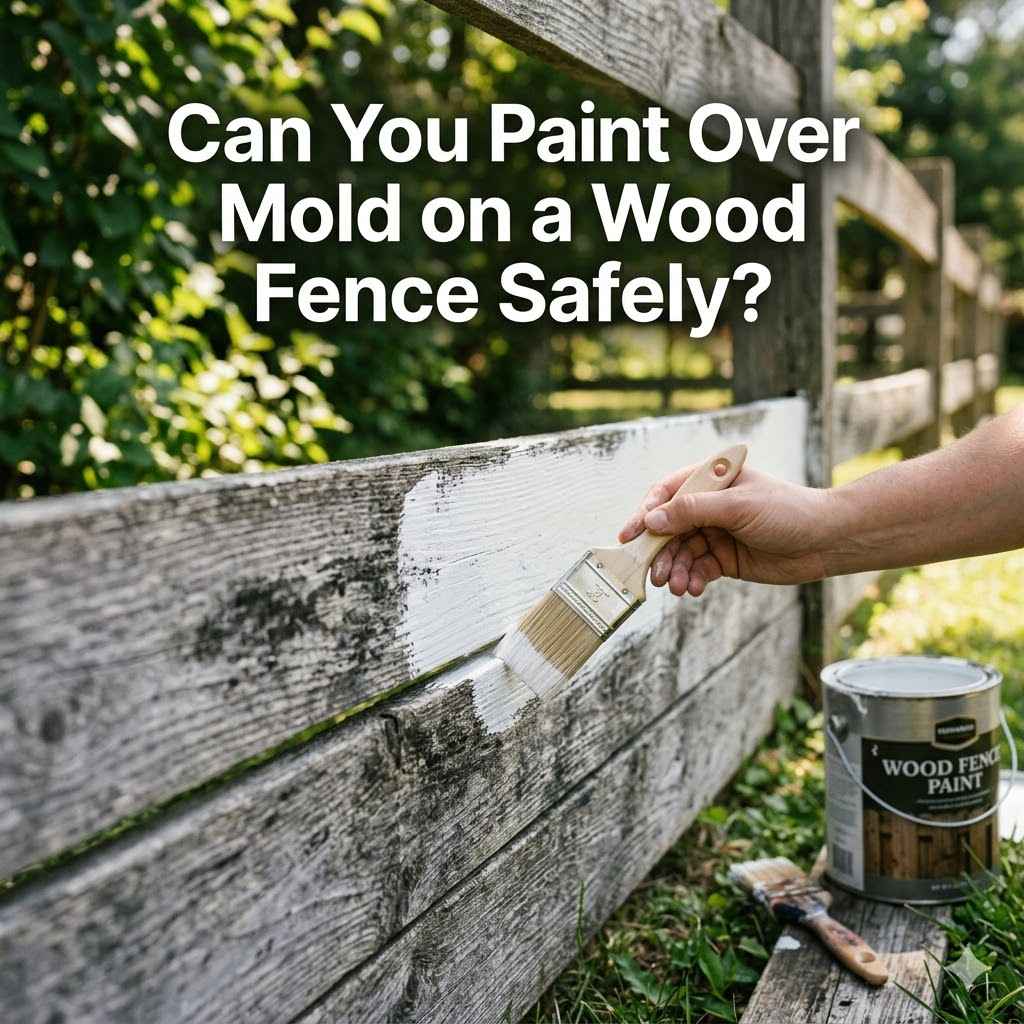
Can You Paint Over Mold on a Wood Fence Safely?
It’s a question many homeowners ponder when they see fuzzy green or black spots on their wooden fences. The thought of painting over it seems like a quick fix, right? But for beginners, figuring out if it’s safe and effective can be tricky. This guide will clear things up. We’ll walk you through a simple, step-by-step way to handle mold on your fence so you can get a beautiful, long-lasting finish. Let’s look at what you need to do before you even think about picking up a brush.
Why Mold on a Wood Fence is a Problem
Mold on a wood fence isn’t just an eyesore; it’s a sign of underlying moisture issues and can actually damage your fence over time. Mold is a type of fungus that thrives in damp environments. When it grows on wood, it starts to break down the material. This weakening can make your fence less sturdy and more prone to rot. If you don’t address mold properly, it can spread and cause more significant problems down the line, leading to costly repairs or even needing to replace the entire fence. Ignoring mold can also affect the health of your surroundings by releasing spores into the air.
Understanding Mold Growth on Wood
Mold needs a few things to grow: moisture, a food source (wood is perfect for this), and the right temperature. Wood fences are constantly exposed to the elements, making them prime real estate for mold. Rain, dew, sprinklers, and even shade can create damp conditions that mold loves.
Different types of mold can appear, from the common green and black varieties to more subtle pink or white fuzzy patches. These fungi feed on the organic compounds in the wood, slowly degrading its structure.
The visible mold you see is just the tip of the iceberg. The roots, called hyphae, can penetrate deep into the wood. This is why simply painting over mold is rarely a good long-term solution.
The mold will continue to grow underneath the paint, eventually causing it to peel and bubble.
Health Concerns Associated with Fence Mold
Beyond damaging the fence itself, mold can pose health risks. Mold spores are microscopic and can become airborne. When inhaled, these spores can cause allergic reactions in some people.
Symptoms can include sneezing, runny nose, itchy eyes, and skin rashes. For individuals with asthma or other respiratory conditions, mold exposure can trigger more severe reactions, like coughing fits or difficulty breathing.
Additionally, some types of mold produce mycotoxins, which are toxic compounds that can be harmful if ingested or inhaled. While the risk of severe mycotoxin exposure from fence mold is generally low, it’s still a good reason to remove it safely. This is why protective gear is important when dealing with mold.
Can You Paint Over Mold on a Wood Fence Safely?
The short answer is no, you cannot safely paint directly over mold on a wood fence if you want a lasting and healthy result. Painting over mold is like putting a band-aid on a serious wound; it hides the problem temporarily but doesn’t fix it. The mold will continue to grow beneath the paint, weakening the wood and eventually causing the paint to fail. Furthermore, painting over mold can trap moisture, creating an even more favorable environment for the mold to thrive and spread.
The Risks of Painting Over Untreated Mold
When you paint over mold without removing it first, you’re setting yourself up for disappointment. The mold spores will continue to multiply under the paint layer. This leads to unsightly patches, bubbling, and peeling paint within a short period.
The underlying wood will also continue to deteriorate, compromising the fence’s structural integrity. This means you’ll likely have to redo the painting job much sooner than you’d expect, costing you more time and money.
Moreover, painting over mold can release mold spores into the air when the paint is disturbed. This is especially concerning during the application and drying process. If you have allergies or respiratory issues, this can be particularly problematic.
It also means the mold can spread to other surfaces around your home or garden.
Mold Remediation Before Painting is Crucial
To safely paint a wood fence that has mold, you must thoroughly remove the mold first. This process is called mold remediation. It involves cleaning the affected areas to kill the mold and prevent its regrowth.
Only after the fence is completely clean, dry, and mold-free should you consider applying a fresh coat of paint or stain.
Proper mold remediation ensures that the paint adheres well to the wood and provides a durable, protective finish. It also addresses the health concerns by eliminating the source of airborne spores. This step is non-negotiable for a successful and safe fence painting project.
How to Safely Remove Mold from Your Wood Fence
Removing mold from a wood fence requires a bit of effort, but it’s manageable with the right approach. The key is to use a cleaning solution that kills mold and its spores, followed by thorough rinsing and drying. Always wear protective gear, such as gloves, eye protection, and a mask, to avoid direct contact with mold and cleaning chemicals. Test any cleaning solution on an inconspicuous area first to ensure it doesn’t damage the wood or surrounding plants.
Choosing the Right Cleaning Solution
Several effective cleaning solutions can tackle fence mold. A popular and often effective choice is a mixture of water and white vinegar. Vinegar is acidic and can kill a significant percentage of mold species.
For a more stubborn mold problem, a diluted bleach solution can be used. Bleach is a powerful disinfectant that effectively kills mold and removes stains.
However, bleach can be harsh on wood and surrounding plants. It’s crucial to dilute it properly and rinse the area thoroughly afterward. Another option is to use a commercial mold and mildew remover specifically designed for outdoor surfaces.
These products are formulated to be effective against mold while being relatively safe for wood when used as directed.
Common Cleaning Solution Ratios:
- Vinegar Solution: Mix equal parts white vinegar and water in a spray bottle or bucket.
- Bleach Solution: Mix 1 part bleach to 3 parts water. Always add bleach to water, not the other way around, to avoid dangerous fumes.
- Commercial Cleaners: Follow the manufacturer’s instructions precisely.
The Cleaning Process Step-by-Step
Here’s a straightforward process to clean mold from your wood fence:
- Prepare the Area: Clear any plants or furniture away from the fence. Cover any sensitive plants with plastic sheeting.
- Apply the Cleaner: Using a garden sprayer or a brush, apply your chosen cleaning solution to the moldy areas. Let it sit for about 10-15 minutes to allow it to work on the mold.
- Scrub the Mold Away: Use a stiff-bristled brush or a scrub pad to gently scrub away the mold. Work in small sections.
- Rinse Thoroughly: Use a garden hose to rinse the fence thoroughly. Ensure all cleaning solution and loosened mold are washed away. If using bleach, rinse multiple times to remove all traces.
- Allow to Dry Completely: This is a critical step. The wood needs to be completely dry before you can paint. This can take 24-48 hours, depending on the weather.
Power Washing Considerations
Power washing can be an efficient way to remove mold, but it needs to be done carefully. Using a power washer on too high a setting can damage the wood fibers, creating a rougher surface that can be more prone to future mold growth. If you choose to power wash, use a low-pressure setting and a fan tip nozzle.
Keep the nozzle at a consistent distance from the fence and avoid holding it in one spot for too long.
Always test the power washer on an inconspicuous area first. If you’re not comfortable with power washing, scrubbing by hand with a stiff brush is a safer alternative. After power washing, you’ll still need to ensure the fence dries completely before painting.
Preparing Your Fence for Painting
Once the mold is gone and your fence is clean, the next step is proper preparation for painting. This involves ensuring the wood is dry, smooth, and ready to accept paint. Skipping these steps can lead to paint peeling, flaking, and an uneven finish. Proper preparation is key to a long-lasting and beautiful fence.
Ensuring the Wood Is Completely Dry
This cannot be stressed enough: your wood fence must be bone dry before you paint. Even a little bit of residual moisture trapped under the paint can cause problems. Moisture can lead to blistering, peeling, and can even encourage mold to return.
Allow at least 24 to 48 hours of dry weather after cleaning before you start painting. Humidity and shade can prolong drying times.
You can check if the wood is dry by touching it. It should feel dry and not cool to the touch. If you have a moisture meter, you can use that for a more precise reading.
Aim for a moisture content of 15% or less in the wood. If it’s higher, you’ll need to wait longer.
Sanding for a Smooth Surface
After cleaning and drying, the wood might feel a bit rough, especially if it’s older or was power washed. Sanding the fence will create a smoother surface for the paint to adhere to. This also helps to remove any loose wood fibers or remaining surface imperfections.
Use medium-grit sandpaper (around 80-100 grit) for this task. You can do this by hand with sandpaper blocks or use a power sander for larger areas.
If you’re using a power sander, be sure to follow the grain of the wood and avoid oversanding. After sanding, wipe down the fence with a tack cloth or a damp rag to remove all the dust. This ensures a clean surface for primer and paint.
Priming Your Fence
Priming is an essential step, especially after dealing with mold and before painting. A good exterior primer will create a barrier between the wood and the paint, improving adhesion and preventing stains from bleeding through. It also helps to seal the wood and provide a uniform base for your topcoat, ensuring a more even color and finish.
Choose a high-quality exterior primer that is specifically designed for wood and is mildew-resistant. Apply it evenly across the entire fence surface. Allow the primer to dry completely according to the manufacturer’s instructions before applying your paint.
This might take a few hours.
Choosing the Right Paint or Stain
Selecting the right type of paint or stain is crucial for protecting your wood fence and ensuring a beautiful, lasting finish. Not all paints are created equal, and some are better suited for outdoor wood applications than others. Consider the climate, the type of wood, and your desired aesthetic when making your choice.
Types of Exterior Paint for Wood Fences
For wood fences, you’ll generally want to use 100% acrylic latex exterior paint. This type of paint offers excellent durability, flexibility, and resistance to cracking and peeling. It’s also water-based, making cleanup easier.
Oil-based paints were once popular, but they tend to become brittle over time and can crack.
Look for paints that are labeled as “mildew-resistant.” This feature is particularly important for a fence that has experienced mold growth. The mildew-resistant additives in the paint will help prevent mold and mildew from growing on the surface of the paint itself.
Stains vs. Paints
While paint provides a solid color and a protective layer, stains offer a different aesthetic and level of protection. Wood stains penetrate the wood, enhancing its natural grain and color while offering some protection from the elements. They can be semi-transparent, allowing the wood grain to show through, or solid, offering a more opaque finish similar to paint.
If your goal is to protect the wood and let its natural beauty shine through, a high-quality exterior wood stain is a good choice. If you want to completely change the color of your fence or achieve a more uniform, solid look, paint is the way to go. Both can be effective when applied correctly to a properly prepared fence.
Color Choices and Durability
The color you choose can impact the durability and maintenance of your fence. Darker colors tend to absorb more heat from the sun, which can cause the wood to expand and contract more, potentially leading to premature wear. Lighter colors reflect more sunlight and may last longer in very sunny climates.
However, modern exterior paints are formulated to withstand a wide range of conditions.
Consider the surrounding landscape and your home’s exterior when choosing a color. A well-chosen color can enhance your property’s curb appeal. Always check the manufacturer’s warranty and recommendations for the best color retention and durability.
Maintaining Your Painted Fence
Once your fence is painted, a little regular maintenance can go a long way in keeping it looking great and preventing future problems like mold. Regular cleaning and inspection are key to extending the life of your fence and the paint job.
Regular Cleaning and Inspection
It’s a good idea to inspect your fence at least twice a year, usually in the spring and fall. Look for any signs of new mold growth, insect damage, or loose boards. Gently wash your fence annually with a mild soap and water solution to remove dirt, grime, and any early signs of mold.
This prevents build-up that can eventually lead to more serious issues.
Rinsing your fence with a hose after heavy rain can also help wash away debris that might encourage mold growth. If you notice any small spots of mold forming, address them immediately with a mild cleaning solution before they have a chance to spread.
Addressing Minor Issues Promptly
If you spot a small patch of mold, don’t wait for it to grow. Clean it off right away with a cloth dipped in a vinegar and water solution. For minor paint chips or scratches, touch them up with the matching paint as soon as you notice them.
This prevents moisture from seeping into the wood and causing further damage. Small, timely repairs are much easier and cheaper than dealing with extensive damage later.
When to Repaint
Most exterior paint jobs on fences last between 5 to 10 years, depending on the quality of the paint, the climate, and the amount of exposure to the elements. You’ll know it’s time to repaint when you see significant fading, cracking, peeling, or if new mold growth is difficult to keep at bay. Before repainting, you’ll likely need to do some minor prep work, such as cleaning and spot-sanding, to ensure the new coat adheres well.
Frequently Asked Questions
Question: Do I need to remove all the old paint before painting over mold?
Answer: If the old paint is peeling or loose, yes, you should remove it. If the old paint is in good condition and just has mold on top, you need to clean the mold off thoroughly first, then prime and paint over the existing good paint.
Question: Can I use a pressure washer to clean mold off my fence?
Answer: Yes, but you must use a low-pressure setting and a wide fan nozzle. High pressure can damage the wood. Always test in an inconspicuous area first.
Question: How long does it take for a fence to dry after cleaning before painting?
Answer: It typically takes 24 to 48 hours of dry weather for the wood to dry completely. Humidity and shade can make this take longer.
Question: What if I have mold on the bottom of my fence posts?
Answer: Mold at the bottom of posts often indicates a moisture problem with the ground. You may need to improve drainage around the posts or consider replacing posts that are rotted.
Question: Is it safe to paint over mildew on a fence?
Answer: No, mildew is a type of mold. You must always clean and remove mold or mildew completely before painting for the paint job to be successful and safe.
Summary
You cannot safely paint over mold on a wood fence. The process requires thorough mold removal using appropriate cleaners and protective gear. After cleaning, ensure the fence is completely dry, then sand and prime it before applying a quality exterior paint or stain. Regular maintenance will keep your fence looking good.
This guide gives you the steps to safely tackle mold on your wood fence. You’ll protect your fence and make it look great. Just follow the cleaning and prep work. Then you can enjoy your newly painted fence.