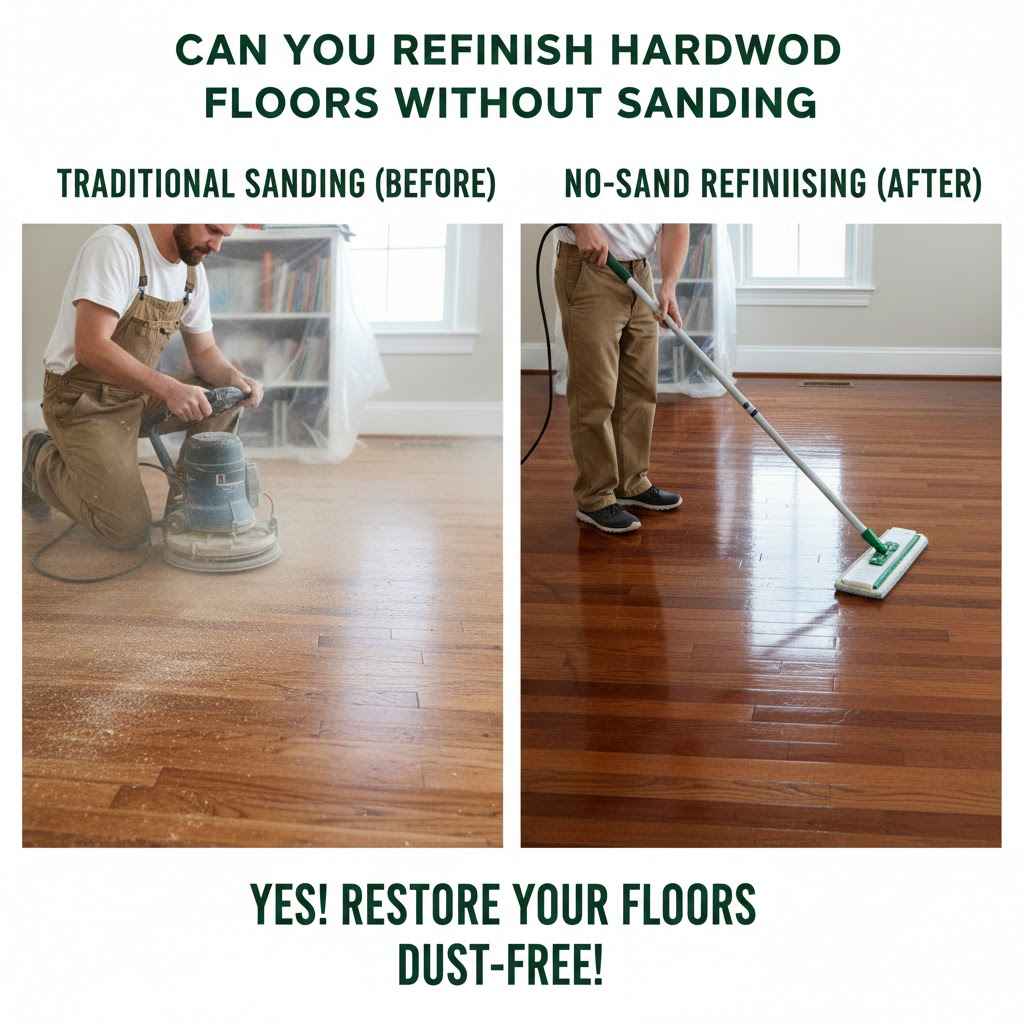
Can You Refinish Hardwood Floors Without Sanding
Thinking about making your hardwood floors look amazing again? You might be wondering, Can You Refinish Hardwood Floors Without Sanding? This is a super common question, especially for people who haven’t tackled floor projects before. Sanding can sound like a big, messy job, and who has the time or energy for all that dust?
Don’t worry, there are ways to refresh your floors that skip the sanding step. We’ll walk you through it, keeping things simple and easy to follow. Get ready to learn how to revive your floors step by step.
How To Refinish Hardwood Floors Without Sanding
Many homeowners wish to restore the beauty of their hardwood floors without the extensive labor and mess associated with traditional sanding. The prospect of sanding can seem overwhelming, involving dust, noise, and significant preparation. Fortunately, advancements in floor finishing products offer effective alternatives for those seeking a less intrusive method.
This section explores the primary methods for refinishing hardwood floors without sanding, focusing on approaches that refresh the existing finish and address minor wear and tear.
Surface Refinishing Options
Surface refinishing, often called screen and recoat or buff and recoat, is a popular method for updating hardwood floors when the existing finish is still largely intact but has lost its luster or shows light scratches. This process involves cleaning the floor thoroughly and then abrading the surface lightly with a buffer and a screening disc. This creates a profile for the new coat of finish to adhere to.
It’s crucial to understand that this method is for cosmetic improvements and minor wear; it will not fix deep scratches, gouges, or significant wear down to the bare wood.
The key advantage of screen and recoat is its speed and minimal dust production compared to full sanding. A professional can often complete the job in a single day. The materials involved are also less expensive than a full refinishing project.
The process typically requires a floor buffer, a screening pad (often 120-180 grit), a high-quality water-based polyurethane, and applicators. The floor must be meticulously cleaned beforehand to remove all dirt, wax, and debris, as any particles trapped under the new finish will be permanently visible.
The process begins with a thorough cleaning. Using a wood floor cleaner, remove any oils, grease, or sticky residues. Then, the floor is screened using a buffer with a screening disc.
This lightly roughens the surface of the existing finish, allowing the new coat of polyurethane to bond properly. After screening, all dust must be removed using a vacuum with a brush attachment, followed by tack cloths or a microfiber mop dampened with mineral spirits. Finally, one or two coats of a new water-based polyurethane finish are applied.
Water-based finishes dry quickly and have low odor, making them ideal for this process.
A common scenario involves a homeowner with a 15-year-old oak floor that has lost its shine and has light surface scratches from everyday wear. The finish is not worn through to the wood, but it looks dull and tired. Traditional sanding would be a significant undertaking in their busy household.
They opt for a screen and recoat using a high-quality water-based polyurethane. After the process, the floor looks significantly brighter, the scratches are less noticeable, and the homeowner has a refreshed look without the dust and disruption of sanding.
Choosing the Right Finish
Selecting the correct type of finish is vital for the longevity and appearance of your refinished floors. For screen and recoat jobs, water-based polyurethanes are generally recommended. They dry fast, typically in 2-4 hours, allowing for recoating within the same day.
They also have a clearer appearance, meaning they are less likely to yellow over time compared to oil-based finishes. Oil-based polyurethanes are more durable and can offer a warmer amber tone, but they take longer to dry (8-24 hours between coats) and have a stronger odor.
When deciding on the sheen level—matte, satin, semi-gloss, or gloss—consider the room’s lighting and your aesthetic preferences. Matte finishes hide imperfections best but can show scuffs more easily. Glossy finishes reflect light and can make the room appear brighter, but they also highlight every scratch and dust particle.
Satin or semi-gloss offer a good balance for most homes.
-
Water-Based Polyurethane
Water-based polyurethanes are a fantastic choice for refinishing hardwood floors without sanding. They dry very quickly, meaning you can often apply a second coat on the same day. This is a huge time saver.
They also tend to have less odor than their oil-based counterparts, making the process more pleasant for you and your family. The finish is typically clear, which helps maintain the natural color of your wood and prevents yellowing over time, which is a common issue with older finishes.
-
Oil-Based Polyurethane
Oil-based polyurethanes are known for their exceptional durability and a slightly warmer, amber tone that some people prefer. They penetrate the wood more deeply, offering a rich look. However, they require a longer drying time between coats, often 24 hours.
This means a project can take several days to complete. They also emit stronger fumes during application, so good ventilation is absolutely necessary. While very tough, they can yellow the wood over time, which might not be desirable for lighter wood species.
-
Sheen Levels
The sheen level you choose impacts both the look and the upkeep of your floors. A matte finish provides a very natural, low-glare look and is forgiving of minor imperfections. However, it might show wear patterns more quickly.
A high-gloss finish is very shiny and can make a room feel more open and bright, but it also magnifies every scratch, ding, and speck of dust. Satin or semi-gloss are popular middle-ground options that offer a pleasant sheen without being overly reflective and are relatively good at hiding everyday wear and tear.
Assessing Floor Condition For Non-Sanding Refinishing
Before you decide if refinishing without sanding is the right path for your floors, it’s crucial to honestly assess their current condition. This non-sanding method works best on floors that have a finish that is generally sound but has lost its shine or has only minor surface scratches. If the finish is heavily worn in high-traffic areas, down to the bare wood, or if there are deep gouges, dents, or water stains, sanding will likely be necessary to achieve a satisfactory result.
You should be able to feel the finish as a smooth, continuous layer under your fingertips, even if it’s dull.
To check for wear, use your fingernail to gently try to scrape the surface in a few different spots, especially in doorways or pathways. If you can easily lift a flake of finish or if you see exposed wood, a simple recoat will not suffice. Another test is to rub a damp white cloth over the floor; if dark residue comes off onto the cloth, it might indicate that the finish is breaking down.
If the wood itself is damaged with deep scratches or dents, these can only be properly repaired by sanding down the surface. For those considering DIY, it is always wise to test any product in an inconspicuous area first.
Consider the age and type of the existing finish. Older finishes, particularly wax-based finishes, can be problematic for recoating without sanding. Wax cannot be screened off effectively and will prevent new finishes from adhering.
Modern polyurethane finishes are much more compatible with the screen and recoat process. If you are unsure about the type of finish on your floor, it is best to consult with a flooring professional.
Screening Versus Buffing
When we talk about preparing the floor for a new coat of finish without full sanding, two terms often come up: screening and buffing. While they sound similar, they refer to slightly different aspects of the process. Buffing is the action of using a floor machine to smooth and clean the surface, often preparing it for a new finish or for polishing.
Screening is a specific type of buffing that uses a flexible abrasive disc (a screen) instead of a buffing pad.
A floor buffer is a machine with a rotating pad or brush underneath. It can be used with various attachments for different tasks. For refinishing without sanding, you’ll typically use a buffer with a screening disc, which is a web-like abrasive material.
This screen is designed to lightly abrade the existing finish, creating microscopic scratches that allow the new finish to adhere properly. This is a much gentler process than sanding, which removes a layer of wood.
The goal of screening is not to remove the old finish but to scuff it up just enough. Think of it like lightly scuffing a wall before painting. If you buff with a polishing pad without an abrasive screen, you are just cleaning and perhaps adding a bit of shine, but you are not preparing the surface for a new layer of finish to adhere to.
Therefore, using a screening disc is the critical step for a successful screen and recoat project.
-
The Purpose of Screening
Screening is the essential step that allows a new coat of finish to stick to your old finish. Without this light abrasion, the new polyurethane would likely peel or flake off over time because it has nothing to grab onto. The screening disc essentially creates a textured surface at a microscopic level.
This texture provides the “tooth” needed for adhesion. It’s a delicate balance; you want enough abrasion for the new finish to bond, but not so much that you damage the existing finish or wear through to the bare wood.
-
Types of Screening Discs
Screening discs are usually made of a tough, flexible mesh embedded with abrasive grit, typically aluminum oxide. They come in various grits, with 100 to 180 grit being common for hardwood floor refinishing. A coarser grit might be used if there are some slightly more stubborn dull spots, but generally, a finer grit is preferred to avoid aggressive abrasion.
These discs are designed to conform to the floor’s surface, ensuring even scuffing.
-
Post-Screening Cleanup
After screening, removing all dust is paramount. This is where many DIYers make mistakes, leading to a poor finish. You need to vacuum thoroughly, paying attention to edges and corners.
Then, use a tack cloth or a damp microfiber mop (dampened with mineral spirits, not water) to pick up any remaining fine dust particles. Any dust left behind will be trapped under the new finish, creating a speckled or textured appearance that is impossible to remove without starting over.
Products and Tools Needed
To successfully refinish your hardwood floors without sanding, you will need a specific set of tools and products. The most crucial piece of equipment is a floor buffer, which can often be rented from local hardware or tool rental stores. Ensure you get a buffer that comes with a screening disc attachment.
You will also need a quality wood floor cleaner to prepare the surface and a vacuum with a brush attachment for dust removal. Tack cloths or a mineral spirits-dampened mop are essential for final dust pickup.
For the actual refinishing, you’ll need a good polyurethane finish. Water-based polyurethanes are highly recommended for their fast drying times and low odor. Choose your desired sheen level.
You’ll also need high-quality applicator pads or brushes suitable for polyurethane finishes. Ensure you have proper ventilation, especially if using oil-based products, though even water-based finishes benefit from good airflow during drying.
Here’s a comprehensive list of what you’ll typically need:
-
Floor Buffer Machine
A floor buffer is a machine that spins a pad or brush at high speed. For this project, you need one that can accommodate a screening disc. Renting is often the most cost-effective option for a DIYer.
Make sure the rental company can provide the correct type of buffer for hardwood floors.
-
Screening Disc
This is a flexible abrasive disc that attaches to the floor buffer. It’s designed to lightly scuff the surface of your existing floor finish, creating the necessary profile for the new finish to adhere. Grits typically range from 100 to 180.
Always use a fresh disc for even abrasion.
-
Wood Floor Cleaner
A pH-neutral cleaner specifically designed for hardwood floors is essential for removing dirt, grime, and any wax or polish that might be on the surface. Thorough cleaning prevents these contaminants from being sealed into the new finish.
-
Vacuum Cleaner with Brush Attachment
After screening, a vacuum is needed to pick up loose dust. A brush attachment helps agitate and lift dust from the wood grain.
-
Tack Cloths or Mineral Spirits Dampened Microfiber Mop
These are crucial for removing the very fine dust particles left behind after vacuuming. Any remaining dust will show up in the new finish.
-
Water-Based Polyurethane Finish
Choose a high-quality water-based polyurethane in your desired sheen. Ensure it’s suitable for hardwood floors. Water-based finishes are generally preferred for their quick drying and low odor.
-
Applicator Pads or Brushes
High-density foam applicators or specialized finish applicator pads are recommended for a smooth, streak-free finish. High-quality natural bristle brushes can be used for edges.
-
Painter’s Tape and Drop Cloths
To protect baseboards, walls, and any furniture you can’t move. Ensure good ventilation by opening windows or using fans, but avoid direct drafts that can cause dust to settle on wet finish.
Let’s consider a real-life example. Sarah wanted to refresh her living room floors before hosting a family gathering. The floors were dull and had light scratches.
She rented a floor buffer with a screening disc. She first cleaned the floors thoroughly with a hardwood cleaner. Then, she used the buffer with the screen.
After vacuuming, she wiped everything down with tack cloths. She applied two coats of a water-based satin polyurethane, allowing each coat to dry for about 4 hours. The result was a visibly brighter, smoother floor that received many compliments at the gathering.
The entire process took about a day and a half.
Steps for Refinishing Without Sanding
Refinishing your hardwood floors without sanding is a process that requires careful preparation and execution. The goal is to clean, lightly abrade, and then reapply a protective finish. This method is ideal for floors that are structurally sound but have lost their aesthetic appeal due to dullness, scuffs, and minor surface scratches.
Following these steps precisely will help ensure a professional-looking outcome and extend the life of your beautiful wood floors.
Begin by clearing the room of all furniture and rugs. This provides ample space to work and prevents damage to your belongings. Then, thoroughly clean the floors.
Use a specialized wood floor cleaner to remove all dirt, grease, and any residual wax or polish. Any contaminants left on the floor can interfere with the adhesion of the new finish. After cleaning, let the floor dry completely.
This might take several hours, so plan accordingly.
The next critical step is to screen the floor. Attach a screening disc to your floor buffer. Move the buffer slowly and steadily across the floor in overlapping passes.
It’s like vacuuming, but with the buffer. The screening disc will lightly scuff the surface of the existing finish. You are not trying to remove the finish, just to create a dull, uniformly abraded surface.
Pay attention to areas that might seem particularly dull or scuffed, but avoid dwelling too long in one spot to prevent uneven abrasion.
After screening, thorough dust removal is paramount. Use a vacuum cleaner with a brush attachment to capture as much dust as possible. Then, use tack cloths or a microfiber mop dampened with mineral spirits to wipe down the entire floor surface.
This ensures that even the finest dust particles are removed, which is crucial for a smooth, professional finish. Inspect the floor carefully; any dust left behind will be visible under the new coat of finish.
Finally, you are ready to apply the new finish. Stir the polyurethane gently; do not shake it, as this can create bubbles. Using your applicator, apply a thin, even coat of polyurethane.
Work in sections, maintaining a wet edge to avoid lap marks. Follow the manufacturer’s instructions for drying times between coats, which for water-based polyurethanes is typically 2-4 hours. Most projects require two coats for adequate protection and appearance.
Allow the final coat to cure fully before returning furniture to the room; this can take several days. Ensure adequate ventilation throughout the application and drying process.
-
Clear the Room
First, remove all furniture, rugs, and anything else from the floor. This ensures you have complete access to every part of the floor and prevents accidental damage to your belongings. It also makes the cleaning and application processes much easier and more efficient.
-
Deep Clean the Floor
Use a high-quality wood floor cleaner. This step is crucial for removing any dirt, grease, wax, or old polish. If you have any doubt about the type of finish on your floor, it’s wise to do a spot test with a small amount of cleaner in an inconspicuous area to see how it reacts.
Allow the floor to dry completely after cleaning.
-
Screen the Floor Surface
Attach a screening disc (usually 100-180 grit) to your floor buffer. Move the buffer over the entire floor in a systematic pattern, overlapping your passes slightly. The goal is to create a dull, uniform surface.
This lightly abrades the existing finish, preparing it for the new coat. Do not press down too hard or linger in one spot.
-
Remove All Dust
This is a critical step. Vacuum the floor thoroughly with a brush attachment. Then, wipe the entire floor with tack cloths or a microfiber mop dampened with mineral spirits.
Ensure no dust particles remain, as they will mar the finish. Good lighting is helpful here to spot any missed dust.
-
Apply the First Coat of Finish
Stir the polyurethane gently. Apply a thin, even coat using an applicator pad or brush. Work in one direction with the grain of the wood.
Avoid applying too much, which can lead to pooling or streaking. Maintain a wet edge to prevent lap marks.
-
Apply Subsequent Coats
Let the first coat dry according to the manufacturer’s instructions (usually 2-4 hours for water-based). Lightly buff the dried coat with a fine-grit sanding sponge (220 grit or higher) or screens if recommended by the finish manufacturer, and then vacuum and tack again before applying the next coat. Apply a second coat, and a third if desired for extra durability.
Always follow the specific product’s instructions.
-
Allow for Curing
After the final coat, allow the finish to cure fully before placing furniture back. This can take anywhere from 3 to 7 days, depending on the product and humidity. Light foot traffic is usually okay after 24 hours, but heavy traffic and furniture should wait.
A case study involving a property manager highlighted the effectiveness of this method. They managed several rental units with hardwood floors that needed a facelift between tenants. Full sanding was too time-consuming and expensive for regular turnover.
By implementing a screen and recoat process, they were able to refresh the floors in each unit within 2-3 days, significantly improving their appeal to new renters and reducing overall refurbishment costs by an estimated 40% compared to full sanding.
When You Might Need To Sand
While refinishing without sanding is a fantastic option for many situations, there are definite times when it’s not enough, and traditional sanding becomes necessary. The primary indicator is the depth of the damage or wear on your floors. If your hardwood floors have deep scratches, gouges, or dents that go into the wood itself, simply applying a new coat of finish over them will not make them disappear.
The new finish will highlight these imperfections rather than conceal them.
Another key reason for sanding is if the existing finish is heavily worn down to the bare wood in significant areas. This often happens in high-traffic areas like hallways or in front of doorways. If you can see the raw wood through the finish, a simple recoat will not provide adequate protection or a uniform appearance.
The new finish would likely adhere unevenly and wear out quickly in these exposed spots.
Water damage, pet stains, or other deep discoloration that has penetrated the wood are also situations where sanding is usually required. While some stains can be spot-treated, if they are deep and widespread, sanding is the only way to remove the affected wood and achieve a consistent color and tone across the entire floor. Additionally, if your floors have been previously refinished multiple times with thick layers of different finishes, or if there’s a buildup of wax or incompatible sealers that cannot be removed by cleaning, sanding may be the only viable option to create a clean slate for a new finish.
If you are unsure about the condition of your floors, it’s always best to consult with a professional flooring contractor. They can assess the situation and recommend the most appropriate course of action, whether it’s a non-sanding refinish or a full sanding and refinishing project.
Dealing with Deep Scratches and Gouges
Deep scratches and gouges are the most common reasons why a non-sanding refinish won’t work. These are physical indentations in the wood itself, not just on the surface of the finish. Think of a significant scratch like a cut; you can’t just paint over a cut and expect it to look smooth.
You need to address the underlying damage.
With deep scratches, the wood fibers are compressed or torn. Applying a new coat of finish will fill the scratch, but the impression will still be visible, and often more noticeable because the light will reflect differently off the filled area. Gouges are even worse, as they remove material or create significant divots in the wood surface.
These require leveling the surrounding wood down to the bottom of the gouge.
In some cases, minor scratches might be repairable with wood filler before recoating, but this is often a tedious process and may not blend perfectly. For widespread or deep damage, sanding is the only way to remove the damaged wood and create a smooth, uniform surface. A professional sander removes the top layer of wood, effectively erasing all previous damage and providing a perfectly flat surface to apply new stain and finish.
The rule of thumb is if you can feel the scratch or gouge with your fingernail and it catches, it’s likely too deep for a non-sanding refinish. You might be able to make very light surface scratches less visible with a good recoat, but anything substantial will require more intensive treatment.
-
Identifying Deep Damage
Run your hand over the floor. If you feel any noticeable dips or ridges that aren’t just surface dullness, you’re likely dealing with damage that requires sanding. The light also plays a role; if the scratch creates a dark line because it has penetrated the finish and stained the wood, it’s a deep scratch.
Very light scuffs that don’t catch your fingernail might be okay, but anything more significant is a red flag.
-
Wood Filler Limitations
While wood filler can sometimes be used for minor repairs, it’s not a substitute for sanding when you have widespread damage. Wood filler needs to be colored to match the surrounding wood, which can be tricky. It also doesn’t always adhere perfectly long-term, and the repaired areas can sometimes be visible as subtle color or texture differences.
For significant damage, filler can make the floor look patchy.
-
The Role of Sanding
Sanding removes a thin layer of wood, effectively erasing all surface imperfections. This process creates a completely new, smooth surface ready for a fresh stain and finish. It’s a more involved process but guarantees a like-new appearance for floors that have seen significant wear or damage.
This is the only way to fix deep dents, gouges, and extensive wear-through.
Addressing Significant Wear and Stains
Significant wear means the original finish has been completely removed in high-traffic zones, exposing the bare wood. This bare wood is susceptible to staining, dirt, and further damage. A simple recoat will not provide protection or a uniform look in these areas.
The new finish will simply sit on top of the worn areas and the surrounding finish, creating a patchy and uneven appearance.
Similarly, deep stains from pets, spills, or aging wood cannot be simply covered up with a new coat of finish. These stains have penetrated the wood fibers and altered their color. Trying to cover them will only result in the stain showing through the new finish.
The only effective way to remove these deep stains and achieve a uniform color is to sand down to the affected wood and remove it.
If your floors have a history of wax buildup or if an incompatible product was used previously, this can also prevent new finishes from adhering. Sometimes, these old finishes can be removed with special strippers, but if the buildup is significant or has bonded deeply, sanding becomes the most reliable method to ensure a clean surface for a new finish. In these cases, the non-sanding refinish is simply not an option.
Statistics show that the average lifespan of a hardwood floor finish can range from 10 to 20 years, depending on traffic and maintenance. When this finish wears out significantly, it indicates that the protective layer is gone and the wood is exposed, necessitating more than just a recoat.
| Floor Condition | Non-Sanding Refinish Possible? | Sanding Necessary? | Explanation |
|---|---|---|---|
| Dullness, minor surface scratches, intact finish | Yes | No | Surface abrasion and recoating will refresh appearance and add protection. |
| Light scuffs and dull spots | Yes | No | Screening will remove scuffs, recoating will restore shine. |
| Deep scratches, gouges, dents in wood | No | Yes | Surface repairs are not enough; wood needs to be leveled. |
| Finish worn down to bare wood in areas | No | Yes | Bare wood needs to be protected and leveled with surrounding areas. |
| Deep stains or discoloration in wood | No | Yes | Stains have penetrated wood; must be sanded out. |
| Significant wax buildup or incompatible finishes | Potentially No (depends on removal success) | Often Yes | Old finishes can prevent new ones from adhering; sanding ensures a clean surface. |
When Is It Time To Call A Professional
Deciding whether to tackle floor refinishing yourself or hire a professional depends on several factors, including your comfort level with DIY projects, the condition of your floors, and your available time. If your floors have significant damage, deep scratches, or extensive wear down to the bare wood, it’s often best to call a professional. They have the industrial-grade equipment and expertise to handle these more complex situations effectively.
Hiring a professional is also a good idea if you are unsure about the type of finish currently on your floors or if you have encountered issues with previous DIY attempts. Professionals can assess the situation, recommend the best course of action, and ensure the job is done correctly the first time. They have the experience to deal with potential problems like uneven finish application, lap marks, or adhesion issues that can arise during a DIY project.
Furthermore, if you have a very large area to cover or if your schedule is tight, a professional can complete the job much faster than a DIYer. They have teams that can work efficiently and often complete projects in a shorter timeframe. While professional services come at a cost, they can save you time, frustration, and the potential expense of fixing mistakes.
Always get quotes from multiple reputable flooring contractors before making a decision.
-
Assessing Floor Damage
If you’re unsure about the extent of damage on your floors, a professional can provide an accurate assessment. They can determine if a non-sanding refinish is sufficient or if full sanding is required. This expertise is invaluable, as attempting the wrong method can waste your time and money.
-
Equipment and Expertise
Professionals have access to high-quality sanding machines and finishing products that are often not available to the public. They also possess the knowledge and skills to use this equipment effectively, ensuring an even and durable finish. Their experience in handling various wood types and finishes is a significant advantage.
-
Time Savings
Refinishing floors, even without sanding, takes time and effort. If you have a busy schedule or lack the desire for a physically demanding DIY project, hiring a professional is a practical solution. They can complete the work efficiently, often in a fraction of the time it would take a DIYer.
Frequently Asked Questions
Question: Can I refinish my laminate floors without sanding
Answer: No, you cannot refinish laminate floors in the same way you can hardwood floors. Laminate is a synthetic material with a printed design layer and a protective wear layer. It is not designed to be sanded and refinished.
If laminate is damaged or worn, it typically needs to be replaced.
Question: Will refinishing without sanding hide deep scratches
Answer: No, refinishing without sanding will not hide deep scratches. This method is best for addressing dullness, light scuffs, and minor surface imperfections. Deep scratches or gouges that have penetrated the wood itself will still be visible after a recoat.
Question: How long does a non-sanding refinish last
Answer: The longevity of a non-sanding refinish depends on the quality of the products used, the preparation, and the amount of traffic the floors receive. Generally, a properly done screen and recoat can last anywhere from 3 to 7 years before needing another refresh.
Question: Can I use a regular floor cleaner before refinishing without sanding
Answer: It is best to use a specialized wood floor cleaner that is pH-neutral and does not leave behind any residue. Avoid cleaners containing waxes or silicones, as these can prevent the new finish from adhering properly. Always follow the recommendations of the finish manufacturer.
Question: Is it safe to refinish floors without sanding if I have pets and children
Answer: Yes, refinishing without sanding, especially when using water-based polyurethanes, is generally safe. Water-based finishes have low VOCs (Volatile Organic Compounds) and dry quickly, allowing you to return to normal use sooner. Always ensure good ventilation during application and drying, and check the specific product’s safety data sheet.
Final Thoughts
So, Can You Refinish Hardwood Floors Without Sanding? Absolutely, for many common issues like dullness and minor scratches. This method offers a quick, less messy way to refresh your floors. It involves cleaning, lightly screening, and applying a new coat of finish.
Remember, this approach is for surface-level updates and won’t fix deep damage, which still requires sanding. Choose quality products and follow the steps carefully for a beautiful, revitalized floor.