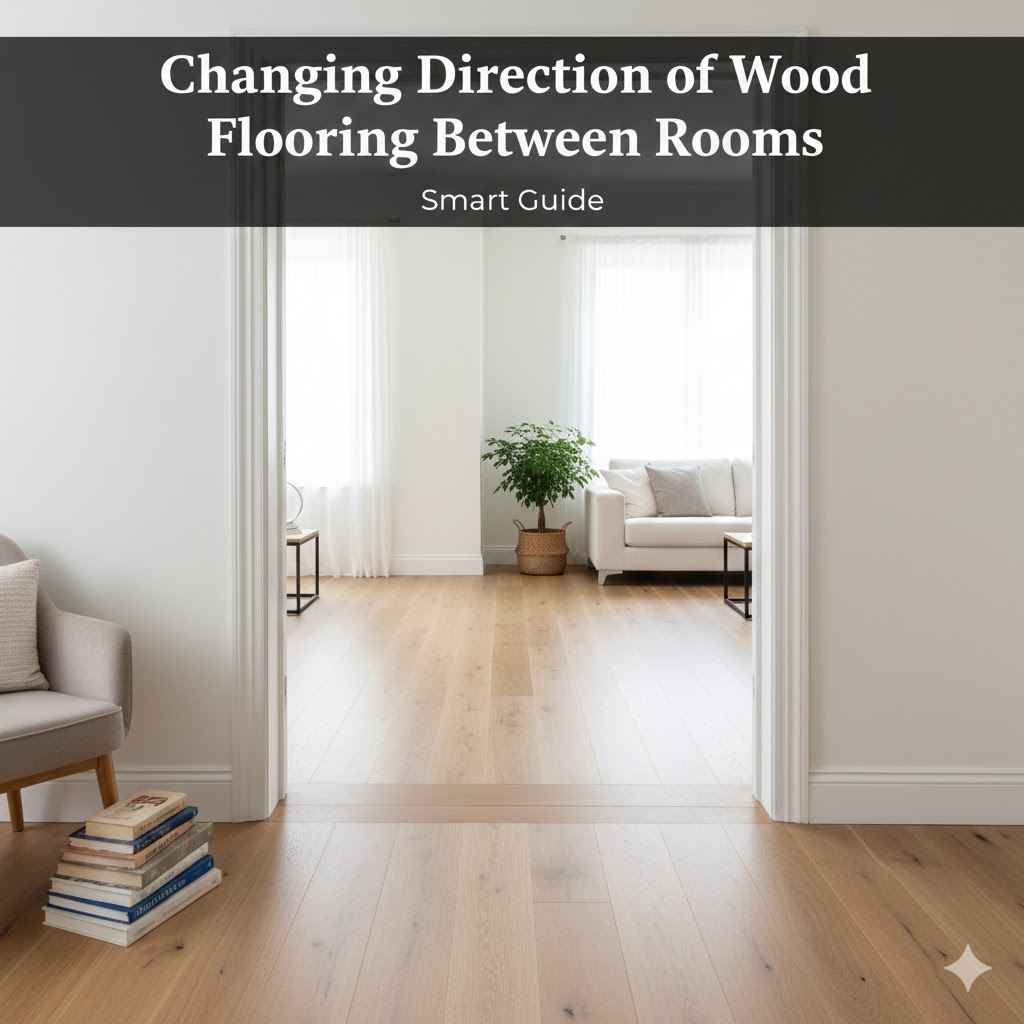
Changing Direction of Wood Flooring Between Rooms: Smart Guide
Thinking about changing your wood flooring’s direction between rooms? It’s a common project, but it can seem tricky at first. Many people find it a little confusing, mainly because of how the floorboards fit together and how you want the finished look to be. Don’t worry, it’s totally manageable! This guide, Changing Direction of Wood Flooring Between Rooms: Smart Guide, will walk you through everything, step-by-step, making it easier than you think. Let’s explore the process and learn how to do it correctly and make your home look amazing. Get ready to transform your space with confidence!
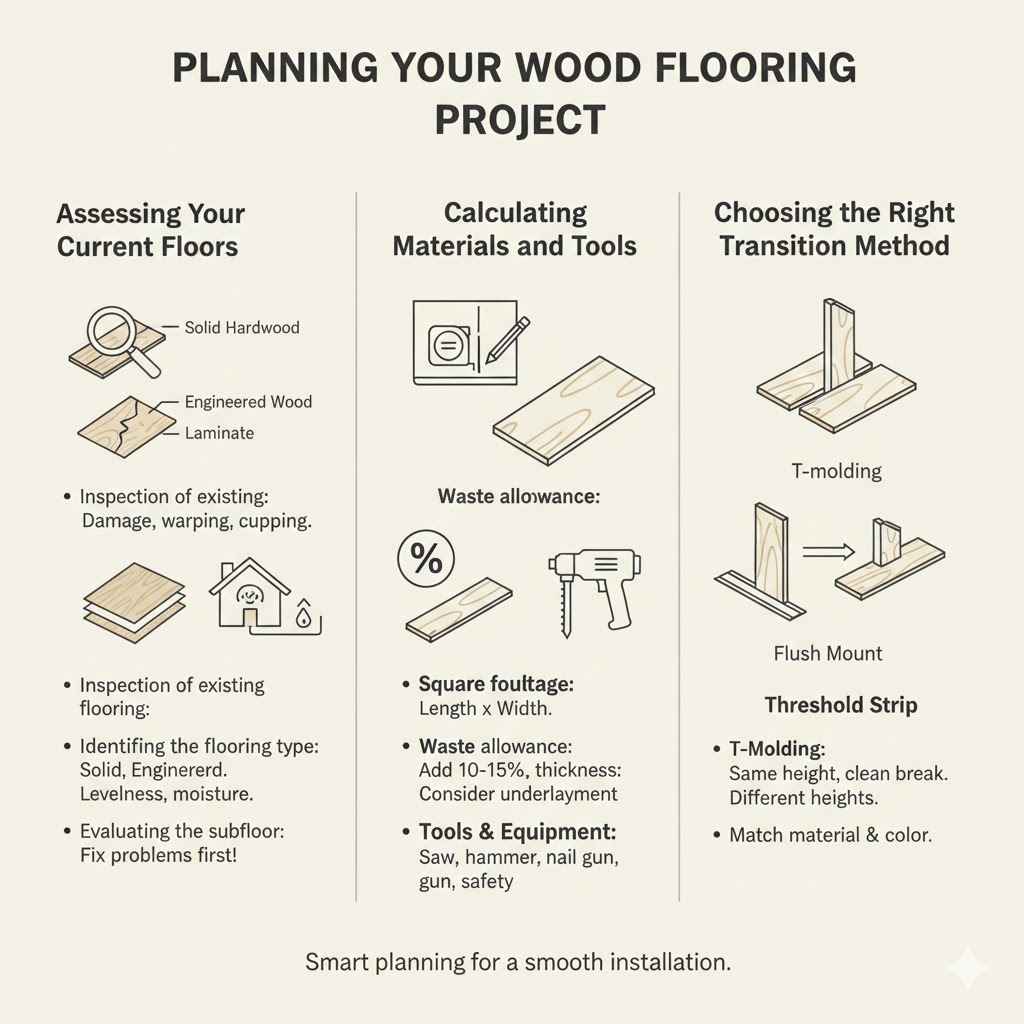
Planning Your Flooring Project
Before you get started, good planning is critical for any project, especially when you’re Changing Direction of Wood Flooring Between Rooms: Smart Guide. This involves figuring out the layout, the tools you’ll need, and the amount of wood flooring you require. Proper planning saves time, money, and headaches, ensuring your project goes smoothly. Consider aspects like the size and shape of each room, the existing flooring, and the overall look you want to achieve. Taking the time to plan your project carefully will set you up for success and help you avoid any unexpected problems down the road.
Assessing Your Current Floors
Checking your current flooring is the initial step in the project. This involves inspecting the existing floors for any damage, such as warping, cupping, or gaps. Assess the type of flooring you have, whether it’s solid hardwood, engineered wood, or laminate. It’s also important to determine how the current flooring is installed; is it glued down, nailed, or floating? Knowing this will guide your removal process and the method for installing the new flooring. Inspect the subfloor for any imperfections or issues. A damaged subfloor can cause problems with your new flooring, so it’s essential to fix any problems before you begin. A properly prepared subfloor ensures a stable and long-lasting installation.
- Inspection of the existing flooring: Look for any signs of damage, such as scratches, dents, or water damage. These issues can affect the appearance and durability of your new floor.
- Identifying the flooring type: Knowing whether you have solid hardwood, engineered wood, or laminate will affect your choice of installation methods. Solid hardwood generally requires nailing or gluing, while engineered wood and laminate often use a floating installation.
- Evaluating the subfloor: Check for any unevenness, dips, or high spots in the subfloor. These issues can cause problems with your new flooring installation. You may need to level the subfloor with self-leveling compound or plywood shims.
- Checking for moisture: Use a moisture meter to check the moisture content of your subfloor and your new flooring. The moisture levels need to be compatible to prevent warping or other damage.
Calculating Materials and Tools
Accurately calculating the materials and tools you need is a crucial part of the planning process. Measure the square footage of each room where you’ll be installing new flooring. Add extra material for waste, typically around 10% to 15% to account for cuts and errors. Determine the type of flooring you want, and calculate how much you need. Beyond flooring, consider underlayment, transition strips, and any necessary adhesives or fasteners. Make a list of all required tools, including a saw, measuring tape, hammer, nail gun (if needed), and safety equipment. This pre-planning prevents last-minute trips to the hardware store and guarantees a smooth installation process.
- Square footage calculation: Calculate the area of each room by multiplying the length by the width. Then, add these areas together to get the total square footage.
- Waste allowance: Factor in waste by adding 10% to 15% to your total square footage calculation. This accounts for cuts, mistakes, and any damaged boards.
- Flooring type and thickness: Choose the appropriate flooring type for your needs. Different flooring materials have different thicknesses, which may affect the installation process and the need for underlayment.
- Tools and equipment: Make a list of all required tools, including a saw (circular saw, miter saw, or table saw), measuring tape, hammer, nail gun, safety glasses, and hearing protection.
Choosing the Right Transition Method
Selecting the right transition method is vital when you’re Changing Direction of Wood Flooring Between Rooms: Smart Guide. There are several options, each with its own benefits and suitable applications. Consider how much traffic the area experiences and the overall design of your space. Some common options include using T-molding for a simple, clean break, or a threshold strip for a more dramatic change. Remember to choose materials that complement your flooring and the style of your home. The transition method not only ensures a smooth aesthetic transition between rooms but also provides necessary structural support and flexibility for the floors.
- T-molding: This is a popular choice for transitions between rooms where the flooring height is the same. It covers the expansion gap between the floors and provides a smooth transition.
- Threshold strips: Threshold strips are used when the flooring heights differ significantly. They provide a more pronounced transition and can accommodate changes in floor height.
- Flush mount transitions: These transitions are designed to create a seamless look, where the flooring appears to flow from one room to another without an obvious break.
- Matching the material: Ensure that the transition strips match the type and color of your flooring. This creates a cohesive and visually pleasing appearance.
Preparing for a Smooth Installation
Preparing the area is key to a successful flooring project. This involves removing any existing flooring, cleaning the subfloor, and ensuring the area is ready for the new installation. Proper preparation lays the foundation for a durable, long-lasting floor. Skipping these steps can lead to problems like uneven flooring, squeaks, and potential damage. Take your time to get the space ready, paying close attention to detail for the best results. A well-prepared space will lead to a more effective installation process.
Removing Existing Flooring
Removing the old flooring is a fundamental first step. The method varies depending on the type of flooring you have. For hardwood floors, you might need to use a pry bar and hammer to gently lift the boards. For tile or vinyl, a scraper or demolition hammer may be necessary. Safety is paramount; wear appropriate gloves, eye protection, and a dust mask. Take your time to avoid damaging the subfloor. Once the old flooring is removed, clear away any debris and old adhesive, leaving the subfloor clean and ready for the next stage. Carefully removing the old flooring prevents any problems with the new installation.
- Gather the necessary tools: You’ll need tools like a pry bar, hammer, scraper, utility knife, and protective gear such as gloves, eye protection, and a dust mask.
- Start carefully: Begin by scoring the edges of the existing flooring to prevent damage to the surrounding walls or trim.
- Remove wood flooring: Use a pry bar and hammer to lift the boards. Work slowly and methodically, using the pry bar to carefully separate the boards from the subfloor.
- Scraping tile or vinyl: Use a scraper or demolition hammer to remove the tiles or vinyl flooring. Take caution to avoid damaging the subfloor.
Cleaning and Leveling the Subfloor
Cleaning and leveling the subfloor is essential before installing new flooring. Start by removing any adhesive residue, nails, staples, or other debris. Use a scraper, putty knife, or sanding machine to thoroughly clean the subfloor. Once clean, inspect for unevenness. Use a level to identify any low spots or high points. Small imperfections can be addressed with self-leveling compound, while larger issues might require patching with plywood. A level and clean subfloor ensures that your new flooring will sit flat and remain stable. Ensuring the subfloor is smooth ensures the new floor will look great and last for years.
- Remove debris: Scrape away old adhesive, remove nails and staples, and sweep the subfloor.
- Level the subfloor: Use a level to check for any unevenness. Fill any low spots with self-leveling compound and sand down high spots.
- Repair any damage: Repair any damage to the subfloor. This might include replacing damaged sections or reinforcing the existing subfloor.
- Check for moisture: Use a moisture meter to check the moisture content of the subfloor. The subfloor must be dry before you install new flooring.
Acclimating the New Flooring
Acclimating your new flooring is a key step, especially for solid hardwood. This process involves allowing the flooring to adjust to the temperature and humidity of your home before installation. Different climates affect wood’s moisture content, leading to expansion or contraction. By letting the wood acclimate, you minimize the risk of gaps or warping after installation. Place the flooring in the room where it will be installed, and allow it to sit for the recommended period, usually a few days up to a week. Proper acclimation ensures the floor will remain stable and look its best over time. It ensures that the flooring adjusts to the conditions of your home.
- Unpack the flooring: Open the boxes of flooring and spread the planks out in the room where they will be installed.
- Allow time for acclimation: The amount of time depends on the type of flooring and the local climate. Follow the manufacturer’s instructions for the recommended acclimation period.
- Maintain temperature and humidity: Keep the room at a consistent temperature and humidity level during the acclimation period.
- Check the moisture content: Use a moisture meter to check the moisture content of the flooring and the subfloor before installation.
Installing the New Flooring
The installation is the main part of the project! This section will provide you with step-by-step instructions. Properly installing the flooring will make the difference between a great job and a major headache. Start with the first row and work your way across the room, carefully aligning the boards and securing them in place. Depending on your flooring choice, you may use nails, glue, or a floating method. Pay attention to details, such as expansion gaps and transitions to ensure a professional and beautiful finish.
Laying the First Row
Laying the first row correctly is crucial for the success of your flooring installation. Start by measuring and marking the room to ensure straight lines. Decide on the direction of your flooring and ensure the first row is perfectly aligned with the starting wall. Use spacers to maintain the recommended expansion gap along the walls. This gap allows the wood flooring to expand and contract with changes in temperature and humidity, preventing buckling or other problems. Align the first row of planks precisely, securing them with nails or adhesive, depending on the flooring type. Proper alignment in the beginning sets the stage for a great finish.
- Measure and mark: Determine the layout and mark the starting line on the subfloor.
- Install spacers: Place spacers between the flooring and the walls to maintain the expansion gap.
- Secure the planks: Secure the first row of planks. Use nails, screws, or adhesive as recommended by the manufacturer.
- Check alignment: Regularly check the alignment of the first row to ensure it stays straight throughout the installation.
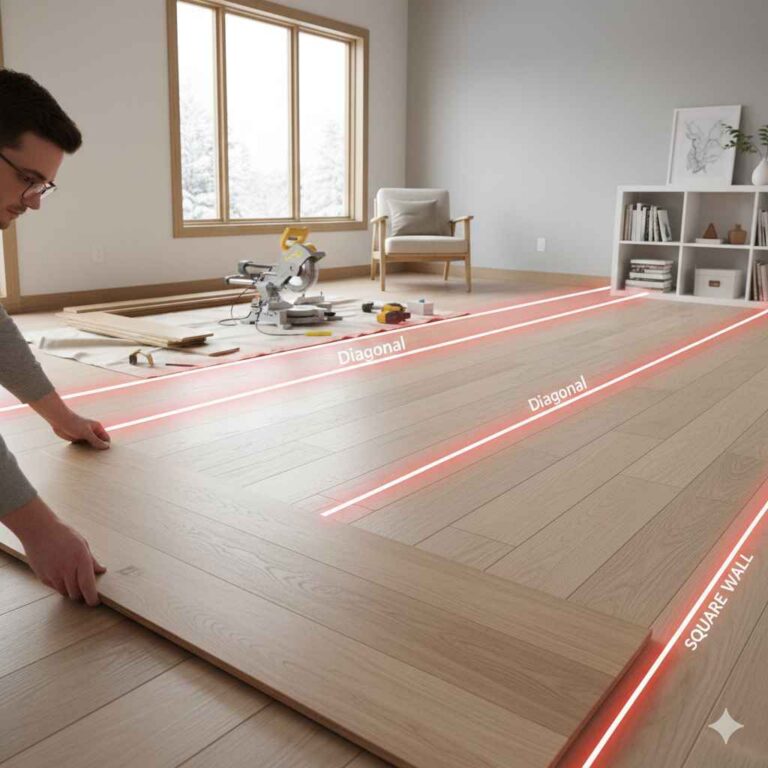
Changing Direction of Wood Flooring Between Rooms: Smart Guide for Transitioning
Changing the direction of wood flooring between rooms needs careful planning and execution. The key is to create a seamless transition that looks professional and allows for movement of the flooring. To begin, use transition strips or T-molding to conceal the edges and provide a smooth, level surface. The direction should complement the layout and design of each room. Ensure that the new direction aligns properly with the existing direction and consider the natural flow of the space. Proper planning and preparation are crucial. This will help you achieve a seamless and beautiful transition. This guide on Changing Direction of Wood Flooring Between Rooms: Smart Guide provides a solid understanding of how to make this work.
- Plan the Transition Point: Determine where the direction change will occur, preferably at a doorway or a natural break in the room. This helps to create a visual division.
- Use Transition Strips: Install transition strips or T-molding at the transition point to cover the expansion gap and provide a neat appearance.
- Matching Heights: Ensure the heights of the flooring in both rooms are the same. If not, use transition strips with height adjustments.
- Directional Considerations: Plan the direction of the new flooring to complement the existing flooring and the room’s layout. Consider running flooring parallel to the longest wall or towards a focal point.
Cutting and Fitting the Boards
Cutting and fitting the boards is the most precise step. Use a miter saw or circular saw to make clean, accurate cuts for each plank. Carefully measure and mark each board before cutting, accounting for the expansion gaps and any irregular walls. Wear safety glasses and a dust mask for protection. Precise cuts are essential for a professional appearance. Take your time to measure accurately, cut slowly, and double-check your work before securing the boards in place. The extra care at this point will pay off in the finished result, resulting in a floor that looks clean and well-executed.
- Measure accurately: Use a measuring tape to measure each board precisely.
- Make clean cuts: Use a miter saw or circular saw to make clean cuts. Cut the boards to the right length.
- Cut around obstacles: Use a jigsaw or coping saw to cut around any obstacles, such as pipes or doorways.
- Check the fit: Before securing the boards, check the fit to make sure everything fits snugly and has enough room for expansion.
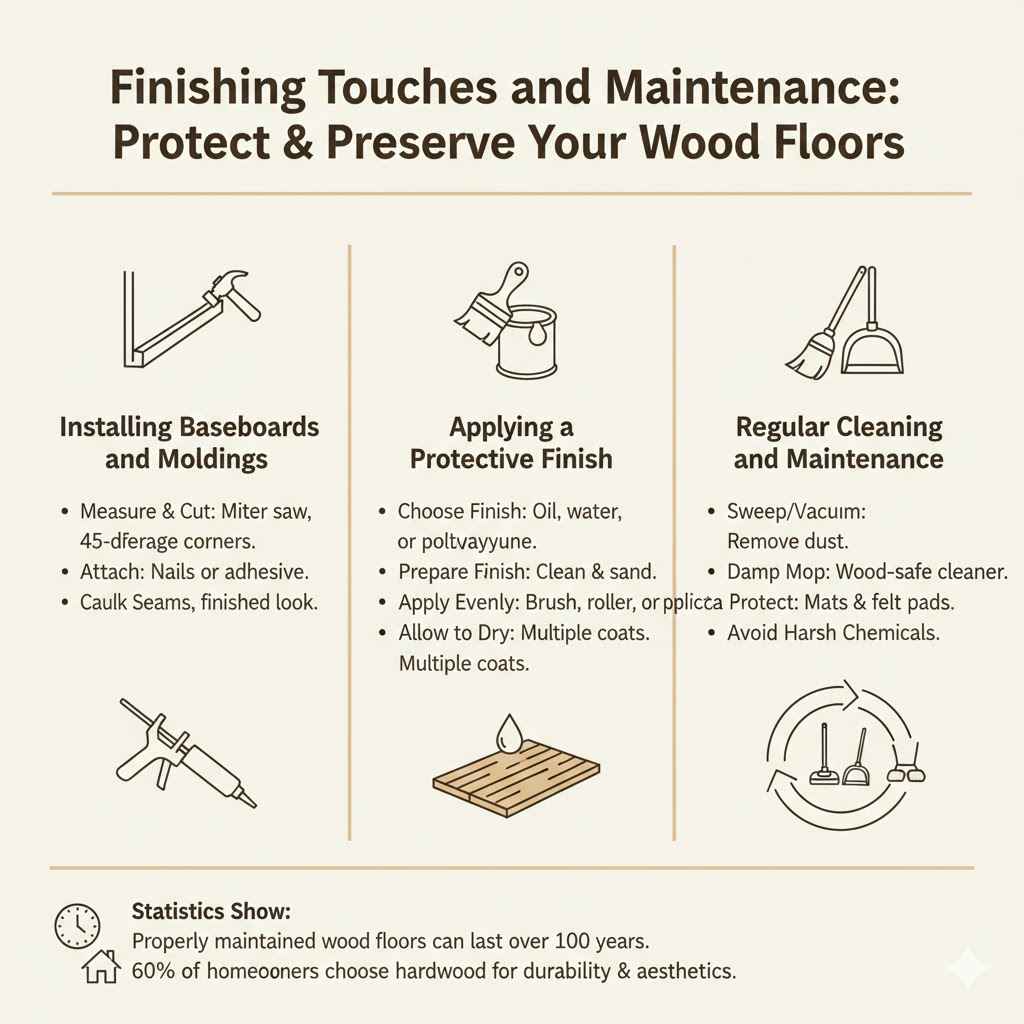
Finishing Touches and Maintenance
After installation, the finishing touches are important to complete your wood flooring project and ensure it looks its best. This includes installing baseboards, moldings, and transition strips, and applying a protective finish to the wood. Proper maintenance is also important. These steps will protect your flooring, making it beautiful for many years. Regular cleaning, and protecting the floors from scratches, will ensure the long life of your wood flooring, preserving its beauty and function.
Installing Baseboards and Moldings
Installing baseboards and moldings is an important step in completing your flooring project, adding the finishing touches and protecting the walls. Baseboards cover the expansion gap along the walls, providing a clean, finished look. The moldings will also conceal the edges of the flooring, making a polished finish. Cut the baseboards and moldings to the right size with a miter saw, and secure them with nails or adhesive. Ensure the baseboards and moldings are installed correctly. This step will enhance the appearance and protect the floors from dust and other debris. Proper installation will add to the overall visual appeal.
- Measure and cut the baseboards: Measure the length of each wall and cut the baseboards to fit. Use a miter saw to cut the corners at a 45-degree angle.
- Install the baseboards: Attach the baseboards to the wall. Use nails or adhesive. Make sure that the baseboards are flush with the flooring and the wall.
- Install the moldings: Install the moldings to cover any gaps. Use nails or adhesive to attach them. Make sure that the moldings are flush with the baseboards and the wall.
- Caulk the seams: Apply caulk to any gaps between the baseboards and the walls to provide a finished appearance.
Applying a Protective Finish
Applying a protective finish to your wood flooring is crucial to protecting it from wear and tear. Choose a finish that suits your needs, whether it’s oil-based, water-based, or polyurethane. Apply the finish according to the manufacturer’s directions, ensuring each coat is even and allowed to dry completely. A good finish will protect your flooring from scratches, moisture, and everyday use, and it’ll help to keep it looking great. It also gives the wood a beautiful look. This will protect your flooring and help it last for a long time.
- Choose the right finish: Consider the type of wood flooring and the amount of traffic it will receive. Options include oil-based, water-based, and polyurethane finishes.
- Prepare the flooring: Clean the flooring thoroughly, and sand it if needed. This will help the finish stick to the flooring.
- Apply the finish: Apply the finish evenly, following the manufacturer’s instructions. Use a brush, roller, or applicator.
- Allow to dry: Allow each coat of finish to dry completely before applying the next coat. Multiple coats are usually needed for the best protection.
Regular Cleaning and Maintenance
Regular cleaning and maintenance will help keep your wood floors looking their best for many years. Vacuum or sweep the floors regularly to remove dust and debris. Use a damp mop with a wood floor cleaner to clean the floors. Avoid using harsh chemicals or abrasive cleaners that can damage the finish. Protect your floors from scratches by placing mats at entrances and using felt pads under furniture legs. Periodic maintenance will help your flooring stay beautiful and in good condition for many years.
- Sweep or vacuum regularly: Remove dust and debris from your wood floors regularly. This will prevent scratches and keep the floors looking clean.
- Use a damp mop: Use a damp mop with a wood floor cleaner to clean your wood floors. Avoid using too much water.
- Protect against scratches: Place mats at entrances and use felt pads under furniture legs to protect against scratches.
- Avoid harsh chemicals: Avoid using harsh chemicals or abrasive cleaners that can damage the finish on your wood floors.
Statistics Show: A recent study showed that properly installed and maintained wood flooring can last for over 100 years. Choosing the right methods can greatly increase its lifespan. According to the National Wood Flooring Association, about 60% of homeowners choose hardwood for its durability and aesthetic appeal. Taking the time to do it correctly and maintain it will pay off.
Frequently Asked Questions
Question: Can I change the direction of my wood flooring myself?
Answer: Yes, with careful planning, the right tools, and following our Changing Direction of Wood Flooring Between Rooms: Smart Guide, you can change the direction of your wood flooring.
Question: What is the best transition method for changing the direction of wood flooring?
Answer: T-molding or a threshold strip are great options. The best method depends on the height differences and your desired look.
Question: How do I prepare the subfloor before changing the direction of wood flooring?
Answer: Clean, level, and make sure the subfloor is dry. Fill any low spots with a leveling compound.
Question: What tools will I need to change the direction of my wood flooring?
Answer: You’ll need a measuring tape, saw, hammer, nail gun (optional), and safety equipment like eye protection and gloves.
Question: How much extra wood flooring should I buy for my project?
Answer: It’s best to buy about 10% to 15% extra wood flooring to account for cuts and waste.
Final Thoughts
You’ve now explored Changing Direction of Wood Flooring Between Rooms: Smart Guide and have the knowledge to do this flooring project. Remember that careful planning, the correct tools, and taking the steps one by one will help you make a great job. Start by assessing your current floors and calculating materials and tools. Next, prepare your space by removing the old flooring, leveling the subfloor, and allowing the new flooring to acclimate. Proper installation comes next, followed by adding finishing touches.
Regular cleaning, and protecting the floors from scratches, will ensure the long life of your wood flooring, preserving its beauty and function. With these guidelines, you’re ready to create a beautiful, cohesive look in your home. Don’t be afraid to try this exciting project, and enjoy the transformation!