Create Your Own DIY Plywood Bookshelf: Simple Steps
The advent of modern woodworking techniques has revolutionized the way we approach home design, particularly in the realm of bespoke furniture solutions like the DIY plywood bookshelf. Utilizing high-grade plywood not only enhances structural integrity but also allows for customizable aesthetics that harmonize with various interior styles. The engineering behind plywood’s layered construction offers durability, while its versatility enables creative freedom in design.
Whether you’re a seasoned craftsman or an aspiring DIY enthusiast, the process of building your own bookshelf provides an enriching experience and transforms your space. Discover how to elevate your home decor with a striking DIY plywood bookshelf as we delve deeper into the intricacies of this rewarding project.
Create Your Own DIY Plywood Bookshelf: A Step-By-Step Guide
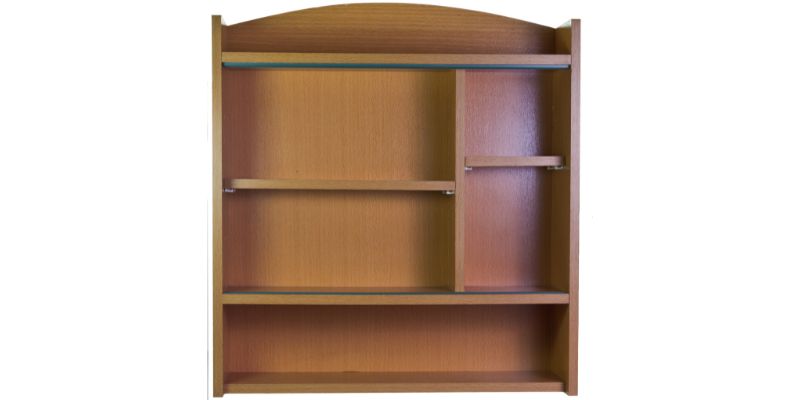
Building a DIY plywood bookshelf offers an excellent opportunity to combine functionality with personal creativity. This guide delves into the materials, tools, and step-by-step methods required to craft a sturdy and stylish bookshelf tailored to your space. Perfect for beginners and experienced DIY enthusiasts alike, this project emphasizes a cost-effective approach while enhancing your home décor. Whether you’re looking to organize your favorite books or showcase decorative items, a DIY plywood bookshelf is a rewarding endeavor that adds charm to any room.
Benefits of a DIY Plywood Bookshelf
Costeffectiveness compared to storebought options. Customization to fit your space and style. Quality of materials and craftsmanship.
Building your own bookshelf from plywood can save you cash. Instead of spending big bucks at the store, you’ll create something special for much less. Plus, you can design it to fit your room perfectly.
If your space looks like a puzzle, don’t worry—your DIY skills are the missing piece! Using quality materials means your bookshelf won’t wobble or fall over when you reach for that heavy book. Here’s a quick view of the total benefits:
| Benefit | Store-Bought | DIY Plywood Bookshelf |
|---|---|---|
| Cost | High price | Budget-friendly |
| Customization | Limited options | Endless creativity! |
| Quality | Variable | Top-notch and sturdy! |
Essential Tools and Materials Needed
List of tools (saw, drill, sandpaper, etc.). Types of plywood recommended (grades, thickness). Additional materials (glue, screws, paint, or stain).
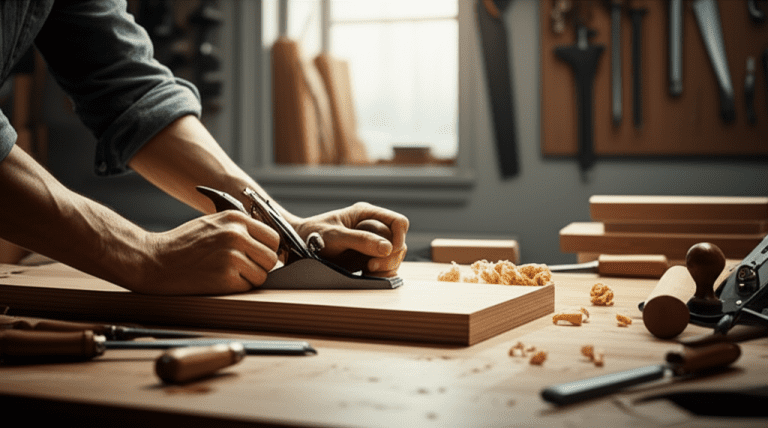
To build your own plywood bookshelf, you’ll need some trusty tools and materials. Grab a saw for cutting, a drill for making holes, and sandpaper to smooth out rough edges—ouch, splinters hurt! You’ll want to pick the right plywood, too.
Opt for grades like CDX or Birch, and thickness around 3/4 inch. Don’t forget some glue, screws, and a splash of paint or stain to make it pretty!
| Tools | Materials |
|---|---|
| Saw | Plywood |
| Drill | Glue |
| Sandpaper | Screws |
| Paint or Stain |
Measuring and Planning Your Bookshelf Design
How to measure available space accurately. Design considerations (shelf height, width, and depth). Sketching your design ideas.
Start by measuring the space where your bookshelf will go. Use a tape measure for accuracy. Note the height, width, and depth in inches.
This helps ensure a good fit.
Next, think about what you will store. Adjust shelf height based on your needs. Consider a depth that can hold your books without tipping.
Width should fit comfortably in your space.
Sketch your ideas on paper. This will help visualize your design.
Remember, having a plan makes building easier!
- Measure height, width, and depth
- Decide shelf height for different items
- Choose depth for stability
- Sketch your design for guidance
Step-by-Step Assembly Instructions
Cutting plywood to size (dimensions, angles). Assembling the frame and attaching shelves. Techniques for securing structural integrity.
First, grab your plywood and measure it like a pro! Cut the pieces according to your desired size. If you want angled edges, remember that the right tools will keep you from turning your project into a funny pigeon house!
| Component | Dimensions (inches) | Angle (if applicable) |
|---|---|---|
| Side Panels | 72 x 24 | 90° |
| Top Shelf | 24 x 10 | 90° |
Next, assemble the frame.
Use screws like they’re candy—tighten them well! For the shelves, ensure they sit stably, so your books won’t tumble like they’re performing acrobatics. To secure everything, use brackets or wood glue.
After all, nobody likes a wobbly bookshelf!
Finishing Touches for Your Plywood Bookshelf
Sanding and prepping surfaces for finishing. Painting or staining options to enhance aesthetics. Adding protective finishes for durability.
To make your plywood bookshelf look amazing, start by sanding the surfaces. This step removes rough spots and helps paint or stain stick better. Choose from these options to enhance the look:
- Paint: Bright colors can make your bookshelf pop.
- Stain: Gives a rich finish while showing wood grain.
After painting or staining, add a protective finish. This keeps your bookshelf safe from scratches and spills. Options include:
- Polyurethane for a strong layer.
- Coconut oil for a natural look.
These finishing touches will make your bookshelf both beautiful and durable!
Creative Ideas for Personalizing Your Bookshelf
Incorporating decorative elements (lighting, plants). Customizing shelf layouts for functionality. Multifunctional designs (desk, display area).
Make your bookshelf feel like home with fun decorations! Adding lighting can turn a plain shelf into a cozy reading nook. Choose some cute plants to bring life and color.
You can also design your shelves based on what you need. Need a quick spot for your snacks? A shelf can double as a mini desk or display area. Mix things up for something unique!
| Decorative Element | Purpose |
|---|---|
| Lighting | Creates ambiance |
| Plants | Adds freshness |
| Custom Layouts | Enhances functionality |
| Multifunctional Design | Serves multiple purposes |
Common Challenges and Solutions
Overcoming design limitations of smaller spaces. Troubleshooting assembly issues. Tips for ensuring stability and safety.
Designing a plywood bookshelf for tiny spaces can feel like a game of Tetris. You want it to fit perfectly without a gap! To tackle this, measure your space carefully before starting and consider adjustable shelves. Assembly can also be tricky.
Ensure all pieces line up so you don’t end up with a lopsided masterpiece. Below are some quick tips for stability:
| Tip | Solution |
|---|---|
| Use L-brackets | Attach them to walls for extra support. |
| Check levelness | Use a level to avoid wobbling. |
| Secure heavy items | Place them on lower shelves to prevent tipping. |
Remember, a stable bookshelf is a happy bookshelf. And a happy bookshelf is less likely to give you a surprise avalanche of books!
Keep these in mind, and you’re all set!
Inspiration: DIY Plywood Bookshelf Projects
Showcasing unique and popular designs. Highlighting usersubmitted projects and ideas. Resources for additional inspiration (blogs, Pinterest).
Looking for clever ways to jazz up your space? Consider some amazing diy plywood bookshelf designs! Users everywhere are crafting unique shelves that can hold everything from books to cat toys.
Check out the fun submissions online. Many brave souls share their projects that you might wanna steal—uh, we mean, get inspired by! Don’t forget to peek at blogs and Pinterest for more ideas. There’s a whole world of creativity waiting!
| Project Name | Description |
|---|---|
| Minimalist Marvel | A sleek design with clean lines and no frills. |
| Rustic Charm | Perfect for a cozy vibe with reclaimed wood looks. |
| Floating Fantasy | Bold and eye-catching shelves that float on your wall. |
Conclusion
In conclusion, a DIY plywood bookshelf is a practical and rewarding project that enhances your home while showcasing your creativity. By following simple steps and utilizing quality materials, you can craft a functional piece that meets your storage needs and complements your decor. Embrace the opportunity to personalize your space with an affordable, stylish bookshelf tailored to your taste.
FAQs
What Materials And Tools Do I Need To Build A Diy Plywood Bookshelf?
To build a DIY plywood bookshelf, you’ll need plywood sheets for the shelves and sides, along with wood screws and wood glue for assembly. Essential tools include a circular saw or table saw for cutting the plywood, a drill for making pilot holes, and a sander or sandpaper for smoothing edges. A tape measure and square will help ensure accurate measurements and right angles. Optional tools like a clamp can provide extra stability while you assemble the bookshelf.
What Are The Best Dimensions For A Plywood Bookshelf To Fit In A Typical Room?
The best dimensions for a plywood bookshelf to fit in a typical room are generally around 36 to 48 inches wide, 12 to 16 inches deep, and 72 to 84 inches tall. This size accommodates a variety of books and decorative items while remaining proportional to most room sizes. Additionally, consider leaving some space above and around the bookshelf for airflow and aesthetic balance. Always measure your available space to ensure a proper fit.
How Can I Customize The Design Of My Plywood Bookshelf To Match My Home Decor?
To customize the design of your plywood bookshelf, start by selecting a wood finish or paint color that complements your existing decor. You can add decorative elements like molding or trim to enhance its visual appeal. Consider arranging the bookshelf in an eye-catching shape or incorporating open and closed storage options to fit your style. Finally, accessorize the shelves with decorative items that resonate with your overall theme, creating a cohesive look.
What Are Some Tips For Finishing And Sealing Plywood To Ensure Durability And A Professional Look?
To ensure durability and a professional look when finishing and sealing plywood, begin by sanding the surface with fine-grit sandpaper to create a smooth finish. Apply a primer to enhance adhesion and prevent moisture damage, followed by a high-quality paint or stain, ensuring even coverage. After the color is set, seal the plywood with a suitable clear coat, such as polyurethane, for added protection. Finally, allow adequate drying time between coats and buff the final layer for a polished appearance.
How Do I Properly Assemble The Joints And Ensure Stability In My Diy Plywood Bookshelf?
To properly assemble the joints of your DIY plywood bookshelf, use wood glue along with screws or dowels to create strong connections. Pre-drill holes for screws to prevent splitting the plywood and ensure a snug fit. For added stability, incorporate corner brackets or angle brackets at the joints, especially for heavier loads. Make sure to let the glue dry completely before moving or loading the bookshelf to ensure long-lasting stability.