Create Your Own DIY Seating Bench: Easy Step-By-Step Guide
In the realm of home improvement and outdoor decor, the concept of a DIY seating bench embodies the intersection of functionality and aesthetic appeal. This innovative project not only enhances space efficiency but also provides a personalized touch to any environment. Utilizing various materials such as reclaimed wood, metal, or composite elements, enthusiasts can achieve a blend of durability and style. Moreover, understanding basic carpentry techniques and design principles is crucial for success in creating a bench that complements your existing decor.
Dive into the transformative journey of crafting your own seating solution and discover how to elevate your outdoor or indoor spaces with a DIY seating bench.
Creative Ideas For Your Diy Seating Bench Project
Creating a DIY seating bench can elevate both functionality and aesthetics in any space. This practical guide will delve into various designs, materials, and step-by-step instructions, enabling you to craft a unique seating solution tailored to your needs. From simple garden benches to stylish indoor options, the process encourages creativity and personal expression. With the right tools and techniques, you can transform basic supplies into an inviting and comfortable spot for relaxation or socializing. Dive in to discover how to make your ideal DIY seating bench.
Why Build a DIY Seating Bench?
Benefits of a DIY project. Cost savings compared to storebought options. Customization to fit your style and space.
Building a seating bench yourself has many advantages. First, it can save you money compared to buying one from a store. You can use affordable materials and skip costly markups. Customization is another big perk.
You can design the bench to match your style and fit perfectly in your space. This makes it special and unique to your home. Here are some more benefits:
- Learn new skills while creating.
- Create fun family memories during the project.
- Make the bench as big or small as you want.
Materials Needed for Your DIY Seating Bench
Types of wood suitable for benches. Recommended tools for construction. Essential hardware and finishing supplies.
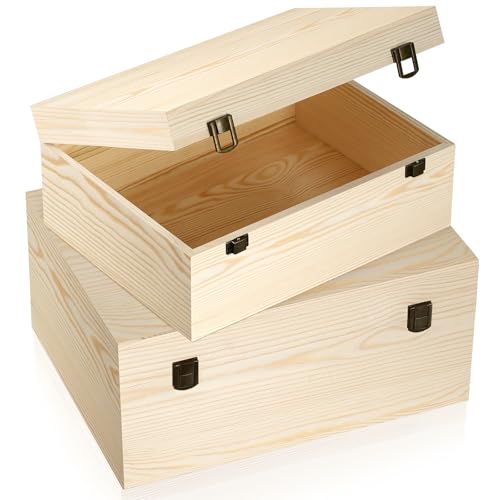
Building a cozy seating bench can be a fun project! First, choose the right wood. Pine is light and easy to work with, while cedar resists rot and smells nice—like a spa day for your yard!
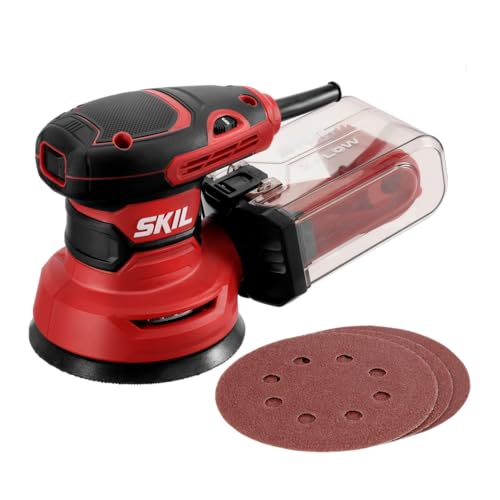
Next, grab the right tools: a saw, drill, and measuring tape will be your best friends. Don’t forget essential hardware like screws and brackets to hold it together. Finally, some finishing supplies like sandpaper and sealant will give your bench a polished look. Let’s not forget to keep the saw away from our toes!
| Type of Wood | Notes |
|---|---|
| Pine | Light and easy to work with. |
| Cedar | Rot-resistant and aromatic. |
| Oak | Strong and durable, but harder to cut. |
With the right materials, you’ll have a bench that feels like a throne!
Step-by-Step Guide to Building a DIY Seating Bench
Design planning and drafting your bench. Cutting the wood to size. Assembling the bench frame. Adding the seat and supports.
Ready to create your own cozy seating? First, sketch your bench design. Keep it simple.
What do you want it to look like? Next, measure and cut the wood to the right size. Don’t forget to leave enough room for your bottom! Then, assemble the frame.
This is where it starts looking like a bench, not just a pile of wood. Finally, add the seat and supports. Make sure they’re sturdy—no one wants a surprise dip when sitting down!
| Step | Details |
|---|---|
| Design | Sketch your favorite style! |
| Cutting | Measure twice, cut once! |
| Assemble | Join the wood pieces snugly. |
| Add Seat | Ensure it’s strong enough for snack time! |
Bench Design Ideas and Styles
Rustic wooden benches. Modern minimalist designs. Multifunctional benches with storage.
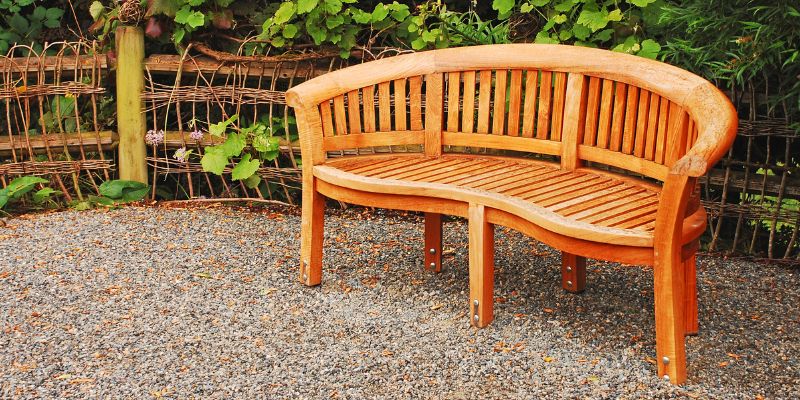
Many bench designs can add charm to your space. First up, rustic wooden benches bring a warm touch. They look like they belong in a cozy cabin, perfect for inviting friends over for hot cocoa.
Next, modern minimalist designs are sleek and stylish.
They keep your area looking clean and simple. Who knew a bench could be so fancy?
Lastly, multifunctional benches with storage are real superheroes!
They provide seating and a secret place to hide your clutter. Hide your toys or winter jackets like a pro.
| Bench Style | Description |
|---|---|
| Rustic Wooden | Warm and inviting, great for cozy settings. |
| Modern Minimalist | Sleek design for a clean look. |
| Multifunctional | Seating and storage, perfect for small spaces! |
Finishing Touches for Your DIY Seating Bench
Painting or staining options. Sealing for weather resistance. Cushion and fabric choices for comfort.
To make your seating bench pop, think about painting or staining it. Bright colors can add a whole lot of cheer, and stains show off the wood’s natural beauty. Don’t forget to seal it! A good seal will keep rain and snow from turning your bench into a soggy mess.
For comfort, add cushions covered in fun fabric—think of all the cute patterns you can choose! Your bench will be the ultimate hangout spot.
| Option | Description |
|---|---|
| Paint | Bright colors for a cheerful look! |
| Stain | Enhances wood’s natural beauty. |
| Sealant | Keeps weather at bay. |
| Cushions | Soft and stylish for comfort. |
Common Mistakes to Avoid When Building a DIY Seating Bench
Poor measurements and alignment issues. Skipping essential safety measures. Underestimating drying and curing times.
Building a DIY seating bench can be fun, but watch out for common pitfalls! First, measure twice and cut once; poor measurements can lead to a bench that wobbles like a jelly on a trampoline. Next, never skip safety measures!
Wearing goggles might not make you look cool, but eye safety is no joke. Finally, don’t rush the drying process. A hurried bench will stick together like two friends at a sleepover—messy and hard to separate!
| Common Mistakes | Why to Avoid |
|---|---|
| Poor Measurements | Leads to wobbling and uneven seats. |
| Skipping Safety Measures | Increases risk of injuries. Safety first! |
| Underestimating Drying Times | A hasty bench might fall apart quickly. |
Maintenance Tips for Your DIY Seating Bench
Regular cleaning and upkeep. Seasonal treatments for outdoor benches. Repairing minor damages.
To keep your DIY seating bench happy, regular cleaning is a must. Wipe off dirt and crumbs to prevent a bug party! Use a soft cloth and mild soap.
If your bench is outdoors, give it seasonal treatments. A good waterproof seal in winter can save it from the rain’s shenanigans. Don’t forget to check for loose screws; they can be sneakier than they sound!
For those minor dings and scratches, a bit of wood glue and sanding can work wonders.
It’s like giving your bench a spa day! So roll up your sleeves and keep that bench looking fabulous!
| Maintenance Task | Frequency |
|---|---|
| Clean Surface | Weekly |
| Waterproof Seal | Seasonally |
| Check Screws | Monthly |
| Repair Dings | As Needed |
Inspiration from Existing DIY Bench Projects
Showcase usersubmitted designs. Highlight popular bench trends on social media. Link to online communities or resources for DIY enthusiasts.
Many DIY enthusiasts have shared their creative seating bench designs online. From rustic wooden styles to sleek modern looks, there’s plenty of inspiration to spark your creativity. Trends like colorful paint and repurposed materials are flying high on social media.
Check out popular platforms to see these unique creations. It’s like a never-ending bench fashion show! Join the fun in online communities to find tips and share your own masterpieces.
| Design Style | Social Media Trend |
|---|---|
| Rustic Wooden | Natural Looks |
| Sleek Modern | Minimalism |
| Colorful Paint | Vibrant Accents |
Conclusion
In conclusion, crafting a DIY seating bench not only enhances your outdoor or indoor space but also adds a personal touch to your decor. With a few materials and the right tools, you can create a functional and stylish piece that reflects your taste. Embrace your creativity, and enjoy the satisfaction of building something uniquely yours!
FAQs
Sure! Here Are Five Questions Related To The Topic Of Diy Seating Benches:
1. What materials are commonly used for DIY seating benches? 2. How can I ensure my DIY bench is sturdy and safe for use? 3. What style of bench design is best for small spaces? 4. Can I incorporate storage into my DIY seating bench? 5. What tools do I need to build a DIY seating bench?
Sure! Please provide the question you’d like me to answer.
What Materials Are Commonly Used To Build A Diy Seating Bench?
Common materials for building a DIY seating bench include wood, such as cedar, pine, or plywood, which provide durability and aesthetic appeal. Metal components, like steel or aluminum, can be used for added strength and a modern look. Additionally, upholstery or outdoor fabric may be incorporated for comfortable seating. Lastly, fasteners like screws, nails, and brackets are essential for assembly and stability.
What Are Some Popular Design Styles For Diy Seating Benches?
Popular design styles for DIY seating benches include rustic farmhouse, which features natural wood and a cozy, inviting aesthetic; modern minimalist, characterized by clean lines and functional simplicity; industrial, incorporating metal and reclaimed wood for a rugged look; and coastal, which uses light colors and beach-inspired materials to create a relaxed vibe. Each style offers unique elements that can be tailored to fit various home decors. Additionally, combining elements from different styles can lead to a personalized and distinctive bench design. Ultimately, the choice depends on individual preferences and the overall theme of the space.
How Do You Determine The Ideal Dimensions For A Diy Seating Bench To Fit Your Space?
To determine the ideal dimensions for a DIY seating bench, first measure the available space where the bench will be placed, considering both height and width to ensure it fits comfortably without obstructing movement. Next, decide on the intended usage, such as seating for one or multiple people, which can affect the length and depth required. Additionally, consider the height of other nearby furniture to ensure a cohesive look and comfortable seating experience. Lastly, sketch out the design to visualize the proportions and make any necessary adjustments before construction.
What Tools And Equipment Are Necessary For Constructing A Sturdy Diy Seating Bench?
To construct a sturdy DIY seating bench, you’ll need basic tools such as a saw, drill, and screwdriver, along with measuring tape and level for accuracy. Essential materials include high-quality wood (like cedar or pressure-treated lumber), screws, and wood glue for reinforcement. Additionally, sandpaper or a sander will help achieve a smooth finish, while outdoor sealant can protect the bench from the elements. Safety equipment, like goggles and gloves, is also important to ensure a safe building experience.
What Finishing Techniques Can Be Applied To A Diy Seating Bench To Enhance Its Durability And Appearance?
To enhance the durability and appearance of a DIY seating bench, you can apply a high-quality wood sealer to protect against moisture and pests. Finishing with a paint or stain not only adds aesthetic appeal but also provides an additional layer of protection. Consider using a clear coat or polyurethane for added durability against scratches and UV damage. Lastly, sanding the surface before finishing will ensure a smooth, professional look.