Difference Between Engineered Hardwood And Hardwood: Proven Essential
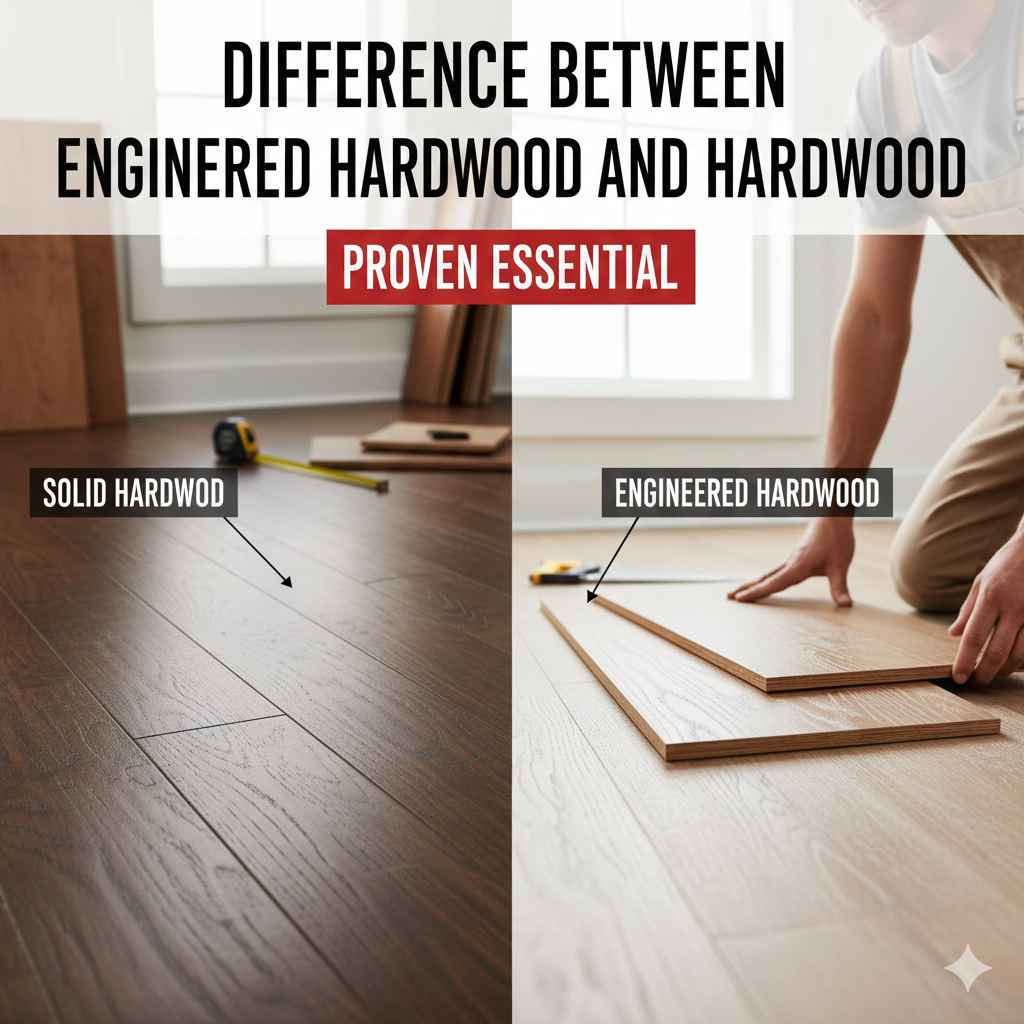
The main difference between engineered hardwood and solid hardwood lies in construction. Solid hardwood is one solid piece of wood, offering maximum refinishing potential. Engineered hardwood uses a plywood base with a thin veneer of real wood on top. Both offer a beautiful look, but engineered is often more stable in humid environments, making the choice essential for your home project’s success
Choosing new flooring can feel like a big puzzle. You want that classic, warm look of real wood, but the terms “engineered hardwood” and “solid hardwood” sound confusingly similar. If you’ve spent hours staring at samples, wondering which one will hold up best in your busy kitchen or basement, you are definitely not alone! This decision impacts durability, cost, and how much maintenance you’ll need down the road.
Don’t worry; we are going to break down the structure, pros, and cons of each type. As your guide, I’ll show you exactly what makes them different so you can choose the perfect floor confidently. We’ll cover everything from how they are made to where they should (and shouldn’t) be installed. Let’s start building that confidence right now!
Understanding Solid Hardwood: The Classic Choice
Solid hardwood flooring is what most people picture when they think of beautiful, traditional wood floors. It’s been a staple in homes for hundreds of years for a very good reason—it brings unmatched character and value.
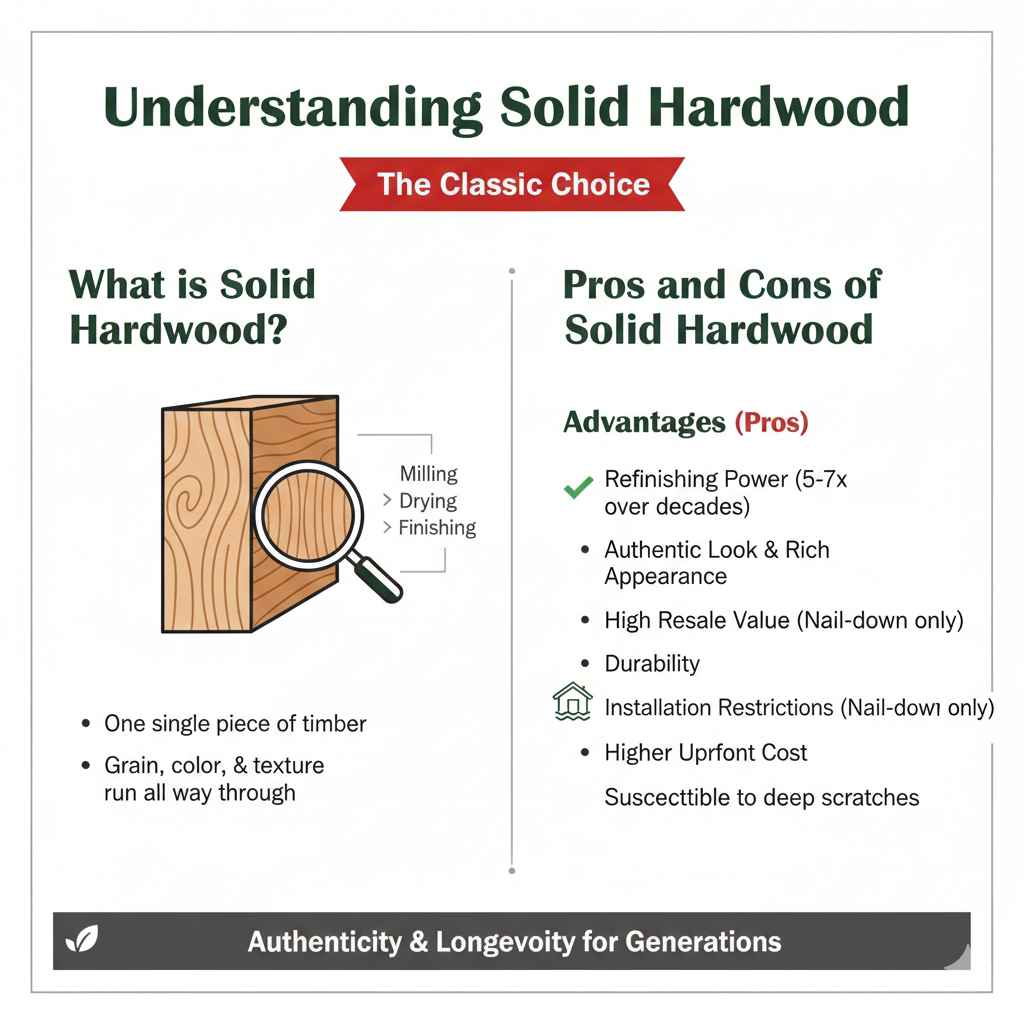
What is Solid Hardwood?
Simply put, solid hardwood is exactly what it sounds like: a plank milled from one single piece of timber. If you pick up a board, the entire thing is made of that specific species of wood, like oak, maple, or hickory. This means the grain, color, and texture run all the way through the entire depth of the plank.
Because it’s solid all the way through, it has unique benefits related to its natural material. Think of it like cutting a thick slice from a beautiful log—it’s pure nature from top to bottom.
The Construction Process
The process for making solid hardwood is very straightforward, which contributes to its authenticity:
- Milling: Logs are carefully cut into boards according to standard sizing (thickness and width).
- Drying: The boards are slowly dried in kilns to reduce moisture content. This crucial step prevents excessive warping later on.
- Milling and Finishing: The planks are cut to final dimension, shaped (like adding tongue-and-groove edges), and often pre-finished with stains or protective coats before they reach your home.
Pros and Cons of Solid Hardwood
Knowing the good and the not-so-good upfront helps you weigh your options effectively. Remember, there’s no single “best” option, only the best option for your specific room and climate.
The Advantages (Pros):
- Refinishing Power: This is the biggest win! Because the entire plank is real wood, you can sand it down and refinish it multiple times over decades—sometimes 5 to 7 times! This gives it an extremely long lifespan.
- Authentic Look: The grain pattern is continuous and natural across the whole plank, offering the deepest, richest appearance.
- Resale Value: Many buyers see original solid hardwood as a significant premium feature in a home.
- Durability: With proper care, solid wood can last a lifetime.
The Drawbacks (Cons):
- Moisture Sensitivity: Solid wood expands and contracts significantly with changes in humidity and temperature. This makes it a risky choice for basements or areas below grade (like garages or ground level with radiant heat).
- Installation Restrictions: It must generally be nailed down to a plywood subfloor and cannot be glued directly to concrete.
- Cost: It is usually the more expensive option upfront.
- Susceptibility to Wear: Deep scratches or gouges may require sanding the entire floor to repair seamlessly.
Exploring Engineered Hardwood: Modern Stability
Engineered hardwood flooring is the modern answer to installing real wood in more challenging areas. It cleverly combines the beauty of real wood with the stability of composite materials. If you’re a DIYer working below ground level, this might be your go-to choice.
What is Engineered Hardwood?
Engineered wood is a multi-layered product. It is designed to look identical to solid hardwood on the surface but has a much more complex internal structure. Think of it like a really sturdy, custom sandwich, where every layer serves a specific, important job.
The Layered Construction Explained
Understanding the three main layers is key to understanding why engineered flooring behaves differently than solid wood. This structure is what gives it its stability against moisture changes.
| Layer Name | Material | Primary Function |
|---|---|---|
| Top Layer (Veneer) | Thin slice of real hardwood (e.g., Oak, Walnut) | Provides the actual appearance and feel of hardwood. |
| Core Layers | High-quality plywood or High-Density Fiberboard (HDF) | Provides strength, dimension, and resistance to moisture fluctuation. |
| Backing Layer | Moisture-resistant layer or balancing veneer | Prevents the plank from cupping or warping upward. |
Pros and Cons of Engineered Hardwood
Engineered flooring is incredibly versatile. Here is where it shines and where it might fall short compared to its solid counterpart.
The Advantages (Pros):
- Moisture Stability: The cross-ply core resists changes in humidity much better than solid wood. This makes it perfect for concrete slabs, radiant heat systems, and even above-grade bathrooms (though check manufacturer guidelines for full moisture resistance!).
- Installation Flexibility: It can be nailed, stapled, glued down, or even floated over the subfloor, making it ideal for DIY installations.
- Use Below Grade: Generally safe for basements where humidity control is harder.
- Cost: Often slightly less expensive than premium solid hardwood.
The Drawbacks (Cons):
- Limited Refinishing: You can usually only sand and refinish engineered floors once or twice, depending on the thickness of the top veneer. Once that veneer layer is gone, you have to replace the floor.
- Veneer Thickness: Thicker veneers mean more refinishing options, but very thin veneers limit repairs significantly.
- Longevity: While durable, its lifespan is typically shorter than well-maintained solid hardwood because the surface layer is limited.
Key Differences: Engineered vs. Solid Hardwood
Now that we know how they are built, let’s get straight to the heart of the matter: the direct comparison of the difference between engineered hardwood and hardwood.
For homeowners, the two most critical differences are where you can install it and how long it will last before needing replacement.
1. Installation Environment and Subfloor Compatibility
This is arguably the most critical factor for DIY installation success. Solid wood needs a solid, dry, wood-based subfloor above grade. Engineered wood is far more forgiving.
When working on a concrete slab (common in new construction or ground-level apartments), solid hardwood is usually out of the question due to moisture vapor transmission from the concrete. Engineered hardwood, when installed correctly using a vapor barrier or adhesive, thrives in these conditions.
2. Lifespan and Refinishing Potential
Think about how long you plan to stay in your home. If you plan to pass the floors down to your grandkids, solid wood might be the better investment because it can be repeatedly sanded down to remove scratches and refresh the look. If you renovate every 10–15 years, engineered wood is perfectly capable of serving you well during that time frame.
For example, a high-quality solid oak floor might be refinished 5 times over 75 years. A good quality engineered oak with a 3mm veneer might only be refinished once, perhaps giving it a 30 to 40-year lifespan before the veneer wears through.
3. Durability Against Environmental Changes
When humidity swings wildly—say, in a poorly climate-controlled attic space or a damp basement—solid wood panels often start to cup (edges curl up) or gap widely. The layered construction of engineered wood acts like a stabilizing truss system, meaning it doesn’t move nearly as much.
For reliable structural performance in areas where moisture is a concern, engineered flooring is the winner. For expert installation tips on managing moisture before laying any wood floor, always check resources like the Forest Products Laboratory for national standards.
How to Choose the Right Wood for Your Project
To help you finalize your decision, follow this simple flowchart guide based on where you are installing the new wood floor in your home.
Step 1: Assess the Subfloor
What is directly beneath where the wood will go?
- Wood Subfloor (Above Ground Level): Both Solid and Engineered are options. Move to Step 2.
- Concrete Slab (Ground Level or Below): Engineered is the safer, highly recommended choice. Solid wood is generally not advised unless specialized moisture barriers are used and even then, it requires expert consultation.
- Radiant Heat Systems: Engineered wood is almost always the required standard for use over in-floor heating due to its stability.
Step 2: Consider Your Future Plans (Refinishing vs. Replacement)
How long do you want this floor to last, and are you okay with eventual replacement instead of sanding?
- Lifetime Investment (50+ years) & Deep Refinishing Needed: Choose Solid Hardwood.
- 15–30 Year Plan & Need for Easy Installation: Choose Engineered Hardwood.
Step 3: Check the Veneer Thickness (For Engineered Only)
If you chose engineered flooring, look closely at the specifications:
- Thick Veneer (3mm or more): You can likely sand and refinish this floor 1–2 times. This is excellent quality engineered flooring.
- Thin Veneer (1mm to 2mm): This is intended to look good for its initial life, but sanding will remove the real wood layer quickly. Great for budget or temporary installations.
DIY Installation Tips for Both Types
While the installation methods differ, the prep work for both solid and engineered wood is crucial for a floor that stays put and looks great.
Essential Prep Steps (The Same for Both!)
- Acclimation is Non-Negotiable: Bring the wood boxes into the room where they will be installed and let them sit for at least 3–5 days (sometimes 7 days, check the box!). This allows the wood to adjust to your home’s specific temperature and humidity. Skipping this causes instant warping after installation.
- Check Moisture Levels: Use a reliable moisture meter. For solid wood, subfloor moisture levels must be very low (usually under 12%). For engineered wood over concrete, you must verify the concrete has cured and has a vapor barrier.
- Ensure a Flat Subfloor: Any dips or humps greater than 1/8 inch over a 6-foot span will lead to squeaks and potential plank failure later. Sand down high spots and fill low spots with leveling compound.
Installation Method Comparison Table
This table summarizes the typical installation requirements for each type of flooring:
| Installation Aspect | Solid Hardwood | Engineered Hardwood |
|---|---|---|
| Fastening Method | Nail-down (must be nailed to wood subfloor) | Nail, Glue, or Float (highly versatile) |
| Concrete Subfloor Use | Rarely Recommended | Commonly Recommended |
| DIY Difficulty | Moderate to High (requires specific flooring nailer) | Low to Moderate (floating methods are easy) |
Maintenance and Care: Keeping Your Investment Looking Great
The difference in care between the two types is minimal on a daily basis, but when repairs are needed, the process diverges significantly.
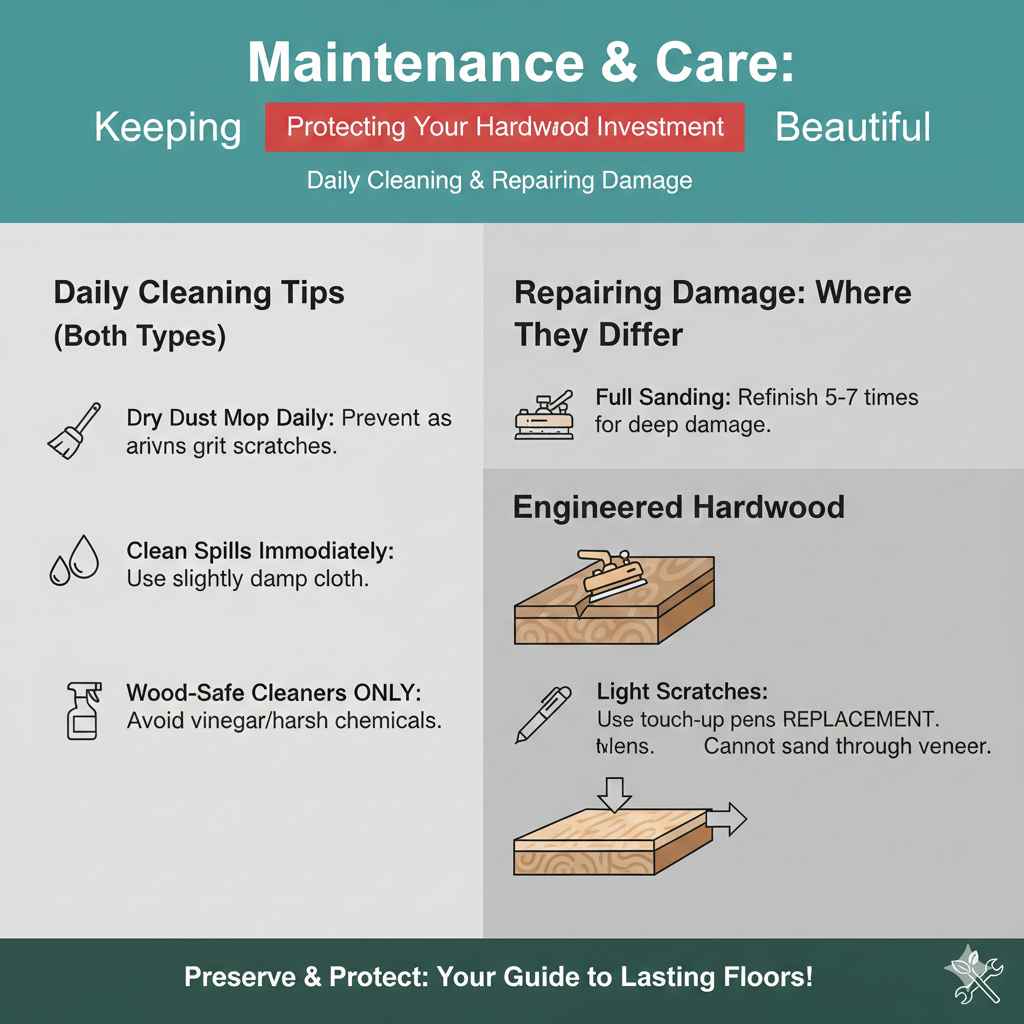
Daily Cleaning Tips (Applies to Both)
Whether you have solid or engineered, avoid excess water. Wood floors hate standing water.
- Use a dry dust mop daily or every other day to sweep up grit, which acts like sandpaper underfoot.
- Clean spills immediately using a slightly damp cloth.
- Use cleaning products specifically labeled safe for hardwood floors. Avoid vinegar or harsh chemicals, which can break down the factory finish.
Repairing Damage
This is where the construction difference truly matters for the homeowner.
Repairing Solid Hardwood:
If you get a deep gouge, you have options:
- Spot Repair: Fill the gouge with matching wood filler, sand lightly, and re-stain/re-seal the immediate area (though matching the finish perfectly can be tricky).
- Full Sanding: If the damage is widespread, you can rent a floor sander, remove the old finish, and apply a new stain/finish to the entire room, making it look brand new again.
Repairing Engineered Hardwood:
Repairing engineered wood depends entirely on the veneer thickness:
- Light Scratches: Treat these like solid wood—use touch-up pens or scratch concealers.
- Deep Damage (Through the Veneer): If the damage goes through the real wood layer and hits the plywood core, the plank cannot be sanded effectively. The typical fix is to carefully cut out the damaged plank and replace it with a new one. This can be tricky if you don’t have matching spares, especially years later.
Frequently Asked Questions (FAQ)
Q1: Which type of flooring is better for kitchens?
Engineered hardwood is generally considered better for kitchens because it handles small spills and humidity fluctuations better than solid wood. However, no real wood floor is 100% waterproof; tile or luxury vinyl plank (LVP) are still the most worry-free options for true wet areas.
Q2: Can I install hardwood flooring myself?
Yes, many DIYers successfully install engineered wood using the “floating floor” method, which involves no gluing or nailing to the subfloor. Solid hardwood installation is more challenging as it requires specialized pneumatic nail guns and careful nailing schedules, making it slightly less beginner-friendly.
Q3: Does engineered hardwood look less authentic than solid wood?
In the past, yes. Today, high-quality engineered wood uses premium slicing techniques (like rotary cut or sawn cut veneers) that make them virtually indistinguishable from solid wood once installed. The visual quality is excellent in both.
Q4: If I refinish engineered wood once, is it ruined?
Not at all! If you have a thick, high-quality veneer (3mm+), a single professional sanding and refinishing job can give you many more years of use. Just make sure you only sand as much as necessary—you want to remove the existing finish, not wear down the real wood layer prematurely.
Q5: Which one adds more value to my home?
Solid hardwood generally offers a slightly higher perceived resale value, especially in older or high-end homes where originality is prized. However, professionally installed, high-quality engineered wood installed in a basement (a place solid wood cannot go) adds significant functional value to the home.
Q6: Do I need an underlayment for engineered wood?
If you are installing engineered wood as a floating floor, a thin foam or cork underlayment is usually required. This padding provides sound dampening, adds slight cushion, and can sometimes incorporate a moisture barrier.
Conclusion: Making the Confident Choice
Deciding between engineered hardwood and solid hardwood boils down to understanding what each material is built for. You now know that the difference between engineered hardwood and hardwood isn’t just about looks—it’s about structure and stability.
If your space is above ground, dry, and you plan on staying put for decades, investing in the lasting potential of solid hardwood, with its multiple refinishing opportunities, is a wonderful choice. It’s the time-tested classic.
If you are installing over concrete, dealing with slight humidity shifts, or working in a basement, engineered hardwood provides that beautiful, genuine wood surface you crave with the structural integrity needed to last for years without buckling or warping. It’s the smarter, modern solution for difficult environments.
Take the time to inspect your specific installation site—measure moisture, check the subfloor flatness, and calculate how long you intend to enjoy your new floors. Armed with this knowledge, you’re ready to confidently select the right material. You’ve got this project handled!