Difference Between Nitro Wood: Proven Essential
Nitro Wood is a fast-drying, hard finish ideal for fine furniture, while Nitro Wood Magnum is a thicker, high-build version often used for achieving a deeper, more durable gloss quickly, especially on surfaces needing more filling.
Welcome! Dealing with wood finishes can feel tricky when you first start out. You see terms like “Nitro Wood” and “Nitro Wood Magnum” and wonder what the real-world difference is for your weekend project. It’s confusing when labels aren’t crystal clear!
Don’t worry. We are going to clear this up right now. Understanding these two finishes means you choose the perfect protection and shine for your creation. We’ll explain exactly what each one does and when to grab which can.
By the end of this guide, you’ll feel confident selecting the right lacquer for any piece, from simple shelves to fine heirloom tables. Let’s dive into the proven essentials of nitrocellulose lacquer!
Understanding Nitrocellulose Lacquer in DIY Woodworking
Before we break down the difference between the standard and the Magnum versions, let’s ground ourselves in what nitrocellulose lacquer actually is. Think of it as a classic, tried-and-true finish. It’s what your grandpa likely used on his favorite guitar or antique dresser.
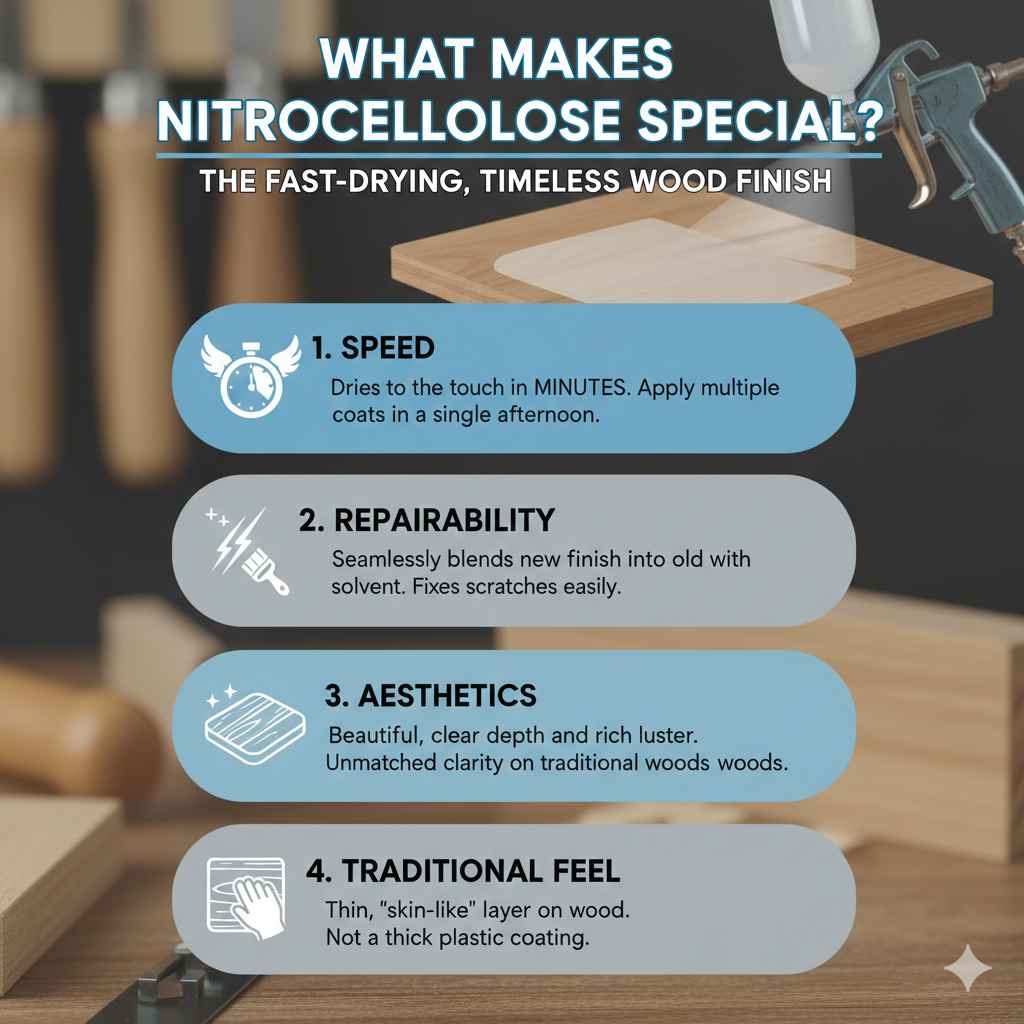
What Makes Nitrocellulose Special?
Nitrocellulose lacquer is a solvent-based topcoat known for drying incredibly fast. This quick-dry time is a huge advantage when you are working in a home shop where dust is always a threat.
Here are the core benefits that keep woodworkers coming back to nitro:
- Speed: It dries to the touch in minutes, allowing you to apply multiple coats in a single afternoon.
- Repairability: If you scratch it later on, you can usually smooth the area and melt the new finish into the old one using more lacquer thinner or solvent—it blends seamlessly.
- Aesthetics: It cures with a beautiful, clear depth that many modern finishes just cannot match, especially on traditional woods.
- Traditional Feel: It’s thin enough to feel like a skin on the wood, rather than a thick plastic layer sitting on top.
Safety First: Working with Lacquer Solvents
Because nitro finishes use strong solvents to stay liquid in the can and apply smoothly, safety is non-negotiable. This isn’t a finish you spray around casually.
Always remember these essential safety steps:
- Ventilation is Key: You must work in a very well-ventilated area, ideally using a dedicated spray booth or outside with good airflow. These fumes are potent.
- Respirator Use: Always wear an organic vapor respirator rated for chemical sprays. A simple dust mask is not enough here.
- Skin Protection: Wear nitrile gloves to prevent skin contact with the lacquer and thinner.
For more detailed safety guidelines on handling lacquers and flammable liquids, resources like the Occupational Safety and Health Administration (OSHA) provide crucial information on working safely with these types of coatings.
The Core Difference: Nitro Wood vs. Nitro Wood Magnum
The terms “Nitro Wood” and “Nitro Wood Magnum” generally refer to two different formulations of the same base chemistry (nitrocellulose). The difference lies primarily in the solids content and the viscosity—think of it like the difference between skim milk and heavy cream.
Nitro Wood (Standard Formula)
The standard Nitro Wood formula is the workhorse of the nitrocellulose world. It is designed for general top-coating, sealing, and achieving a traditional, relatively thin finish.
This is typically applied in many light coats. Because the solids content (the actual finish left behind after the solvent evaporates) is lower, it dries very thin on each pass.
When to Choose Standard Nitro Wood:
- When you want an extremely thin, traditional “skin” finish.
- For simple sealing coats over bare wood before applying a final color or topcoat.
- When you prefer many, many light coats over fewer heavy coats.
- On intricate carvings or surfaces where heavy coating might obscure detail.
Nitro Wood Magnum (High-Build Formula)
The “Magnum” designation almost always indicates a higher concentration of nitrocellulose solids suspended in the solvent. This means that when the solvent evaporates, more actual finish material remains on the wood surface.
Because it leaves more material down per coat, Magnum builds up film thickness much faster than the standard version. This results in a “high-build” lacquer.
When to Choose Nitro Wood Magnum:
- When you need to fill minor scratches or small pores in the wood quickly (it acts as a self-sealer).
- If you want a very thick, glossy finish achieved in fewer coats (e.g., 3–5 heavy coats vs. 8–12 light coats).
- For applications where a substantial film build is desired, like on tabletops that need excellent wear resistance quickly.
- When time is critical and you need to get to the final sanding and buffing stage faster.
Comparison Table: Standard vs. Magnum
This table summarizes the practical implications of choosing one formula over the other for your DIY project.
| Feature | Nitro Wood (Standard) | Nitro Wood Magnum |
|---|---|---|
| Solids Content | Lower | Higher |
| Film Build Per Coat | Thin (requires more coats) | Thick (fewer coats needed) |
| Best Use Case | Sealing, traditional thin finish, fine detail work | Fast build-up, filling small imperfections, high gloss |
| Drying Behavior | Dries very quickly, less risk of runs if applied poorly | Slightly slower overall cure due to thicker application; higher run risk if applied too heavily in one pass |
| Sanding Effort | Requires more sanding time overall to reach desired thickness | Faster to sand smooth due to initial thickness |
How to Apply Each Type Like a Pro
The application method—whether spraying or wiping—is crucial. For beginners, spraying usually gives the best, most even results with lacquer. If you are brushing, stick to very light coats of the standard formula.
Preparation: The Foundation of Success
No matter which nitro you choose, 90% of your success depends on preparation. A bad prep job equals a bad finish, regardless of how good the product is.
- Sand Thoroughly: Sand the wood progressively, ending with 220 or 320 grit sandpaper. Make sure all scratches from lower grits are gone.
- Clean Aggressively: Use a tack cloth or wipe the wood down with a solvent-dampened rag (like mineral spirits or pre-cleaner) to remove all sanding dust. Dust trapped under lacquer is a permanent flaw.
- Ensure Conditions are Right: Temperature and humidity matter. High humidity can cause the lacquer to “blush” (turn milky white). Aim for moderate temperature and low humidity, as recommended by the finish manufacturer.
Application Steps: Standard Nitro Wood
When using the standard formula, think light and frequent. You are building the finish slowly, layer by layer, which is very forgiving for beginners.
- Thinning (If Necessary): Check the can. Often, standard lacquer is ready to spray straight from the can, or needs only a small amount of dedicated lacquer thinner added to meet your spray gun’s requirements.
- First Seal Coat (Very Light): Apply an extremely thin “mist” coat. This just wets the surface. Let it flash off (dry, usually 5–10 minutes).
- Subsequent Coats: Apply coats spaced 20–30 minutes apart. Keep the spray gun moving smoothly and overlap each pass by 50%.
- Building Thickness: Apply 6 to 10 coats until you feel you have enough material for the final sanding process.
Application Steps: Nitro Wood Magnum
With Magnum, you are laying down more product per pass, so you must slow down slightly and watch for drips, especially on vertical surfaces.
- Thinning: Magnum formulas are often thicker and may require slightly more solvent than standard formulas to spray properly, depending on your gun settings. Always follow the manufacturer’s thinning recommendations for the best atomization.
- First Coat (Binder): Apply a slightly heavier coat than you would with standard nitro. This coat begins filling the pores. Let it dry for 30–45 minutes.
- Building Coats: Apply subsequent coats, perhaps allowing 45–60 minutes between them. Because the coats are thicker, you need to wait slightly longer for the solvents deep in the coat to escape before applying the next one.
- Checking for Runs: Watch the edges and corners closely. If you see any sagging or runs appear as you spray, immediately stop, let it dry, and gently sand that area smooth before proceeding.
The “Melt-In” Principle: Why Nitro is Unique
Here is a key difference in how you handle recoating: Nitrocellulose lacquers “re-soften” or “melt” into previous coats as long as the previous coat hasn’t fully cured or hardened too much. This is why you can achieve that famous seamless look.
Timing Tip: For the best melt-in, most professionals recoat within 1 to 24 hours. If you wait too long (several days), the underlying coat cures hard, and you risk “lifting” the finish when you spray the new coat, causing wrinkling. If you do wait, you must lightly sand the surface with 320 or 400 grit paper first to give the new coat something to grip onto.
Filling Grains: Sealer vs. High-Build
One of the most frustrating parts for beginners working with open-pored woods like Oak, Ash, or Mahogany is trying to get a glass-smooth topcoat. Standard nitro doesn’t always fill deep pores on its own.
Using Standard Nitro as a Sealer
If you use standard Nitro Wood on an open-pored wood, it acts primarily as a barrier coat—it seals the surface to prevent blotching, but it doesn’t necessarily fill the pores.
To get a flat surface with standard nitro, you would typically need to:
- Apply 3–4 thin coats of standard nitro.
- Let them dry fully (24 hours).
- Sand the entire surface down until the pores are visibly filled or nearly filled (this can take off most of your first coats!).
- Apply 4–6 more coats to rebuild the film thickness.
This process works, but it takes significant time and material.
The Magnum Advantage for Filling
Nitro Wood Magnum shines here because its high solids content allows it to fill those pores much more efficiently in just one or two coats.
When applying Magnum:
- The thick first coats settle heavily into the grain structure.
- The material shrinks less dramatically as solvents leave, resulting in a much flatter surface initially.
- It bridges the small gaps in the grain structure, requiring fewer coats to achieve a flat substrate for your final color or clear coat.
When to Use a Dedicated Grain Filler
For extremely open woods like Walnut or exotic species, even Magnum might not be enough to achieve a perfect mirror finish without significant sanding. In these cases, even as a seasoned pro, I recommend using a separate paste wood filler specifically designed for lacquer compatibility before you even open the nitro can. This saves time and guarantees the smoothest possible result.
Finishing and Final Sanding Techniques
Once you have applied enough coats—whether using many light coats of standard or fewer heavy coats of Magnum—the next stage is flattening the surface. This is where beginners often panic because the finish looks uneven and slightly bumpy.
The Denibbing Process
Denibbing means sanding off the orange peel texture and any imperfections in the applied coats to create a flat plane for buffing.
- Wait for Cure: Allow the finish to cure completely. While nitro dries fast, it takes time for all the solvents to fully outgas and harden the film. For best results, wait at least 48 hours, or ideally, a week, before heavy sanding.
- Start Wet Sanding: Begin with a higher grit wet/dry sandpaper, usually 400 or 600 grit. Keep the surface and the sandpaper wet by misting with soapy water. This prevents the lacquer from gumming up the paper.
- Work Systematically: Sand lightly but consistently across the whole surface. You are aiming to remove the dust nibs and achieve a uniform, dull sheen across the entire piece.
- Progress to Finer Grits: After 600 grit, move to 800, then 1000, and potentially 1200 grit. Each stage refines the surface smoothness for the final polishing stages.
Polishing to a High Gloss
The final shine comes from buffing, not from the lacquer itself.
- Standard Nitro: Because the film is thinner, it can sometimes be easier to polish to a high gloss faster, but it requires careful sanding preparation to ensure no deep scratches remain from lower grits.
- Magnum: Because you have a thicker film, you have more material to work with during the sanding/polishing stage, which can hide minor mistakes better, leading to a deeper-looking final shine if polished aggressively.
If you plan to machine polish, Magnum offers a slight safety margin due to its higher film thickness, which helps prevent sanding through to the wood accidentally.
Troubleshooting Common Lacquer Issues
Working with strong solvents like nitrocellulose always presents a few unique challenges. Knowing how to troubleshoot the difference between standard and Magnum issues can save you a stripped finish.
Blushing (Milky White Appearance)
Cause: Too much moisture in the air condenses on the rapidly cooling surface during application, freezing into tiny water droplets trapped in the film.
Fix: Stop spraying immediately. Increase shop heat and decrease humidity. You can sometimes clear a mild blush by wiping the area with a cloth dampened with lacquer thinner (which flashes off extremely fast and carries the trapped moisture away). For severe blushing, you may need to sand the affected area down and reapply.
Lifting or Wrinkling
Cause: The new coat is too hot (too much solvent or applied too heavily) and dissolves the underlying coat too quickly, causing the old coat to wrinkle up like skin.
Fix: This is most common when applying a thick coat of Magnum over a coat that hasn’t fully dried/flashed off yet. The only reliable fix is to let it dry, sand the wrinkles perfectly flat, and reapply with much lighter, slower coats.
Poor Leveling (Orange Peel)
Cause: The lacquer is drying too fast for the material to flow out and level itself before hardening.
Fix: This is often an issue when using Standard Nitro in hot weather. Add a “retarder” solvent to your lacquer thinner mix. Retarders slow the overall evaporation rate, allowing the finish more time to flow out before setting.
Summary of Repair Strategy
One major advantage across both types is the solvent-based repair. Because they use similar chemistry, you can use standard lacquer thinner to gently soften a marred spot and smooth it back into the surrounding finish. This is far harder to achieve with water-based finishes.
When to Use a Different Finish Entirely
While nitro is excellent, it’s not the only choice. If your primary goal is extreme chemical resistance or you are finishing exterior items, you need to pivot.
Here are scenarios where you might skip both Nitro Wood and Nitro Wood Magnum:
- Exterior Use: Nitrocellulose degrades with prolonged UV exposure and weather. For outdoor furniture, look toward Spar Urethane or marine-grade varnishes.
- Extreme Durability Required: For a commercial bar top that sees heavy abuse, a two-part (2K) polyurethane or epoxy resin offers superior resistance to chemicals, heat, and abrasion that nitro simply cannot match.
- Very Low VOC Tolerance: Nitro lacquers have high levels of Volatile Organic Compounds (VOCs). If shop safety or environmental impact is your main concern, look into high-quality water-based acrylic lacquers.
For most indoor woodworking—cabinets, guitars, decorative furniture, and shelves—nitro finishes remain the top choice for their traditional look and easy repairability.

DIY Confidence Check
Remember, choosing between standard Nitro Wood and Nitro Wood Magnum is simply choosing how quickly you want to build your film thickness. Don’t overthink it! If you are unsure, start with the standard formula. It is far more forgiving of thick applications than Magnum is.
Frequently Asked Questions (FAQ) for Beginners
Q1: Can I use Nitro Wood Magnum over regular shellac sealer?
A: Yes, but you must use a barrier coat first! Never spray nitro directly over fresh shellac. Use a compatible sanding sealer or seal the shellac with a very light coat of standard nitro first. Shellac contains denatured alcohol, which can instantly dissolve shellac if sprayed too heavily, causing lifting.
Q2: How long do I have to wait before sanding Magnum lacquer?
A: For light sanding between coats (denibbing), 30–60 minutes is usually enough. However, for heavy flattening before final buffing, wait at least 48 hours, and preferably a full week, to ensure all solvents have evaporated and the film is fully hardened.
Q3: Is Nitro Wood Magnum really better for filling wood grain than the standard version?
A: Yes, for filling simple pores, Magnum is more efficient because it has a higher percentage of solids. It lays down more material per coat, meaning you reach a flat surface faster with fewer applications than the thinner standard formula.
Q4: What is the best way to thin nitro lacquer for spraying?
A: Always use the matching dedicated lacquer thinner recommended by the manufacturer. Thinning is dependent on your spray equipment. A general starting point for HVLP guns is to thin until the finish flows off your stirring stick in a thin, continuous, steady stream, like warm maple syrup.
Q5: Does lacquer scratch easier than polyurethane?
A: Generally, yes. Polyurethane cures into a very hard, plastic-like shell that resists abrasion better. Nitro lacquer is softer and more flexible. However, the advantage of nitro is that if you scratch it, you can often repair that specific spot seamlessly, which is much harder to do with hardened polyurethane.
Q6: Can I brush on Nitro Wood Magnum?
A: While technically possible, Magnum is difficult to brush because it dries so fast and builds thickness quickly, leading to brush marks. If you must brush, use the standard Nitro Wood with a high-quality natural bristle brush, applying very thin, long passes, and work quickly.
Conclusion: Building Confidence with the Right Finish
You now have a clear understanding of the essential difference between standard Nitro Wood and Nitro Wood Magnum. It boils down to film build: standard is for slower, thinner applications, and Magnum is for faster, thicker applications designed to level and fill more effectively per coat.
As a DIYer, this knowledge empowers you. You no longer have to guess; you can select the finish that matches your project’s needs—whether you are seeking that traditional thin touch or the quick, deep build of Magnum.
Remember safety first, prepare your wood surface meticulously, and don’t be afraid to experiment with light coats. With a little practice, you will confidently achieve beautiful, lasting, and professional-looking results on your next woodworking project. Happy finishing!