DIY Corn Hole Boards: Step-By-Step Guide To Create Yours
In the realm of portable recreational activities, DIY cornhole boards have emerged as a quintessential project for enthusiasts seeking to blend craftsmanship with outdoor fun. The construction utilizes basic woodworking techniques and durable materials, transforming simple plywood and 2x4s into a competitive bean bag toss game. Advanced joinery methods and surface finishing options can enhance both aesthetics and gameplay performance, while regulatory specifications ensure optimal board dimensions and hole placements.
As players and builders alike revel in custom designs, the allure of personalized cornhole boards takes center stage. Discover the journey of creating your unique set and elevate your backyard gatherings.
How To Create Your Own DIY Corn Hole Boards
Building your own DIY corn hole boards offers a rewarding blend of creativity and craftsmanship. This summary highlights essential tips for selecting materials, designing your boards, and mastering the assembly process. With detailed instructions and design ideas, you can create customized corn hole boards that cater to your personal style and enhance your outdoor gatherings. Whether you want to add a personal touch or save on costs, this guide provides the necessary steps to craft high-quality boards that everyone can enjoy.
Essential Materials for DIY Cornhole Boards
List of required materials (wood types, screws, paint, etc.). Tips on selecting quality materials for durability and performance.
Creating your own cornhole boards is fun and rewarding. Begin by gathering the right materials:
- Wood types: Choose high-quality plywood or 2x4s for a sturdy base.
- Screws: Use durable wood screws to ensure everything stays together.
- Paint: Select weather-resistant paint to protect your boards from the elements.
When picking your materials, focus on durability. This ensures your boards last longer and perform better. Strong wood and rust-resistant screws are key.
Happy building!
Step-by-Step Instructions for Building Cornhole Boards
Detailed steps for measuring and cutting the wood. Assembly process with visual aids or diagrams.
To start your cornhole adventure, first measure two pieces of plywood. Each piece should be 24 inches wide by 48 inches long. Now, grab a pencil (no, not the doodling kind) and mark these dimensions on the wood. Cut along the lines, and watch those sawdust clouds fly!
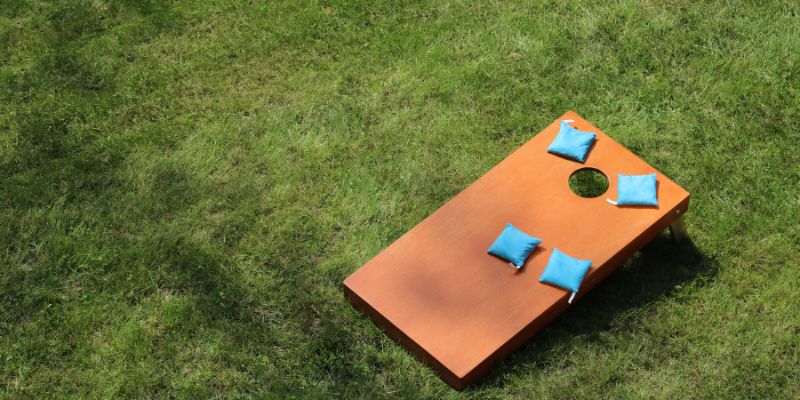
Next up, you’ll need to assemble the frame. Use 2×4 boards to create a rectangular shape, like a pizza, but without the cheese. Join the edges with screws.
Check the image below for visual aid:
| Part | Dimension |
|---|---|
| Plywood | 24″ x 48″ |
| 2×4 Frame | 24″ and 48″ lengths |
After framing, attach the plywood to the top. Make sure it doesn’t fly away! Finally, sand the edges to avoid splinters. Now those DIY cornhole boards are ready for action!
Let the games begin!
Customizing Your Cornhole Boards
Ideas for painting and finishing designs. Techniques for adding personal touches (stencils, decals, etc.).
Customizing your cornhole boards can be a fun way to express your creativity. Start with simple painting ideas, like solid colors or patterns. You could use stripes or polka dots for a playful look. Consider finishing with a clear sealer for protection.
- Use stencils for neat shapes, like stars or hearts.
- Add decals of your favorite sports teams or logos.
- Try sponge painting for a textured effect.
These personal touches make your boards unique and exciting!
Maintenance Tips for Your Cornhole Boards
Proper care and storage suggestions. Common issues and how to fix them.
Taking care of your cornhole boards is crucial for fun game days! First, store them in a cool, dry place to prevent warping. A garage is perfect— unless your dog thinks it’s a new bed!
If you spot scratches, sand them down and repaint for a fresh look.
Check the legs for wobbling and tighten any loose screws before a game; no one wants a wobbly board when aiming for victory!
Here’s a quick table on common issues and fixes:
| Issue | Solution |
|---|---|
| Warping | Store in a dry, flat space |
| Scratches | Sand and repaint |
| Wobbly Legs | Tighten screws |
With these tips, your boards will be game-ready and looking sharp—like a cornhole ninja!
Popular Variations and Game Rules
Different styles of cornhole games and variations in gameplay. Rules and scoring systems to enhance the experience.
Cornhole can be played in many fun ways. Here are a few exciting styles:
- Traditional Cornhole: Players take turns throwing bags at a slanted board. The goal is to land bags on the board or in the hole.
- Speed Cornhole: Players throw bags quickly in a timed round.The fast pace adds excitement!
- Head-to-Head: Two players or teams compete. The first to reach a set score wins.
Each game has its own rules. Here are some scoring highlights:
- 3 points for a bag in the hole.
- 1 point for a bag on the board.
- Only one team scores in each round, based on the difference in points.
These variations and rules make cornhole a game everyone can enjoy!
Where to Play and Host a Cornhole Tournament
Suggestions for venues (backyards, parks, etc.). Tips for organizing a fun and competitive tournament.
Hosting a cornhole tournament can be exciting and fun! You can play in various venues that are spacious and comfortable.
- Backyards: Perfect for friendly gatherings.
- Parks: Ample space for teams and spectators.
- Community centers: Great for larger events.
To keep the tournament lively, consider these tips:
- Set clear rules before starting.
- Offer small prizes for winners.
- Encourage friendly competition with team spirit.
With the right venue and organization, your cornhole tournament will be unforgettable!
Resources and Community for Cornhole Enthusiasts
Online forums and groups for DIY help and competition. Links to tutorials and additional reading materials.
If you’re diving into DIY corn hole boards, there’s a whole community waiting to help, like a cheering crowd at a family BBQ! Online forums are treasure troves of tips and tricks. You can find everything from design ideas to competitive strategies. Plus, tutorials can turn anyone from a novice to a pro in no time.
Don’t forget to check out these great resources:
| Resource | Link |
|---|---|
| Corhole Central Forum | cornholecentral. com |
| YouTube DIY Cornhole Boards | youtube. com |
| Cornhole University | cornholeuniversity.com |
Join a group, share your progress, and maybe even spark a friendly rivalry. Remember, while you’re crafting, laughter is the best glue—unless you’re using wood glue, of course!
Conclusion
In conclusion, crafting your own DIY corn hole boards not only enhances your outdoor fun but also allows for personal expression through creative designs. With the right materials and a clear plan, you can create a unique game that will entertain friends and family for years to come. So gather your supplies and start building your custom boards today!
FAQs
What Materials Are Needed To Build Diy Cornhole Boards?
To build DIY cornhole boards, you’ll need plywood sheets for the playing surfaces, typically 2′ x 4′. You’ll also require 2″ x 4″ lumber for the frame and legs, as well as screws to assemble the components. Additionally, sandpaper is essential for smoothing the edges, and paint or stain can be used for finishing the boards. Lastly, you’ll need bags filled with beans or similar materials for tossing.
How Do You Ensure That The Cornhole Boards Are The Correct Size And Dimensions According To Official Rules?
To ensure that cornhole boards meet official dimensions, start by checking that the boards measure 24 inches wide by 48 inches long, with a height of 12 inches at the back and 4 inches at the front. Additionally, verify that the hole is centered 9 inches from the back and has a diameter of 6 inches. Use a measuring tape for accuracy and consider using a level to confirm they are even. Finally, consult the official cornhole rulebook to ensure compliance with any specific regulations.
What Is The Best Way To Paint Or Finish The Cornhole Boards For Durability And Aesthetics?
To achieve durability and aesthetics when painting cornhole boards, start by sanding the surface to create a smooth base for the paint. Use a high-quality primer followed by multiple coats of outdoor-grade acrylic or latex paint for vibrant colors that can withstand weather elements. After the paint is dry, seal the boards with a clear polyurethane or epoxy resin finish to protect against scratches and moisture. Finally, allow the finish to cure fully before using the boards to ensure maximum durability.
How Can I Make Custom Cornhole Bags, And What Are The Recommended Dimensions And Materials?
To make custom cornhole bags, you’ll need durable fabric such as duck canvas or polyester, and a filler like dried corn kernels or plastic resin pellets. The recommended dimensions for each bag are 6×6 inches, and they should weigh around 15-16 ounces each. Cut your fabric into squares, sew them together, leaving one side open for filling, then fill, and finally sew the opening shut. For added design, you can customize the fabric with prints or embroidery before assembly.
What Are Some Creative Design Ideas For Personalizing My Diy Cornhole Boards?
You can personalize your DIY cornhole boards by painting them with your favorite team colors or logo for a sporty touch. Consider using stencils to add fun patterns or custom graphics, such as family names or favorite quotes. Adding LED lights around the edges can enhance their appeal for nighttime play. Finally, incorporating unique materials like reclaimed wood or vinyl wraps can give your boards a one-of-a-kind look.