Mastering Home Improvement: How to “Do the Ratchet” Like a Pro
Hey there! If you’re diving into home improvement, you might’ve heard the phrase “do the ratchet” floating around. It’s a fun, catchy way to describe tackling projects with confidence, using the right tools, and getting the job done efficiently. I’ve spent years tinkering with home repairs, from fixing leaky faucets to building custom shelves, and I’ve learned that “doing the ratchet” is all about precision, preparation, and a little bit of grit. In this guide, I’m going to walk you through what it means to “do the ratchet” in the world of home improvement.
Whether you’re a newbie with a toolbox or a seasoned DIYer, I’ve got you covered with practical tips, step-by-step advice, and everything you need to make your projects shine. Let’s get started!
What Does “Do the Ratchet” Mean in Home Improvement?
When I first heard “do the ratchet,” I thought it was just a cool slang term. But in home improvement, it’s a mindset. It means using a ratchet tool—or any tool—with skill and purpose to get results. A ratchet, like a ratchet wrench, lets you apply force in one direction while keeping things tight and secure. It’s about working smarter, not harder. In my garage, I’ve got a trusty ratchet set that’s helped me assemble furniture, tighten bolts, and even fix my old porch swing. The phrase captures that moment when you’re in the zone, turning a wrench with precision, and feeling like a pro. It’s about confidence, control, and getting the job done right.
For homeowners in the USA, “doing the ratchet” also means taking pride in your work. Whether you’re tightening a loose cabinet handle or installing a new ceiling fan, it’s about approaching each task with focus. You don’t need to be a contractor to “do the ratchet.” You just need the right tools, a bit of know-how, and a willingness to learn. Let’s break down how you can bring this mindset to your home projects.
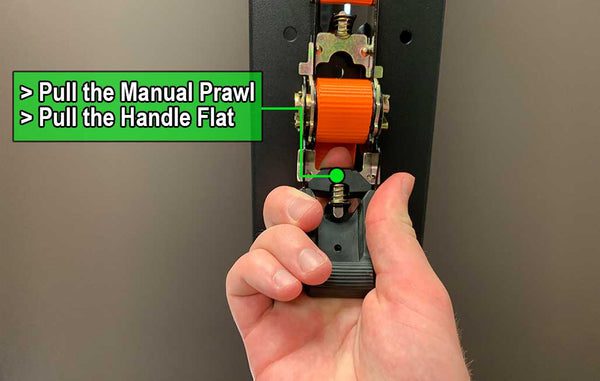
Why a Ratchet Tool Is Your Best Friend
I can’t tell you how many times my ratchet wrench has saved the day. It’s a must-have for any home improvement project. A ratchet tool, like a socket wrench or ratchet screwdriver, lets you apply consistent pressure without slipping. It’s perfect for tasks like assembling furniture, tightening plumbing fittings, or securing deck boards. The beauty of a ratchet is its efficiency—you turn it one way to tighten, and it clicks back without loosening the bolt. It’s like having an extra hand.
Here’s why I love my ratchet tools:
- Speed: They make quick work of repetitive tasks. I once assembled a whole bookshelf in under an hour because of my ratchet wrench.
- Precision: You can apply just the right amount of force without over-tightening.
- Versatility: From car repairs to home projects, a ratchet works everywhere.
- Comfort: Modern ratchets have ergonomic grips, so your hands don’t ache after hours of work.
If you’re new to this, start with a basic ratchet wrench set. A 3/8-inch drive is great for most home tasks. I keep a small kit with different socket sizes in my toolbox, and it’s been a game-changer for everything from fixing my kids’ bikes to installing curtain rods.

Essential Tools to “Do the Ratchet” Right
To “do the ratchet” like a pro, you need more than just a ratchet wrench. Over the years, I’ve built up a collection of tools that make every project smoother. Here’s a rundown of what I keep handy:
| Tool | Use | Why It’s Great |
|---|---|---|
| Ratchet Wrench | Tightening bolts and screws | Fast, precise, and easy to use |
| Socket Set | Fits different bolt sizes | Perfect for furniture and appliances |
| Screwdriver Set | Driving screws of all types | A must for small fixes and assemblies |
| Adjustable Wrench | Gripping nuts and bolts | Versatile for odd sizes |
| Level | Ensuring surfaces are even | Keeps shelves and frames straight |
| Tape Measure | Measuring distances accurately | No guesswork, just perfect cuts |
| Safety Gear | Protecting eyes, ears, and hands | Keeps you safe while you work |
I learned the hard way that having the right tools makes all the difference. A few years back, I tried tightening a loose table leg with a cheap wrench, and it stripped the bolt. A ratchet wrench would’ve saved me a trip to the hardware store. Now, I always make sure my tools are ready before I start a project. If you’re building your toolkit, invest in quality brands like Craftsman or DeWalt. They last longer and feel better in your hand.
Step-by-Step Guide to Tackling a Home Improvement Project
Let’s talk about how to “do the ratchet” on a real project. I’ll walk you through a simple task I did last summer: installing a new mailbox post. It’s a great example because it involves planning, measuring, and using a ratchet tool. Here’s how I did it:
- Plan Your Project: I started by checking my local hardware store for mailbox posts. I picked a sturdy wooden one that matched my home’s vibe. Planning means knowing what materials you need and checking if you have the right tools.
- Gather Your Tools: For this, I used a ratchet wrench, a socket set, a shovel, a level, and a tape measure. I also grabbed safety glasses because digging can get messy.
- Measure and Mark: I measured where the post would go in my yard. A tape measure helped me ensure it was 42 inches above ground, per USPS guidelines.
- Dig the Hole: I dug a hole about 18 inches deep for the post. A level made sure it was straight as I set it in concrete.
- Secure the Post: Here’s where the ratchet came in. I used it to tighten the bolts connecting the mailbox to the post. The ratchet’s clicking sound told me when it was tight enough.
- Double-Check: I used the level again to make sure everything was even. Then I cleaned up and admired my work.
This project took me about two hours, and it felt so satisfying. The ratchet wrench made the bolting part quick and secure. You can apply these steps to almost any home improvement task, whether it’s building a deck or fixing a leaky pipe. The key is preparation and using tools like a ratchet to make the job easier.
Common Home Improvement Tasks Where a Ratchet Shines
I’ve used my ratchet tools for all sorts of projects around the house. Here are some common ones where “doing the ratchet” makes a big difference:
- Furniture Assembly: Flat-pack furniture from IKEA or Wayfair often comes with bolts that need tightening. A ratchet wrench is faster than an Allen key.
- Plumbing Fixes: Tightening pipe fittings or securing a new faucet is a breeze with a ratchet. I fixed a leaky sink in 20 minutes once I got the right socket size.
- Deck Building: Securing deck boards or railings requires strong, even pressure. A ratchet ensures every bolt is tight without stripping.
- Appliance Installation: When I installed a new dishwasher, my ratchet wrench helped me secure it to the cabinet without a hitch.
- Outdoor Projects: From garden trellises to swing sets, a ratchet makes outdoor assemblies sturdy and weather-resistant.
One time, I helped my neighbor build a pergola in her backyard. We used a ratchet to tighten the bolts holding the beams together. It was hot, sweaty work, but the ratchet made it so much faster. By the end, we were sipping lemonade under a gorgeous new structure, feeling like champs.
Tips for Choosing the Right Ratchet Tool
Not all ratchet tools are created equal. I’ve tried a few duds over the years, so here’s what I look for when buying one:
- Durability: Look for tools made of chrome-vanadium steel. They’re tough and resist rust.
- Grip: A comfortable, non-slip handle is key. I love my ratchet with a rubberized grip—it’s easy on my hands.
- Size: A 3/8-inch drive is versatile for most home tasks. If you’re working on bigger projects, like car repairs, a 1/2-inch drive might be better.
- Ratchet Mechanism: A fine-tooth ratchet (with more teeth) gives smoother action. My 72-tooth ratchet is a dream for tight spaces.
- Brand Reputation: Stick with trusted names like Stanley, GearWrench, or Milwaukee. They’re worth the extra bucks.
I once bought a cheap no-name ratchet at a discount store, and it broke halfway through a project. Now, I stick to brands I trust. Check reviews online or ask a friend who’s handy for recommendations.
Safety First: Protecting Yourself While You Work
I’ll be honest—when I was younger, I skipped safety gear to save time. Big mistake. A flying wood chip once got way too close to my eye. Now, I’m all about safety. Here’s what I recommend when you “do the ratchet”:
- Wear Safety Glasses: They protect your eyes from dust, debris, or stray bolts.
- Use Gloves: Heavy-duty gloves keep your hands safe from sharp edges and give you a better grip.
- Ear Protection: If you’re using power tools alongside your ratchet, earplugs save your hearing.
- Work in a Clear Space: Clear away clutter to avoid tripping or knocking things over.
- Check Your Tools: Make sure your ratchet and sockets are in good shape. A worn-out tool can slip and cause injury.
Last year, I was tightening bolts on a metal fence when my ratchet slipped. Luckily, I was wearing gloves, so I only got a scraped knuckle instead of a real injury. Take it from me—safety gear is non-negotiable.
How to Maintain Your Ratchet Tools
I treat my tools like family. They’ve gotten me through countless projects, so I make sure they stay in top shape. Here’s how I maintain my ratchet tools:
- Clean After Use: Wipe down your ratchet with a dry cloth to remove dirt or grease. I use a little WD-40 for stubborn grime.
- Store Properly: Keep your tools in a dry toolbox or case. Moisture can cause rust.
- Check the Mechanism: If your ratchet starts sticking, it might need lubrication. A drop of machine oil works wonders.
- Inspect for Wear: Look for worn teeth or loose parts. I replace any tool that feels off to avoid accidents.
- Organize Sockets: I use a socket organizer to keep sizes in order. It saves time when I’m in the middle of a project.
I learned this the hard way when I left my ratchet wrench outside overnight. It rusted, and I had to replace it. Now, I store everything in a toolbox in my garage, and my tools last for years.
Troubleshooting Common Ratchet Tool Problems
Even the best tools can act up sometimes. Here’s how I handle common issues:
- Ratchet Won’t Turn: If it’s stuck, check for dirt in the mechanism. A quick clean with a brush usually fixes it.
- Socket Slips Off: Make sure the socket size matches the bolt. If it’s still loose, the socket might be worn out.
- Clicking Stops: This means the ratchet’s internal gears are worn. Time to replace it or get it repaired.
- Over-Tightening: If you’re stripping bolts, ease up on the force. A torque wrench can help you apply the right pressure.
I once stripped a bolt while assembling a grill because I got too enthusiastic with my ratchet. Now, I go slow and check my work as I go. If you’re unsure, practice on a spare piece of wood or metal first.
Why “Doing the Ratchet” Boosts Your Confidence
There’s something empowering about finishing a home improvement project. Every time I tighten that final bolt with my ratchet wrench, I feel like I’ve conquered something. “Doing the ratchet” isn’t just about tools—it’s about taking control of your space. Whether I’m fixing a wobbly chair or building a new fence, each project makes me more confident. I remember my first big project: installing a ceiling fan. I was nervous, but my ratchet wrench made it so easy to secure the brackets. When the fan spun perfectly, I felt like a rockstar.
For you, it might be a small fix or a big renovation. Either way, “doing the ratchet” means you’re not afraid to tackle a challenge. Start with something simple, like tightening loose screws around the house. You’ll be amazed at how quickly you build skills and confidence.
Budget-Friendly Tips for Home Improvement
I know home improvement can get pricey. But you don’t need to break the bank to “do the ratchet.” Here are my go-to tips for saving money:
- Shop Secondhand: Check thrift stores or online marketplaces for used tools. I scored a barely-used ratchet set for half the price.
- Borrow Tools: If you only need a ratchet for one project, ask a neighbor or friend to borrow theirs.
- Buy Multi-Use Tools: A ratchet wrench with interchangeable sockets covers a lot of tasks.
- DIY Materials: Instead of buying pre-made furniture, build your own with affordable lumber from a hardware store.
- Plan Ahead: Make a list of what you need to avoid impulse buys. I always check my toolbox before heading to Home Depot.
Last spring, I built a garden bench for under $50 using scrap wood and my ratchet tools. It’s still holding strong, and I saved hundreds compared to buying one.

Conclusion
After years of home improvement projects, I can tell you that “doing the ratchet” is more than a catchy phrase—it’s a way to take charge of your home. From tightening bolts to building furniture, a ratchet tool and the right mindset make every project easier and more rewarding. I’ve shared my favorite tips, from choosing the right tools to staying safe and saving money.
Whether you’re fixing a leaky faucet or building a deck, you can “do the ratchet” with confidence. So grab your tools, plan your project, and get to work. There’s nothing like the feeling of standing back and admiring a job well done. Let’s make your home better, one ratchet turn at a time!
Frequently Asked Questions
What’s the Best Ratchet Tool for Beginners?
A 3/8-inch ratchet wrench with a basic socket set is perfect for beginners. It’s versatile enough for most home tasks, like assembling furniture or tightening bolts. Look for a comfortable grip and a reputable brand like Craftsman. I started with a simple set, and it’s still my go-to for quick fixes.
Can I “Do the Ratchet” Without Experience?
Absolutely! Start with small projects, like tightening loose screws or assembling a shelf. Watch online tutorials for guidance, and always use the right tools. My first project was a wobbly table, and I learned by doing. You’ll pick it up fast with a bit of practice.
How Do I Know If I’m Using the Right Socket Size?
Check the bolt or nut size with a tape measure or compare it to your socket set. The socket should fit snugly without wobbling. I keep a chart of common bolt sizes in my toolbox to make it easy. If it slips, try a different size.
Are Ratchet Tools Safe for Kids to Use?
With supervision, kids can use ratchet tools for simple tasks. I let my teenager help with furniture assembly, but I always check their work. Make sure they wear safety glasses and gloves, and start with lightweight tools to avoid strain.
How Often Should I Replace My Ratchet Tools?
A good ratchet can last years with proper care. Replace it if the mechanism sticks, the teeth wear out, or it feels loose. I’ve had my main ratchet for a decade, but I inspect it regularly. Cheap tools wear out faster, so invest in quality.