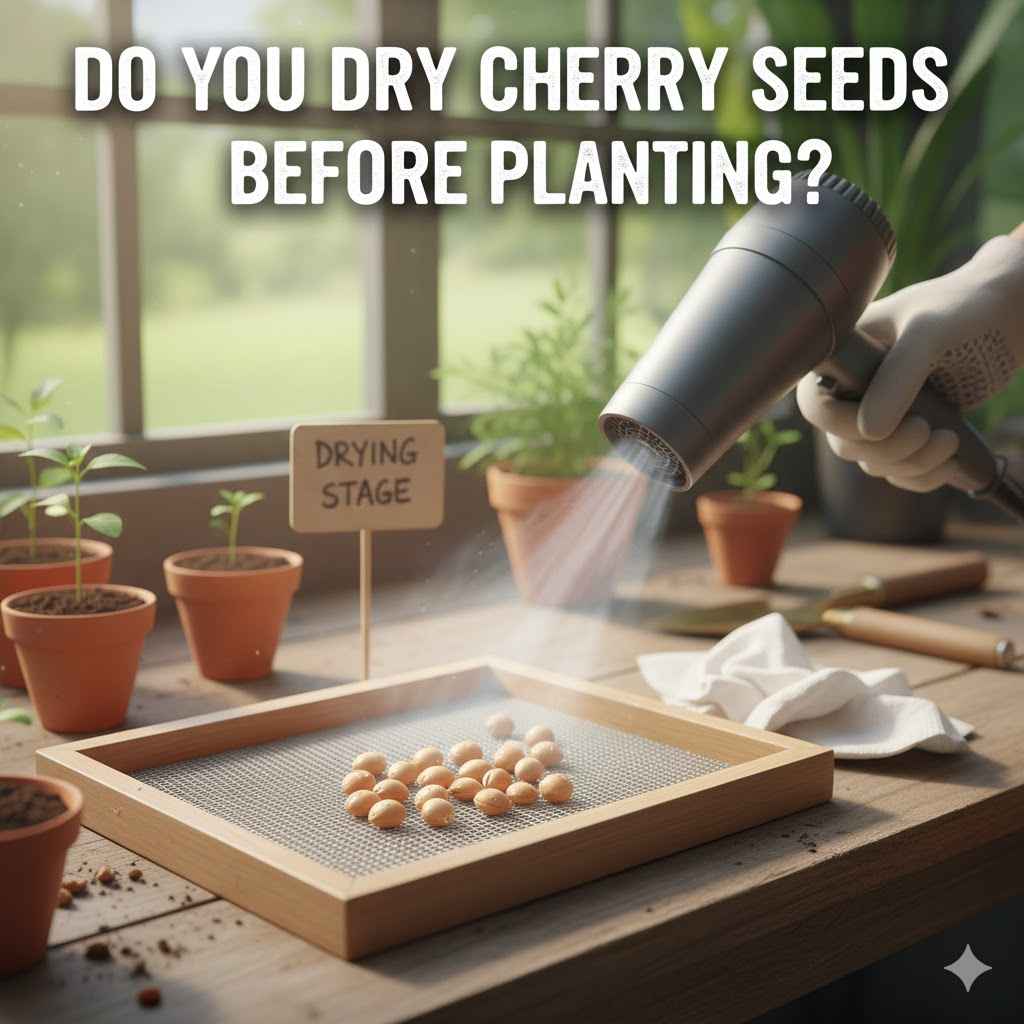
Do You Dry Cherry Seeds Before Planting?
Starting a cherry tree from seed can be a fun project for any gardener. But one common question pops up: Do You Dry Cherry Seeds Before Planting? It might seem tricky because cherry seeds have a hard shell and need special care.
This guide will make it super easy. We’ll walk you through everything step-by-step so your little seeds have the best chance to grow. Let’s get your cherry-growing adventure started!
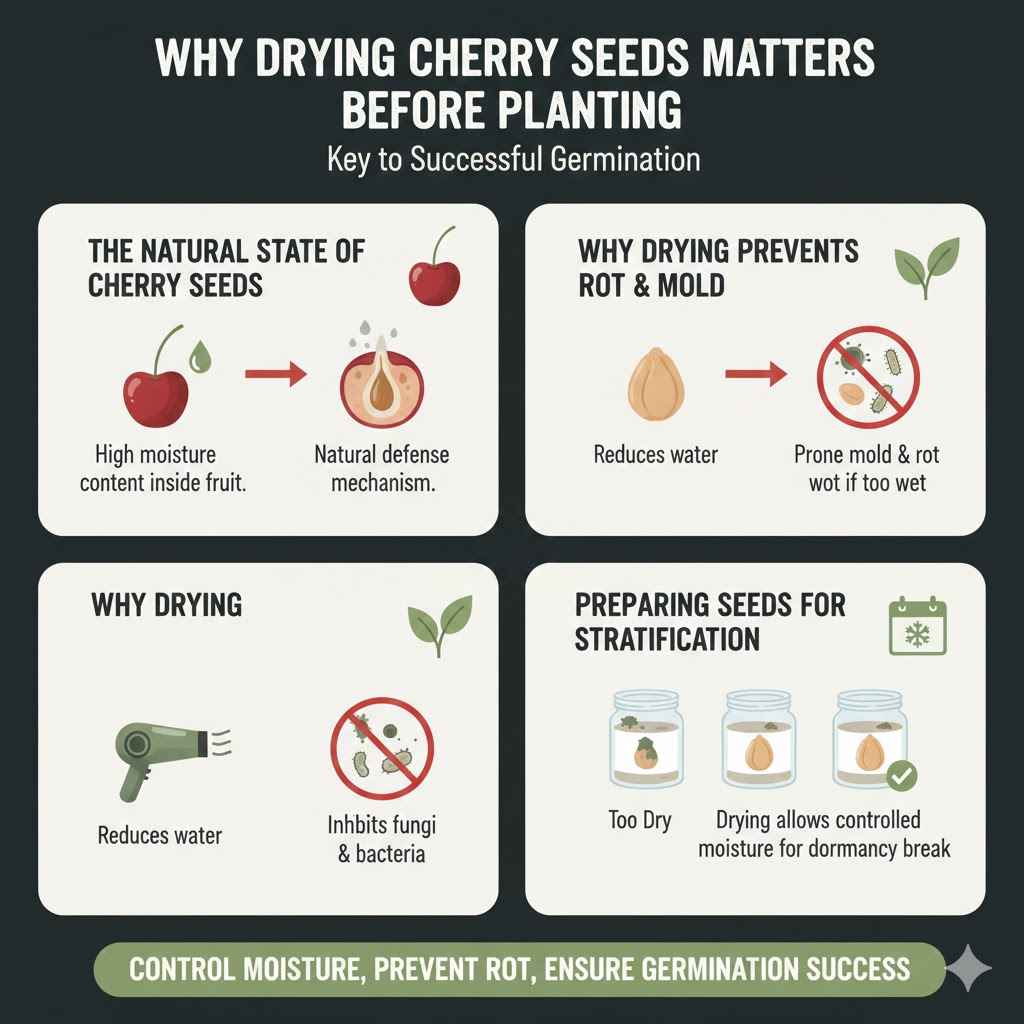
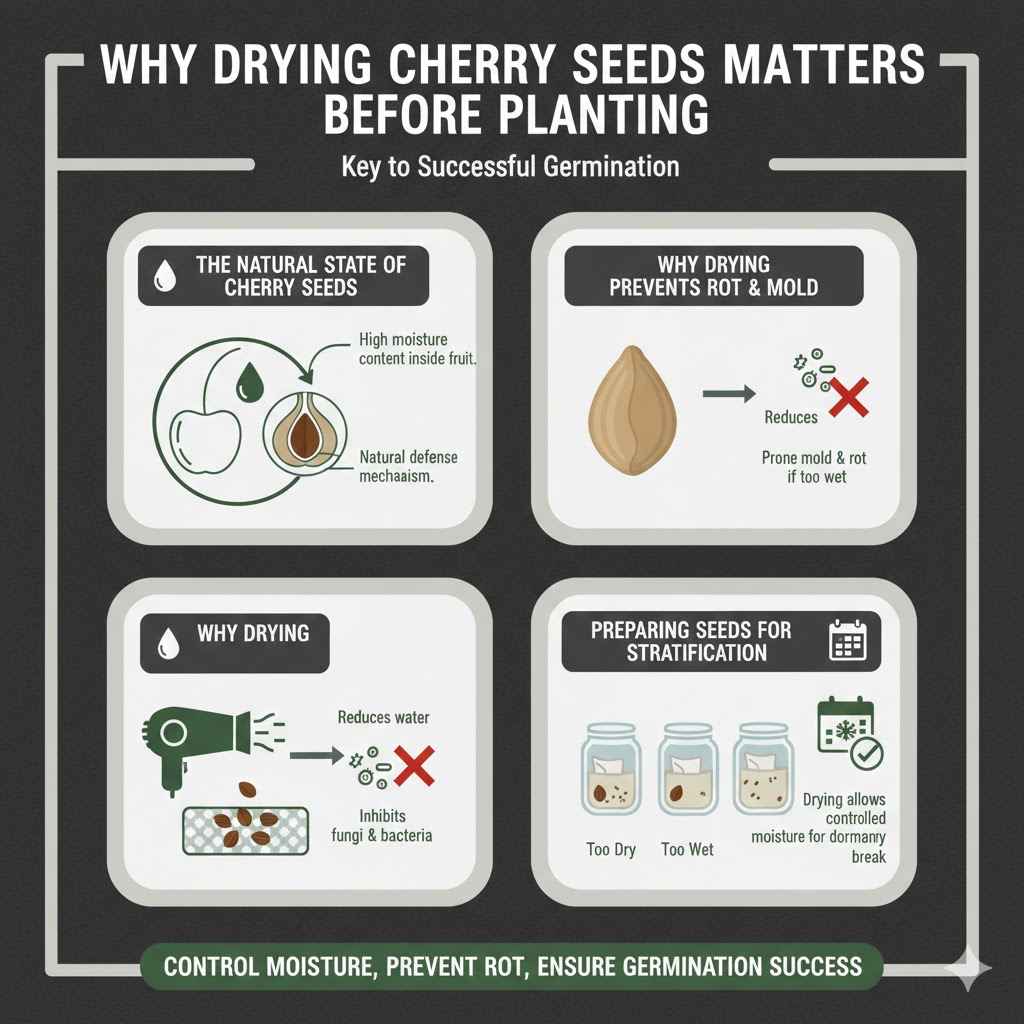
Why Drying Cherry Seeds Matters Before Planting
Understanding the importance of drying cherry seeds before planting is a key step for successful germination. Cherry seeds, also known as kernels, naturally contain a high moisture content. This moisture is a natural defense mechanism of the plant to protect the seed from drying out in its environment and also to prevent premature germination before the right conditions are met.
However, for a gardener aiming to sprout these seeds, this natural moisture can become a problem. If not dried properly, the seed can be more prone to mold and fungal infections once it’s out of its natural protective fruit and placed in the soil, especially if the soil is too wet or the drying process isn’t managed well. This can significantly reduce the chances of the seed successfully sprouting.
Therefore, managing this moisture through a proper drying period is crucial.
This drying process serves multiple purposes. Firstly, it helps to harden the seed coat, making it more resistant to physical damage during handling and planting. Secondly, and more importantly, it prepares the seed for stratification, a necessary cold treatment that many fruit tree seeds require to break dormancy.
Without adequate drying, the seed might not respond effectively to stratification, delaying or even preventing germination. It’s a balancing act; you want the seed to be dry enough to prevent rot but not so dry that it becomes inviable. For beginners, this distinction can be confusing, leading to over-drying or under-drying, both of which can hinder success.
This section aims to clarify why this step is vital and what you should aim for.
The Natural State of Cherry Seeds
When you first get a cherry seed, it’s inside the cherry fruit. The fruit is plump and full of water. The seed itself, within its hard shell, also holds a good amount of moisture.
This is how nature designed it to stay alive until it finds good soil and the right weather to grow. Think of it like a tiny, water-filled balloon. This moisture is essential for the seed’s life processes while it’s still in the fruit and even for a short while after the fruit is gone.
However, once you remove the seed from the fruit, especially after it’s been cleaned of all fruit pulp, its environment changes drastically. The seed is now exposed to air, which will naturally start to draw out some of its moisture. If you were to try and plant a very fresh, moist seed right away, especially in conditions that are not perfectly sterile or balanced, that natural moisture can become a breeding ground for unwelcome guests like mold and bacteria.
These microscopic organisms thrive in damp, enclosed spaces and can attack the seed before it even has a chance to germinate, effectively rotting it from the inside out or the outside in.
Why Drying Prevents Rot and Mold
Mold and rot are the biggest enemies of most seeds when you’re trying to start them, especially those with a naturally high moisture content like cherry seeds. When a cherry seed is too wet, it creates a perfect environment for fungi and bacteria to grow. These microorganisms feed on the seed’s stored energy and can quickly destroy its ability to sprout.
By drying the cherry seeds, you significantly reduce the amount of available water. This makes it much harder for mold and rot-causing organisms to survive and multiply. It’s like taking away their food and water source.
A properly dried seed is less hospitable to these pests, giving it a better chance to remain healthy during the subsequent steps, like stratification, and eventually germinate.
Preparing Seeds for Stratification
Stratification is a process that mimics the natural winter conditions seeds experience. Many fruit tree seeds, including those from cherries, need a period of cold and moisture to break their hard seed coat and awaken the embryo inside. Think of it as a ‘wake-up call’ that tells the seed it’s safe to start growing because spring is coming.
Drying the seeds before stratification is important because it allows you to control the moisture levels during this cold period. If seeds are too wet going into stratification, they can still rot. If they are too dry, they might not absorb enough moisture to break dormancy.
The drying phase ensures you start the stratification process with seeds that are firm and have a manageable moisture content, making it easier to introduce the precise amount of moisture needed for successful stratification. This control is key to getting those dormant embryos ready to sprout when the time is right.
How to Properly Dry Cherry Seeds
Drying cherry seeds correctly is a simple process, but it requires attention to detail. The goal is to reduce the moisture content enough to prevent mold while keeping the seed viable. Over-drying can kill the seed, and under-drying can lead to rot.
We want to find that perfect middle ground. This section will guide you through the best methods to achieve this, ensuring your seeds are ready for the next stages of germination.
It’s important to remember that you’re not trying to make the seeds brittle or completely dehydrated. You are aiming for a state where they are no longer plump and moist, but rather firm and dry to the touch. This typically involves letting them air dry for a specific period, away from direct heat or sunlight.
Following these steps will help you prepare your cherry seeds with confidence, setting a strong foundation for your growing success.
Step-by-Step Drying Method
Begin by cleaning your cherry seeds thoroughly. Remove all traces of fruit pulp. You can do this by rinsing them under cool water and then gently rubbing them to get rid of any sticky residue.
Once they are clean, spread them out in a single layer on a clean, dry surface. Paper towels, a clean cloth, or a mesh screen work well for this.
Place the seeds in a location that is warm, dry, and has good air circulation, but away from direct sunlight. A kitchen counter or a shelf in a well-ventilated room is often ideal. Avoid areas that are too humid or too cold, as these conditions can hinder the drying process or promote mold growth.
Allow the seeds to air dry for at least 7 to 14 days. The exact time can vary depending on your climate and the initial moisture content of the seeds. Check the seeds periodically.
They should feel dry to the touch and no longer soft or plump. The hard outer shell should feel firm. You can gently press one; it shouldn’t give way easily.
Once they appear dry, you can store them. Store the dried seeds in a breathable container, like a paper bag or a cloth pouch, in a cool, dry place until you are ready for stratification. This method ensures that the seeds continue to dry slowly and evenly, minimizing the risk of mold and preserving their viability.
Choosing the Right Drying Surface
The surface you choose for drying your cherry seeds can impact how well they dry and whether they develop mold. It’s crucial to select something that allows for good air circulation around each seed. This prevents moisture from getting trapped underneath and creating a damp spot where mold can start.
Paper towels are a popular choice because they absorb any residual moisture from the seed and the surface it’s on. Spreading seeds on a single layer of paper towel on a tray or plate is a common practice. Another good option is a fine-mesh screen or a piece of cheesecloth stretched over a frame.
These materials allow air to flow freely from all sides of the seed, promoting a more efficient and even drying process.
Avoid using solid plastic containers or non-porous surfaces for the initial drying period. These can trap moisture, creating the very conditions you are trying to avoid. The goal is to mimic a gentle, natural drying process, not to bake or steam the seeds.
Signs of Properly Dried Seeds
Recognizing when your cherry seeds are adequately dried is important. They should not feel damp or sticky. The hard outer shell should be firm and solid.
If you were to try and gently squeeze a seed, it should not yield or feel squishy.
Another good indicator is that the seeds will likely feel lighter than when they were fresh from the fruit. They will also have a less ‘alive’ feel to them, meaning they are no longer plump with internal moisture. A slight wrinkling of the shell, very subtle, might also appear if they have dried sufficiently, but this is not always noticeable.
A simple test is to place a seed on a dry paper towel for a few hours. If no significant moisture spot appears underneath, it’s a good sign they are dry enough. However, always err on the side of caution; it’s better to slightly under-dry than to over-dry, as over-drying can damage the seed’s viability.
Common Drying Mistakes to Avoid
One of the biggest mistakes is trying to rush the drying process. Using direct heat, such as placing seeds near a radiator or in an oven, even on a low setting, can kill the embryo inside. Seeds need to dry slowly and naturally.
Another common error is not cleaning the seeds properly. Any remaining fruit pulp can ferment and lead to mold and rot, even if the seed itself is seemingly dry. Ensuring they are completely clean before drying is vital.
Finally, storing seeds in airtight containers too soon can trap any remaining moisture. This can cause them to mold during storage. Always ensure seeds are thoroughly dry and stored in breathable containers until stratification.
Do You Dry Cherry Seeds Before Planting The Stratification Process
After you’ve properly dried your cherry seeds, the next crucial step is stratification. This process is essential for breaking dormancy in many fruit tree seeds, including cherries. It mimics the natural chilling period that seeds would experience over winter in their native environment.
Without this cold treatment, the seeds may never sprout, no matter how well you care for them. This section will detail how to prepare and conduct the stratification process to give your dried cherry seeds the best chance of germination.
Stratification involves exposing the seeds to a period of cold, moist conditions. This signals to the seed that winter has passed and it is time to grow. Understanding the right temperature, duration, and moisture levels for stratification is key.
We’ll walk through the most effective methods to ensure your seeds are properly prepared to sprout when the time is right. This preparation is what bridges the gap from a dried seed to a potentially growing seedling.
What is Stratification and Why It’s Needed
Stratification is a technique used to prepare certain seeds for germination. It involves subjecting seeds to specific temperature and moisture conditions for a set period. For many temperate climate plants, like cherry trees, this usually means a period of cold, moist treatment.
This process is necessary to overcome what is called ’embryonic dormancy’ or ‘seed coat dormancy’.
Think of it like this: a cherry seed developing inside a fruit in the summer or fall doesn’t know when winter is coming. If it were to sprout immediately, a sudden frost could kill the young seedling. Nature has a clever way of preventing this.
The seed needs to experience the prolonged cold of winter to ‘understand’ that it’s a safe time to grow. Stratification artificially provides this necessary winter chill. Without it, the seed’s internal clock doesn’t get the signal to begin the germination process.
This is especially true for the hard-shelled seeds of stone fruits like cherries. The hard outer coat often needs the softening effect of prolonged moisture and the physiological changes induced by cold temperatures to allow the embryo inside to activate and grow. For a gardener, this means replicating a simulated winter for the seed.
Methods for Stratifying Dried Cherry Seeds
The most common and effective method for stratifying dried cherry seeds involves using a moist medium and refrigeration. Here’s a breakdown of how to do it:
1. Prepare Your Medium: You’ll need a material that holds moisture but also allows for air circulation. Peat moss, vermiculite, or sand are excellent choices.
Some gardeners also use damp paper towels. Ensure the medium is moist but not waterlogged. Squeeze out any excess water until it feels like a wrung-out sponge.
2. Combine Seeds and Medium: Place your dried cherry seeds into the moist medium. If using peat moss or vermiculite, mix the seeds thoroughly so they are evenly distributed.
If using paper towels, moisten them, then place the seeds on one half of the towel and fold the other half over them.
3. Package for Refrigeration: Place the seed and medium mixture into a sealable plastic bag or a small container with a lid. Make sure the bag or container is labeled with the type of seed and the date you started the stratification.
This helps you keep track of different seed batches and when they should be ready.
4. Refrigerate: Place the sealed bag or container in your refrigerator. The ideal temperature for stratification of cherry seeds is typically between 35°F and 41°F (1.7°C to 5°C).
Avoid the coldest part of the freezer, as freezing can damage the seeds.
5. Monitor and Maintain Moisture: Check the seeds every week or two. The medium should remain consistently moist.
If it feels dry, lightly mist it with water. If you see any signs of mold, remove the affected seeds and the moldy medium immediately. You can also rinse the remaining seeds and
The duration for stratification can vary, but for cherry seeds, a period of 90 to 120 days (about 3 to 4 months) is generally recommended. Some varieties might require longer or shorter periods, so research your specific cherry type if possible. Patience is key with this process.
Moisture Control During Stratification
Achieving the correct moisture level is perhaps the most critical aspect of stratification. Too much moisture leads to rot and fungal diseases, while too little moisture prevents the seed from breaking dormancy. The medium should be damp, not soaking wet.
When you squeeze the moistened peat moss, vermiculite, or paper towel, only a few drops of water should come out.
Regularly checking the moisture is vital. Over time, the medium will lose moisture, especially in a refrigerator which can be a dry environment. If the medium starts to feel dry, you can lightly mist it with a spray bottle filled with clean water.
The goal is to keep it consistently humid but not saturated.
If you notice any condensation building up excessively inside the bag or container, it might be too moist. You can briefly open the container to allow some excess moisture to evaporate. Some gardeners also recommend rinsing the seeds in a diluted hydrogen peroxide solution (around 1%) once or twice during the stratification period to help inhibit fungal growth and maintain sterility.
Duration of Stratification for Cherry Seeds
The length of time cherry seeds need for stratification can vary depending on the specific variety of cherry and its native growing conditions. However, a general guideline for most sweet and sour cherry varieties is between 90 and 120 days. This equates to approximately three to four months of continuous cold, moist treatment.
During this period, the seed undergoes physiological changes. The hard seed coat may soften, and the embryo inside begins to prepare for germination. It’s a slow process, and rushing it by shortening the duration significantly reduces the chances of successful germination.
Patience is a virtue when growing fruit trees from seed.
Some sources suggest that even longer periods might be beneficial for certain cultivars. If you are unsure about the specific needs of your cherry variety, it’s often better to err on the side of a longer stratification period. Keeping detailed notes of when you started the process will help you determine when they might be ready to plant.
Recognizing Signs of Stratification Success
As the stratification period progresses, you might start to see visual cues that indicate the seeds are responding. The most obvious sign is the appearance of small root radicals, which are tiny white sprouts emerging from the seed. This is often called ‘rooting’ or ‘chitting’.
You might also notice that the seeds themselves have become plumper. The seed coat might appear softer or even slightly cracked. If you are using paper towels, you may see a small root emerging from the seed, which might have slightly stained the towel.
It’s important to be gentle when checking for these signs. If you see a root starting to emerge, it’s a clear indication that the seed is ready for planting. However, it’s also common for seeds to show no visible external signs but still be ready internally.
If you have completed the recommended stratification period and the seeds look healthy (no mold or rot), they are likely ready to be planted.
Do You Dry Cherry Seeds Before Planting And Then Plant Them
After the essential drying and stratification phases, the next logical step is planting. This is where all your preparatory work comes to fruition, literally. Properly planting your stratified cherry seeds is crucial for their germination and initial growth.
It involves selecting the right conditions and providing the necessary support for the tiny embryo to develop into a seedling. This section will guide you through the best practices for planting your dried and stratified cherry seeds, ensuring they have the optimal environment to begin their life above ground.
The act of planting itself is straightforward, but paying attention to details like soil type, depth, and watering can make a significant difference. We will cover how to prepare your planting medium, the ideal planting depth, and how to care for your newly sown seeds to encourage successful germination. Getting this stage right means you are one step closer to seeing your own cherry tree grow from a seed you nurtured yourself.
Choosing the Right Soil Mix
For germinating cherry seeds, it’s best to use a well-draining potting mix. A good quality seed-starting mix is ideal because it is typically light, sterile, and provides excellent aeration. This type of soil prevents waterlogging, which is a common cause of seed rot.
You can also create your own mix. A simple and effective combination is one part peat moss or coco coir, one part perlite, and one part compost or sterile topsoil. The peat moss or coco coir helps retain some moisture, while the perlite ensures good drainage and air circulation.
Sterilizing your own soil mix by baking it in the oven at around 180°F (82°C) for 30 minutes can help eliminate any potential pathogens that might harm young seedlings.
Avoid using heavy garden soil directly from your yard, as it can be too dense and may contain weed seeds or pathogens. The goal is to create a welcoming, supportive environment for the delicate roots of a new cherry seedling. The right soil mix provides a balance of moisture retention and drainage, which are critical for successful germination.
Planting Depth and Spacing
Once your stratification period is complete and you’ve checked for signs of germination, it’s time to plant. The ideal planting depth for cherry seeds is generally about 1/2 inch to 1 inch (1.25 to 2.5 cm) deep. Planting them too deep can make it difficult for the seedling to emerge, while planting them too shallow might expose the seed to drying out too quickly.
If you are planting multiple seeds, space them about 2 to 3 inches (5 to 7.5 cm) apart. This gives each seedling enough room to grow without competing too much for resources in the early stages. If you are using small pots or seed trays, you can plant one or two seeds per cell or small pot.
If both seeds germinate, you can later thin out the weaker one or transplant the stronger one to its own container.
Using pots or seed trays with drainage holes is essential. This allows excess water to escape, preventing the soil from becoming waterlogged and reducing the risk of root rot. The right depth and spacing ensure that each seed has a good chance to establish a strong root system.
Watering After Planting
After planting your cherry seeds, water the soil gently but thoroughly. The goal is to moisten the soil all the way down to the bottom of the pot or tray. A watering can with a fine rose attachment is ideal for this, as it prevents disturbing the seeds.
You can also bottom water by placing the pots or trays in a shallow container of water and allowing the soil to soak up moisture from below.
Once the initial watering is done, the key is to maintain consistent moisture. The soil should be kept lightly moist, but never soggy. Check the soil surface daily by touching it.
If the top layer feels dry, it’s time to water again. Overwatering is a common mistake that can lead to damping-off disease, a fatal fungal condition that affects young seedlings.
After the seedlings have emerged and developed their first true leaves, you can gradually reduce the frequency of watering, allowing the soil to dry out slightly between waterings. This encourages stronger root development. However, always ensure the soil doesn’t completely dry out, especially during the critical early growth stages.
Transplanting Seedlings
Once your cherry seedlings have developed a few sets of true leaves and are large enough to handle (typically a few inches tall), you can transplant them into larger individual pots. This allows their root systems more space to grow.
When transplanting, be very gentle with the roots. Try to disturb them as little as possible. Carefully lift the seedling from its original pot or tray, ensuring you have as much of the root ball intact as you can.
Place the seedling in its new, larger pot, which should contain a good quality potting mix. Fill in around the roots with soil and water thoroughly.
If you have multiple seedlings, you can continue to grow them in pots for their first year. Before planting them outdoors permanently, it’s often recommended to ‘harden them off’. This process gradually exposes them to outdoor conditions, such as sunlight, wind, and fluctuating temperatures, over a period of a week or two.
This helps them adjust and reduces the shock of transplanting into their final garden location.
When Can You Expect Cherry Seeds To Germinate
After planting your carefully dried and stratified cherry seeds, the question on every gardener’s mind is when they will sprout. Germination times can vary significantly, influenced by many factors. Understanding these factors can help manage expectations and ensure you are providing the best possible environment for your seeds to grow.
This section will provide insight into the typical germination timelines and what to do if you haven’t seen any sprouts yet.
The journey from seed to seedling is one that requires patience. While some seeds might show signs of life relatively quickly, others can take much longer. We’ll explore the common germination windows for cherry seeds and discuss why some might take longer than others.
This knowledge will empower you to be a more informed and patient grower.
Typical Germination Times
Once planted after proper stratification, cherry seeds typically begin to germinate within 4 to 8 weeks. However, this is a broad range, and some seeds may take longer, potentially up to 3-4 months. The germination time is heavily dependent on the success of the stratification process, the health of the seed, and the environmental conditions post-planting.
If you’ve completed a full 90-120 day stratification period and planted your seeds in optimal conditions (consistent moisture, appropriate temperature, well-draining soil), you should start seeing sprouts within that 4-8 week window. It’s important to remember that not every seed will germinate. Some seeds may be non-viable, or the stratification might not have been perfectly successful for every single one.
The emergence of a small green shoot, often with the seed coat still attached, is the first visible sign of germination. Be patient during this phase; sometimes, growth can appear slow, but the root system may be developing underground.
Factors Affecting Germination Speed
Several factors can influence how quickly cherry seeds germinate. The most significant factor is the success of the stratification process. If the cold, moist treatment was too short, too long, or lacked adequate moisture, the seed’s dormancy may not be fully broken, delaying or preventing germination.
The temperature of the soil where the seeds are planted is also critical. Cherry seeds generally germinate best in temperatures between 60°F and 70°F (15°C to 21°C). If the soil is too cold, germination will be very slow or may not occur at all.
Conversely, if it’s too hot, the seeds can be damaged.
The viability of the seed itself plays a huge role. If the seed was not properly dried and stored, or if it was damaged during handling, it may not be capable of germinating. Consistent moisture levels in the soil are also paramount; allowing the soil to dry out completely can kill a germinating seed or seedling.
Finally, the specific cherry variety can influence germination speed. Some varieties are naturally quicker to germinate than others. Researching the specific type of cherry you are trying to grow can provide more tailored expectations.
What To Do If Seeds Don’t Germinate
If you’ve waited a considerable amount of time, say 10-12 weeks after planting, and haven’t seen any signs of germination, don’t despair immediately. First, check the soil moisture. Ensure it has remained consistently moist but not waterlogged.
If it has dried out, water it gently and continue to monitor.
You can carefully excavate a few seeds to check their condition. Gently dig up a seed or two from different areas of the pot or tray. Look for signs of rot or mold.
If the seeds are mushy and dark, they have likely rotted. If they appear shriveled and dry, they may not have received enough moisture during stratification or after planting.
If the seeds appear healthy but haven’t sprouted, they might simply need more time, or the stratification period may have been insufficient. You could try re-stratifying the seeds for another period (though this is less common and often less successful) or, more practically, consider obtaining new seeds from a reputable source and starting the process again, paying close attention to the details of drying and stratification.
Sometimes, a cherry tree seed can take over a year to germinate, especially if it wasn’t perfectly stratified or planted. So, if you have a tray of seeds that haven’t sprouted after a few months, it might be worth keeping them in moist soil in a cool place for a while longer, or even trying a second stratification period if they appear viable.
Growing On Seedlings
Once your cherry seeds have successfully germinated and produced seedlings, the next stage is to nurture them into healthy young trees. This involves providing them with the right conditions for growth. Continue to keep the soil consistently moist, but avoid overwatering.
As mentioned, they generally prefer temperatures between 60-70°F (15-21°C) during their active growth phase.
Ensure your seedlings receive plenty of indirect sunlight. A bright windowsill or a spot in a greenhouse is ideal. As they grow stronger, they can tolerate more direct sunlight, but be careful not to scorch them, especially if they have been accustomed to lower light levels.
If you planted multiple seeds per pot and they both germinated, it’s time to thin them out. Choose the strongest-looking seedling and carefully snip the weaker one at the soil line with clean scissors. This prevents competition for resources.
Alternatively, you can try to carefully separate and transplant the weaker seedling into its own pot, but this is often a delicate procedure.
Continue to monitor your seedlings for any signs of pests or diseases. Good air circulation can help prevent many common problems. As they grow, repot them into larger containers as needed.
This process of growing on in pots can take one to two years before the seedlings are robust enough to be planted outdoors in their final location.
Frequently Asked Questions
Question: Do I need to dry cherry seeds before planting?
Answer: Yes, it’s highly recommended to dry cherry seeds before planting. This helps prevent mold and rot, and prepares them for the necessary stratification process.
Question: How long should I dry cherry seeds?
Answer: You should air dry cherry seeds for about 7 to 14 days. They should feel firm and dry to the touch, but not brittle.
Question: Can I plant fresh cherry seeds without drying or stratifying?
Answer: Planting fresh seeds without drying and stratifying is generally not successful. They require a cold, moist period (stratification) to break dormancy.
Question: What happens if I over-dry my cherry seeds?
Answer: Over-drying can kill the embryo inside the seed, making it unable to germinate. It’s important to achieve a state of dryness where mold is prevented, but the seed remains viable.
Question: How long does it take for cherry seeds to germinate after planting?
Answer: After proper drying and stratification, cherry seeds typically take 4 to 8 weeks to germinate, but can sometimes take longer, up to 3-4 months.
Conclusion
Drying cherry seeds before planting is a vital step. It ensures seeds are free from mold and rot and primes them for stratification. Following simple air-drying methods for about two weeks sets them up for success.
This preparation is key for their cold treatment and eventual germination. With careful drying, stratification, and planting, you can grow your own cherry trees.