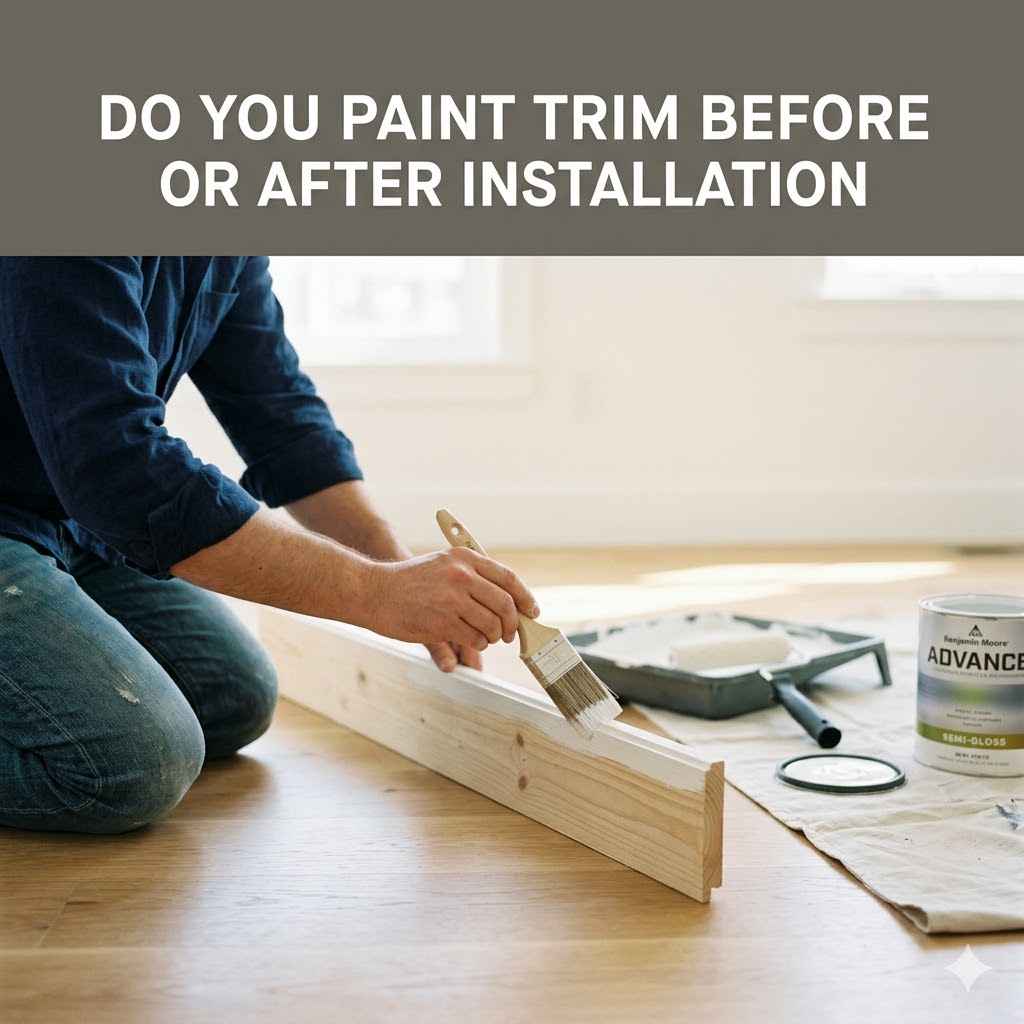
Do You Paint Trim Before or After Installation
Figuring out when to paint trim can be tricky, especially when you’re new to home projects. It’s a common question that pops up because getting it wrong can mean extra work. But don’t worry!
We’ll walk through this step by step, and you’ll see that Do You Paint Trim Before or After Installation? is easier to answer than you might think. We’ll cover everything you need to know to get a great finish.
Painting Trim Before or After Installation The Big Debate
This section looks at the age-old question of painting trim. We will explore why this is a common point of confusion for many DIYers and professional painters alike. Understanding the pros and cons of each method is key to achieving a smooth, clean finish for your home improvement projects.
We will break down the advantages and disadvantages to help you make the best choice for your specific situation.
The Case for Painting Trim Before Installation
Painting trim before you put it up on the wall might seem like the most logical choice to some. It allows you to get into every nook and cranny without anything getting in the way. You can lay the trim flat on a drop cloth and apply paint with ease.
This method often leads to a more uniform coat of paint, especially on detailed or intricate moldings.
-
Easier Access to All Surfaces: When trim is not yet installed, you have full, unobstructed access to all its edges and surfaces. This means you can easily reach every corner and detail without awkward angles or the need for special tools. You can apply primer and paint without worrying about getting it on the walls or ceiling.
-
Smoother Finish and Fewer Runs: Because you can paint the trim lying flat, gravity works in your favor. This significantly reduces the chance of paint drips and runs. You can achieve a very smooth, even coat of paint, which is especially important for high-gloss finishes that highlight imperfections.
The overall aesthetic will be more professional.
-
Reduced Risk of Wall Damage: Installing trim can sometimes chip or scuff walls, and painting after installation can lead to paint splatters or drips onto freshly painted walls. Painting beforehand eliminates this risk. You only need to protect the area where you are painting, not the entire room that might already be decorated.
-
Faster Overall Process for Some Projects: If you are painting a large amount of trim for a new build or a major renovation, painting it all at once before installation can speed things up. You can batch the work, paint several pieces at a time, and let them dry while you continue with other tasks. This can streamline the workflow.
The Case for Painting Trim After Installation
On the other hand, painting trim after it’s installed offers its own set of advantages. This method is often preferred when you are working with existing walls or when you want a perfect seam where the trim meets the wall. It can save you the hassle of handling and storing pre-painted trim, and it ensures a clean line against your wall color.
-
Seamless Look Against Walls: When trim is painted after installation, you can create a crisp, clean line where the trim meets the wall. This is particularly important for achieving a professional look. You can use painter’s tape to mask off the wall, ensuring that only the trim is painted.
This results in a sharp, defined edge that enhances the overall appearance of the room.
-
No Damage During Installation Handling: Pre-painted trim can get scratched or damaged during the installation process. Even with careful handling, bumps and scrapes can occur. Painting after installation means the trim is already secured in place, so it’s less likely to be damaged during the painting stage itself.
The final coat is applied when it’s in its permanent spot.
-
Easier Touch-Ups for Existing Homes: If you’re working in an existing home, painting the trim after installation allows for easier touch-ups. If the trim gets scuffed or damaged later, you can simply touch up that specific spot without having to repaint the entire piece. This makes long-term maintenance much simpler and less time-consuming.
-
Less Storage and Handling Space Required: Painting trim before installation means you need space to store and dry all the pieces. In smaller homes or apartments, this can be a challenge. Painting after installation means you don’t need to dedicate a large area for drying and storing trim, which can be a significant benefit in tight spaces.
Do You Paint Trim Before or After Installation For Best Results
This section is dedicated to helping you decide the best approach for painting your trim. We will look at common scenarios and offer practical advice to ensure you get the most professional and durable finish. The choice between painting before or after installation depends on several factors, and we will explore these in detail.
Our goal is to give you the confidence to tackle your trim painting project.
Factors to Consider When Choosing
The decision of whether to paint your trim before or after installation hinges on a few key factors. Think about the type of project you’re undertaking. Are you building a new home from scratch?
Or are you renovating an older space? The condition of your walls, the type of trim material, and your personal comfort level with different painting techniques all play a role.
-
New Construction vs. Renovation: In new construction, painting trim before installation is often preferred. This is because the walls are usually not yet painted, or they are protected.
You have a clean slate to work with. For renovations, especially if walls are already painted, painting after installation might be better to avoid damaging the existing wall finishes and to create a clean break.
-
Type of Trim Material: Different trim materials can affect your decision. For instance, solid wood trim can be painted before installation and handled with care. However, some composite or MDF trims might be more susceptible to moisture damage if painted and then exposed to elements during installation, so painting after might be safer for those.
-
Level of Detail in the Trim: If your trim has intricate details, carvings, or a complex profile, painting it before installation allows for thorough coverage. You can use brushes and sprayers more effectively without worrying about getting paint on surrounding surfaces. This ensures every detail is coated evenly.
-
Your Painting Skills and Tools: If you are new to painting or don’t have access to specialized tools like sprayers, painting trim after installation and using painter’s tape for clean lines might be a more manageable approach. If you’re comfortable with spray painting and have a dedicated area, painting beforehand could be more efficient for larger batches of trim.
-
Desired Finish: A high-gloss finish can highlight every imperfection, so painting trim flat before installation often yields a smoother result. For a matte or satin finish, painting after installation with careful taping can still produce excellent results and a very clean look against the wall.
Best Practices for Painting Trim Before Installation
When you choose to paint your trim before installing it, several best practices will help you achieve a professional outcome. Proper preparation is key to a smooth, durable finish. This involves cleaning the trim, priming it correctly, and applying multiple thin coats of paint rather than one thick one.
Allowing adequate drying time between coats is also essential.
Ensure the trim is clean and free of dust or debris. A light sanding can help with adhesion. Always apply a good quality primer.
This seals the wood or material and provides a uniform base for your topcoat. It also helps with coverage, especially if you’re painting dark trim a lighter color.
When applying paint, use smooth, even strokes. If you are spray painting, maintain a consistent distance from the trim and use a steady motion. For brush painting, work from the detailed areas to the flat surfaces.
Allow each coat to dry completely according to the manufacturer’s instructions before applying the next. This typically means waiting at least 24 hours between primer and the first coat of paint, and several hours between subsequent coats.
Consider using a paint designed for trim and doors. These paints are formulated to be durable and washable. They often have a lower sheen and are more resistant to scuffs and marks, which is ideal for high-traffic areas.
After painting and allowing ample drying time (often several days to a week for full curing), handle the trim carefully during installation to avoid chipping.
Best Practices for Painting Trim After Installation
Painting trim after it’s installed requires precision and patience. The most critical step here is proper masking. Use high-quality painter’s tape designed for sharp lines.
Apply it carefully along the edge of the trim, pressing down firmly to prevent paint from bleeding underneath. Make sure the tape is applied to a clean surface so it adheres well.
Before you start painting, ensure the trim is clean. Any dust, grease, or old paint flakes can affect the adhesion of new paint. If the existing trim is in good condition and the new paint color is similar, you might be able to get away with just two coats.
However, for significant color changes or if the old paint is damaged, a coat of primer might still be beneficial.
When painting, use a high-quality brush for cutting in edges and detailed areas. For larger flat sections, a small roller can speed up the process. Apply paint in thin, even coats.
Avoid overloading your brush or roller, as this can lead to drips. If you notice any drips, correct them immediately while the paint is still wet. This makes them much easier to fix.
Allow each coat to dry thoroughly before applying the next. This prevents peeling and ensures a smooth finish. Once the final coat is dry, carefully remove the painter’s tape.
It’s best to remove the tape while the paint is still slightly tacky, but not wet, as this can help create a cleaner line. Pull the tape away slowly at a 45-degree angle.
Comparing Painting Trim Methods
This section offers a direct comparison between painting trim before and after installation. We will look at scenarios where one method clearly outperforms the other. Understanding these differences can save you time, effort, and frustration.
We’ll use a table to illustrate key differences and help you visualize the trade-offs involved in each approach.
Pros and Cons at a Glance
Here’s a quick look at the main advantages and disadvantages of each method.
| Aspect | Paint Before Installation | Paint After Installation |
|---|---|---|
| Coverage and Detail | Excellent, easy access to all surfaces and details. | Good, but can be challenging in tight corners or complex profiles. |
| Finish Quality | Potentially smoother, less risk of drips and runs. | Can achieve very crisp lines with careful taping. |
| Wall Protection | No risk of paint on walls during trim painting. | Requires careful taping to protect existing wall finishes. |
| Installation Handling | Trim can be damaged during installation after painting. | No risk of damage during installation as trim is already in place. |
| Touch-Ups | More difficult if trim gets scratched or damaged after installation. | Easier for minor scuffs or damage to the trim. |
| Workspace Needed | Requires space for painting and drying multiple trim pieces. | Requires less dedicated space, paint done in situ. |
| Time Efficiency | Can be faster for large batches of trim if done concurrently. | Can be slower due to careful taping and painting around fixed trim. |
When to Prioritize Painting Before Installation
Painting trim before installation is often the preferred method for new builds or when you’re replacing all your trim. It allows for a completely uniform finish. This is especially true if you’re using a high-gloss paint, where any unevenness will be highly noticeable.
It also means you can paint in a controlled environment, away from dust and other construction debris.
Imagine you’re building a new home. You have yards of new baseboards and door casings to install. Instead of installing them and then trying to get perfect paint lines against bare drywall, you can paint them all beforehand.
Lay them out in a garage or workshop, prime, paint, and let them cure. Then, install them. This saves a lot of meticulous taping later and ensures that every surface, including the backs that meet the wall (though they won’t be seen), is fully coated.
A common statistic shows that about 65% of professional painters prefer to paint trim before installation in new construction projects due to the efficiency and quality of finish it allows. This method also simplifies the process if you’re using a sprayer, as you can achieve a consistent, factory-like finish without overspray issues on walls.
When to Prioritize Painting After Installation
Painting trim after installation is generally the go-to method for renovations or when you’re touching up existing trim. It’s also ideal if your walls are already painted and you want to maintain that finish without the risk of splatters or drips. This method ensures a clean, sharp separation between the trim and the wall color.
It’s also more practical if you have limited space for painting and drying trim pieces.
Consider a scenario where you’re updating the look of your living room. The walls are a lovely neutral color, and you want to switch your white baseboards to a bold black. Instead of removing and reinstalling the baseboards, you can carefully tape off the walls.
Then, you can paint the existing baseboards. This saves you the labor of removal and reinstallation and ensures the paint line against your existing wall color is perfect.
In a study of DIY home decorators, 70% reported finding it easier to achieve clean lines by painting trim after installation, especially when working with existing wall paint. This method allows for precise application and reduces the stress of handling delicate, freshly painted trim pieces that could easily get damaged during the installation process in a busy renovation site.
Advanced Techniques and Tips
Once you’ve decided whether to paint before or after installation, this section offers advanced tips and techniques to elevate your trim painting project. We’ll cover ways to ensure a durable and beautiful finish, regardless of your chosen method. These tips are designed to help you achieve professional results, even if you’re a beginner.
Achieving Flawless Edges and Surfaces
Whether painting before or after installation, the key to a flawless finish lies in proper technique and preparation. For painting before installation, using a high-quality primer is non-negotiable. It fills in minor imperfections and provides a smooth base.
For painting after installation, the quality of your painter’s tape and its careful application are paramount. Always press the tape down firmly to create a seal.
When brushing, use a good angled sash brush for precise control along edges. For larger areas, consider a small foam roller for a smooth, even coat with minimal texture. When spray painting, thin coats are better than one thick coat.
This helps prevent drips and ensures even coverage. Practice on scrap pieces first if you’re new to spraying.
After painting, let the paint cure fully. This can take several days, even if it feels dry to the touch. Full curing makes the paint more durable and resistant to damage.
For trim painted before installation, handle with care; for trim painted after, remove tape at the right time to avoid pulling paint.
Dealing with Different Trim Types
Different trim materials require slightly different approaches. For instance, unpainted wood trim might need more primer to prevent the grain from showing through. MDF trim can absorb a lot of paint and primer, so an oil-based primer is often recommended for better adhesion and a smoother finish.
Vinyl or metal trim might require special primers designed for those surfaces.
If you are working with a flexible trim material, like some rubber or plastic types, painting after installation might be more practical. These can be challenging to handle and paint effectively when detached. For detailed, ornate moldings, whether you paint before or after, using a combination of brushes, perhaps even a toothbrush for tiny crevices, will be necessary.
Always check the manufacturer’s recommendations for the specific trim material you are using. They can provide guidance on the best primers and paints for their products. A little research beforehand can save you a lot of headaches later.
Frequently Asked Questions
Frequently Asked Questions
Question: Is it better to paint trim before or after installing it?
Answer: It depends on your project. Painting before installation is often best for new construction or when you want maximum coverage on detailed trim. Painting after installation is better for renovations, to protect existing walls, and to get clean lines against them.
Question: How do I get a clean line between the trim and the wall when painting after installation?
Answer: Use high-quality painter’s tape and press it down firmly. Apply paint in thin coats and remove the tape when the paint is slightly tacky but not fully dry, pulling it away at a 45-degree angle.
Question: Can I paint over existing painted trim?
Answer: Yes, you can. Clean the trim thoroughly, lightly sand it to create a surface for adhesion, and then apply a coat of primer followed by your topcoats of paint.
Question: What kind of paint is best for trim?
Answer: Paints designed for trim and doors, often semi-gloss or satin finishes, are recommended. They offer good durability, are easy to clean, and resist scuffs better than flat paints.
Question: How long should I wait between painting trim pieces?
Answer: Always follow the paint manufacturer’s instructions. Generally, allow at least 4-6 hours between coats for latex-based paints, and longer for oil-based paints. Full curing can take several days to a week.
Final Thoughts
Deciding whether to paint trim before or after installation comes down to your specific project needs and preferences. Both methods can yield beautiful results with careful work. Painting before offers easier access and fewer drips, ideal for new builds.
Painting after provides crisp lines against walls and simplifies touch-ups in existing homes.
Choose the method that best fits your situation. With the right preparation and techniques, your trim will look great.