Does Engineered Hardwood Flooring Need To Acclimate: Fatal
Yes, engineered hardwood flooring absolutely needs to acclimate. Skipping this step is one of the most common and costly mistakes a homeowner can make. It allows the wood to adjust to your home’s unique temperature and humidity, preventing future problems like buckling, gapping, and cupping. Acclimation is your best insurance for a beautiful, long-lasting floor.
So, you’ve picked out beautiful new engineered hardwood flooring. You’re excited to get it installed and transform your space. But then you hear the word “acclimation,” and it sounds like a frustrating delay. I get it. You want to see results! But trust me, this is one step you cannot afford to skip. It might seem small, but it’s the difference between a floor you love for decades and a floor that causes headaches down the road.
Don’t worry, this process is incredibly simple. In this guide, I’ll walk you through everything you need to know. We’ll cover why it’s so important, how to do it correctly, and what common pitfalls to avoid. You’ll see that giving your new floor a little time to “breathe” is the secret to a perfect, professional-looking installation. Let’s get started!
What is Acclimation and Why Is It So Important?
Before we dive into the “how,” let’s talk about the “why.” Understanding this will make the whole process feel less like a chore and more like a smart move for your home.
Acclimation is simply the process of letting your new flooring material adjust to the normal living conditions of the room where it will be installed. Think of it like letting a plant get used to a new spot in your house before you repot it. The flooring needs to reach a moisture content level that is in balance with its new environment.
Wood is a natural material, and like a sponge, it absorbs and releases moisture from the air around it.
- When the air is humid, wood absorbs moisture and expands.
- When the air is dry, wood releases moisture and shrinks.
This movement is completely normal, but it can cause major problems if it happens after your floor is installed. The warehouse where your flooring was stored has a different temperature and humidity level than your home. If you install the planks right away, they will expand or shrink after being locked into place, leading to serious issues.
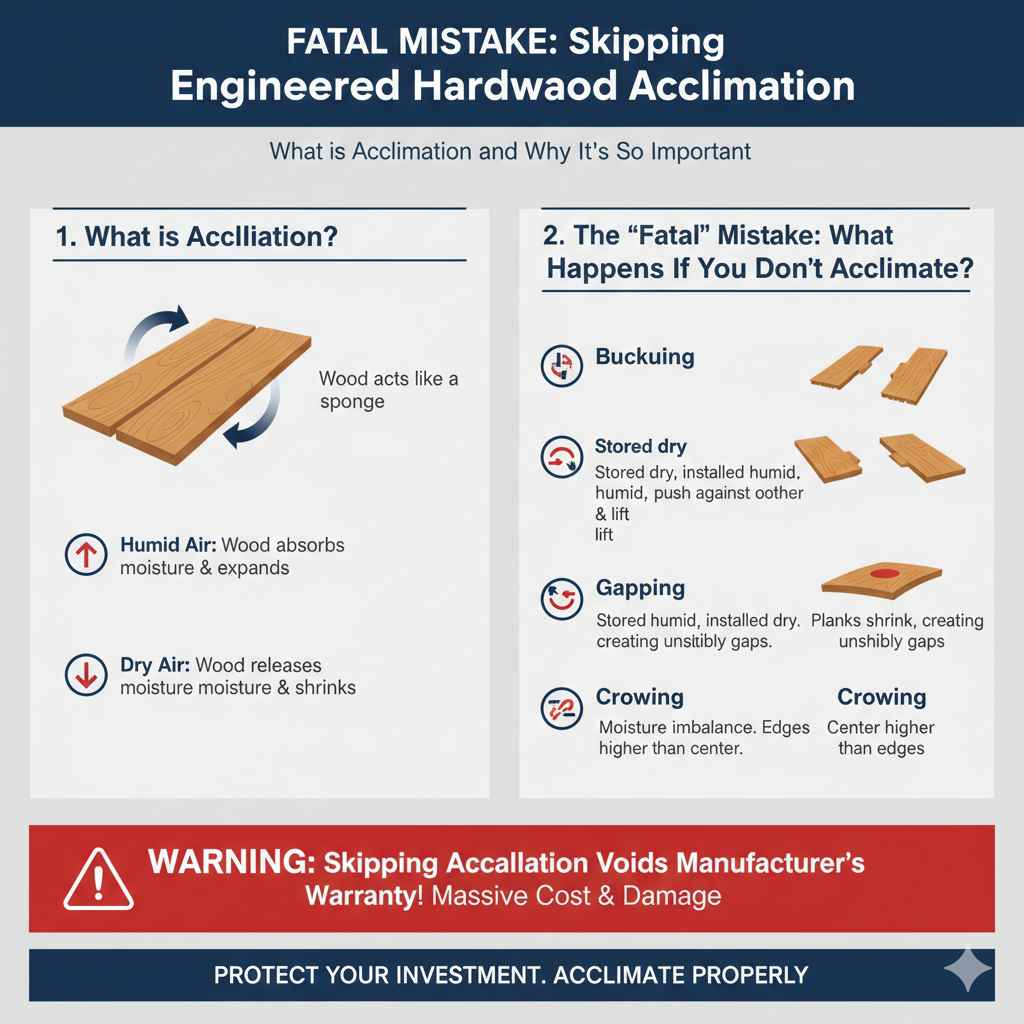
The “Fatal” Mistake: What Happens If You Don’t Acclimate?
Skipping acclimation can lead to flooring failures that are often expensive and difficult to fix. Here are the most common problems you might face:
- Buckling: If the flooring was stored in a dry place and installed in a more humid home, the planks will absorb moisture and expand. With nowhere to go, they will push against each other and lift off the subfloor, creating ugly and dangerous waves or peaks.
- Gapping: This is the opposite problem. If the flooring was stored in a humid place and installed in a drier home, the planks will release moisture and shrink. This causes unsightly gaps to open up between the boards, collecting dirt and ruining the look of your floor.
- Cupping: This happens when the edges of a plank are higher than its center, creating a concave shape. It’s often caused by a moisture imbalance, where the bottom of the plank is wetter than the top. Improper acclimation is a primary cause.
- Crowning: The reverse of cupping, crowning is when the center of the plank is higher than its edges. This can also result from moisture issues that acclimation helps prevent.
Worst of all, these issues often void your manufacturer’s warranty. They consider proper acclimation a mandatory part of the installation process. So, skipping it not only risks damaging your floor but also leaves you with no recourse if something goes wrong.
Engineered vs. Solid Hardwood: Is There a Difference?
A common myth is that because engineered hardwood is more stable than solid hardwood, it doesn’t need to acclimate. This is absolutely not true! While it’s more resistant to changes in humidity, it is not immune.
Engineered hardwood is made of a top layer of real hardwood veneer bonded to multiple layers of plywood or high-density fiberboard (HDF). This layered construction makes it less likely to expand and shrink dramatically. However, the top layer is still real wood, and the core materials can also be affected by moisture.
Think of it this way: a boat made of plywood is more stable in water than a solid log, but it will still get wet and can still be damaged by moisture over time. Engineered flooring is more stable, but it still needs to get in sync with your home’s environment before installation.
Let’s look at a quick comparison:
| Feature | Solid Hardwood | Engineered Hardwood |
|---|---|---|
| Construction | Single piece of solid wood | Real wood veneer on a plywood/HDF core |
| Stability | More susceptible to expansion/contraction | More stable and resistant to moisture changes |
| Acclimation Need | Absolutely essential (often 7+ days) | Still absolutely essential (usually 48-72 hours) |
| Installation Areas | Not recommended for below-grade areas like basements | Suitable for most areas, including basements |
As you can see, both types require acclimation. The process is non-negotiable for a successful, long-lasting installation.
Your Step-by-Step Guide to Acclimating Engineered Hardwood
Ready to do it right? The process is easy, I promise. It just requires a little patience. Follow these simple steps, and you’ll be setting your project up for success.
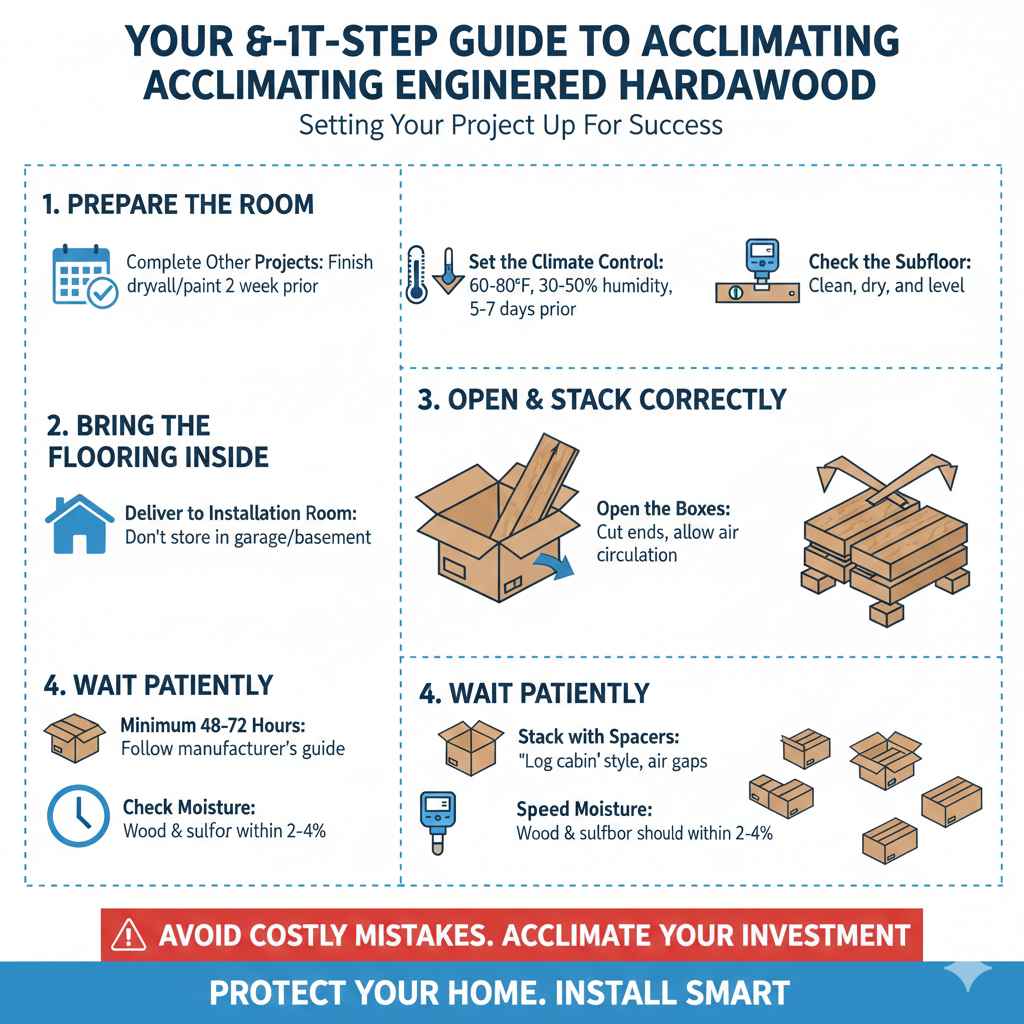
Step 1: Prepare the Room
Before the flooring even arrives, get the room ready. The goal is to acclimate the wood in the exact conditions it will live in permanently.
- Complete Other Projects: Finish any drywalling, painting, or plastering work at least a week before the wood arrives. These activities introduce a lot of moisture into the air.
- Set the Climate Control: Your heating or air conditioning system should be running for at least 5-7 days before delivery. Maintain a steady temperature and humidity that you will normally live with. A good target is between 60°F and 80°F (15°C and 26°C) with a relative humidity between 30% and 50%. You can find more specific guidance on ideal indoor humidity levels from resources like the Environmental Protection Agency (EPA).
- Check the Subfloor: Ensure your subfloor is clean, dry, and level. Any moisture issues from the subfloor must be resolved before you bring in the new wood.
Step 2: Bring the Flooring Inside
As soon as the flooring is delivered, bring it into the room where it will be installed. Don’t leave it in the garage, basement, or on the porch. The conditions in those areas are not the same as your living space, so acclimating it there would be pointless.
When you bring the boxes inside, handle them carefully to avoid damaging the edges or locking mechanisms of the planks.
Step 3: Open and Stack the Boxes Correctly
This is a key part of the process. You need to allow air to circulate around every plank. Simply leaving the boxes sealed and stacked in a corner won’t work.
- Open the Boxes: Cut open the ends of the boxes. Do not dump the planks out—just open up the packaging to let air flow through. Some manufacturers may recommend removing the planks entirely, so always check their specific instructions first.
- Stack with Spacers: Lay the boxes flat on the floor, but not directly on concrete. Use small wood scraps or “stickers” to elevate the first layer of boxes. Then, stack the rest of the boxes in a crisscross or “log cabin” style, leaving air gaps between each layer.
- Spread Them Out: If you have enough space, spread the boxes around the room instead of putting them all in one big stack. This helps them adjust to the room’s conditions more evenly.
Step 4: Wait Patiently
Now comes the hardest part for any eager DIYer: waiting! The standard recommendation for engineered hardwood is to acclimate it for a minimum of 48 to 72 hours.
However, this can change based on several factors:
- Your Climate: If you live in a very humid or very dry area, you might need to extend the acclimation time.
- The Season: Wood delivered during a humid summer may need more time to release moisture than wood delivered in a dry winter.
- The Product: Always, always read the manufacturer’s installation guide. They will provide the most accurate acclimation time for their specific product. Failing to follow their instructions can void the warranty.
A helpful tool to have is a moisture meter. You can use it to test the moisture content of your wood planks and your subfloor. The goal is for them to be within a certain range of each other (usually within 2-4% for wood subfloors). When the moisture level of the planks stops changing, you know they are fully acclimated.
Common Acclimation Mistakes to Avoid
Even with the best intentions, it’s easy to make a small mistake that can derail the process. Here are some common pitfalls and how to steer clear of them.
| Common Mistake | Why It’s a Problem | How to Do It Right |
|---|---|---|
| Acclimating in the Garage or Basement | These spaces have different humidity and temperature levels than your main living area. | Always acclimate the flooring in the exact room where it will be installed. |
| Leaving the Boxes Sealed | Air cannot circulate around the planks, so they won’t adjust to the room’s conditions. | Open the ends of the boxes or remove the plastic wrapping to allow for proper airflow. |
| Not Running the HVAC | The wood will acclimate to an environment that isn’t the “normal” living condition. | Run your heat or AC for at least 5 days prior to and during acclimation to stabilize the room. |
| Rushing the Process | 48 hours might not be enough in certain climates or conditions. The wood may not be stable yet. | Always wait at least the manufacturer’s minimum recommended time (usually 72 hours) and consider extending it in extreme climates. |
| Stacking Boxes Directly on the Floor | This restricts airflow to the bottom boxes and can transfer moisture if on a concrete slab. | Use spacers to elevate the stacks and arrange them in a crisscross pattern for maximum airflow. |
Frequently Asked Questions (FAQ)
1. Can you acclimate engineered hardwood for too long?
Generally, no. You can’t really over-acclimate flooring. Once the wood’s moisture content has stabilized with the surrounding environment, it won’t change any further. Leaving it for an extra day or two won’t cause any harm. The real danger lies in not acclimating it for long enough.
2. Do I need to acclimate the flooring if my house is brand new?
Yes, absolutely! New construction sites can have very high humidity levels due to drying concrete, paint, and drywall compound. It is even more critical to acclimate flooring in a new home to allow the structure’s moisture levels to normalize first.
3. What is the ideal humidity level for acclimating and living with hardwood floors?
The ideal indoor relative humidity range for hardwood floors is between 30% and 50%. Drastic swings outside of this range can cause the wood to move, even after it’s installed. It’s a good idea to use a humidifier in the winter and a dehumidifier in the summer to maintain this stable environment.
4. Does the type of subfloor affect acclimation?
Yes, it does. You need to ensure your subfloor is dry. If you have a concrete subfloor, you must perform a moisture test to make sure it’s ready. A damp subfloor can ruin your new flooring, no matter how well you acclimated it. Always follow recommended guidelines for moisture barriers over concrete.
5. Do I need to open every single box?
For best results, yes. You should at least open the ends of every box. The goal is to get air to all the planks. If you have them stacked in a way that allows air to flow through the open ends and between the boxes, that is usually sufficient. Check the manufacturer’s guide for their specific recommendation.
6. What if the flooring gets delivered on a rainy day?
If the boxes get wet during delivery, you need to be extra careful. Bring them inside immediately and open them to allow the planks to dry. Point a fan at the stacks to help with air circulation. You will likely need to extend the acclimation period and use a moisture meter to confirm when they are ready for installation.
7. Does click-lock or floating engineered flooring still need to acclimate?
Yes. The installation method doesn’t change the nature of the wood. Whether you are gluing, nailing, or floating your floor, the material itself still needs to adjust to the home’s environment to prevent gapping, buckling, and other issues after installation.
Conclusion: A Little Patience for a Lifetime of Beauty
So, does engineered hardwood flooring need to acclimate? The answer is a resounding YES. It’s a simple, non-negotiable step that protects your investment and ensures you get the beautiful, durable floor you dreamed of. It’s not about adding extra work; it’s about doing the job right so you can enjoy the results for years to come.
By taking 48 to 72 hours to let your new flooring get comfortable in its new home, you are preventing the “fatal” flaws of buckling, gapping, and cupping. You’re also protecting your warranty and, most importantly, giving yourself peace of mind.
Home improvement is all about building something you can be proud of. Taking the time to acclimate your flooring is a mark of a smart, patient DIYer who values quality and longevity. You’ve got this! Just follow the steps, give it time, and you’ll be ready to install a floor that looks incredible and stands the test of time.