Feather Finish vs Self Leveling: Best Choice
For a smooth, flawless finish on your woodworking projects, both feather finish and self-leveling compounds can be excellent choices. The best option, feather finish vs self leveling, depends on your specific project needs: feather finish is ideal for filling small imperfections and providing a smooth surface for paint, while self-leveling compounds excel at creating a perfectly flat, uniform surface over larger areas.
Hey there, fellow woodworkers! Ever find yourself staring at a piece of wood, ready to apply that beautiful finish, only to notice a few tiny dents, scratches, or imperfections? It’s a common sight, and it can be frustrating when you want that perfectly smooth surface. Don’t worry, we’ve all been there! The good news is, there are fantastic products designed to help us achieve that professional, glass-like finish. Today, we’re going to dive into two popular options:
feather finish and self-leveling compounds. We’ll break down what they are, how they work, and most importantly, help you decide which one is the best choice for your next project. Get ready to transform your woodworking surfaces!
Understanding Feather Finish
Feather finish, often referred to as a wood filler or grain filler, is a fantastic product designed to fill small imperfections in wood. Think of it as a super-fine putty that dries hard and can be sanded down to blend seamlessly with the surrounding wood. Its name comes from its ability to be applied in very thin layers, or “feathered” out to nothing at the edges, making it perfect for those minor surface issues.
What is Feather Finish?
Feather finish is typically a water-based or solvent-based paste that’s easy to work with. It’s formulated to be non-shrinking and to adhere well to wood. The primary goal of feather finish is to fill pores, small dents, gouges, and scratches, creating a smooth, uniform surface that’s ready for primer, paint, or stain. It’s particularly useful for open-grained woods like oak or mahogany, where the natural pores can affect the smoothness of the final finish.
How Does Feather Finish Work?
When you apply feather finish, you’re essentially filling in the low spots and imperfections on the wood’s surface. You’ll typically apply it with a putty knife or a flexible spreader, pressing it into the grain or damage. The key is to apply it thinly and evenly, ensuring it fills the void without leaving excess on the surface. Once it dries, it becomes hard enough to sand. The sanding process is crucial for achieving that smooth, integrated finish. You’ll sand until the filled area is flush with the surrounding wood, effectively making the imperfection disappear.
When to Use Feather Finish
Feather finish shines in situations where you need to:
- Fill small dents, scratches, and nail holes.
- Fill the pores of open-grained woods for a smoother finish, especially before painting.
- Repair minor damage on furniture or trim.
- Create a smooth surface for a high-gloss paint finish.
- Work on smaller projects or intricate details where precision is key.
Pros and Cons of Feather Finish
Like any woodworking product, feather finish has its advantages and disadvantages:
Pros:
- Excellent for filling fine scratches and minor imperfections.
- Great for filling wood pores on open-grained woods.
- Easy to sand to a smooth finish.
- Available in various colors, though often tinted to match wood.
- Can be applied in thin layers, reducing the risk of thick build-up.
Cons:
- May require multiple applications for deeper imperfections.
- Not ideal for filling large voids or significant damage.
- Can be labor-intensive for very large areas.
- May not be suitable for applications requiring a perfectly flat, level surface over a large expanse without significant sanding.
Understanding Self-Leveling Compounds
Self-leveling compounds are a bit different. These are often cementitious or epoxy-based products designed to flow and spread out evenly on their own, creating a smooth, flat surface. They are commonly used in flooring applications but have found their way into woodworking for specific purposes where a perfectly level and smooth surface is paramount.
What is a Self-Leveling Compound?
A self-leveling compound is a material that, when mixed with water or a specific activator, becomes fluid enough to spread out and seek its own level, creating a flat and smooth surface without much troweling or manipulation. They are engineered to reduce air bubbles and create a seamless finish. In woodworking, these are often epoxy-based or specialized polymer compounds that offer superior adhesion and durability.
How Does a Self-Leveling Compound Work?
The magic of a self-leveling compound lies in its rheology – how it flows. When mixed correctly, it has a low viscosity, allowing gravity to do most of the work. You pour or spread it onto the surface, and it naturally flows into low spots and spreads out to create a uniform thickness. The key is to prepare the surface meticulously, ensuring it’s clean, stable, and often primed, so the compound adheres properly and flows evenly. For woodworking, they might be used to level out an uneven workbench top, create a smooth base for a resin pour, or even as a decorative concrete-like finish on certain projects.
When to Use Self-Leveling Compounds
Self-leveling compounds are your go-to for:
- Creating a perfectly flat and level surface over a large area.
- Filling significant dips or unevenness in a workbench or table.
- Providing a smooth, durable base for other finishes like epoxy resin or specialized coatings.
- Achieving a seamless, monolithic surface.
- When you need a material that self-smooths, reducing sanding time on larger areas.
Pros and Cons of Self-Leveling Compounds
Let’s look at the good and the not-so-good:
Pros:
- Creates an exceptionally flat and level surface automatically.
- Ideal for covering large areas with imperfections.
- Can create a very durable and smooth finish.
- Reduces the need for extensive troweling or manual smoothing.
- Excellent for creating a uniform base for other finishes.
Cons:
- Can be more expensive than feather finish.
- Requires precise mixing ratios for proper performance.
- May require specific primers for optimal adhesion.
- Not suitable for filling very small, isolated imperfections like tiny scratches.
- Can be messy and require careful containment if not used on a contained surface.
- Drying/curing times can be longer than feather finish.
Feather Finish vs Self Leveling: The Key Differences
To really nail down the best choice for your project, let’s put feather finish and self-leveling compounds side-by-side and highlight their core differences. This comparison will help you see where each product truly excels.
| Feature | Feather Finish | Self-Leveling Compound |
|---|---|---|
| Primary Use | Filling small imperfections, pores, scratches. | Creating a flat, level surface over larger areas. |
| Application Method | Applied with putty knife/spreader in thin layers. | Poured or spread; flows to level itself. |
| Leveling Capability | Minimal; requires careful application and sanding. | High; designed to create a flat surface automatically. |
| Best For | Detailed work, filling small defects, preparing for paint. | Uneven surfaces, workbenches, creating a base for resin. |
| Surface Coverage | Best for localized repairs. | Ideal for entire surfaces. |
| Finish Result | Smooth, integrated surface after sanding. | Uniformly flat and smooth, often monolithic. |
| Complexity | Relatively simple to apply and sand. | Requires precise mixing and surface preparation. |
| Drying Time | Generally faster drying. | Can have longer curing times. |
| Cost | Typically more affordable. | Can be more expensive, especially epoxy-based. |
Choosing the Right Product for Your Project
Now that we understand what each product does, let’s talk about how to pick the right one for your specific woodworking needs. It really boils down to the problem you’re trying to solve and the finish you want to achieve.
When Feather Finish is Your Best Bet
If your project involves:
- Fine Woodworking Projects: Restoring an antique chair, building a detailed cabinet, or crafting delicate trim? Feather finish is perfect for filling the tiny nicks and dings that happen during woodworking, ensuring a flawless surface for paint or stain.
- Open-Grained Woods: Working with oak, ash, or walnut and want a super-smooth finish? Feather finish will fill those deep pores, preventing the grain from showing through your paint or clear coat. This is crucial for achieving that modern, sleek look.
- Surface Imperfections: You’ve got a few small scratches, nail holes, or minor dents from handling the wood. Feather finish is designed precisely for these kinds of localized repairs. It’s easy to apply just where you need it.
- Preparing for Paint: If your goal is a painted finish, feather finish is your best friend. It creates a smooth, consistent surface that primer and paint can adhere to beautifully, preventing the imperfections from telegraphing through the final coat.
Think of feather finish as your precision tool for fixing small issues and enhancing the surface texture for a refined look.
When Self-Leveling Compound is Your Best Bet
Consider a self-leveling compound if your project involves:
- Workbenches and Shop Furniture: Need a perfectly flat surface on your workbench or assembly table? A self-leveling compound can transform a slightly warped or uneven surface into a precision work area. Check out resources from organizations like Woodworkers Journal for ideas on shop furniture surfaces.
- Large Surface Restoration: You have a large table, countertop, or even a concrete floor in your shop that needs to be made perfectly flat and smooth. Self-leveling compounds are designed for this scale.
- Base for Resin or Epoxy: If you plan to pour a resin or epoxy river table or countertop, the underlying surface needs to be perfectly level and smooth. A self-leveling compound provides an ideal foundation.
- Creating a Monolithic Surface: You want a seamless, continuous surface that looks and feels like a single piece of material, without any visible joints or variations.
Self-leveling compounds are your heavy-duty solution for creating large-scale flatness and a uniform, durable finish.
Step-by-Step Application Guide
To help you get started, here’s a general guide for applying both feather finish and self-leveling compounds. Remember to always read and follow the specific manufacturer’s instructions for the products you choose!
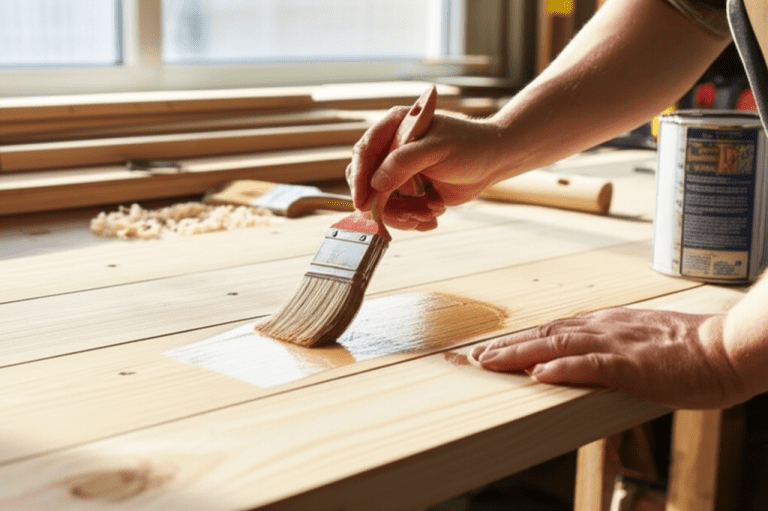
Applying Feather Finish
- Prepare the Surface: Ensure the wood is clean, dry, and free from dust or debris. Sand any rough edges or areas where you’ll be applying the filler.
- Mix (if necessary): Some feather finishes come ready-to-use, while others may require a small amount of water to achieve the right consistency. Follow the product label.
- Apply the Filler: Using a putty knife or spreader, scoop a small amount of feather finish and press it firmly into the imperfection (dent, scratch, or wood pore). Work it into the area, ensuring it fills the void completely.
- Feather the Edges: With a clean edge of your spreader, scrape away any excess material, feathering the edges of the filled area so it blends smoothly with the surrounding wood. The goal is to leave as little excess as possible.
- Allow to Dry: Let the feather finish dry completely according to the manufacturer’s instructions. Drying times can vary based on humidity and application thickness.
- Sand Smooth: Once dry, use sandpaper (starting with a medium grit like 120-150 and moving to finer grits like 220) to sand the filled area until it is flush with the surrounding wood surface. For best results, sand in the direction of the wood grain.
- Clean and Repeat (if needed): Wipe away all dust with a tack cloth. If the imperfection is still visible or if the filler has shrunk slightly, apply another thin coat and repeat the drying and sanding process.
- Prime and Finish: Once you’re satisfied with the smooth, filled surface, you can prime and apply your chosen finish (paint, stain, varnish, etc.).
Applying Self-Leveling Compound
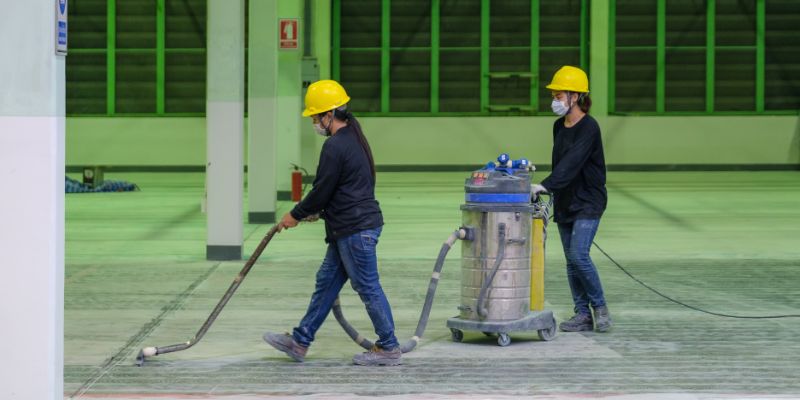
- Prepare the Surface: This is critical for self-leveling compounds. The surface must be clean, dry, structurally sound, and free of any loose particles. Remove any old finishes, wax, or grease. For porous surfaces like wood, a specialized primer is often required to prevent the compound from soaking in too quickly and to ensure proper adhesion. Refer to your product’s technical data sheet for primer recommendations.
- Contain the Area: If you’re working on a surface that isn’t naturally contained (like a workbench), you’ll need to create dams or barriers around the edges using tape or wood strips to prevent the compound from flowing off.
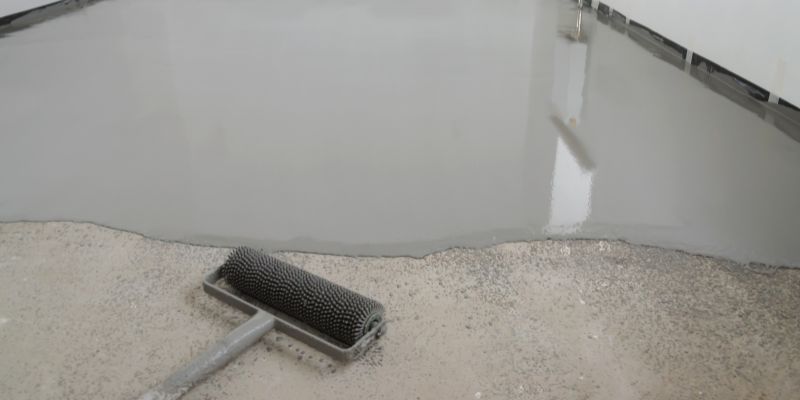
- Mix the Compound: Carefully measure the required amount of compound and water (or activator) according to the manufacturer’s instructions. Mixing ratios are crucial for the self-leveling properties and strength of the compound. Use a mechanical mixer (like a drill with a mixing paddle) for best results, mixing until a smooth, lump-free consistency is achieved. Avoid overmixing, which can introduce air bubbles.
- Pour and Spread: Immediately after mixing, pour the compound onto the prepared surface, starting in the lowest area. Use a squeegee or a gauge rake designed for self-leveling compounds to help guide the material and ensure an even thickness. Work quickly as the product has a limited working time.
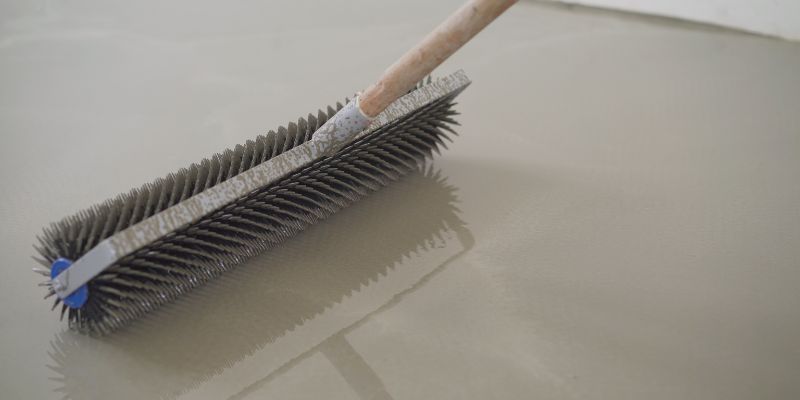
- De-Aerate (Optional but Recommended): Use a spiked roller or a smoothing tool to gently roll over the surface. This helps to release any trapped air bubbles and further enhance the smooth finish.
- Allow to Cure: Let the self-leveling compound cure completely according to the manufacturer’s instructions. This can take several hours to a few days, depending on the product and environmental conditions. Proper curing is essential for strength and durability.
- Finish: Once cured, the surface is typically ready for its final finish, whether that’s a clear coat, paint, or another decorative treatment. Light sanding might be needed for minor imperfections, but the goal is to minimize this.
Frequently Asked Questions (FAQ)
Here are some common questions beginner woodworkers have about feather finish and self-leveling compounds.
Q1: Can I use feather finish on very deep gouges?
A1: Feather finish is best for shallow imperfections. For deep gouges, you might need to apply feather finish in multiple thin layers, allowing each layer to dry before applying the next. For very large or deep voids, a more robust wood filler or even epoxy might be a better choice. Always follow the product’s recommendations for maximum layer thickness.
Q2: Will self-leveling compound work on plywood?
A2: Yes, self-leveling compounds can work on plywood, but proper preparation is key. You’ll likely need to seal the plywood first with a compatible primer to prevent the self-leveling compound from soaking into the wood unevenly, which could affect its flow and adhesion. Check the specific primer recommendations from the self-leveling compound manufacturer.
Q3: Can I stain over feather finish?
A3: This depends on the type of feather finish. Some feather finishes are designed to accept stain, while others are not. If you plan to stain, look for feather finishes specifically labeled as stainable. Often, if you’re painting, it’s not an issue. For clear finishes, it’s best to test on a scrap piece first.
Q4: How thick can I apply self-leveling compound?
A4: The maximum thickness varies significantly by product. Some are designed for very thin applications (as little as 1/8 inch), while others can be poured up to 1-2 inches thick. Always check the product’s technical data sheet for its specified thickness range. Applying too thick can lead to cracking or improper curing.
Q5: What’s the difference between feather finish and regular wood putty?
A5: Feather finish is generally a finer-grained filler that is easier to sand and feather out to an invisible line, making it ideal for fine finishes and painting. Regular wood putty can sometimes be coarser, shrink more, or be harder to sand smoothly, making it more suited for basic filling tasks where a perfect surface finish isn’t the top priority.
Q6: Do I need to prime before using feather finish?
A6: Generally, no. Feather finish is applied directly to the wood. However, if you are filling pores on an open-grained wood and planning to stain, some woodworkers may apply a grain filler first, then sand, then apply feather finish to any remaining imperfections before staining. For painting, feather finish is typically applied directly to the wood after any necessary sanding.
Q7: Can I use a self-leveling compound on vertical surfaces?
A7: Most self-leveling compounds are designed for horizontal surfaces. They rely on gravity to spread. Applying them to vertical surfaces would be very difficult and likely result in a mess. There are specialized “self-leveling” or trowel-applied mortars for vertical applications, but they behave differently and are not typically what’s meant by a woodworking self-leveling compound.
Conclusion
So, there you have it! Whether you’re smoothing out tiny scratches with feather finish or creating a perfectly flat workbench top with a self-leveling compound, you now have a clearer understanding of which product is the right tool for your job. Remember, the goal in woodworking is to achieve the best possible result for your project, and knowing the strengths of each material is key. Feather finish is your go-to for detailed work and surface perfection before painting, while self-leveling compounds are your champions for large-scale flatness and durability. Keep practicing, keep experimenting, and most importantly, keep building! You’ve got this, and your projects will thank you for it.