Finger Joint vs Dovetail: Proven Joinery Essentials
Choose between finger joints and dovetails for strong, beautiful wood connections. Finger joints are quick, strong, and ideal for boxes or carcasses, easily made with a table saw. Dovetails are exceptionally strong, decorative, and perfect for drawer fronts or fine furniture, often requiring hand tools or specialized jigs for a classic look. Both are essential skills for any woodworker.
Hey everyone, Ashraf here! Are you staring at two pieces of wood, wondering how to connect them so they look good and hold strong? You’re not alone. Wood joinery can seem like a secret handshake for experienced woodworkers, especially when you hear terms like “finger joint” and “dovetail.” But don’t worry! These aren’t some magical incantations; they’re just smart ways to join wood. Understanding the difference between finger joints and dovetails is a game-changer for your DIY projects, whether you’re building a simple shelf or a fancy drawer. We’ll break down exactly what they are, how they’re made, and when to use each one. Get ready to build with confidence!
What is Wood Joinery?
Before we dive into finger joints and dovetails, let’s quickly touch on what joinery means in woodworking. Simply put, joinery is the art and science of connecting pieces of wood together. It’s about creating strong, stable, and often beautiful connections that can withstand the forces applied to the finished piece. Think of it as the skeleton of your woodworking projects. Good joinery ensures your furniture doesn’t wobble, your drawers slide smoothly, and your boxes stay together for years to come.
Finger Joints: The Strong, Simple Connector
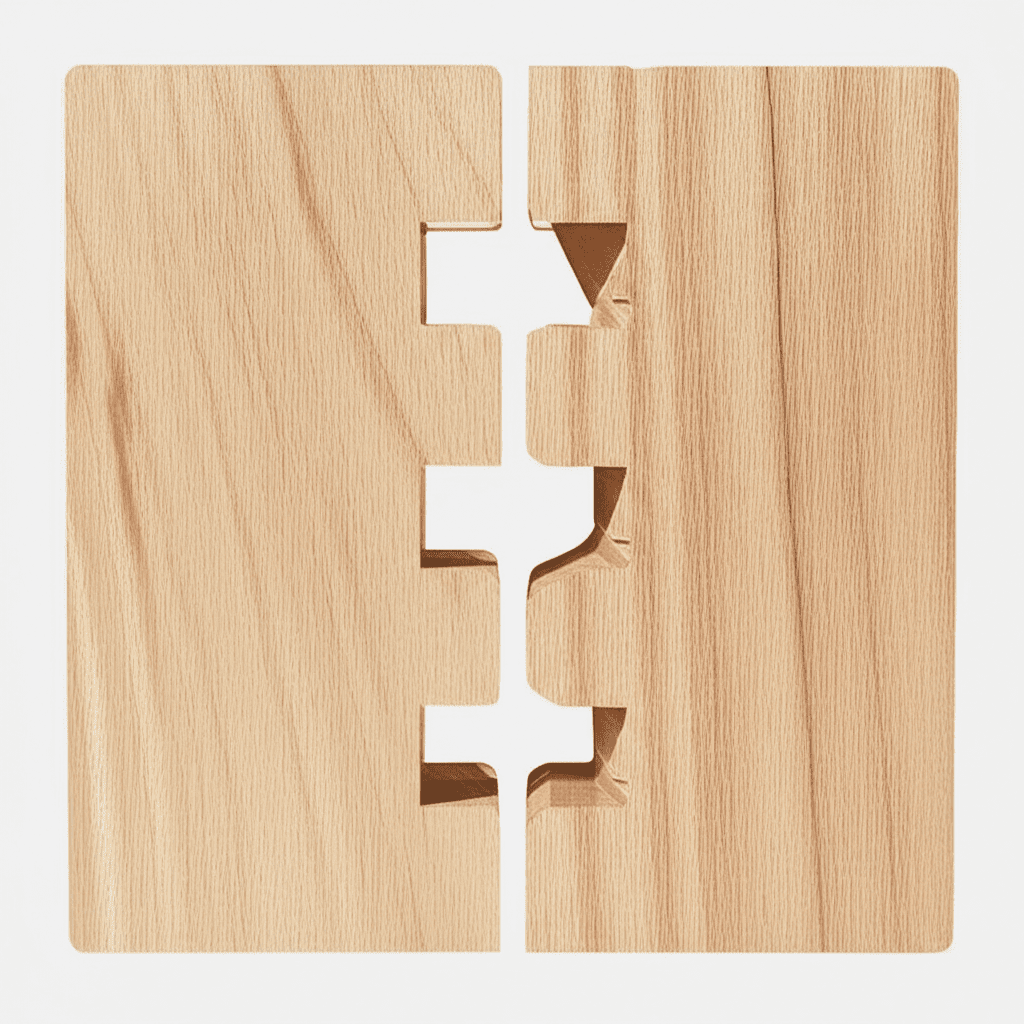
Finger joints, also known as box joints, are a series of interlocking rectangular “fingers” cut into the ends of two pieces of wood. When brought together, these fingers mesh perfectly, creating a large surface area for glue. This makes them incredibly strong, especially for resisting racking or twisting forces.
Why Use Finger Joints?
Strength: The interlocking design provides a lot of glue surface, making them very robust.
Ease of Making: With a table saw and a simple jig, finger joints can be cut relatively quickly and accurately.
Aesthetics: While functional, they also offer a distinctive, geometric look that many woodworkers appreciate.
Versatility: Excellent for boxes, carcasses of cabinets, drawers, and even structural components.
How Are Finger Joints Made?
The most common and beginner-friendly way to make finger joints is using a table saw. You’ll need a few things:
Table Saw: The heart of the operation.
Dado Stack or Thin Kerf Blade: A dado stack makes wider, square-edged fingers, while a standard thin kerf blade can be used for narrower, more refined joints.
Crosscut Sled or Tenoning Jig: This is crucial for safety and accuracy, holding the workpiece securely against the fence.
Finger Joint Jig: This can be a homemade jig or a purchased one that helps space your cuts perfectly.
Here’s a simplified overview of the process using a table saw and a jig:
1. Set Up Your Jig: Mount your finger joint jig to your table saw or set up your crosscut sled with a stop block. The key is to ensure consistent spacing and depth for each cut.
2. Determine Finger Width: Decide on the width of your fingers and the gap between them. This will often be determined by the width of your dado blade or the width of your saw blade plus a slight offset.
3. Make the First Cut: Place your workpiece against the fence and make the first cut.
4. Advance the Jig/Workpiece: Move the jig or workpiece to make the next cut, ensuring the blade or jig mechanism engages the previous cut perfectly. This creates the alternating finger and gap pattern.
5. Repeat: Continue this process across the end of your wood until you have a series of perfectly meshing fingers.
6. Test Fit: Before applying glue, test fit the two pieces. They should slide together snugly. You might need to trim a bit if it’s too tight, but avoid forcing it.
Pro Tip: For consistent results, a dedicated finger joint jig is highly recommended. Many can be found online or even built yourself with basic lumber and hardware.
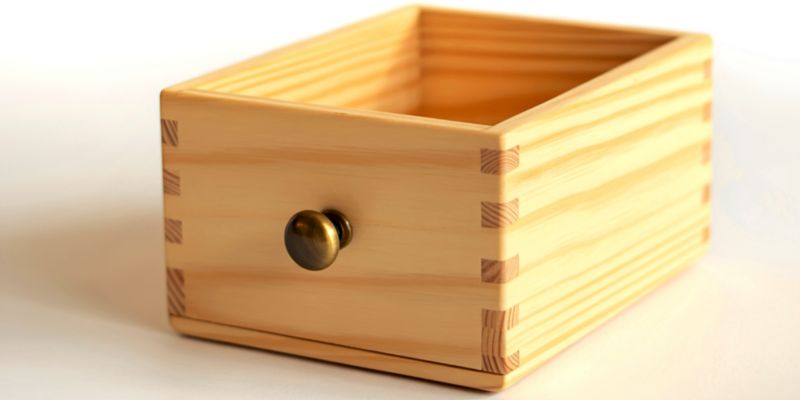
Dovetail Joints: The Classic, Strong Connection
Dovetail joints are arguably one of the most beautiful and strongest woodworking joints. They are characterized by their interlocking “pins” and “tails” that resemble the shape of a dove’s tail. This angled, wedged shape makes them incredibly resistant to being pulled apart, making them ideal for applications where strength and elegance are paramount.
Why Use Dovetail Joints?
Exceptional Strength: The angled tails wedge into the pins, creating a mechanical lock that is extremely difficult to break. They are renowned for their resistance to being pulled apart.
Aesthetic Appeal: Dovetails are visually stunning and are a hallmark of fine furniture. They signal quality craftsmanship.
Durability: They hold up exceptionally well over time, making them perfect for high-wear items like drawer fronts.
How Are Dovetail Joints Made?
Dovetails have a reputation for being difficult, and traditional hand-cut dovetails do require significant practice. However, there are several methods, making them accessible even to beginners.
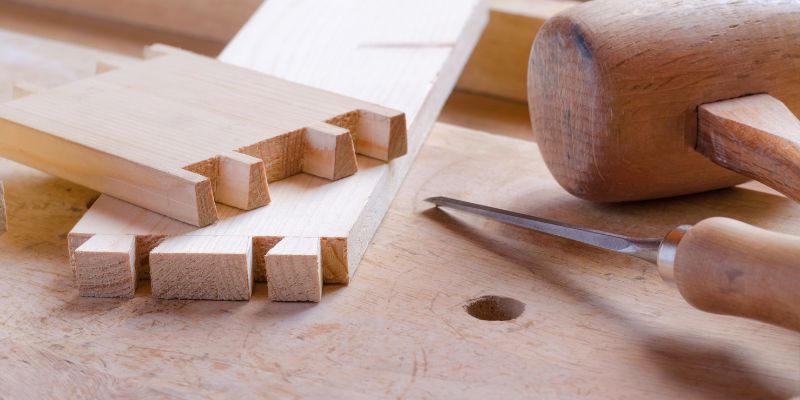
Hand Cutting: This is the traditional method using hand saws, chisels, and marking gauges. It offers the most control and the most beautiful result but has the steepest learning curve.
Marking: Carefully mark out the tails on one piece and the pins on the other. Precision is key here.
Sawing: Use a fine-toothed dovetail saw to cut along your marked lines.
Chiseling: Remove the waste wood between the tails and pins using sharp chisels.
Fitting: Carefully pare away waste until the two pieces fit together perfectly.
Router Jigs: This is the most popular method for beginners and intermediate woodworkers. Router dovetail jigs come in various forms, but most use templates to guide your router.
Jig Setup: You’ll typically clamp your wood into the jig, which has a template for the tails and pins.
Router and Bit: A router with a specific router bit (often a straight bit and a matching guide bushing or a specialized dovetail bit) is used.
Cutting: The router, guided by the jig’s template, cuts the interlocking shapes. You’ll usually cut one piece (e.g., tails) and then switch the wood orientation or template to cut the mating pins.
Bandsaw/Table Saw (Limited): While not true dovetails, some jigs for bandsaws or table saws can create a similar interlocking effect, though they often lack the mechanical strength and aesthetic of true dovetails. These are often simpler to execute but are less traditional.
External Resource: For a deeper dive into the nuances of hand-cut dovetails, the Woodworkers Journal offers excellent, detailed guides.
Finger Joint vs Dovetail: A Side-by-Side Comparison
To help you decide which joint is right for your project, let’s look at them side-by-side.
| Feature | Finger Joint | Dovetail Joint |
|---|---|---|
| Appearance | Series of interlocking rectangular “fingers” or slots. Functional and geometric. | Interlocking “pins” and “tails” shaped like a dove’s tail. Decorative and classic. |
| Strength | Very strong, especially against racking and twisting due to large glue surface. | Extremely strong, particularly against pull-apart forces due to the mechanical wedge lock. |
| Ease of Making (Beginner) | Relatively easy with a table saw and jig. Can be done quickly once set up. | Can be challenging by hand. Easier with router jigs, but still requires precision. |
| Ideal Use Cases | Boxes, cabinet carcasses, drawers, crates, jigs, tool handles. | Drawer fronts and backs, fine furniture construction, keepsake boxes, sliding lid boxes. |
| Tools Required | Table saw, dado stack (optional), crosscut sled or tenoning jig, finger joint jig. | Hand saws, chisels, marking tools (for hand-cut); Router, router bits, dovetail jig (for router-cut). |
| Time Investment | Moderate setup time, quick cutting once jig is ready. | High for hand-cutting. Moderate for router jig setup and cutting. |
When to Choose Which Joint
Choosing the right joint depends on your project, your skill level, and the desired outcome.
Choose Finger Joints When:
You need a strong, straightforward joint for box construction: Think utility boxes, storage crates, or the main body of a cabinet. The strength and ease of cutting make them perfect for these applications.
Speed and efficiency are important: If you have a batch of identical boxes to make, finger joints can be cut much faster than hand-cut dovetails.
You have a table saw and are comfortable using jigs: This is the most accessible way to make robust joints for beginners.
The joint will be hidden or is primarily functional: While visually appealing, finger joints don’t have the same heirloom quality as dovetails.
Choose Dovetail Joints When:
You’re building drawers for fine furniture: The strength and beauty of dovetails are unmatched for drawer construction, especially for the front and back pieces.
The joint will be visible and you want to showcase craftsmanship: Dovetails are a classic sign of quality woodworking.
You need maximum resistance to pull-apart forces: For example, in the corners of a chest or in high-stress drawer applications.
You have the time and patience to learn or use specialized tools: Whether it’s hand tools or a router jig, mastering dovetails is a rewarding step in your woodworking journey.
Understanding wood movement is also important. Wood expands and contracts with changes in humidity. Well-made joints, whether finger or dovetail, can accommodate some of this movement, but it’s a factor to consider in larger projects. The United States Department of Agriculture’s Forest Products Laboratory provides excellent resources on wood properties and behavior, which can be invaluable for understanding these dynamics. You can explore their publications on Forest Products Journal for detailed scientific data.
Making Your First Joints: Tips for Beginners
Starting with new joinery techniques can feel daunting, but with a little preparation and patience, you can achieve great results.
Tips for Finger Joints:
Practice on scrap wood: Before cutting your project pieces, run a few test cuts to ensure your jig and setup are correct.
Use a sharp blade: A dull blade will lead to tear-out and imprecise cuts, which is the enemy of a good joint.
Ensure your jig is secure: A wobbly jig will result in uneven fingers.
Don’t force the fit: If the pieces don’t slide together easily, check for sawdust in the slots or a slight miscalculation. A gentle tap with a rubber mallet is okay, but forcing it can break the fingers.
Glue application: Apply a thin, even layer of wood glue to all mating surfaces of the fingers.
Tips for Dovetail Joints (Router Jig Method):
Read your jig’s instructions carefully: Each jig is slightly different. Understand how to set it up and use it correctly.
Use the right router bit and bearing: Ensure you have the correct bit for your jig and that the bearing is clean and spins freely.
Clamp securely: Your workpiece needs to be held firmly in the jig to prevent any movement during routing.
Make multiple passes: For deep cuts, it’s better to take several shallower passes rather than one deep one. This is easier on your router, the bit, and your workpiece, and results in cleaner cuts.
* Clean up with a chisel: Even with a router, you might need to use a sharp chisel to clean up the corners where the pins and tails meet.
Frequently Asked Questions About Finger Joints and Dovetails
- What is the strongest wood joint?
- Both finger joints and dovetails are considered very strong joints. Dovetails are generally considered stronger against direct pull-apart forces due to their mechanical lock, while finger joints excel at resisting racking or twisting forces.
- Can a beginner cut dovetails?
- Yes! While hand-cutting dovetails takes practice, using a router dovetail jig makes them much more accessible for beginners. With patience and the right tools, you can achieve beautiful results.
- Which joint is easier to make: finger joint or dovetail?
- Finger joints are generally considered easier and quicker to make for beginners, especially with a table saw and a jig. Dovetails, particularly hand-cut ones, require more skill and precision.
- What is the difference in appearance between finger joints and dovetails?
- Finger joints have a series of straight, rectangular interlocking “fingers.” Dovetails have angled, trapezoidal shapes called “pins” and “tails” that interlock.
- When should I use finger joints instead of dovetails?
- Use finger joints for projects where speed and sheer glue surface strength are key, like cabinet boxes, utility drawers, or crates. They are also a good choice when the joint won’t be a prominent visual feature.
- When should I use dovetails instead of finger joints?
- Opt for dovetails when you need maximum strength against pull-apart forces and want a visually striking, traditional look. They are ideal for high-quality drawer construction and fine furniture where the joinery is meant to be seen and admired.
- Do I need a special saw for finger joints?
- While you can use a standard thin-kerf blade, a dado stack on a table saw makes cutting wider, square-edged finger joints much easier and more efficient. However, a precisely set-up standard blade with a good jig can also work.
Conclusion
So there you have it – a clear look at finger joints and dovetails! Both are proven, essential woodworking joints that offer incredible strength and aesthetic value when used appropriately. Finger joints provide robust, easily-made connections perfect for utility and speed, making them a favorite for boxes and carcasses. Dovetails, on the other hand, offer unparalleled strength against pull-apart forces and a classic, beautiful appearance, making them the gold standard for fine furniture and drawers.
Don’t be intimidated by these techniques. Start with scrap wood, be patient, and you’ll find that with practice, you can master both. Whether you choose the efficient strength of finger joints or the timeless elegance of dovetails, you’re adding a significant skill to your woodworking toolkit. Happy building!