Genius Methods To Remove Crayon Effortlessly
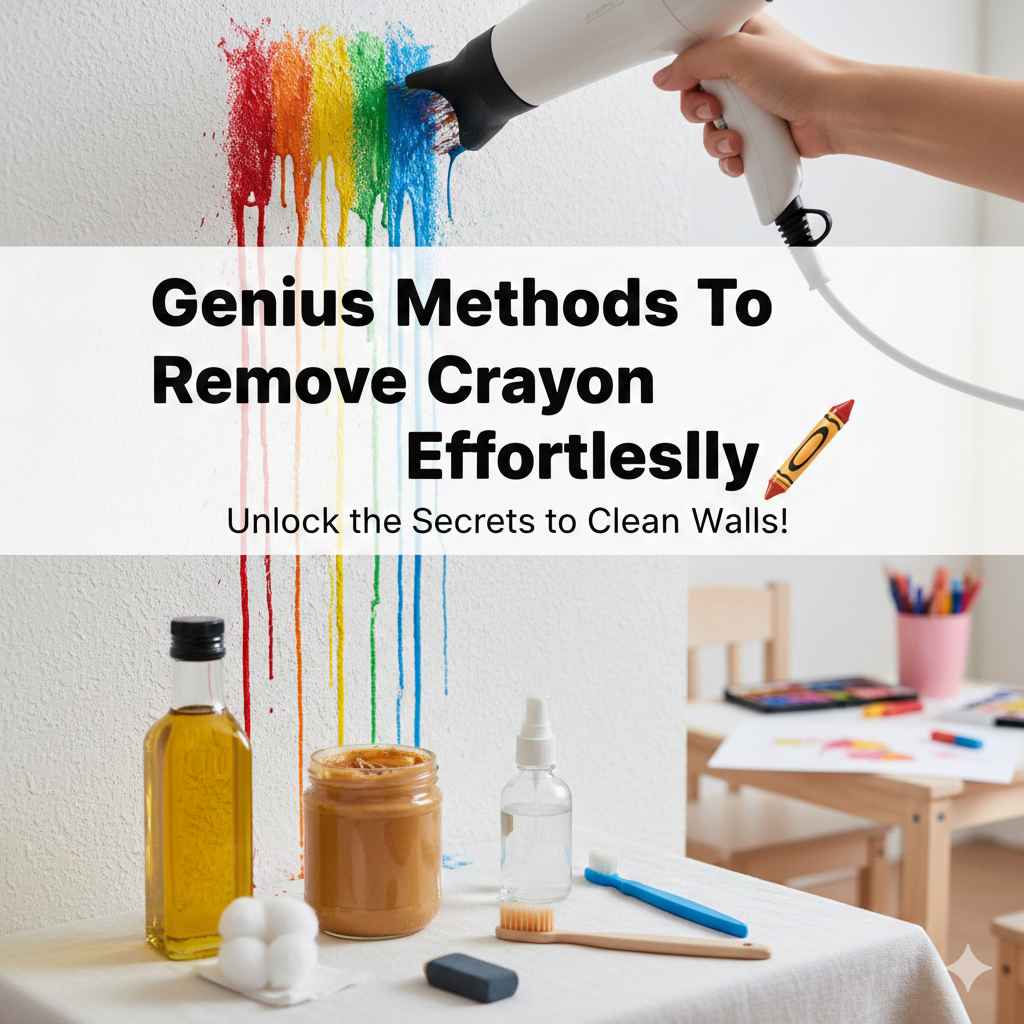
Bolded Quick Summary: To effortlessly remove crayon from walls, start with gentle methods like using a mild dish soap solution or baking soda paste. For tougher marks, a hairdryer to melt the wax, followed by gentle wiping, often works best. Always test your chosen method in a small, hidden spot first.
Welcome! Seeing colorful scribbles on your freshly painted walls can certainly make you sigh. Those waxy marks from a busy toddler or a playful afternoon look permanent, but I promise you, they are not. Dealing with crayon marks is a common home issue, much like fixing a leaky faucet or sanding down a rough edge.
The good news is that crayon wax is relatively easy to lift from most surfaces, especially common household paints, without damaging your finish. You don’t need harsh chemicals or expensive specialty cleaners. We’ll walk through safe, reliable, step-by-step methods using things you likely already have in your kitchen or cleaning cabinet.
Ready to reclaim your walls? Let’s dive into the simplest, most effective ways to erase those waxy masterpieces.
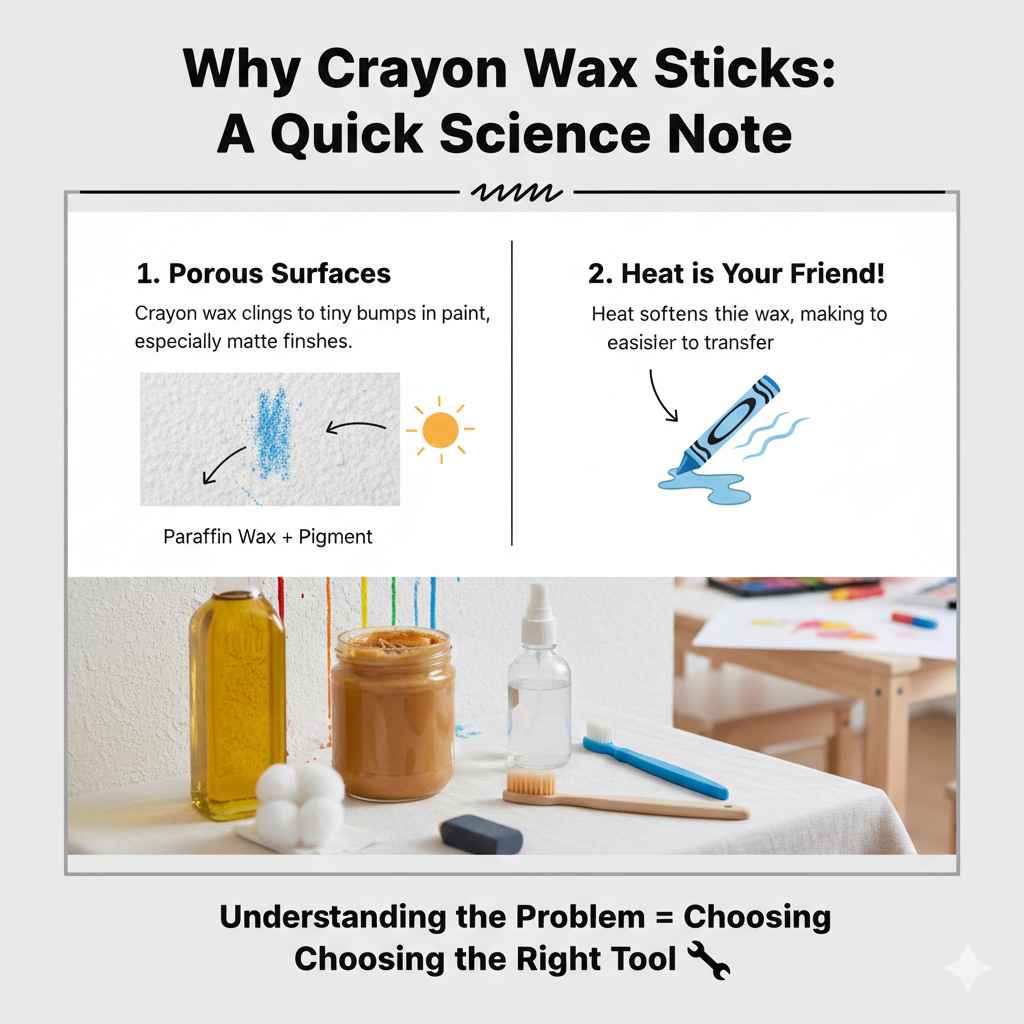
Why Crayon Wax Sticks: A Quick Science Note
Before we clean, understanding what we are fighting helps us choose the right tool. Crayon is mostly made of paraffin wax and pigment (color). Wax loves to stick to slightly porous or textured surfaces, which is why it clings so well to wall paint, especially flat or matte finishes. Because it’s wax, heat is your friend, as it temporarily softens the medium, making it transfer onto your cleaning cloth.
The Golden Rule: Test Before You Tackle
Before you apply any cleaning agent—whether it’s soap, vinegar, or even just water—to the main crayon mark, grab a cotton swab or the corner of a clean cloth. Find a small, inconspicuous spot on the wall, like behind a large piece of furniture or near the baseboard. Apply your cleaner there first. This ensures that your chosen method won’t strip the paint color or ruin the sheen of your finish. It’s the DIY golden rule: test first!
Method 1: The Gentle Start – Soap and Water
For fresh or light marks on walls with semi-gloss or glossy paint, start here. This is the least invasive method.
Tools You Will Need:
- Mild dish soap (one without heavy degreasers or bleach).
- Warm water.
- Two soft, clean microfiber cloths.
Step-by-Step Cleaning Process:
- Prepare the Solution: Mix a few drops of dish soap into a bowl of warm water. You want a light, sudsy mixture, not a bubble bath.
- Dampen the Cloth: Dip one microfiber cloth into the solution and wring it out well. The cloth should be damp, not dripping wet, as excess water can sometimes damage drywall or paint underneath.
- Wipe Gently: Using light, circular motions, wipe over the crayon mark. Do not scrub hard, as this can burnish (polish) the paint, making the area look different from the rest of the wall.
- Rinse and Dry: Use the second, clean cloth dampened only with plain water to wipe away any soap residue. Dry the area immediately with a soft, dry cloth.
Method 2: The Mild Abrasive – Baking Soda Paste
If soap and water don’t quite do the trick, baking soda is a fantastic, slightly abrasive cleaner that won’t usually harm standard latex paint. It’s a staple in my DIY kit for mild scrubbing needs.
Tools You Will Need:
- Baking soda (Sodium Bicarbonate).
- Water.
- Soft sponge or non-scratch scrub pad.
Creating and Applying the Paste:
- Make the Paste: In a small dish, mix baking soda with just enough water to create a thick paste—think toothpaste consistency.
- Apply to Sponge: Dip a clean, damp sponge or a soft cloth into the paste.
- Gentle Rubbing: Rub the paste directly onto the crayon mark. Use very light pressure. The fine grit of the baking soda acts like a very fine sandpaper to lift the wax pigment.
- Wipe Clean: Once the mark is fading, wipe the area clean with a damp cloth, followed by a dry cloth.
Tip from the workshop: Baking soda works well because it is soft enough not to scratch many modern wall finishes, unlike abrasive commercial cleaners. For more information on safe cleaning agents for household finishes, the EPA sometimes offers guidance on common household chemicals.
Method 3: The Heat Trick – Melting the Wax Away
This method is the most reliable for deep or stubborn crayon marks because it tackles the wax itself. By gently heating the wax, you make it transferable again.
Tools You Will Need:
- A hairdryer.
- Brown paper bag (like a grocery bag) or clean paper towels.
- A flat, sturdy surface to rest the bag (optional, but helpful).
Executing the Heat Transfer:
- Prepare the Heat: Set your hairdryer to a medium or low heat setting. High heat can sometimes cause the paint beneath the crayon to bubble or lift, especially older or oil-based paints.
- Warm the Mark: Hold the hairdryer a few inches away from the crayon mark and wave it back and forth for about 30 seconds. You want the wax to become soft and glossy, not dripping.
- The Transfer: Immediately place a piece of brown paper bag or a sturdy paper towel directly over the warmed crayon area.
- Press and Lift: Gently press down on the paper. The warm, softened wax should transfer from the wall onto the paper surface. Lift the paper quickly.
- Repeat If Necessary: If pigment remains, reposition the paper to a clean section and repeat the heating and pressing process until the mark is gone.
This heat transfer technique is very popular because it often pulls the color out of the paint texture without scrubbing. Always be mindful of the paint type; if you have delicate wallpaper or vintage paint, use the lowest heat setting possible.
Method 4: The Kitchen Stalwart – Mayonnaise or Peanut Butter
It sounds strange, but oil-based products work wonders on wax! The oils in mayonnaise or peanut butter help break down the paraffin wax structure, making it easier to wipe away.
Why It Works: Oil Dissolves Wax
Oil and wax are chemically compatible. By applying a fatty substance, you effectively ‘liquefy’ the wax enough to dislodge it from the paint binder.
Step-by-Step Oily Application:
- Apply a Dab: Take a small dollop of regular mayonnaise or smooth peanut butter and gently dab it directly onto the crayon mark.
- Let It Sit (The Wait is Key): Let this sit for about 5 to 10 minutes. This dwell time allows the oils to penetrate and soften the wax thoroughly.
- Wipe Off: Using a soft, dry cloth, gently wipe away the mayonnaise or peanut butter. The crayon residue should come off with it.
- Final Clean: Because you’ve left an oily residue, you must clean the spot afterward. Wipe the area with a damp cloth containing a drop of dish soap, and then dry completely.
Note: Avoid using this method on unsealed or highly porous surfaces (like unfinished wood or textured wallpaper) as the oil might stain. It’s best reserved for standard painted drywall.
Method 5: The Solvent Approach – WD-40 or Rubbing Alcohol (Use Sparingly)
For truly stubborn, deep, or old crayon stains, a mild solvent can be the final answer. These should be used with caution, as they have the highest chance of affecting paint sheen.
When to Use Solvents:
Only use these if the previous four gentle methods have failed. They are powerful wax removers.
Table 1: Solvent Comparison for Crayon Removal
| Solvent Option | Pros | Cons & Safety Notes |
|---|---|---|
| WD-40 | Excellent wax breakdown; readily available. | Leaves an oily film requiring thorough soap cleaning afterward. Strong odor. |
| Isopropyl Rubbing Alcohol (70%+) | Evaporates quickly; effective pigment lifter. | Can dull or dissolve some cheap flat paint finishes easily. Must ventilate. |
| White Vinegar (Acetic Acid) | Safe, natural household cleaner. | Less effective on heavy wax; might require more scrubbing than other methods. |
Safe Application Steps for Solvents:
- Test, Test, Test: Since these are stronger, testing in an invisible spot is non-negotiable.
- Apply to Cloth, Not Wall: Spray a small amount of WD-40 or pour a little rubbing alcohol onto a clean microfiber cloth. Never spray directly onto painted walls.
- Dab and Lift: Gently dab the crayon mark. Allow it to sit for about 60 seconds if using WD-40.
- Immediate Follow-up: As soon as the crayon lifts, immediately wipe the area thoroughly with a soapy water cloth, followed by a plain water rinse, and then dry the area completely. The goal is to remove the solvent quickly.
Working with solvents requires good ventilation. Always open a window or turn on an exhaust fan when using these types of products inside your home.
Tips for Specific Surfaces
Different wall coverings react differently to cleaning methods. Here are a few quick adjustments for common areas:
- Glossy Paint: High gloss and semi-gloss paints are tough! You can be slightly more aggressive with scrubbing compared to matte finishes, but the gentle soap method usually suffices.
- Matte or Flat Paint: These are porous and easily damaged. Use the gentlest methods (soap/water or hairdryer) only. Avoid scrubbing or using solvents, as these will leave a permanent shiny spot where the paint texture is worn away.
- Wallpaper: Test the heat method very carefully, as too much heat can cause wallpaper seams to lift or vinyl coatings to bubble. Often, the mayonnaise/oil method, gently dabbed, is safest here.
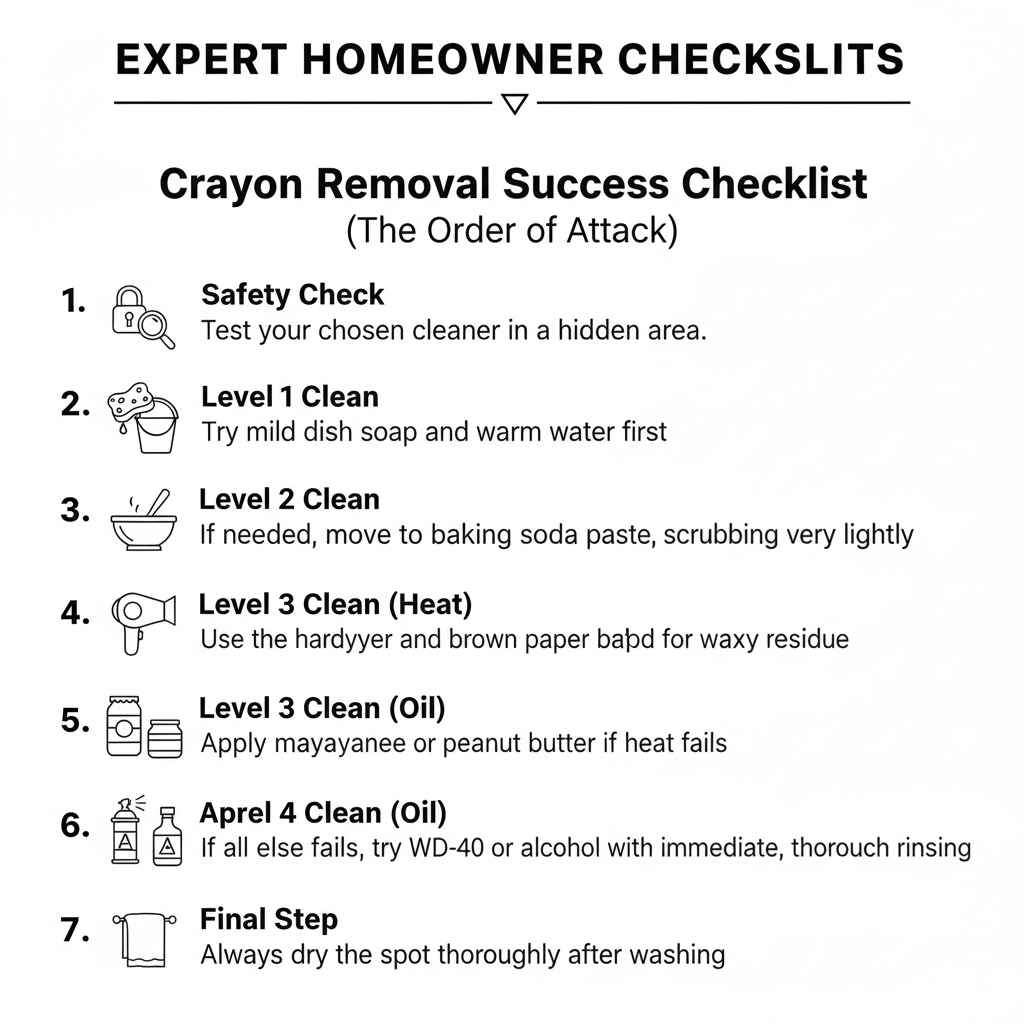
Expert Homeowner Checklists
To keep your clean-up efficient, I like using simple checklists. This ensures you don’t miss a step, especially safety checks.
Crayon Removal Success Checklist (The Order of Attack):
- Safety Check: Test your chosen cleaner in a hidden area.
- Level 1 Clean: Try mild dish soap and warm water first.
- Level 2 Clean: If needed, move to baking soda paste, scrubbing very lightly.
- Level 3 Clean (Heat): Use the hairdryer and brown paper bag method for waxy residue.
- Level 4 Clean (Oil): Apply mayonnaise or peanut butter if heat fails.
- Level 5 Clean (Solvent): If all else fails, try WD-40 or alcohol with immediate, thorough rinsing.
- Final Step: Always dry the spot thoroughly after washing.
Frequently Asked Questions (FAQ) for Homeowners
Q1: Can I use Magic Erasers to remove crayon from painted walls?
A: You can, but use them with extreme caution. Magic Erasers (melamine foam) are essentially ultra-fine abrasives. They work by physically sanding off the top layer of paint and the crayon. They will remove the crayon but often leave a noticeable dull or rubbed spot on the wall finish. Only use them as a very last resort and press as lightly as possible.
Q2: How do I prevent the wall paint from looking different after cleaning?
A: The best way to prevent discoloration or shininess is to avoid aggressive scrubbing and strong chemical solvents. Always follow up cleaning with a plain water rinse and dry immediately. If you used a solvent, a light wash with dish soap helps remove the oily film that can attract dust later.
Q3: What if the crayon is on my wood trim?
A: Wood trim, especially if it’s varnished or sealed, is usually more durable than drywall paint. For stained or varnished trim, the hairdryer/heat method or the mayonnaise method works best, as they are less likely to damage the clear coat. Avoid harsh scrubbing, which can scratch the protective varnish layer.
Q4: Is toothpaste a good option for removing crayon marks?
A: Yes, standard white, non-gel toothpaste works similarly to baking soda paste because it contains mild abrasives. Apply a small amount to a damp cloth, gently rub the mark, and wipe clean. It’s a great go-to if you don’t have baking soda handy.
Q5: Should I worry about lead paint if my house is very old?
A: If your home was built before 1978, there’s a chance of lead-based paint. When dealing with older finishes, avoid sanding, scraping, or using harsh chemical strippers. Stick to the mildest methods first—soap and water or the hairdryer. For older homes, the CDC provides safety guidelines on disturbing old paint surfaces.
Q6: How can I protect my walls from future crayon attacks?
A: Prevention is always easier than cleaning! Consider painting high-traffic areas or kids’ playrooms with washable, scrubbable paint finishes like semi-gloss or satin latex paint. You can also use clear, dry-erase board paint or install clear plastic sheeting guards in known hotspot areas.
Conclusion: Confidence in Cleaning
Tackling crayon marks on the wall is truly a straightforward fix once you know the right sequence of attack. You don’t need to panic or reach for harsh industrial cleaners. Remember our progression: start gentle with soap, move to light abrasives like baking soda, utilize the magic of heat transfer, and only then consider mild oils or solvents if absolutely necessary.
By testing your chosen method first and applying gentle pressure, you can restore your walls to their former clean glory. This is what being a capable homeowner is all about—having simple, reliable solutions for everyday challenges. Now that you have these tried-and-true methods in your back pocket, those waxy masterpieces don’t stand a chance!