How Long Before Staining Treated Lumber: Proven Essential
Quick Summary: Wait at least 30 days, and ideally 60 days, before staining treated lumber. This allows the wood to dry out properly, ensuring the stain penetrates and adheres for a beautiful, long-lasting finish. Rushing the process can lead to a patchy, peeling disaster.
So, you’ve got your hands on some treated lumber for that deck, fence, or garden project. Exciting! But before you grab that paintbrush, a crucial question pops up: how long do you really need to wait before staining it? It’s a common puzzle for DIYers, and getting it wrong can mean a finish that fades fast or peels away. Don’t worry! I’m here to guide you through it, step-by-step. We’ll uncover the secrets to knowing exactly when your treated lumber is ready for its colorful makeover, ensuring your project looks fantastic for years to come. Let’s get your wood prepped and ready for a beautiful stain!
Why Waiting is Crucial for Staining Treated Lumber
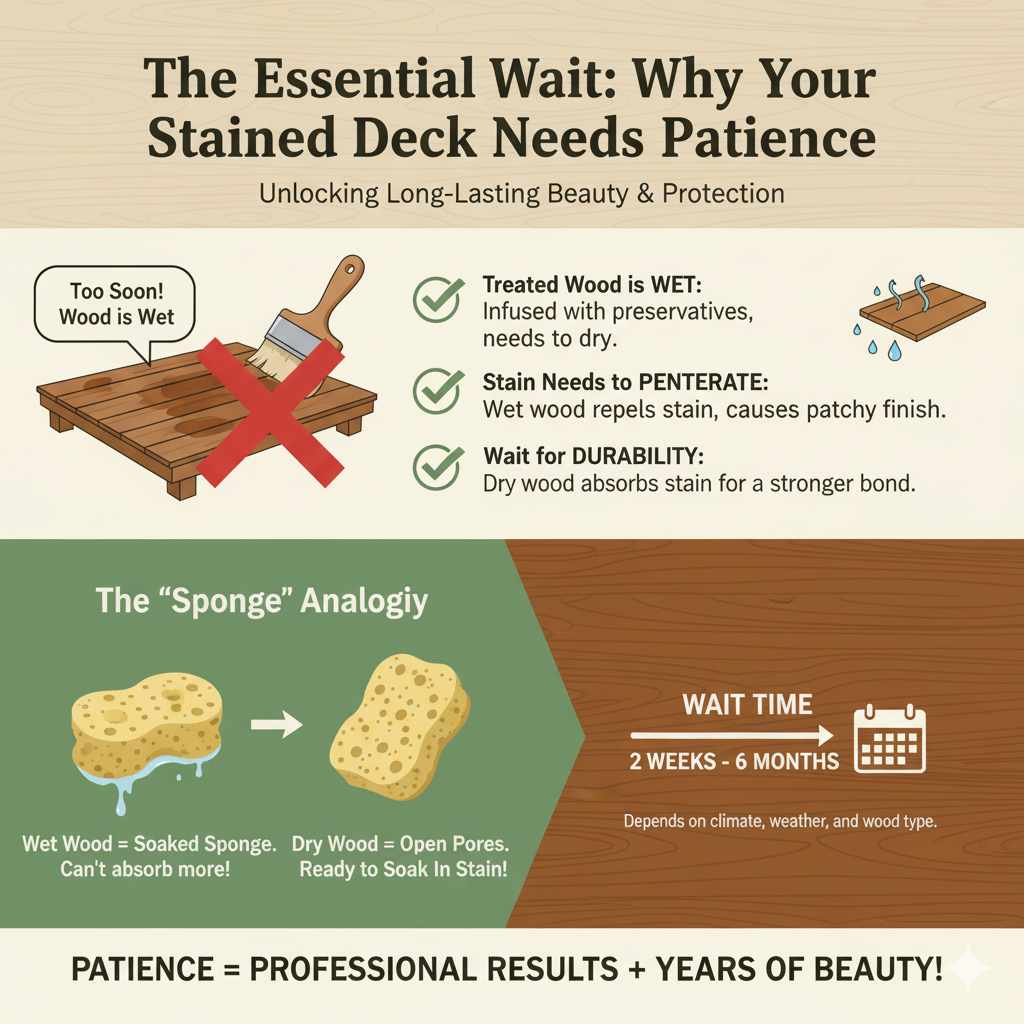
Treated lumber, also known as pressure-treated wood, is a superhero for outdoor projects. It’s infused with chemicals to protect it from rot, insects, and moisture. This treatment process involves forcing these preservatives deep into the wood fibers. However, right after treatment, this lumber is often quite wet. Think of it like a sponge that’s just been soaked – it can only hold so much more liquid, and anything you try to add will just sit on the surface or not soak in properly.
Staining treated lumber is all about giving it color and an extra layer of protection against UV rays and wear. But for the stain to do its job effectively, it needs to soak into the wood. If the wood is still too wet from the treatment process, the stain will have a hard time penetrating. This can result in a finish that looks uneven, patchy, or even washes off after the first rain. It’s like trying to paint over a damp wall – the paint won’t stick well and will likely bubble or peel.
The waiting period is essential for allowing the excess moisture from the treatment process to evaporate. As the wood dries, it opens up its pores, creating the perfect canvas for the stain to seep in and bond with the wood fibers. This creates a much more durable and attractive finish that will stand up to the elements. So, patience truly is a virtue when it comes to stained treated lumber!
Understanding Treated Lumber and Its Moisture Content
Pressure-treated lumber is wood that has been chemically treated to resist decay and insect infestation. The most common treatment uses alkaline copper quaternary (ACQ), copper azole (CA), or micronized copper azole (MCA). These treatments involve placing the wood in a large cylinder and then using a vacuum and pressure process to force the preservatives deep into the wood structure. You’ll often see a greenish tint on new treated lumber, although some newer treatments have less color. This is a sign that the preservatives are present.
The key issue for staining is the moisture content. When lumber comes directly from the treatment plant, it can have a very high moisture content, sometimes exceeding 30% or even 40%. This is significantly higher than the ideal moisture content for finishing wood, which is typically between 10% and 15% for most exterior applications. High moisture content acts as a barrier, preventing stains and sealers from penetrating the wood effectively.
This excess moisture needs time to dissipate. Wood naturally breathes and releases moisture into the air. The drying process for treated lumber depends on several factors, including the type of wood, the specific treatment used, ambient temperature, humidity, and airflow. Simply put, the wood needs to “dry out” from the inside out.
Think of it this way: the preservatives are like a powerful medicine that gets absorbed by the wood. If the wood is already saturated with water, it can’t absorb the stain or sealer properly. The water essentially acts as a buffer. Allowing the wood to dry creates the necessary space for the stain to become part of the wood, not just a layer sitting on top.
The Golden Rule: How Long to Wait?
So, what’s the magic number? The general consensus and best practice from manufacturers and experienced woodworkers is to wait a significant period before staining treated lumber. The most commonly recommended timeframe is at least 30 days, but 60 days is often even better. Some sources suggest waiting up to a year in certain conditions, but for most DIY projects, 30 to 60 days is a practical and effective waiting period.
This waiting period is not arbitrary; it’s based on allowing the wood to reach a moisture level that’s suitable for stain absorption. During this time, the wood is exposed to the elements, which helps it dry out naturally. This process is crucial for ensuring the stain adheres properly and provides the desired color and protection.
It’s important to remember that this is a guideline. The actual drying time can vary. Factors like the climate you live in (humidity, temperature, sun exposure), how the lumber was stored after treatment, and the specific type of treated wood can all play a role. In very humid or cool climates, it might take longer for the wood to dry sufficiently. In hot, dry, sunny conditions, it might dry a bit faster.
The goal is to achieve a moisture content below 15%. If you stain too early, you risk a poor finish. If you wait too long, you might miss the window where the wood is perfectly primed for staining and could start to weather unevenly. The 30-60 day window is a good balance that works in most situations.
Testing for Readiness: The Water Drop Test
How can you tell if your treated lumber is dry enough without a fancy moisture meter? The simplest and most effective method for beginners is the classic water drop test. It’s easy to do and gives you a good indication of whether your wood is ready for stain.
Here’s how to perform the water drop test:
- Choose a Spot: Select an area on the lumber that hasn’t been heavily exposed to direct rain or excessive moisture since it was installed. It’s best to test in a few different spots, especially on surfaces that will be most visible.
- Apply Water: Take a few drops of plain water from your faucet or a bottle and let them fall onto the surface of the wood.
- Observe: Watch what happens to the water.
Here’s what your observations mean:
- Water Absorbs Quickly: If the water beads up and then quickly soaks into the wood within a few minutes, it’s a good sign that the wood is dry and ready for staining.
- Water Beads Up and Sits on the Surface: If the water beads up and stays on the surface for a long time, or doesn’t soak in at all, the wood is likely still too wet. The surface is essentially sealed by residual moisture, preventing the stain from penetrating.
- Water Soaks in Slowly or Partially: If the water soaks in, but it takes a very long time (more than 10-15 minutes to fully disappear), it might still be a bit too damp. It’s better to wait a bit longer.
This test is a reliable indicator for most situations. If the water soaks in readily, you’re likely good to go. If it just sits there, give it more time and re-test in a week or two. Remember, this test is best done after you’ve met the minimum waiting period (like 30 days).
Using a Moisture Meter: The Professional Approach
For a more precise measurement, especially if you want to be absolutely sure or if you’re working on a very large or important project, using a moisture meter is the best approach. These tools are relatively inexpensive and provide an accurate reading of the wood’s moisture content.
How to use a moisture meter:
- Select the Right Meter: There are two main types: pin meters and pinless meters. Pin meters have two small metal pins that you press into the wood to get a reading. Pinless meters have sensors that you place on the surface. For treated lumber, either can work, but pinless meters are less likely to leave marks.
- Calibrate (if necessary): Some meters require calibration. Follow the manufacturer’s instructions.
- Test the Wood: Insert the pins (for pin meters) about 1/4 to 1/2 inch into the wood surface, or place the sensor flat against the wood (for pinless meters). Test in several different locations across the board and on different boards.
- Read the Moisture Content: The meter will display a percentage.
What to look for:
- Ideal Range: For exterior wood projects like decks and fences, the ideal moisture content for staining is generally below 15%. Many professionals aim for 12-15%.
- Too Wet: Readings above 15-20% indicate the wood is still too wet and needs more drying time.
- Dry: Readings below 10% might mean the wood is very dry, which is usually fine, but extremely dry wood can sometimes be more susceptible to cracking.
Using a moisture meter takes the guesswork out of the equation. You can find decent moisture meters for DIY use starting around $20-$30 online or at your local hardware store. It’s a worthwhile investment for any serious DIYer who tackles projects involving wood finishing. You can learn more about wood moisture content and its importance from resources like the Forest Products Laboratory, a branch of the U.S. Forest Service.
Factors Affecting Drying Time
While the 30-60 day rule is a great starting point, several factors can influence how quickly your treated lumber actually dries out. Understanding these can help you adjust your expectations and know when to test.
Climate and Weather Conditions
- Temperature: Warmer temperatures speed up evaporation. Wood dries faster on a hot, sunny day than on a cool, cloudy one.
- Humidity: High humidity slows down drying. If the air is already saturated with moisture, the wood will release its moisture more slowly. Conversely, dry air pulls moisture from the wood more quickly.
- Sun Exposure: Direct sunlight can significantly accelerate drying by heating the wood surface. However, excessive direct sun can also lead to surface checking or cracking if the wood dries too quickly.
- Rainfall: If the lumber gets rained on frequently after installation, it will prolong the drying process.
Airflow and Ventilation
Good airflow is crucial for drying. Wood needs air circulating around it to carry away the moisture that evaporates from the surface. This is why decks and fences, which are typically exposed to breezes, tend to dry better than, say, lumber stacked in a damp, enclosed space.
- Installation Location: A deck with gaps between the boards and open sides will dry much faster than a solid, enclosed structure.
- Spacing: Ensure there are adequate gaps between deck boards and that fence pickets are not installed too tightly together. This allows air to circulate freely.
- Storage: If you have leftover treated lumber, store it off the ground, uncovered, and with some space between boards to allow for drying.
Type of Wood and Treatment
Different types of wood have different densities and absorb preservatives differently. Some wood species might hold onto moisture longer than others. The specific type of chemical treatment and the concentration used can also influence how quickly the wood dries after treatment. For example, some newer treatments may leave the wood drier from the plant than older methods.
Surface Treatments or Coatings
If the treated lumber has any factory-applied sealers or coatings, this could potentially affect how quickly it dries or how well a subsequent stain adheres. It’s always a good idea to check any manufacturer recommendations that came with the lumber.
Considering these factors will give you a more realistic idea of when your specific project’s lumber will be ready for staining. Don’t be afraid to let it dry a little longer if your conditions are less than ideal for drying.
Preparing Treated Lumber for Staining
Once you’ve determined your treated lumber is dry enough (either through the water drop test or a moisture meter), the next step is to prepare the surface. Proper preparation is just as important as waiting for the wood to dry. It ensures the stain penetrates evenly and adheres well, leading to a beautiful, long-lasting finish.
1. Cleaning the Lumber
Over time, even within the 30-60 day waiting period, treated lumber can accumulate dirt, dust, mildew, or sap. These contaminants can prevent the stain from adhering properly. You’ll want to clean the wood thoroughly.
- Light Cleaning: For light dirt and dust, a stiff brush and a bucket of water with a mild detergent (like a dish soap) should suffice. Scrub the wood, then rinse it thoroughly with a garden hose.
- Stubborn Grime or Mildew: For tougher spots, you might need a specialized wood cleaner or a diluted solution of oxygen bleach (like OxiClean). Avoid using harsh chlorine bleach, as it can damage wood fibers and cause them to become fuzzy.
- Pressure Washing (Use with Caution): A pressure washer can be effective, but it must be used on a low setting and with a wide fan tip. Holding the nozzle too close or using too much pressure can goude the wood, raise the grain, and cause permanent damage. Always test on an inconspicuous area first and keep the wand moving constantly.
After cleaning, it’s essential to let the wood dry completely again. This might take another 24-48 hours, depending on the weather. You can perform the water drop test again to confirm it’s dry before proceeding.
2. Light Sanding (Optional but Recommended)
While not always strictly necessary, a light sanding can significantly improve the final finish. Sanding smooths out any rough spots, splinters, or raised grain that might have occurred during the drying process or from cleaning. It also opens up the wood pores slightly, allowing for better stain penetration.
- Grit: Use a medium-grit sandpaper, typically 80-120 grit. Avoid very fine grits, as they can seal the wood surface, making it harder for the stain to penetrate.
- Method: You can sand by hand or use a random orbital sander for larger areas like decks. Always sand in the direction of the wood grain.
- Clean Up: After sanding, thoroughly remove all dust. A shop vacuum with a brush attachment or a leaf blower works well, followed by wiping down with a tack cloth or a slightly damp rag. Any dust left behind will show up in your stain job.
This sanding step is particularly beneficial for achieving a smooth, uniform look on surfaces like deck railings, fences, or outdoor furniture.
Choosing the Right Stain for Treated Lumber
Once your lumber is prepped and ready, selecting the right stain is key. Treated lumber is often denser and can be less absorbent than untreated wood, so choosing a stain designed for this purpose is important. There are several types of stains available, each with its own pros and cons.
Types of Stains
- Oil-Based Stains: These are traditional favorites for a reason. They penetrate deep into the wood, offering excellent protection and a rich, natural look. They are generally more durable and easier to reapply later. Oil-based stains are often a good choice for pressure-treated wood because their oils can help condition the wood.
- Water-Based Stains (Latex Stains): These are easier to clean up (with soap and water) and tend to dry faster. Modern water-based stains have improved significantly in terms of durability and penetration. Some may be formulated with oils to improve their performance on wood like treated lumber.
- Semi-Transparent Stains: These stains add color while allowing the wood grain to show through. They offer moderate UV protection and are good for highlighting the natural beauty of the wood.
- Solid Color Stains: These are more like thin paint and completely hide the wood grain, offering maximum UV protection and a uniform color. They are a good option if you want a specific color or if the wood has imperfections you want to cover. They can provide a look similar to painted wood but with better penetration and less peeling than paint.
- Stain and Sealers (3-in-1 Products): Many products combine stain, sealer, and UV protection into one. These can be convenient and effective for DIYers. Look for products specifically designed for decks and fences.
Key Considerations When Choosing
- Intended Use: Is it a deck, fence, porch, or furniture? Decks and fences experience more wear and tear and direct exposure to the elements, so they require more durable protection.
- Desired Appearance: Do you want to see the wood grain (semi-transparent) or achieve a solid color (solid stain)?
- Ease of Application and Cleanup: Oil-based stains can be trickier to clean up, while water-based are easier.
- Durability and Longevity: How long do you want the stain to last before reapplication?
- Manufacturer Recommendations: Always check the label for specific instructions regarding treated lumber and recommended application methods. Some stains are specifically formulated for pressure-treated wood.
A good choice for treated lumber is often an oil-based semi-transparent or solid stain, or a water-based stain that explicitly states it is suitable for pressure-treated wood. These will provide the best combination of penetration, protection, and aesthetic appeal. For more information on choosing exterior finishes, you might find resources from organizations like the Wood Magazine or the International Code Council (ICC) (which sets building standards) helpful in understanding wood protection requirements.
Application Tips for a Flawless Finish
You’ve waited, you’ve cleaned, you’ve chosen your stain – now it’s time for the application! Applying stain to treated lumber can be a rewarding process if you follow a few key tips to ensure a smooth, even, and long-lasting finish.
1. Timing is Everything
Choose a day with mild weather. Avoid staining in direct, hot sunlight, as this can cause the stain to dry too quickly, leading to lap marks and uneven color. Overcast days or early morning/late afternoon on a sunny day are ideal. Ensure there’s no rain forecasted for at least 24-48 hours after application, as the stain needs time to cure.
2. Stir, Don’t Shake!
Stains, especially those with pigments, can settle at the bottom of the can. Always stir the stain thoroughly with a stir stick. If you shake the can, you can create air bubbles that will transfer to your wood, resulting in a less-than-perfect finish. Stir gently but completely, making sure to scrape the bottom and sides of the can.
3. Work in Small Sections
Don’t try to stain the entire deck or fence at once. Work in manageable sections. For a deck, this might mean staining a few boards at a time, from end to end. For a fence, it might be one or two pickets at a time.
4. Apply Evenly
Use a good quality brush, roller, or pad applicator designed for stains. Apply a thin, even coat. Avoid applying the stain too thickly, as this can lead to puddling and uneven drying. Brush strokes should generally follow the direction of the wood grain.
5. Maintain a Wet Edge
To avoid lap marks (where one section of stain meets an already dried section), always maintain a “wet edge.” This means overlapping your strokes slightly into the area you just stained while it’s still wet. This helps blend the stain seamlessly.
6. Wipe Off Excess Stain
For semi-transparent and solid stains, it’s often recommended to apply the stain and then, after a short waiting period (check the product instructions – usually 10-20 minutes), wipe off any excess stain that hasn’t penetrated the wood. Use a clean, lint-free cloth or rag. This step is crucial for preventing the stain from becoming sticky or gummy and for achieving the desired color depth. For solid stains, you might need less wiping or none at all, depending on the product.
7. Allow Proper Drying Time Between Coats
If your project requires two coats (especially for solid stains or if you want a deeper color), ensure you allow the first coat to dry completely according to the manufacturer’s instructions before applying the second. This is typically 12-24 hours, but can vary.
8. Safety First
Always wear appropriate personal protective equipment (PPE), such as gloves and eye protection. Ensure good ventilation, especially when working with oil-based stains. Dispose of stain-soaked rags properly, as they can be a fire hazard (lay them flat to dry completely outdoors or soak them in water before disposal).
By following these application tips, you’ll be well on your way to a beautiful, professional-looking finish that protects and enhances your treated lumber project.
Common Mistakes to Avoid
Even with the best intentions, DIYers can sometimes stumble into common pitfalls when staining treated lumber. Being aware of these mistakes can save you time, effort, and the frustration of a subpar finish. Let’s look at some of the most frequent errors and how to steer clear of them.
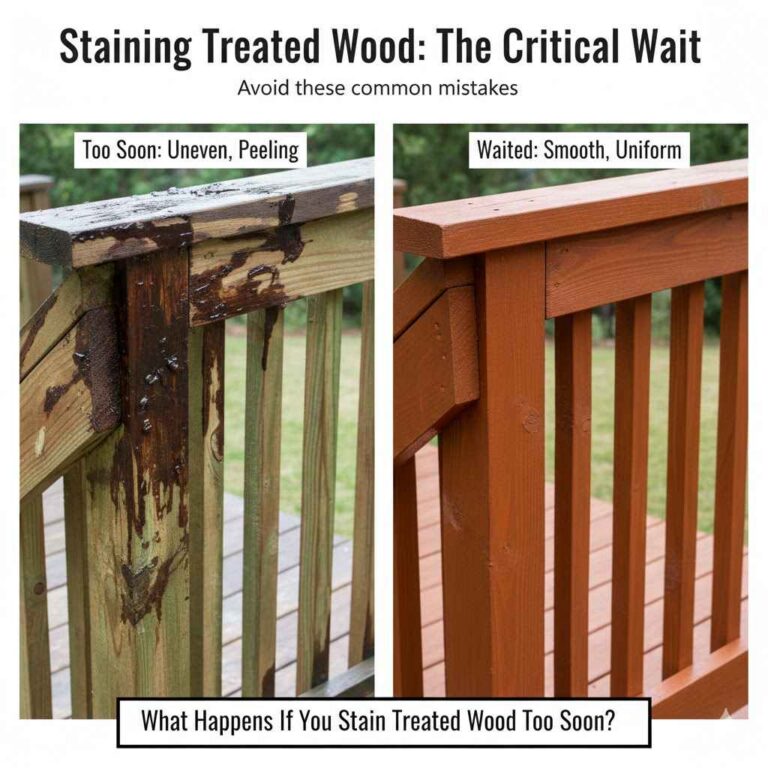
Mistake 1: Staining Too Soon
This is the most common and significant mistake. As we’ve discussed, treated lumber needs time to dry out. Staining wood that’s still saturated with treatment moisture will result in the stain not penetrating properly, leading to peeling, flaking, and an uneven appearance. Always perform the water drop test or use a moisture meter.
Mistake 2: Not Cleaning the Wood Properly
Dirt, dust, mildew, sap, and mill glaze (a smooth surface left by the milling process) can all prevent stain adhesion. If the wood isn’t clean, the stain has nothing to grip onto. Make sure to clean the wood thoroughly and allow it to dry completely before staining.
Mistake 3: Using the Wrong Type of Stain
Not all stains are created equal, and some are better suited for treated lumber than others. Using a stain not designed for exterior use or one that isn’t compatible with pressure-treated wood can lead to premature failure. Always check the product label to ensure it’s suitable for your project and for treated wood.
Mistake 4: Applying Stain Too Thickly
It might seem like applying a thicker coat will offer more protection or color, but it often has the opposite effect. Thick coats can prevent proper drying, lead to cracking, and create a gummy, uneven finish. Apply thin, even coats and let each one dry according to the manufacturer’s instructions.
Mistake 5: Not Stirring the Stain Adequately
Pigments in stains settle. If you don’t stir thoroughly, you’ll end up with uneven color distribution – light in some areas and too dark in others. Remember to stir, don’t shake, and keep stirring periodically during application.
Mistake 6: Skipping the Test Patch
Before committing to staining your entire project, always test the stain on an inconspicuous area or a scrap piece of the same lumber. This allows you to check the color, see how the wood absorbs the stain, and practice your application technique. The color can look different on the wood than it does in the can or on the color swatch.
Mistake 7: Staining in Bad Weather Conditions
As mentioned, staining in direct sun, high humidity, or when rain is expected can ruin your finish. Patience with the weather is as important as patience with the wood drying time.
Avoiding these common mistakes will significantly increase your chances of achieving a beautiful, durable, and long-lasting stain finish on your treated lumber projects.
Maintenance of Stained Treated Lumber
Once you’ve successfully stained your treated lumber project, the job isn’t entirely done. To keep your deck, fence, or furniture looking its best and to ensure the stain continues to protect the wood, regular maintenance is key. Think of it as ongoing care to preserve your hard work and investment.
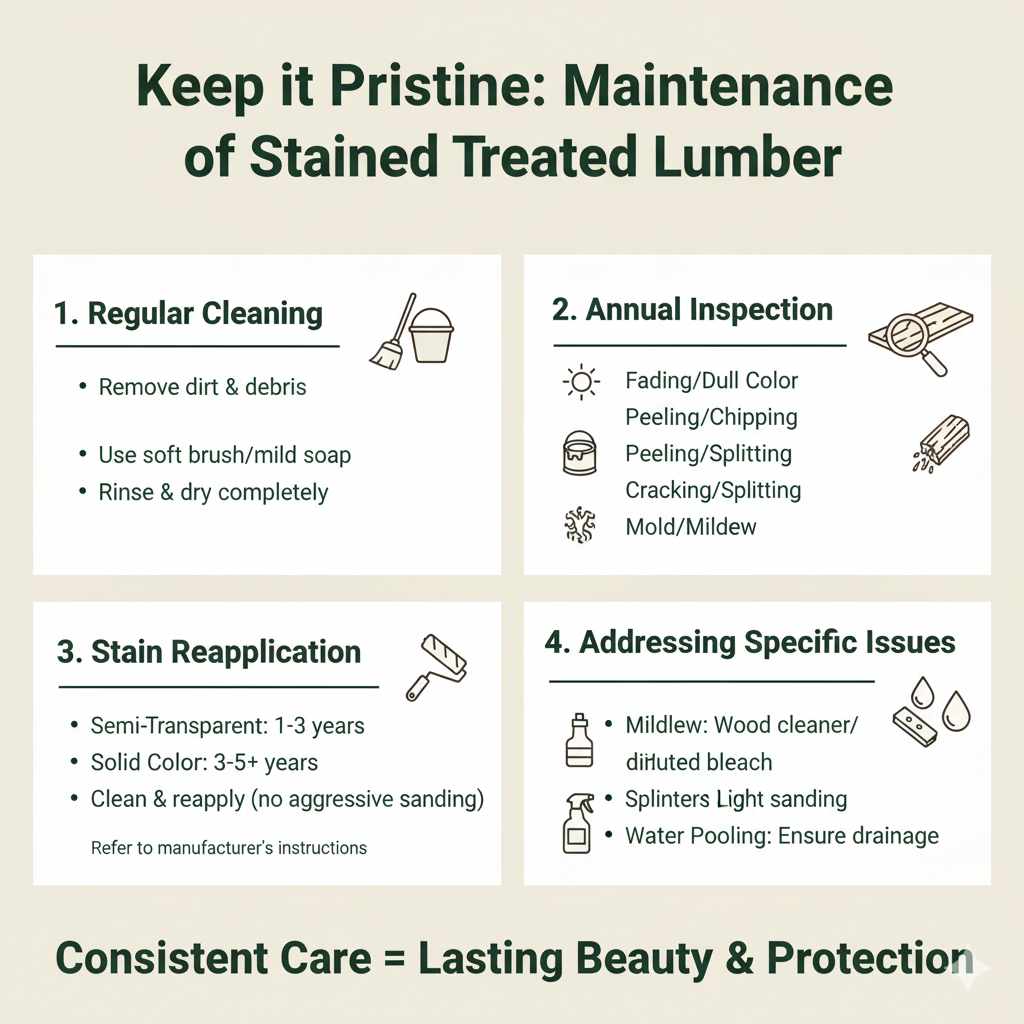
Regular Cleaning
Periodically clean your stained surfaces to remove dirt, debris, mildew, and algae. A soft-bristled brush or a broom is usually sufficient for light cleaning. For tougher grime or mildew, use a mild detergent and water solution, or a specialized wood cleaner. Always rinse thoroughly and allow the wood to dry completely.
Inspection
At least once a year, preferably in the spring, inspect your stained lumber for any signs of wear. Look for:
- Fading: Is the color starting to look dull or washed out?
- Peeling or Chipping: Are there any areas where the stain is lifting from the wood?
- Cracking or Splitting: Has the wood started to show signs of damage?
- Mold or Mildew Growth: Are there any dark spots indicating fungal growth?
Reapplication of Stain
The frequency of reapplication depends on the type of stain used, the quality of the initial application, and the environmental conditions your project is exposed to. Generally:
- Semi-Transparent Stains: May need reapplication every 1-3 years.
- Solid Color Stains: Can last longer, often 3-5 years or more, as they provide more coverage and protection.
- Oil-Based vs. Water-Based: Oil-based stains often fade more gradually and can be reapplied over themselves more easily. Water-based stains might show wear more obviously.
When it’s time to reapply, the process is usually simpler than the initial staining. Often, a thorough cleaning is all that’s needed. For most stains, you can simply clean the wood, let it dry, and apply a new coat. Avoid aggressive sanding unless there are significant peeling or damaged areas. Always refer to the specific stain manufacturer’s recommendations for recoating.
Addressing Specific Issues
- Mildew: Treat mildew promptly with a wood cleaner or a diluted bleach solution (be cautious with bleach and rinse thoroughly).
- Splinters: If minor splinters appear, they can often be sanded down. For larger issues, consider replacing the damaged board.
- Water Pooling: Ensure your project is designed to drain water effectively. Standing water can accelerate wood decay and stain failure.
Consistent, basic maintenance will extend the life and beauty of your stained treated lumber project, ensuring it remains a source of pride for years to come.
FAQ: Your Treated Lumber Staining Questions Answered
Q1: Can I stain brand new treated lumber immediately?
No, it’s not recommended. New treated lumber is typically very wet from the treatment process. You need to let it dry out for at least 30 days, and ideally 60 days, before staining to ensure proper adhesion and a lasting finish.
Q2: How do I know for sure if my treated lumber is dry enough?
The easiest way is the water drop test: sprinkle a few drops of water on the wood. If it soaks in quickly, it’s likely ready. If it beads up and sits on the surface, it’s still too wet. For more accuracy, use a moisture meter and aim for a reading below 15% moisture content.
Q3: What kind of stain should I use on treated lumber?
Choose a high-quality exterior stain designed for decks and fences. Oil-based stains or water-based stains formulated for pressure-treated wood are good choices. Semi-transparent stains let the wood grain show, while solid stains offer more coverage and protection.
Q4: Do I need to sand treated lumber before staining?
Light sanding with 80-120 grit sandpaper is often recommended, especially after cleaning. It helps smooth the surface, remove any raised grain, and improve stain penetration for a more even finish. Always clean off sanding dust thoroughly afterward.
Q5: What if I stain my treated lumber too early and it peels?
If the stain peels or flakes, it’s usually because the wood was too wet. You’ll need to remove the failed stain completely using a stripper or sanding, let the wood dry thoroughly for an extended period, and then reapply the stain correctly.
Q6: Can I use a paint stripper on treated lumber?
Yes, if you need to remove a failed stain or a factory coating, a paint stripper designed for wood can be used. Always follow the product’s safety instructions and test in an inconspicuous area first. After stripping, you’ll need to clean the wood and ensure it’s completely dry before restaining.
Q7: How often should I restain my treated lumber deck?
This depends on the stain type and exposure, but generally, semi-transparent stains may need reapplication every 1-3 years, while solid stains can last 3-5 years or longer. Regular cleaning and inspection will help you determine when it’s time.
Conclusion
Tackling a project with treated lumber is a fantastic way to build something durable and beautiful for your home. The key to a successful stain job, ensuring it looks great and lasts for years, hinges on a little patience and proper preparation. By understanding why treated lumber needs time to dry and knowing how to test for readiness, you’re setting yourself up for success. Remember the 30-60 day waiting period as your baseline, always perform the water drop test or use a moisture meter, and clean and prep the surface thoroughly before you even open that can of stain.
Choosing the right stain and applying it with care – working in small sections, maintaining a wet edge, and wiping off excess – will make all the difference. Don’t be discouraged by the waiting period; it’s a small investment of time that pays off in a superior finish. By avoiding common mistakes and committing to a little ongoing maintenance, your stained treated lumber will not only look stunning but will also be well-protected against the elements.
So, go ahead and plan your project with confidence. With these proven essential steps, you’re well-equipped to transform your treated lumber into a long-lasting, visually appealing feature of your home. Happy building and staining!