How Long Before You Can Stain Pressure Treated Wood: Proven Guide
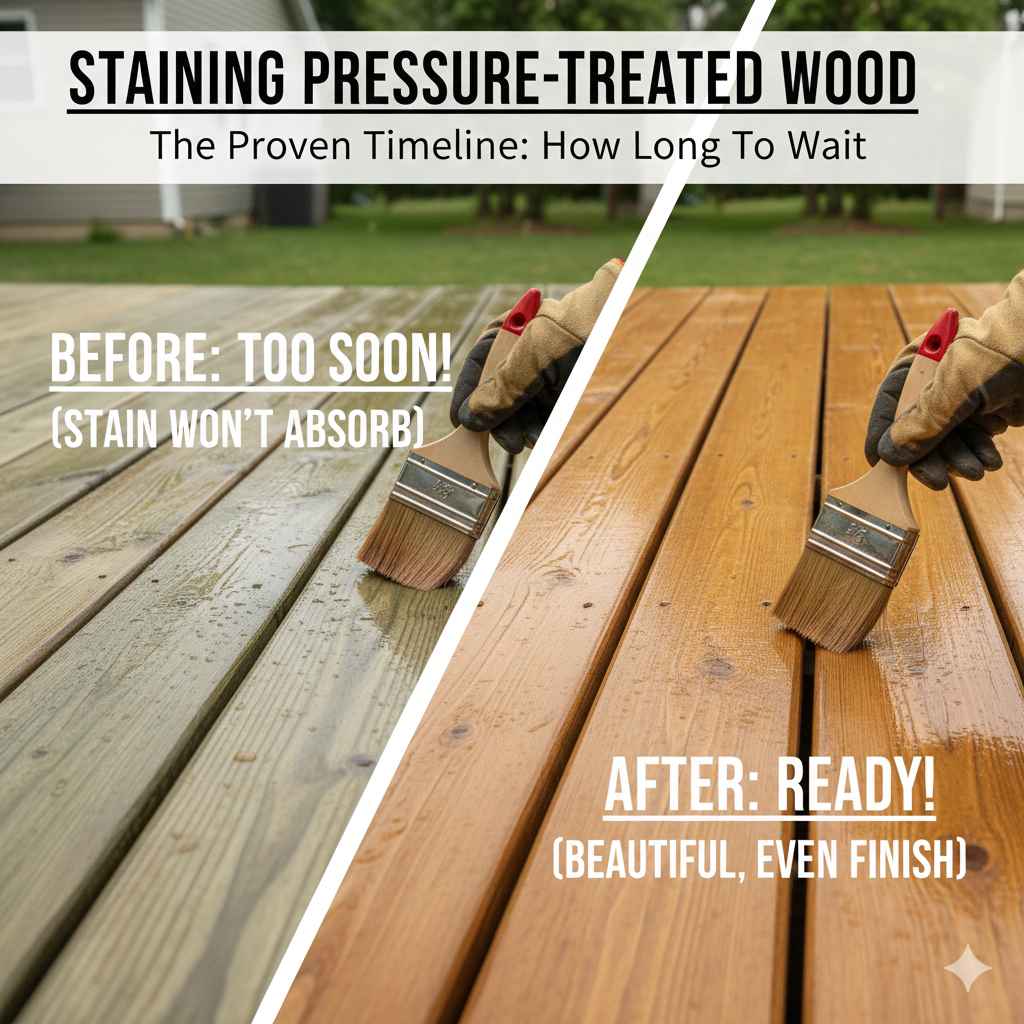
You should wait between 4 to 12 weeks, or until the wood is completely dry, before staining new pressure-treated wood. The “sprinkle test” is the easiest way to check for dryness before applying any stain or sealant for the best, longest-lasting finish.
Building a new deck or fence is exciting! You finally have that beautiful new lumber in place. Then comes the big question: when can I finally stain it? If you jump the gun, your beautiful new color might peel or fail quickly. Waiting too long can also lead to mildew. It feels like a confusing guessing game, but it really isn’t! As your friendly guide, Md Meraj, I promise to make this simple. We will walk through the exact steps to know when your pressure-treated wood is ready for stain. Get ready to build confidence and achieve a finish that lasts for years. Let’s find that perfect window for staining success!
Understanding Pressure Treated Wood and Why Waiting Matters
Pressure-treated wood is a fantastic material. It resists rot, insects, and decay, making it perfect for outdoor projects like decks and railings. But here’s the key difference: this wood is chemically treated under pressure to force preservatives deep inside.
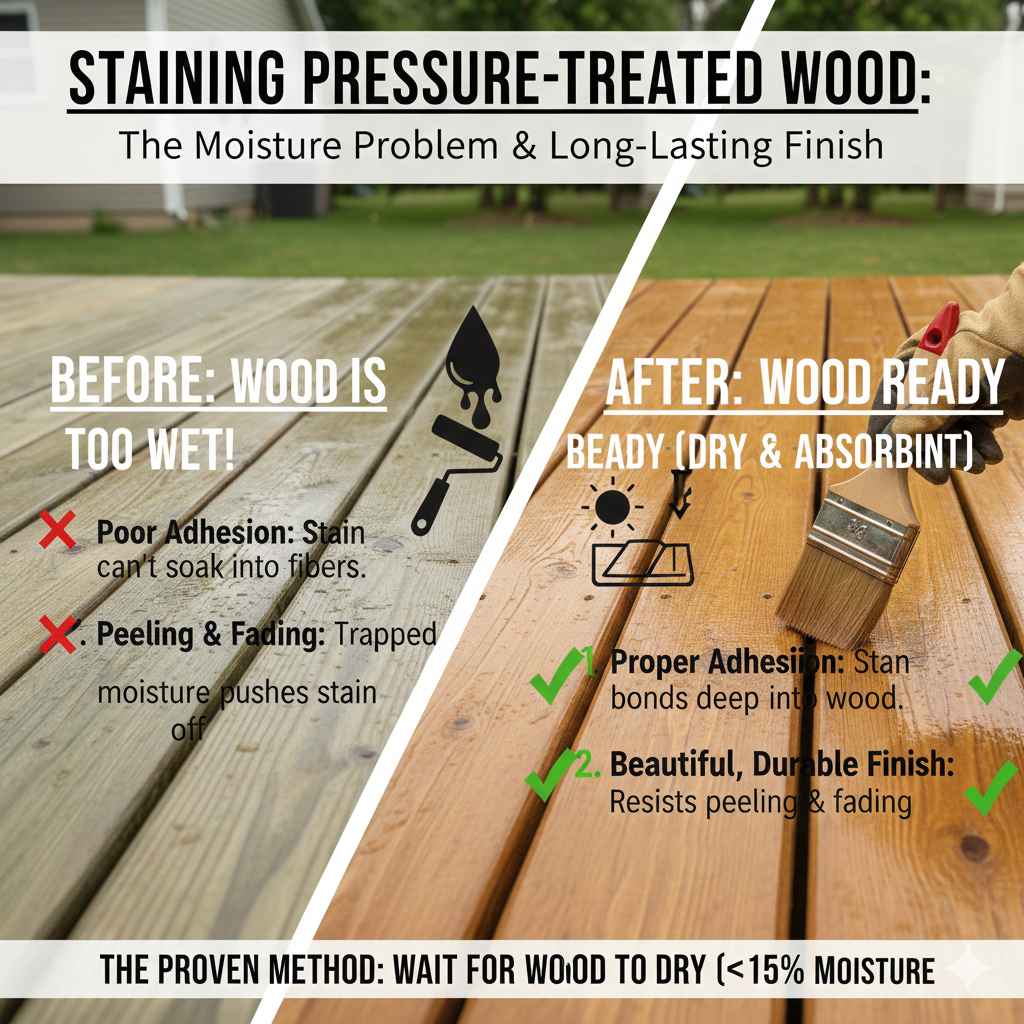
This process leaves the wood very wet, both from the treatment chemicals and the water used during manufacturing. Staining wet wood is like trying to paint a damp sponge—the stain can’t soak in properly.
The Moisture Problem
When wood holds too much moisture (above 15% is usually too high for stain adhesion), two bad things happen:
1. Poor Adhesion: The stain sits on the surface instead of bonding with the wood fibers.
2. Peeling and Fading: When the sun heats the wood, that trapped moisture tries to escape, pushing the surface stain right off.
Knowing how long to wait isn’t just a suggestion; it’s the most crucial step for a beautiful, long-lasting finish.
The Golden Rule: How Long Before You Can Stain Pressure Treated Wood?
There isn’t one single answer, but there is a safe window. Most manufacturers and industry experts agree on a general timeframe, but the wood’s environment plays a huge role.
The General Timeframe
The typical waiting period ranges from four weeks to twelve weeks (one to three months) after installation.
Minimum Wait (Hot, Sunny Conditions): If you live in a very hot, dry climate and your wood is installed where it gets full sun exposure all day, you might be ready closer to four to six weeks.
Average Wait (Moderate Climates): For most locations with balanced sun and occasional rain, aim for eight weeks.
Maximum Wait (Shady, Wet Conditions): If your deck is heavily shaded, under trees, or in a very damp region, you may need to wait the full twelve weeks or longer.
If you wait too long (say, more than six months without protection), the wood can start to weather, turn gray, and become more difficult to stain evenly. That’s why checking the dryness is better than just watching the calendar.
The Most Reliable Test: The Sprinkle Test
Forget guessing games based on the calendar alone. The absolute best, simplest, and most beginner-friendly way to confirm readiness is the water test, often called the “Sprinkle Test.” This test checks the surface moisture level without needing expensive electronic meters.
How to Perform the Simple Sprinkle Test
You only need a glass of water and a sunny day.
- Choose Your Spot: Select a few boards on the structure—especially areas that might be shadier or slightly more protected (like under railings or far from the edge of the deck).
- Wait for Dry Weather: Make sure it hasn’t rained for at least 24 hours, and perform the test when the sun is out, ideally midday.
- Sprinkle Water: Take a small handful of water (about a cup) and lightly sprinkle or pour it directly onto the wood surface. Don’t drench it, just make a small wet spot.
- Observe Immediately: Watch what happens over the next 10 to 15 minutes.
Interpreting the Sprinkle Test Results
Your results tell you exactly what to do next:
| Result After 15 Minutes | What It Means | Next Step |
|---|---|---|
| Water Absorbs Quickly (Beads are gone) | The wood is dry enough and ready for staining! | Proceed to cleaning and staining. |
| Water Beads Up or Sits on Surface | The wood is still too wet or has a natural waxy surface from the treatment. | Wait another 1 to 2 weeks and retest. |
| Water Soaks in Slowly, Leaving a Dark Spot | The wood is almost ready, but still holds significant moisture. | Wait a few more days, but be prepared to test again soon. |
This test is straightforward and gives you professional-level insight into your wood’s readiness.
Step-by-Step Guide to Prepping and Staining Dry Wood
Once you’ve passed the sprinkle test, you are ready for the fun part—coloring your beautiful wood! However, before staining, you must clean the wood thoroughly. New pressure-treated wood often develops a slick, gray surface layer called mill glaze or “checking” (tiny cracks) that prevents stain absorption.
Tools You Will Need
Having the right gear makes this project easy. Here are the essentials:
Safety Glasses and Gloves (Always!)
Stiff-bristled brush (not wire)
Deck brightener or wood cleaner formulated for PT wood
Pressure washer (optional, low setting recommended) or garden hose
Scrub bucket and water
Stain and sealer appropriate for pressure-treated wood (oil-based or water-based)
Paint tray and brush or stain pad applicator
Step 1: Cleaning the Surface (Removing Mill Glaze)
Even if the wood feels dry, surface contaminants block the stain.
- Wet the Wood: Gently spray down the entire surface with a garden hose to wet the wood thoroughly. Do not let it sit soaking wet for hours.
- Apply Cleaner: Mix your wood cleaner or brightener according to the manufacturer’s instructions. Usually, you mix a concentrate with water in a bucket.
- Scrub: Apply the cleaner to the wood, working section by section (maybe a 5×5 foot area at a time). Use your stiff-bristled brush to scrub in the direction of the wood grain. This breaks up the slick layer.
- Let It Dwell: Allow the cleaner to sit for the time specified on the bottle (usually 10–20 minutes). Do not let it dry out on the wood! If it starts drying, mist it lightly with water.
- Rinse Thoroughly: Rinse the entire area completely with clean water. Use a garden hose on a strong spray setting, or use a pressure washer set to a very low pressure (under 1200 PSI) held at least 12 inches away from the surface, always moving with the grain.
Pro Tip from Meraj: If you use a pressure washer, remember that it can damage soft wood fibers if used too close or too aggressively. Err on the side of gentleness.
Step 2: Re-Drying the Wood
This is the step many DIYers skip, but it’s crucial after wetting the wood during the cleaning process!
Allow the wood to dry completely again. This usually takes another 24 to 48 hours of dry, sunny weather.
Retest: Once you think it’s dry, perform the sprinkle test again (Step 3 above). If the water absorbs immediately, you are officially ready to stain!
Step 3: Selecting the Right Stain
Choosing the right stain is almost as important as waiting the right amount of time. Pressure-treated wood, because of the chemicals it contains, needs a specific type of finish.
Oil-Based vs. Water-Based Stains
The chemical treatment in PT wood tends to work better with oil-based stains because the oils penetrate the wood fibers deeply, offering better water resistance and longevity. However, modern water-based acrylics have improved significantly.
| Stain Type | Penetration | Drying Time | Durability | Best For |
|---|---|---|---|---|
| Oil-Based | Excellent penetration | Slower (24+ hours) | Very high, deep protection | Older methods, rougher cuts |
| Water-Based (Acrylic) | Good surface adhesion | Faster (4–8 hours) | Good UV protection, easier cleanup | Newer wood, bright colors |
Resource Note: For detailed information on chemical compatibility and wood protection, resources like the American Wood Protection Association (AWPA) provide excellent standards on wood treatment safety and finishing.
Step 4: Applying the Stain
Apply the stain according to the manufacturer’s instructions—they know their product best!
1. Work in Small Sections: Never try to stain the entire deck at once. Work in manageable areas (like 3-4 boards wide) to maintain a “wet edge.” This prevents ugly lap marks where a dried area meets a freshly stained area.
2. Apply Evenly: Pour a line of stain onto the surface and immediately spread it evenly with your applicator (pad or brush), always following the grain.
3. Wipe Excess (If Needed): Some penetrating stains require you to wipe off any standing liquid after 15–30 minutes so it doesn’t create a sticky film on the surface. Check your can!
4. Allow Curing Time: Let the first coat dry completely before applying a second coat, if recommended. Protect the surface from rain for at least 48 hours after the final coat.
Factors That Speed Up or Slow Down the Drying Process
The calendar timeframe is just a guideline. Your local weather conditions are the real decision-makers. Here is how various factors impact how long you must wait before staining pressure-treated wood.
Factors That Speed Up Drying (Waiting Less Time)
If you notice these conditions, you might hit the four-week mark:
High Heat and Direct Sun: Strong, direct sunlight bakes moisture out rapidly.
Low Humidity: Dry air pulls moisture out of the wood much faster than humid air.
Good Airflow: Decks built high off the ground or installed with wide board spacing (at least 1/8 inch gaps) allow air to circulate underneath, drying the bottom side faster.
Thinner Lumber: 2x4s or 5/4 decking boards dry faster than thick 4×4 posts or 2×10 joists.
Factors That Slow Down Drying (Waiting More Time)
If you see these conditions, you should lean toward the 10- to 12-week wait:
Shade and Overhangs: Wood protected from direct sun takes significantly longer to dry out.
High Humidity: Humid air slows down evaporation significantly.
Close-to-Ground Installation: Structures near the ground, like covered porches or retaining walls, stay damp longer because air can’t move underneath them easily.
Heavy Rain Cycles: Frequent rain necessitates starting your waiting period over every time the wood gets fully saturated.
A Note on ACQ vs. Older CCA Treatment
Modern pressure-treated wood typically uses Alkaline Copper Quaternary (ACQ) or Copper Azole (CA) preservatives. These are generally better behaved than the older Chromated Copper Arsenate (CCA) treatments (which are banned for residential use now). Because modern preservatives penetrate differently, following the general 4–12 week rule and always verifying with the sprinkle test remains the safest bet regardless of the chemical used.
Can I Use a Dehumidifier or Heater to Speed Up Drying?
For smaller projects or specific pieces, you might think you can speed this up artificially. While you can speed up surface drying, it’s very hard to pull deep moisture out of thick lumber quickly without risk.
For Piles of Lumber (Pre-Construction):
If you bought lumber early, stacking it properly (with stickers—small pieces of wood separating the boards) outdoors in the sun allows air circulation to dry it naturally before you even build the structure.
For Installed Structures: Once the wood is installed, you cannot easily place a dehumidifier under a deck or a heater over the entire structure. Aggressive forced drying can sometimes lead to the surface drying too fast while the core stays wet, causing increased cracking or warping. Natural drying, aided by sun and wind, remains the safest method.
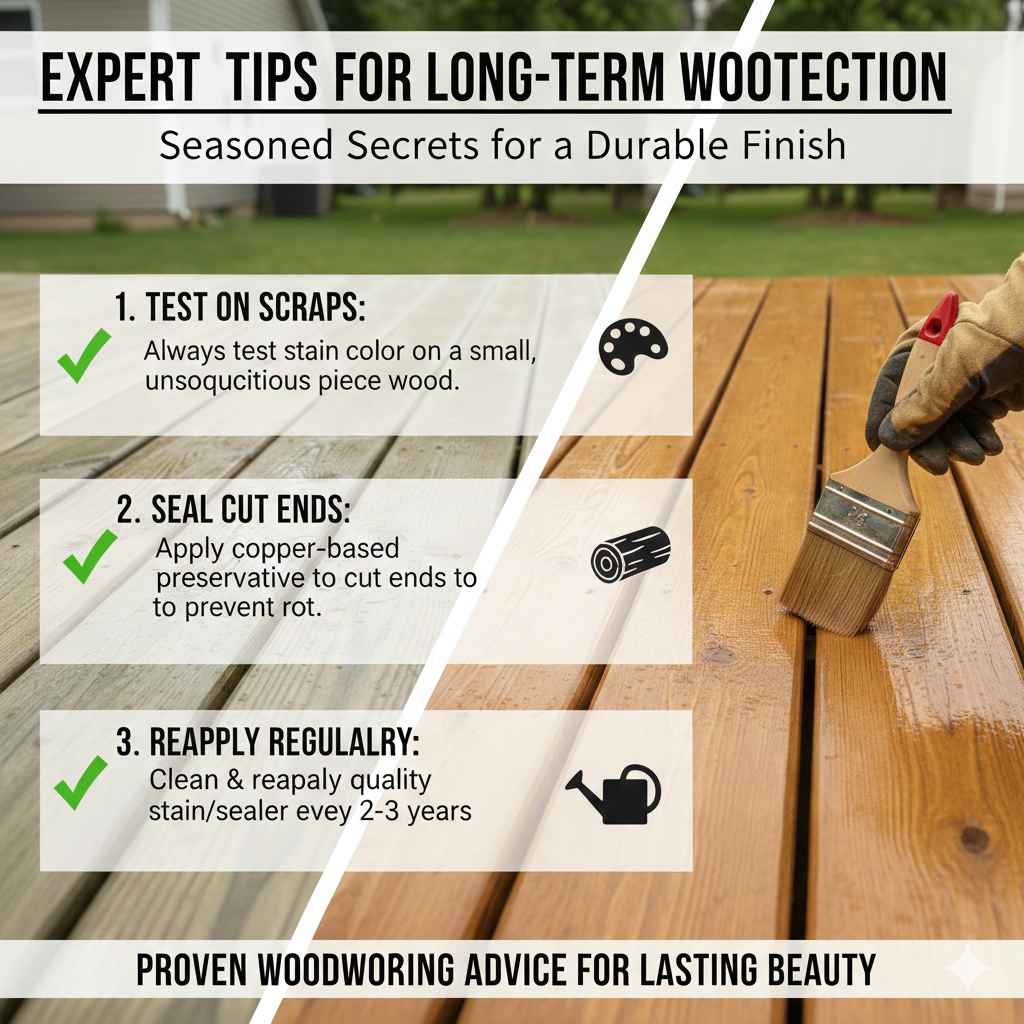
Expert Tips for Long-Term Protection
The initial stain job sets the foundation, but how you maintain it determines its lifespan. Here are a few extra tips from a seasoned woodworker:
Test on Scraps: Always test your chosen stain color on an inconspicuous, already-cut piece of the treated wood before tackling the main structure.
Seal the Cut Ends: Any time you cut pressure-treated lumber, you expose the untreated interior core to moisture and pests. Always seal those cut ends liberally with a copper-based preservative end-cut sealer before assembly or staining.
Reapply Regularly: Even the best exterior stain breaks down under UV light and rain. Plan to clean and reapply a quality sealer/stain every 2 to 3 years, depending on exposure.
Frequently Asked Questions (FAQ) About Staining PT Wood
Q1: Can I stain pressure-treated wood the very next day?
A: No, you absolutely should not. New PT wood is saturated with water from the treatment process. Staining immediately will result in peeling, blotchy color, and a failed finish because the stain cannot penetrate the wet fibers.
Q2: What is the minimum safe waiting time for PT wood?
A: The absolute minimum, only safe in extremely hot, arid, and sunny conditions, is usually around four weeks. However, to be safe and ensure good stain adhesion, aim for six to eight weeks.
Q3: If I clean the wood with a brightener, how long do I wait before staining after rinsing?
A: After using chemical cleaners or rinsing heavily during the cleaning process, you must allow the wood to dry out again, which usually takes 24 to 48 hours of good weather. Always re-do the sprinkle test after cleaning before applying the stain.
Q4: Do I need to sand pressure-treated wood before staining?
A: Light sanding can help remove mill glaze if your initial cleaning didn’t fully succeed, or if the wood has begun to slightly fuzz up. If the wood passes the sprinkle test easily after cleaning, light sanding (100-grit sandpaper) helps open the pores just enough for better color absorption.
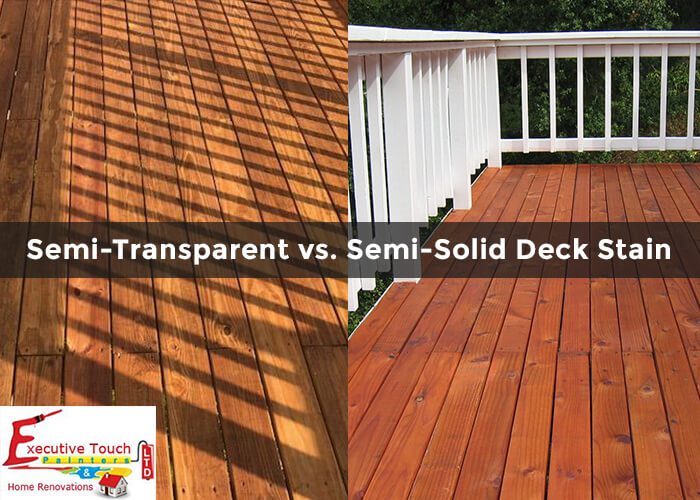
Q5: Can I use semi-transparent stain on pressure-treated wood?
A: Yes, semi-transparent stains are excellent choices. They provide enough pigment to offer UV protection while still allowing the natural grain of the wood to show through. Make sure the product is formulated specifically for exterior wood use.
Q6: My wood has already turned gray. Is it too late to stain?
A: Not at all! Graying means the surface has weathered, but it’s still perfectly fine to stain. However, if it’s gray, you must use a quality wood cleaner/brightener in Step 1 to remove that layer of oxidized wood fibers, otherwise, the new stain will simply sit on top of the gray layer and fail quickly.
Conclusion: Confidence in Your Wait Time
Finishing your pressure-treated wood project with a beautiful stain is highly rewarding, and knowing when* to apply it is the difference between a job that lasts a decade and one that needs touching up next season. Remember the golden rule: Patience wins!** Give the wood at least four weeks, but rely on the simple, foolproof sprinkle test to tell you exactly when it’s thirsty enough to absorb that protective color. By cleaning thoroughly after the waiting period and choosing the right product, you are setting your deck, fence, or outdoor furniture up for long-term beauty and protection. You’ve got this—now go enjoy that finished project!