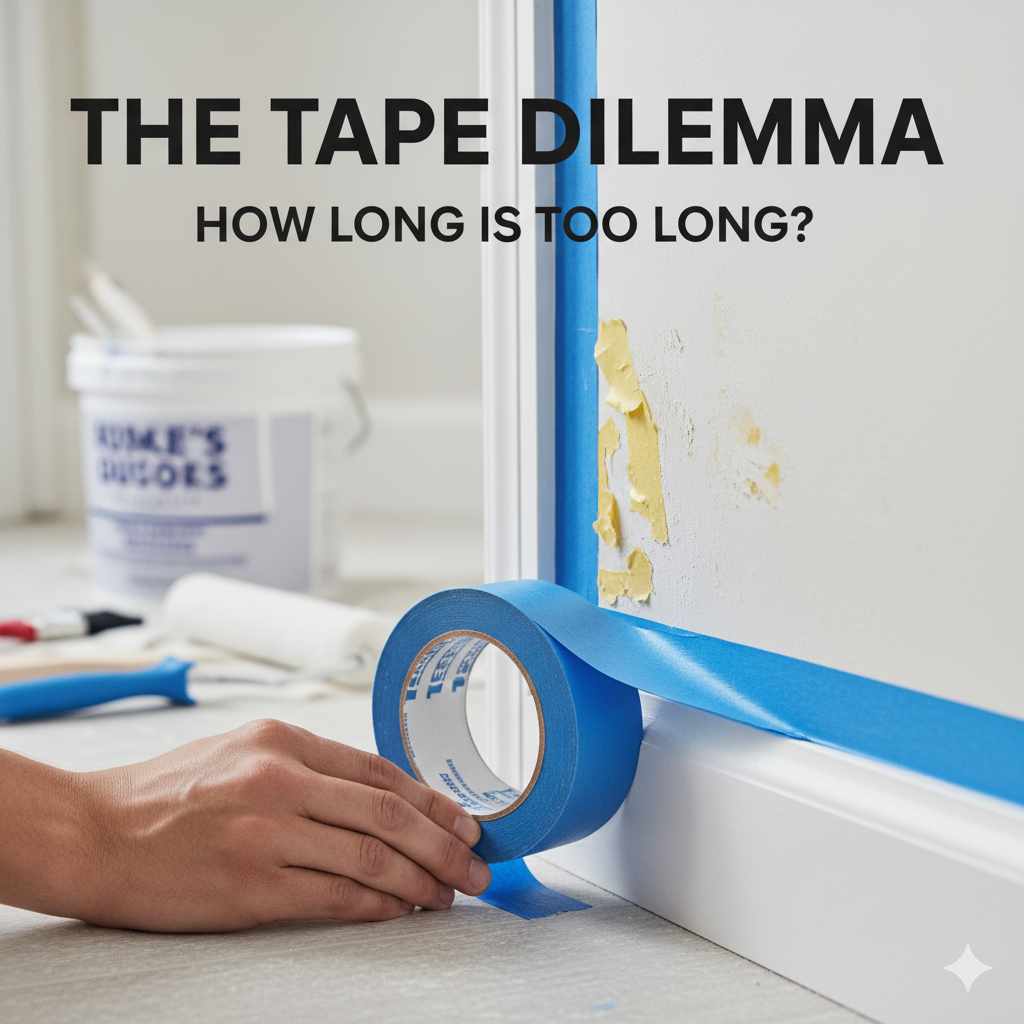
How Long Can You Leave Painters Tape On Before Painting: Essential Guide
Quick Summary: For best results, remove painter’s tape while the paint is still wet or within 24 hours of application. Leaving it on too long can cause the paint to peel, lift, or create jagged edges. Always test a small, inconspicuous area first.
Hey there, DIY friends! Md Meraj here, ready to tackle another common painting puzzle that trips up even seasoned home improvers. We’ve all been there: you’ve masked off those tricky edges with painter’s tape, feeling confident about crisp, clean lines. But then the big question pops up: how long can you actually leave that tape in place before it becomes a problem? It’s a simple question, but getting the answer right can save you a whole lot of frustration and extra touch-up work. Don’t worry, we’ll walk through it step-by-step, ensuring your next painting project looks like a pro did it!
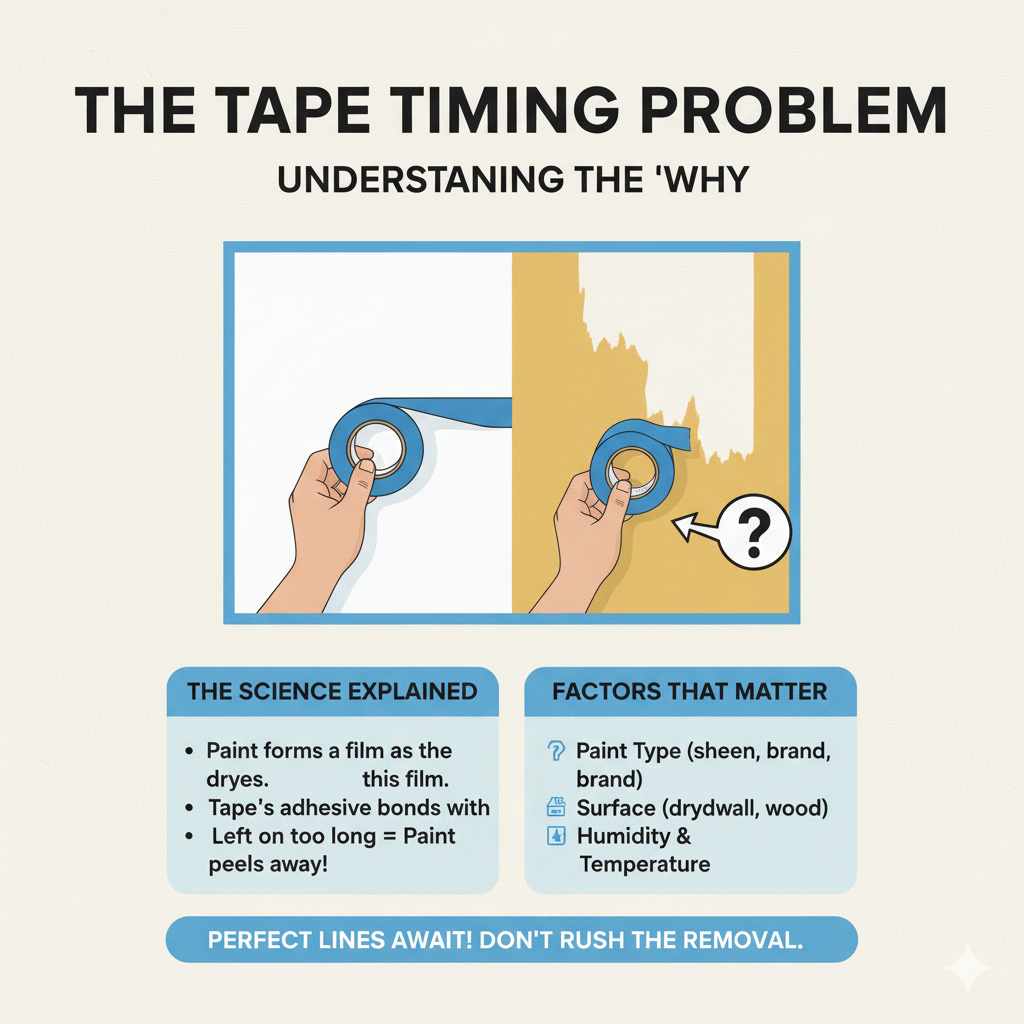
Understanding the “Why” Behind Painter’s Tape Timing
Painter’s tape is a fantastic tool. It’s designed to stick firmly enough to create a barrier against errant paint splatters, but also to be removed cleanly without damaging the surface underneath. The magic, however, lies in its adhesion and how it interacts with drying paint. When paint dries, it forms a film. If painter’s tape stays on too long, this paint film can bond to the tape itself. When you eventually pull the tape off, it can take chunks of that beautiful new paint with it, leaving you with uneven edges and a much bigger cleanup job than you bargained for.
The type of paint, the surface you’re painting, and even the humidity in the room can all play a role in how long the tape can stay. But fear not! By understanding these factors and following a few simple guidelines, you can achieve those perfect, sharp lines every time.
The Golden Rule: Timing is Everything
So, to get straight to the point: when is the best time to remove painter’s tape? The most common and generally safest advice is to remove it while the paint is still wet, or at the very latest, within 24 hours of application.
Let’s break down why this is the golden rule:
- Wet Paint Removal: This is often the ideal scenario. As soon as you finish painting a section and before the paint has a chance to fully cure, carefully pull off the tape. The paint is still flexible enough that it won’t have bonded strongly to the tape. This method usually results in the cleanest lines.
- Slightly Dry Paint Removal (Within 24 Hours): If removing wet paint isn’t practical (perhaps you’re painting a large area or need to step away), aim to remove the tape within a few hours, or definitely before 24 hours have passed. The paint will have started to dry but shouldn’t be fully hardened.
- The Danger Zone (Beyond 24 Hours/Fully Cured): This is where problems often start. If you leave the tape on for days, or until the paint is completely dry and hardened, the paint film will have adhered strongly to the tape. Attempting to remove it then can lead to paint peeling, chipped edges, and the dreaded “bleeding” where paint seeps under the tape.
Factors Influencing Tape Removal Time
While the wet-to-24-hour rule is a great starting point, several other elements can affect how long you can safely leave painter’s tape on:
Type of Paint
Different paint formulations dry and cure at different rates. For example:
- Latex/Water-Based Paints: These generally dry faster than oil-based paints. They often become dry to the touch within an hour or two, but fully curing can take days or weeks. For latex paints, removing the tape while slightly tacky or within a few hours is usually best.
- Oil-Based Paints: These paints take longer to dry. Because of this, you might have a slightly longer window to remove the tape cleanly. However, it’s still crucial not to wait too long. Check the manufacturer’s recommendations on the paint can.
- Specialty Paints (e.g., Chalk Paint, Enamels): These can have unique drying and curing properties. Always refer to the product instructions.
Surface Material
The material you’re painting can also influence how well the tape adheres and how the paint interacts with it.
- Smooth Surfaces (e.g., Trim, Doors): These are generally forgiving. The paint film is less likely to be deeply embedded into the surface, making clean removal easier.
- Textured Surfaces (e.g., Stucco, Rough Wood): Paint can settle into the texture. This might make it slightly harder for the tape to maintain a perfect seal, and paint could seep under. It also means the paint film might be more prone to lifting if the tape is left too long.
- Wallpaper: This is a delicate surface. Always use the gentlest painter’s tape available and remove it very carefully, ideally when the paint is still slightly wet.
Environmental Conditions
The “environment” where you’re painting can significantly impact drying times.
- Temperature: Warmer temperatures generally speed up drying. Colder temperatures slow it down.
- Humidity: High humidity levels can dramatically slow down paint drying and curing. Low humidity can speed it up.
- Ventilation: Good airflow helps evaporate solvents from the paint, leading to faster drying.
Choosing the Right Painter’s Tape
Not all painter’s tape is created equal! The type of tape you use is just as important as your timing. Using the wrong tape can lead to problems regardless of when you remove it.
Here’s a quick rundown of common types:
- Blue Tape (General Purpose): This is the most common type. It’s good for most interior painting jobs and offers a good balance of adhesion and clean removal. It’s a great choice for beginners.
- Green Tape (Delicate Surfaces): This tape has lower adhesion, making it ideal for surfaces that could be easily damaged, like freshly painted walls (that have cured for a while), wallpaper, or delicate wood finishes. It’s less likely to pull paint off when removed.
- Purple Tape (High Performance/Longer Hold): This tape offers stronger adhesion and is designed for demanding jobs, like painting trim or areas where you need a very secure seal for longer periods. However, it requires more care during removal, especially if left on for extended times.
- Yellow Tape (Multi-Surface): This is a versatile option designed to stick well to various surfaces.
For most beginner projects, sticking with a good quality blue painter’s tape is a safe bet. Always check the packaging for recommendations on surface types and how long it’s designed to stay adhered.
Step-by-Step Guide: Applying and Removing Painter’s Tape
Let’s walk through the process of using painter’s tape effectively, from application to removal.
Step 1: Prepare the Surface
Before you even think about tape, ensure the surface you’re taping to is clean and dry. Dust, grease, or moisture can prevent the tape from sticking properly, leading to paint bleeding underneath.
Step 2: Apply the Tape
This is where you create that clean line. Gently press the tape onto the edge of the surface you want to protect (e.g., the edge of a trim piece, the ceiling line). Use a putty knife, a credit card, or even your fingernail to firmly press down the edge of the tape that will meet the painted surface. This is crucial for preventing paint bleed.
Pro Tip: If you’re taping over a freshly painted surface that you want to keep the original color, ensure that paint is fully cured before applying tape. For example, some wall paints need at least 24-48 hours, and sometimes longer, to cure sufficiently to accept tape without damage. Check your paint’s technical data sheet if unsure.
Step 3: Paint with Confidence
Now for the fun part! Paint your new color. When painting up to the tape line, use light, even coats. Avoid overloading your brush or roller, as this can push paint under the tape. If you’re using a brush, paint away from the tape line to further prevent bleed.
Step 4: The Crucial Removal
Here’s where the timing matters most!
- Check the Paint: Gently touch a small, inconspicuous area of the painted surface (not the tape itself) to gauge its dryness. Is it still wet and tacky? Or is it dry to the touch but not fully hardened?
- Start Removing: If the paint is still wet or just slightly tacky, begin peeling the tape.
- Angle of Removal: Pull the tape back on itself at a sharp 45-degree angle. This helps to create a cleaner break and minimizes the chance of lifting the paint film.
- Slow and Steady: Pull the tape slowly and deliberately. If you encounter resistance or see paint starting to lift, stop. You might need to gently score the edge with a utility knife (carefully!) or wait a little longer.
- If Paint Starts to Lift: Immediately stop pulling. You can try to gently press the tape back down in that spot and then try pulling again at a different angle, or wait a bit longer. Sometimes, running a utility knife very lightly along the edge of the tape where it meets the paint can help break any slight adhesion.
- If You Missed the Window (Tape Left On Too Long): If the paint is fully dry and you have to remove the tape, do so very slowly. Consider using a hairdryer on a low heat setting to warm the tape and paint slightly, which can help soften the adhesive and the paint film, making removal less likely to cause damage.
It’s worth noting that the U.S. General Services Administration (GSA) offers extensive resources on building and construction standards, which often include best practices for finishing work, including painting. While they might not specify tape removal times directly, their guidelines emphasize quality and durability, which aligns with careful material application and removal.
Table: Painter’s Tape Removal Time Guidelines
This table provides general guidance. Always consider your specific paint and surface conditions.
| Paint Type | Ideal Removal Time | Maximum Recommended Time (approx.) | Notes |
|---|---|---|---|
| Latex/Water-Based | While wet or slightly tacky | 4-12 hours | Faster drying in warm, dry conditions. Can be prone to lifting if left too long. |
| Oil-Based | When dry to the touch (can take longer) | 12-24 hours | Slower drying. Ensure tape edge is sealed well. |
| Quick-Dry Paints | As soon as it’s dry to the touch | 1-4 hours | Follow paint manufacturer’s recommendations. |
| Specialty Paints (e.g., Chalk, Enamel) | Varies greatly | Varies greatly | Always check product instructions. |
Common Problems and How to Avoid Them
Even with the best intentions, you might run into a few snags. Here’s how to troubleshoot:
-
Problem: Paint Bleeding Under the Tape.
Cause: Poor seal, not pressing tape edge down firmly, painting too liberally.
Solution: Ensure tape is pressed down with a tool. Use painter’s tape specifically designed for the surface. Apply paint in thin coats. For very critical lines, consider a very thin bead of caulk along the tape edge (if appropriate for the surfaces) or a “reverse tape” technique (painting the tape edge with the base color first, letting it dry, then painting the new color). -
Problem: Tape Sticking Too Well / Damaging Surface.
Cause: Using the wrong type of tape (too much adhesion), leaving tape on for too long, painting on a delicate surface.
Solution: Use delicate surface tape (green). Remove tape while paint is still wet. If paint is dry, warm tape with a hairdryer on low. -
Problem: Paint Peeling Off with the Tape.
Cause: Paint is fully cured and bonded to the tape, or the underlying surface wasn’t properly prepared (e.g., old paint is peeling).
Solution: Remove tape sooner! If paint is peeling from the wall, you may have underlying adhesion issues that need to be addressed. For tape-related peeling, score the edge of the tape with a utility knife very carefully before pulling. -
Problem: Jagged or Uneven Lines.
Cause: Pulling tape too fast, paint seeping under, tape not applied straight.
Solution: Pull tape slowly and at the correct angle. Ensure a good seal. Use a level to guide tape placement.
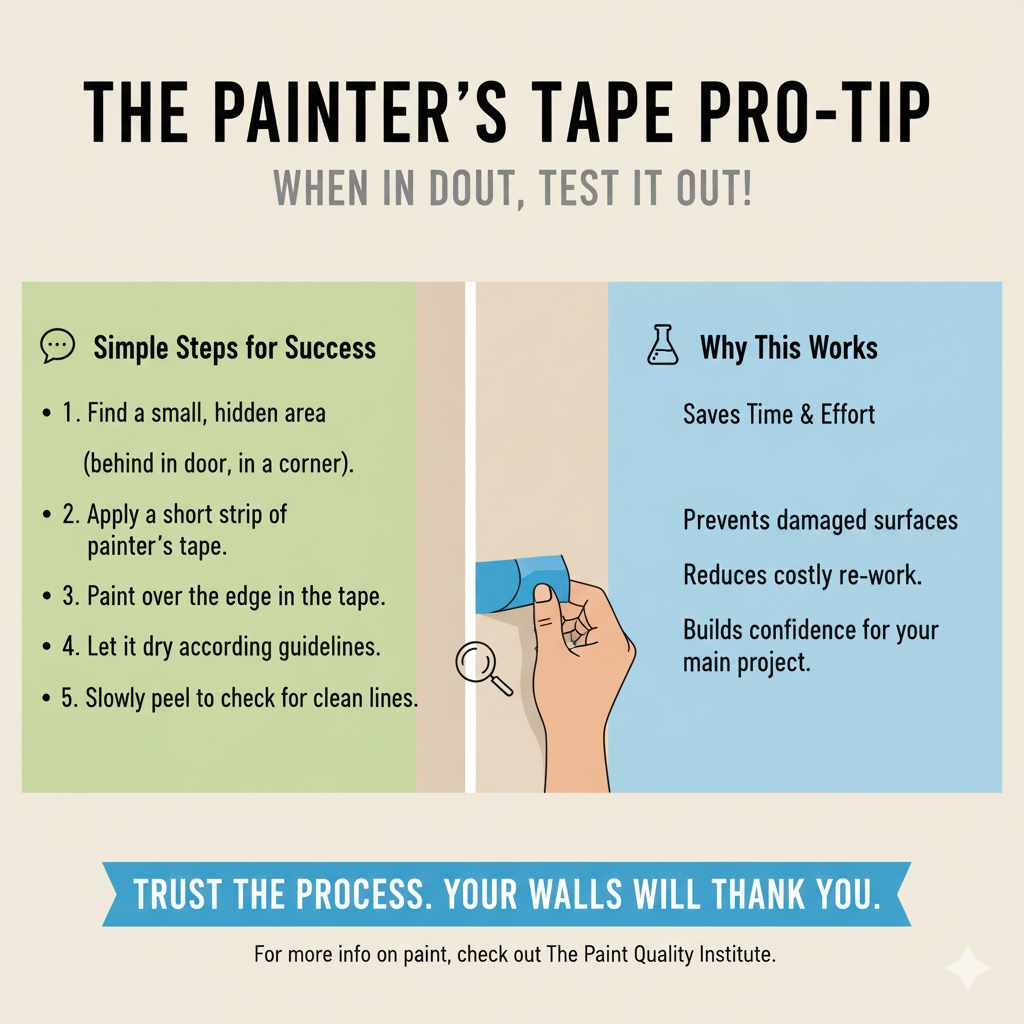
When in Doubt, Test It Out!
This is my biggest piece of advice, especially for beginners or when trying a new paint or surface. Before you tape and paint your entire project, find a small, inconspicuous area. Apply a strip of painter’s tape, paint over it, and then test the removal time. See how it behaves. This little test can save you from a much larger headache later on.
For more information on paint types and their properties, you can often find helpful guides from organizations like The Paint Quality Institute, which offers data and best practices for paint application.
Frequently Asked Questions (FAQ)
Q1: What’s the absolute latest I can leave painter’s tape on?
While the ideal is within 24 hours, if you absolutely must leave it longer, proceed with extreme caution. Use a hairdryer on a low heat setting to warm the tape and paint slightly before attempting removal. This can help soften the adhesive and the paint film. However, there’s no guarantee it will prevent damage, especially with certain paint types.
Q2: Can I leave painter’s tape on overnight?
Yes, generally you can leave painter’s tape on overnight, provided it’s within that 24-hour window. If your room is very humid or cold, the paint might still be wet enough to remove cleanly in the morning. Always check the paint’s tackiness before removing.
Q3: What happens if I leave painter’s tape on for a week?
Leaving painter’s tape on for a week significantly increases the risk of the paint bonding strongly to the tape. When you remove it, you’re very likely to pull up chunks of paint, create jagged lines, or experience significant paint bleed. It’s highly discouraged.
Q4: Does the color of the paint matter for tape removal time?
Generally, the color of the paint doesn’t directly affect the tape removal time. What matters more are the paint’s formulation (latex vs. oil-based, etc.), its drying and curing properties, and the environmental conditions.
Q5: Should I remove tape while the paint is still wet or wait until it’s dry to the touch?
Removing while the paint is still wet or slightly tacky is often preferred for the cleanest lines. However, if you’re worried about smudging wet paint, waiting until it’s dry to the touch (but not fully cured) is also a good option. The key is to avoid waiting until the paint is fully hardened and bonded to the tape.
Q6: I pulled the tape and it ripped the paint. What can I do now?
Don’t panic! If the paint is still wet, you might be able to gently press it back down and try removing the tape at a different angle. If the paint is dry and ripped, you’ll need to let it fully dry, then carefully sand the rough edge smooth, and touch up the line with a small brush. It takes patience, but it can be fixed!
Q7: Is there a way to ensure perfect lines even if I have to leave tape on longer?
For longer waits or very critical lines, consider the “reverse taping” technique. After your base coat has fully cured, apply your painter’s tape. Then, using a small brush, paint a thin bead of the base coat color along the edge of the tape where the new paint will go. Let this thin bead dry completely. Then, apply your new paint color. When you remove the tape, the base coat bead will act as a seal, preventing the new paint from bleeding under the tape, and you’ll get a much crisper line.
Conclusion
Mastering the art of painter’s tape removal is a small but mighty skill that can elevate your DIY painting projects from “good enough” to “wow!” Remember, the sweet spot for removing painter’s tape is while the paint is still wet or within that crucial 24-hour window. By understanding how paint dries, the type of tape you’re using, and the conditions of your workspace, you can confidently achieve those sharp, professional-looking lines you’re aiming for.
Always prioritize a clean surface, a firm tape seal, and a slow, steady removal. And when in doubt, a quick test run on an inconspicuous spot is your best friend. With these tips, you’re well-equipped to tackle your next painting project with confidence and achieve beautiful, lasting results. Happy painting!