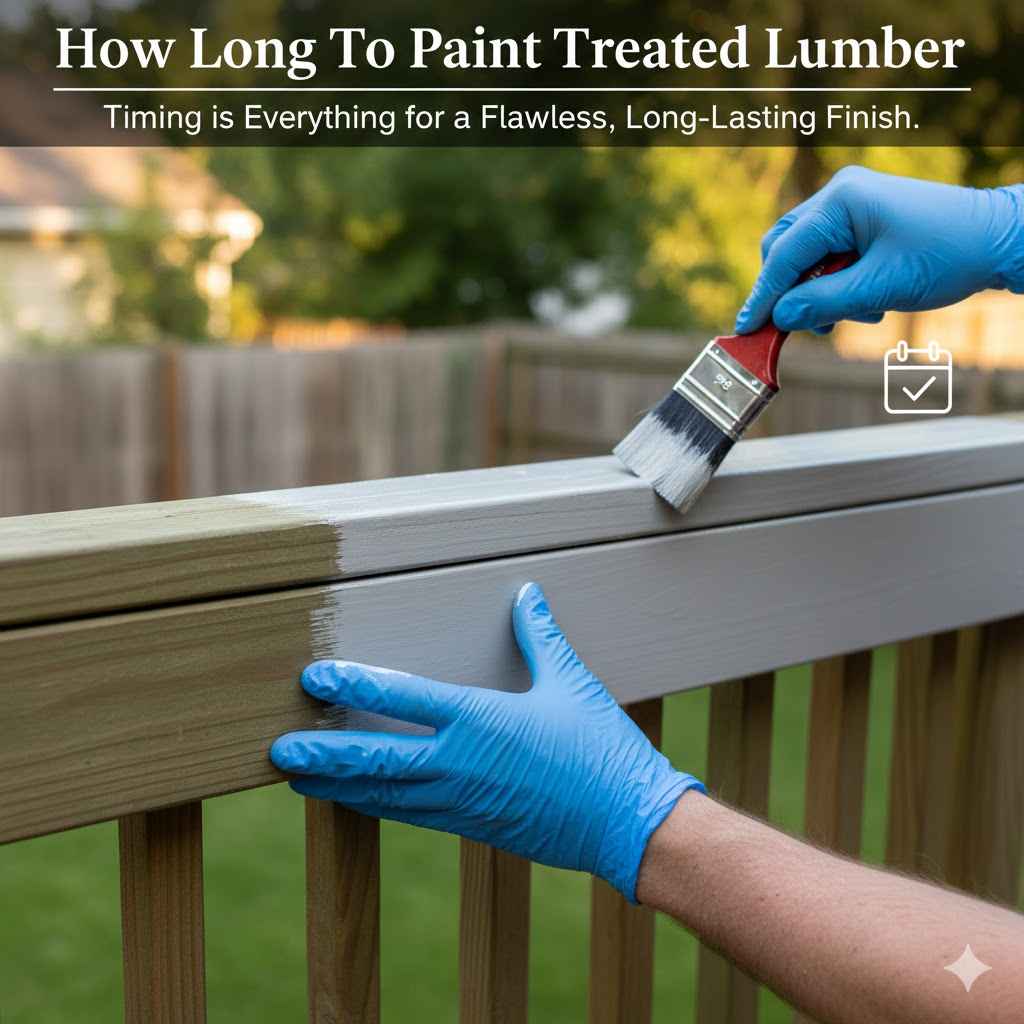
How Long To Paint Treated Lumber
It can be confusing to know when to paint treated lumber. Many people wonder, “How Long Should You Wait to Paint Treated Lumber?” especially when they want their outdoor projects to look great quickly. You might worry about the paint peeling or not sticking well.
Don’t fret! We’ve got a simple plan to help you get the perfect finish. This guide will walk you through it step-by-step.
Let’s make your treated wood projects look amazing!
Painting Treated Lumber A Quick Look
This section will give you a clear idea of why waiting is important and what happens if you paint too soon. We’ll cover the basics of treated lumber and how it interacts with paint. This will help you understand the whole process better.
You’ll learn why patience pays off for a long-lasting, beautiful finish on your outdoor projects.
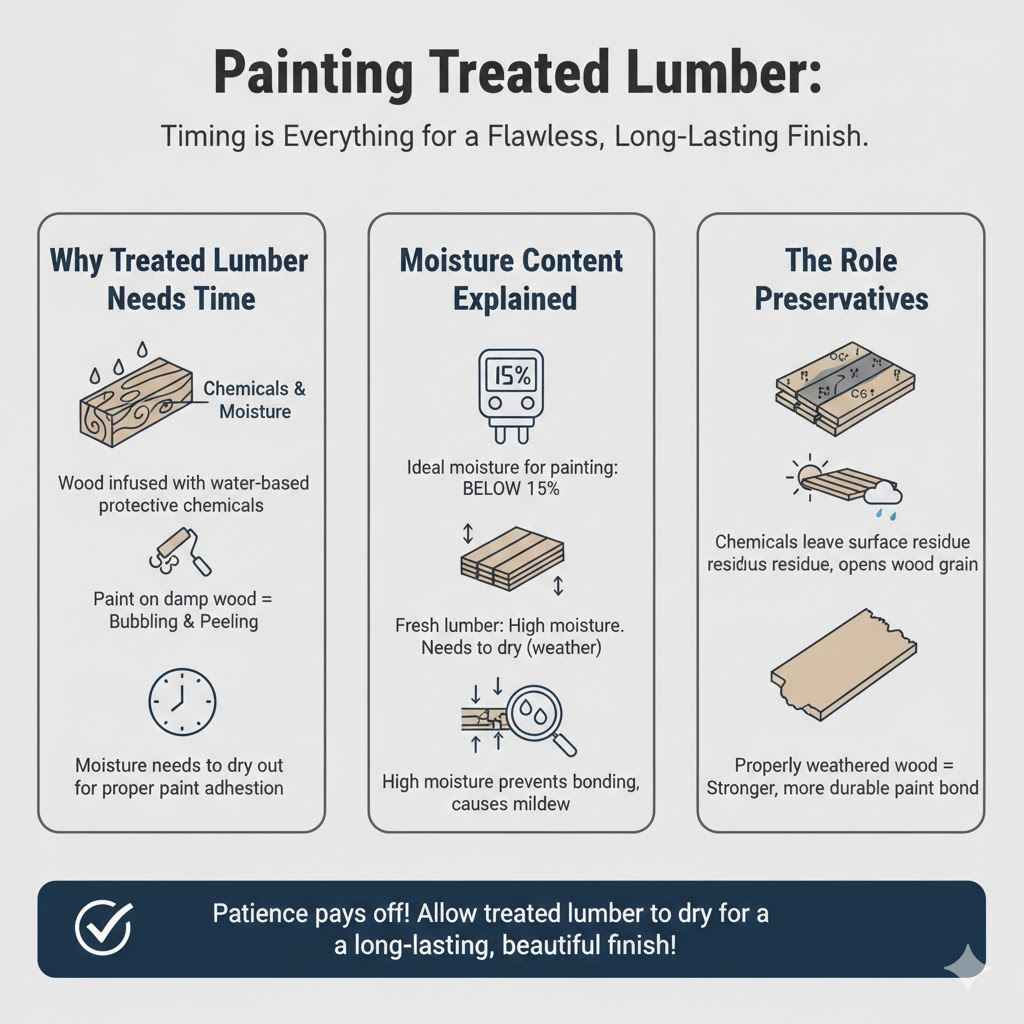
Why Treated Lumber Needs Time
Treated lumber is wood that has chemicals added to protect it from rot, insects, and decay. These chemicals are often water-based. When the wood is treated, it absorbs a lot of moisture from these chemicals.
This moisture needs to dry out before you can paint or stain it. If you paint too early, the paint might not stick properly. The moisture trapped underneath can cause the paint to bubble or peel later on.
Think of it like trying to put a sticker on a wet surface. The sticker won’t stay put for long. The same thing happens with paint on damp wood.
The chemicals used for treatment also need to stabilize within the wood. This process takes time. Rushing can lead to a finish that looks bad and doesn’t last.
Moisture Content Explained
The key to successful painting is the moisture content of the lumber. Treated lumber comes with a higher moisture level than untreated wood. Manufacturers treat the wood by forcing preservatives deep into its fibers.
This process often uses water as a carrier for these preservatives. Therefore, fresh treated lumber can be quite wet.
The ideal moisture content for painting or staining is typically below 15%. Some experts even recommend aiming for 12% or lower for the best adhesion. High moisture levels prevent paint from bonding correctly to the wood.
It can also lead to mildew growth under the paint film if the moisture remains trapped.
The Role of Preservatives
The preservatives in treated lumber are essential for its longevity, but they can affect how paint adheres. These chemicals are designed to protect the wood, and some might leave a residue on the surface as they dry. This residue can act as a barrier, preventing paint from forming a strong bond.
Allowing the wood to weather naturally for a period helps to leach out some of these surface residues. It also lets the wood dry out thoroughly. Over time, the wood’s surface becomes more receptive to paint.
This makes the paint job more durable and attractive.
How Long Should You Wait to Paint Treated Lumber Determining The Time
This section addresses the main question: How Long Should You Wait to Paint Treated Lumber? We will explore the different factors that influence this waiting period. You’ll learn about common recommendations and how to test your wood to be sure.
This information is key to a successful painting project.
General Waiting Period Guidelines
The general advice for how long you should wait to paint treated lumber can vary. Most manufacturers and painting professionals suggest waiting at least 24 to 72 hours after purchasing the wood. However, this is often just a starting point.
Many recommend waiting much longer, especially in humid or cooler climates.
A common guideline is to wait for the wood to air dry. This can take anywhere from a few weeks to several months. Some sources say you should wait a full season, like until the next spring, to be absolutely sure.
The goal is to let the wood dry out as much as possible. This ensures the best surface for paint adhesion and a lasting finish.
Factors Affecting Drying Time
Several things affect how quickly your treated lumber will be ready for paint. The weather is a big one. If it’s sunny and dry, your wood will dry faster.
If it’s humid, rainy, or cold, it will take much longer. Stacking the lumber properly also helps. Leaving space between boards allows air to circulate, which speeds up drying.
The type of treatment used can also play a role. Some treatments contain more water than others. The thickness and size of the lumber also matter.
Thicker boards take longer to dry out than thinner ones. The location where the wood is stored is important too. Is it in a sunny spot or a shady, damp area?
All these details add up.
Testing For Readiness
Instead of just guessing, you can test your lumber to see if it’s ready for paint. One simple test is the “water bead test.” Sprinkle a few drops of water on the wood. If the water beads up and sits on the surface, it means the wood is still too wet or has a waxy residue.
If the water soaks into the wood, it’s likely ready.
Another method is using a moisture meter. These are small electronic devices that measure the moisture content of wood. You simply press the probes into the wood, and it gives you a reading.
You are looking for a reading below 15%, ideally lower. This is the most accurate way to know for sure if your lumber is dry enough.
The Water Bead Test Explained
The water bead test is an easy, no-cost way to get a good idea if your treated lumber is ready. Take a small amount of water, like from a spray bottle or a cup. Sprinkle a few drops onto the surface of the wood you plan to paint.
Watch what happens to the water.
If the water forms little beads, like dew on grass, the wood surface is likely still saturated with moisture or has a waxy coating from the treatment process. These beads won’t soak in. This indicates you need to wait longer.
If the water spreads out slightly and begins to soak into the wood, appearing darker, this is a good sign. It suggests the wood is ready to accept a finish.
Using A Moisture Meter
For the most precise results, a wood moisture meter is the best tool. These devices are readily available at hardware stores. They work by sending a small electrical current through the wood.
The meter then measures the resistance to this current, which directly relates to the moisture level.
To use it, you simply insert the pins of the meter into the wood. Make sure to take readings in several different spots on the board, as moisture can vary. You are aiming for a reading of 15% moisture content or lower.
Some professionals prefer even lower, around 12%, for optimal paint adhesion. This tool takes the guesswork out of the process.
Case Study The Deck Project
Sarah wanted to build a deck before the summer holidays. She bought brand-new treated lumber. She was eager to paint it a beautiful blue to match her house.
She waited only three days, thinking it was enough time. She applied the paint, and it looked great initially.
However, after a few weeks of sun and a little rain, she noticed some spots where the paint was starting to bubble. Then, in one area, it began to peel off. Sarah realized she had rushed the process.
If she had waited longer, letting the wood dry and testing it, her deck would have looked perfect for much longer.
Preparing Treated Lumber For Painting
Once you know your treated lumber is dry enough, proper preparation is crucial. This section details the steps you need to take before applying any paint. Getting the surface ready ensures the paint will stick well and last for years.
It’s about creating the perfect canvas for your color.
Cleaning The Surface
Before you paint, the lumber must be clean. Dirt, dust, mildew, or sap can prevent paint from adhering. You can clean the wood with a stiff brush and a mild soap and water solution.
For tougher grime or mildew, a dedicated wood cleaner or a solution of one part bleach to three parts water can be used.
Always rinse the wood thoroughly after cleaning. Make sure all soap or cleaning solution is gone. Let the wood dry completely again before proceeding.
This might take another day or two, depending on the weather. A clean surface is essential for good paint adhesion.
Removing Mildew And Algae
Mildew and algae can grow on outdoor wood, especially in damp conditions. These organisms create a surface that paint cannot stick to effectively. You need to remove them completely.
A solution of one cup of household bleach mixed with a gallon of water is a common and effective cleaner for this.
You can apply this solution with a sponge or a garden sprayer. Let it sit for about 15-20 minutes. Then, scrub the wood gently with a stiff brush.
Rinse the surface very thoroughly with clean water. Ensure all bleach residue is washed away. Failure to remove mildew completely means the paint will likely fail in those spots.
Dealing With Surface Residue
Sometimes, even after cleaning, a waxy or chalky residue might remain on the surface of treated lumber. This residue comes from the wood treatment process and can interfere with paint adhesion. If the water bead test shows beads, this residue might be the cause.
A mild detergent scrub can help remove some of this. For more stubborn residue, a product designed to clean and de-wax wood might be necessary. Light sanding can also help break down this surface layer.
Always clean the dust off after sanding.
Sanding The Lumber
Lightly sanding the surface of the treated lumber creates a slightly rough texture. This texture gives the paint something to grip onto, improving adhesion. You don’t need to sand aggressively.
The goal is to create a smooth, even surface that’s ready for primer.
Use medium-grit sandpaper (around 100-150 grit). Sand in the direction of the wood grain. After sanding, always wipe away all the dust with a tack cloth or a slightly damp rag.
A clean surface is just as important as a slightly rough one for paint to stick well.
Choosing The Right Sandpaper
The grit of your sandpaper matters. You don’t want to use anything too coarse, as it can damage the wood and leave deep scratches. You also don’t want to use sandpaper that’s too fine, as it won’t provide enough grip for the paint.
For treated lumber that is fairly smooth, a 100-grit or 120-grit sandpaper is usually a good choice. If the wood is rougher or has some imperfections, you might start with an 80-grit and then follow up with 120-grit. The idea is to create a uniform surface.
Sanding Technique For Best Results
Always sand in the direction of the wood grain. This means sanding along the length of the boards. Sanding across the grain will create visible scratches that can show through the paint.
Use a sanding block or an orbital sander for a more even finish.
Apply steady, even pressure. Don’t press too hard in one spot. After sanding, it’s important to remove all the dust.
Use a shop vacuum or a stiff brush to get rid of the bulk of the dust. Then, wipe the surface down with a tack cloth or a clean, lint-free rag.
Priming For Durability
Using a good quality exterior primer is highly recommended when painting treated lumber. A primer seals the wood and provides an excellent base for your topcoat. It helps the paint adhere better, prevents stains from bleeding through, and ensures a more uniform color.
Choose a primer specifically designed for exterior use and for use on wood. Make sure it is compatible with the type of paint you plan to use. Apply the primer in a thin, even coat.
Allow it to dry completely according to the manufacturer’s instructions before applying the paint.
Choosing The Right Primer
Not all primers are created equal, especially when it comes to treated lumber. Look for an exterior-grade primer that offers good adhesion to challenging surfaces. Oil-based primers are often recommended for treated wood because they penetrate well and can seal in any remaining tannins or chemicals from the treatment.
However, many high-quality water-based (latex) exterior primers also perform very well. Always check the product label to ensure it’s suitable for exterior wood applications and compatible with your chosen paint. A primer that blocks stains will be especially helpful if the lumber has any dark streaks or knots.
Applying Primer Properly
Apply the primer in thin, even coats. Avoid applying it too thickly, as this can lead to drips and an uneven finish. Use a good quality brush or roller designed for exterior painting.
Ensure you cover all surfaces that will be painted.
Pay attention to the drying time recommended by the primer manufacturer. Most exterior primers require several hours to dry before you can apply the paint. Some may even require light sanding after drying to ensure a perfectly smooth surface for the topcoat.
Painting Treated Lumber The Right Way
Now that your lumber is clean, dry, and primed, it’s time for the fun part: painting! This section will guide you through the actual painting process. We’ll cover choosing the right paint, applying it, and ensuring a beautiful, long-lasting finish.
Following these steps will make your project look professionally done.
Selecting Exterior Paint
For outdoor projects, you must use paint specifically designed for exterior use. Exterior paints are formulated to withstand harsh weather conditions like sun, rain, and temperature changes. They are also more resistant to fading, cracking, and peeling.
Choose a high-quality acrylic latex paint. These paints are flexible, durable, and easy to clean up. They come in a wide range of colors and finishes.
For treated lumber, a satin or semi-gloss finish is often recommended because it’s durable and easier to clean than a flat finish.
Types Of Exterior Paint
The main types of exterior paint you’ll encounter are acrylic latex and oil-based. Acrylic latex paints are water-based, making them easy to clean up with soap and water. They are also flexible, which helps them expand and contract with the wood as temperatures change.
Oil-based paints, also known as alkyd paints, offer excellent durability and adhesion. They tend to form a harder film. However, they require mineral spirits for cleanup, and they can become brittle over time, which might lead to cracking on wood that experiences a lot of movement.
For most DIY projects, high-quality acrylic latex is a great choice.
Choosing The Right Finish
The finish of your paint refers to its sheen or gloss level. Common finishes include flat, satin, semi-gloss, and gloss.
- Flat finishes hide imperfections well but are harder to clean.
- Satin finishes offer a slight sheen and are more durable and washable than flat.
- Semi-gloss finishes are very durable, washable, and reflect more light, highlighting the wood’s texture.
- Gloss finishes are the most durable and easiest to clean but will show every imperfection.
For treated lumber, a satin or semi-gloss finish is generally preferred. They offer a good balance of durability, washability, and aesthetic appeal. They also tend to wear better over time on exterior surfaces compared to flat paints.
Application Techniques
How you apply the paint makes a big difference. You can use a brush, roller, or sprayer. For smaller projects or detailed areas, a good quality brush is best.
For larger surfaces like decks or fences, a roller or sprayer can be more efficient.
Always apply paint in thin, even coats. Two thin coats are always better than one thick coat. This provides better coverage, durability, and a smoother appearance.
Allow each coat to dry completely before applying the next.
Using Brushes And Rollers
If using a brush, choose one with synthetic bristles for latex paint. A 2-3 inch angled brush is versatile for cutting in edges and painting larger areas. Apply paint with long, even strokes, following the direction of the wood grain.
Avoid over-brushing, which can create brush marks.
When using a roller, a 3/8-inch or 1/2-inch nap roller cover is suitable for most wood surfaces. Rollers are great for quickly covering large areas like deck boards or fence panels. Use a roller tray and maintain a wet edge to avoid lap marks.
Work in manageable sections.
Using Paint Sprayers
Paint sprayers offer the fastest application for large projects. They provide a smooth, even finish. However, they require more preparation.
You’ll need to mask off any areas you don’t want painted and protect surrounding plants or structures from overspray.
Practice on a scrap piece of wood first to get the technique right. Hold the sprayer at a consistent distance from the surface and move it steadily. Apply paint in overlapping passes.
You may still need to do some touch-up with a brush for corners or tight spots.
Maintaining Your Painted Finish
Once your treated lumber is painted, a little care will help your finish last. Regular cleaning and occasional touch-ups will keep it looking its best and protect the wood underneath. This maintenance is key to enjoying your project for many years.
Regular Cleaning
Periodically clean your painted treated lumber. Use mild soap and water with a soft brush or cloth. Rinse thoroughly.
This removes dirt, dust, and prevents mildew growth. Avoid using harsh chemicals or power washers, as they can damage the paint and the wood.
Inspect And Touch Up
At least once a year, inspect your painted surfaces for any signs of wear. Look for chips, cracks, or areas where the paint might be peeling. Small damages can be touched up with matching paint.
This prevents water from getting under the paint and causing more significant problems.
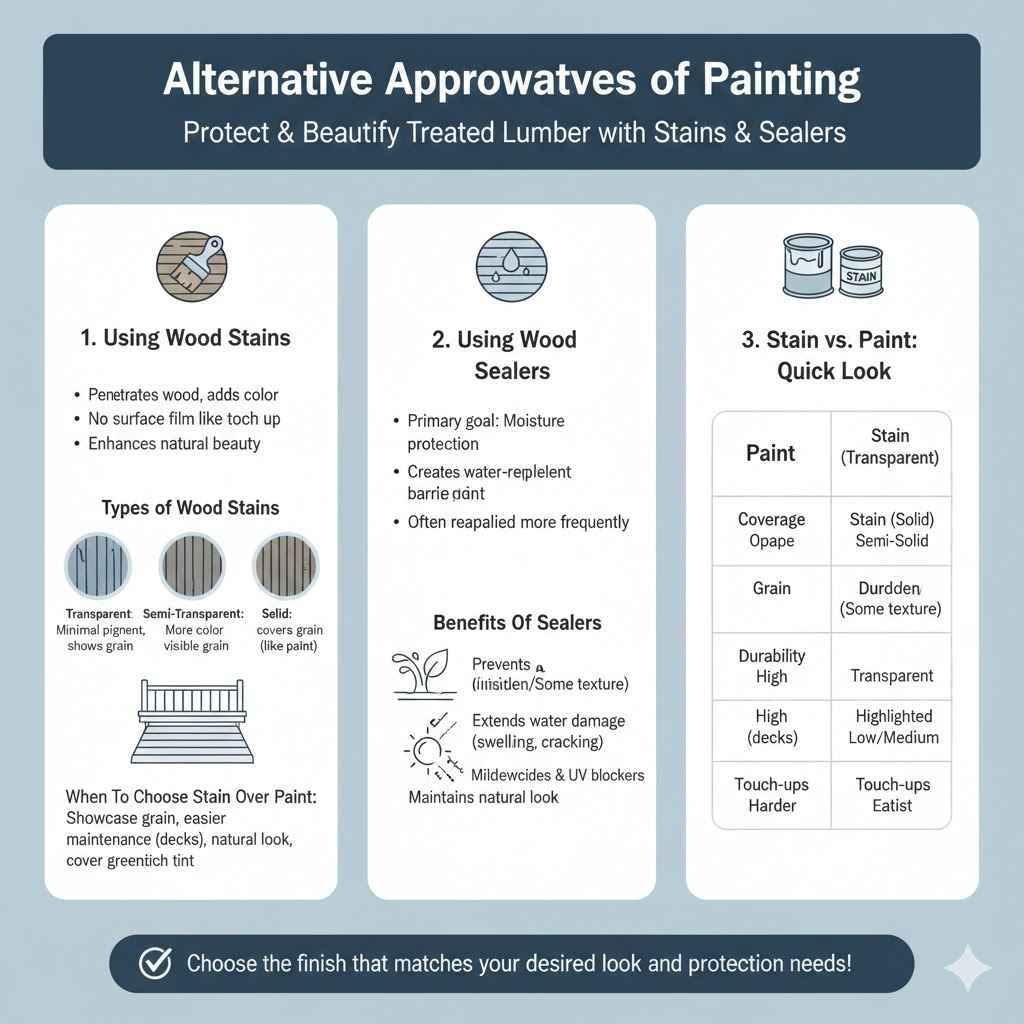
Alternative Approaches To Painting
While painting is a popular choice, other methods can also protect and beautify treated lumber. This section explores stain and wood sealer as alternatives, discussing their benefits and when you might choose them over paint.
Using Wood Stains
Wood stains don’t form a protective film on the surface like paint does. Instead, they penetrate the wood to add color. Stains come in various opacities, from transparent to solid.
Transparent stains allow the wood grain to show through, while solid stains look much like paint.
Stains are often easier to apply than paint and can be simpler to reapply or touch up later. They are a good option if you want to enhance the natural beauty of the wood while still providing some protection.
Types Of Wood Stains
Wood stains are generally categorized by their transparency.
- Transparent stains have minimal pigment and highlight the natural wood grain and color. They offer the least protection.
- Semi-transparent stains contain more pigment, offering more color and UV protection while still allowing some wood grain to be visible.
- Semi-solid stains have even more pigment, hiding more of the wood grain but still showing some texture.
- Solid stains are the most opaque and cover the wood grain almost completely, similar to paint.
The choice depends on the look you want and the level of protection needed.
When To Choose Stain Over Paint
If your treated lumber has a beautiful grain pattern that you want to showcase, a stain is a better choice than paint. Solid stains offer a similar look to paint but can be easier to maintain on horizontal surfaces like decks. Stains are also often favored for a more natural, rustic appearance.
Treated lumber can sometimes have a greenish tint from the treatment process, especially if it’s older. A solid stain can easily cover this. If you prefer a look that blends more with the natural environment, stain is a great option.
Using Wood Sealers
Wood sealers are designed primarily to protect wood from moisture. They create a barrier that repels water, preventing rot and decay. Some sealers also offer UV protection to prevent fading.
Sealers can be clear or tinted.
They are often used on their own for a natural wood look or as a protective layer over a stain. Sealers usually need to be reapplied more frequently than paint or solid stains.
Benefits Of Sealers
The main benefit of wood sealers is their ability to protect wood from water damage. This is crucial for any outdoor wood structure. By repelling water, they help prevent swelling, shrinking, and cracking that can occur when wood is exposed to the elements.
Some sealers also contain mildewcides and UV blockers, adding further protection. They can extend the life of the wood and keep it looking its best. They are a good choice when you want the wood to maintain its natural appearance.
Frequently Asked Questions
Question: Can I paint treated lumber immediately after buying it
Answer: No, you should not paint treated lumber immediately. It needs time to dry out. Painting too soon can lead to peeling and bubbling because the moisture trapped in the wood prevents the paint from adhering properly.
Question: How can I tell if my treated lumber is dry enough to paint
Answer: You can do a water bead test by sprinkling water on the wood. If it beads up, it’s too wet. If it soaks in, it’s likely ready.
A wood moisture meter is the most accurate way to check, aiming for below 15% moisture content.
Question: How long does treated lumber typically need to dry
Answer: The drying time varies greatly depending on weather conditions, but it often takes several weeks to a few months. In humid or cool climates, it can take even longer.
Question: Do I need to use a primer on treated lumber
Answer: Yes, using an exterior-grade primer is highly recommended. It helps the paint adhere better, seals the wood, and prevents stains from bleeding through, ensuring a more uniform and durable finish.
Question: What kind of paint is best for treated lumber
Answer: High-quality exterior acrylic latex paint is generally best. A satin or semi-gloss finish offers good durability and is easier to clean than a flat finish.
Summary
Knowing how long to wait to paint treated lumber is key for a lasting finish. Always let the wood dry thoroughly, test its moisture content, and prepare the surface by cleaning and priming. Using the right exterior paint and application methods ensures your projects look great and stand up to the weather for years.