How Many Layers of Polyurethane on Hardwood Floors? The Key
For most hardwood floors, apply a minimum of three coats of polyurethane. The first coat acts as a sealer, and the subsequent two coats build a durable, protective layer. High-traffic areas may benefit from a fourth coat for extra protection, ensuring a beautiful and long-lasting finish for your floors.
Hello, friend! It’s Md Meraj. You’ve just finished sanding your beautiful hardwood floors, and they look amazing. Now comes the final, crucial step: applying the polyurethane finish. But a question pops into your head that can feel surprisingly tricky: “How many layers of polyurethane do I actually need?”
Don’t worry, you’re not alone in asking this. It’s one of the most common questions I hear. Applying too few coats leaves your floor vulnerable to scratches and spills, while too many can be a waste of time and money. Getting it just right is the key to a floor that not only looks stunning but also stands up to everyday life. In this guide, I’ll walk you through everything, step-by-step, so you can finish your floors with confidence.
Why a Good Polyurethane Finish is Your Floor’s Best Friend
Before we count the coats, let’s talk about why this step is so important. Think of polyurethane as a clear, liquid shield for your wood floors. It’s not just about making them shiny; it’s about giving them the armor they need to last for years. Here’s what a proper finish does:
- Protects Against Damage: It creates a tough barrier against scratches, scuffs, and dings from furniture, pet claws, and daily foot traffic.
- Resists Spills and Stains: A good finish keeps spills like water, juice, or coffee from seeping into the wood and causing permanent stains or water damage.
- Enhances the Wood’s Beauty: Polyurethane brings out the natural grain and rich color of the wood, giving it depth and warmth.
- Makes Cleaning a Breeze: A sealed floor is smooth and non-porous, meaning dust and dirt can be easily swept or wiped away.
Simply put, the layers of polyurethane are what stand between your gorgeous wood and the chaos of daily life. That’s why getting the number of coats right is a non-negotiable step.
The Magic Number: How Many Coats Are Just Right?
Alright, let’s get straight to the answer you came for. For 99% of residential hardwood floors, the magic number is three coats.
This isn’t just a random number; it’s a proven formula for success. Here’s how it breaks down:
- The First Coat (The Sealer): This initial layer soaks into the wood pores, sealing the grain. It acts as a base for the other coats, ensuring they go on smoothly and bond well. This coat will often look a bit uneven as it absorbs differently across the wood, but that’s completely normal.
- The Second Coat (The Body): This coat begins to build the protective layer. It fills in any remaining gaps and starts creating that smooth, durable surface you’re looking for. The floor will start looking much more uniform after this coat.
- The Third Coat (The Topcoat): This is your final layer of defense. It provides the ultimate protection against wear and tear and gives the floor its final sheen, whether that’s matte, satin, semi-gloss, or high-gloss.
For most homes—living rooms, bedrooms, and dining areas—three coats are the perfect balance of protection, beauty, and cost-effectiveness.
When Would You Need More Than Three Coats?
While three is the standard, there are situations where a fourth coat is a smart idea. Think about areas that see a lot of action:
- High-Traffic Zones: Kitchens, hallways, and entryways get the most foot traffic. A fourth coat adds an extra layer of armor where it’s needed most.
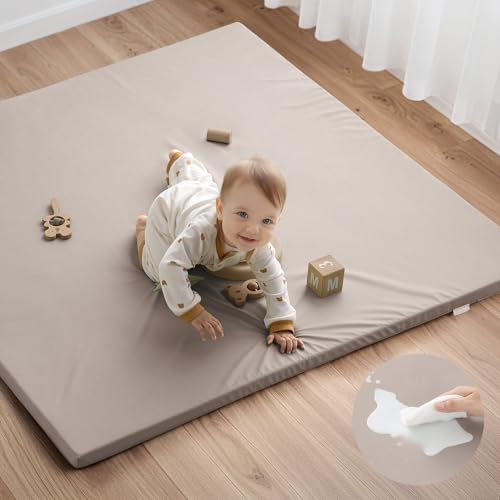
- Homes with Pets or Kids: Let’s be honest, claws and toys can be tough on floors. An extra coat provides peace of mind and added scratch resistance.
- Softer Woods: Woods like pine or fir are softer and dent more easily than oak or maple. A fourth coat can help improve their durability.
- Commercial Spaces: For a business or commercial property, four or even five coats might be necessary to handle the heavy, constant traffic.
Oil-Based vs. Water-Based: Does It Change the Number of Coats?
The type of polyurethane you choose also plays a big role. The two main types are oil-based and water-based, and they have different properties that affect the application process. However, the recommended number of coats generally stays the same: three coats are standard for both.
The main difference is in the thickness of each coat and the drying time.
- Oil-Based Polyurethane: This is the traditional choice. It goes on thicker, has a stronger smell, and takes longer to dry (8-12 hours between coats). It gives the wood a warm, amber glow that deepens over time. Because each coat is thicker, some people feel two heavy coats are enough, but three coats are still recommended for optimal durability.
- Water-Based Polyurethane: This is a more modern option. It goes on thinner, has a low odor, and dries much faster (2-4 hours between coats). It dries crystal clear and won’t yellow over time, which is great for preserving the natural color of light woods like maple. Because the coats are thinner, you should never apply fewer than three coats. A fourth coat is often recommended for high-traffic areas when using water-based products.
Quick Comparison: Oil-Based vs. Water-Based Polyurethane
| Feature | Oil-Based Polyurethane | Water-Based Polyurethane |
|---|---|---|
| Number of Coats | 3 coats recommended | 3-4 coats recommended |
| Dry Time Between Coats | 8-12 hours | 2-4 hours |
| Final Appearance | Warm, amber tint; deepens color | Crystal clear; preserves natural wood color |
| Odor/VOCs | High odor, high VOCs | Low odor, low VOCs |
| Durability | Slightly softer but very durable | Harder finish, excellent scratch resistance |
| Cleanup | Mineral spirits | Soap and water |
Factors That Influence Your Decision
Still not sure if you should stick with three coats or add a fourth? Here are a few key factors to consider for your specific project. Think of this as your personal checklist for deciding on the right number of layers.
1. Foot Traffic Level
This is the most important factor. Be realistic about how much use the floor will get.
| Traffic Level | Description | Recommended Coats |
|---|---|---|
| Low Traffic | Guest rooms, formal dining rooms | 3 Coats |
| Moderate Traffic | Bedrooms, living rooms, home offices | 3 Coats |
| High Traffic | Kitchens, hallways, entryways, homes with pets/kids | 3-4 Coats |
2. Type of Wood
The hardness of your wood can influence how many coats you need. Harder woods like oak, hickory, and maple are naturally more resistant to dents. Softer woods like pine, fir, or cherry can benefit from an extra layer of protection to increase their resilience.
3. Desired Sheen and Look
Each coat of polyurethane adds depth to the finish. If you’re aiming for a very deep, rich, high-gloss look, a fourth coat can enhance that effect. For a more natural, low-sheen look like satin or matte, three coats are typically perfect.
Your Step-by-Step Guide to Applying Polyurethane Coats
Ready to get started? Applying polyurethane is all about patience and process. Rushing is your enemy here! Follow these steps carefully for a smooth, professional-looking finish.
Tools and Materials You’ll Need:
- Polyurethane (oil-based or water-based)
- Applicator (natural bristle brush for oil-based, synthetic for water-based, or a T-bar applicator for large areas)
- Fine-grit sandpaper (220-grit) or a sanding screen
- Vacuum with a brush attachment
- Tack cloth or microfiber cloth
- Protective gear: respirator mask, safety glasses, gloves
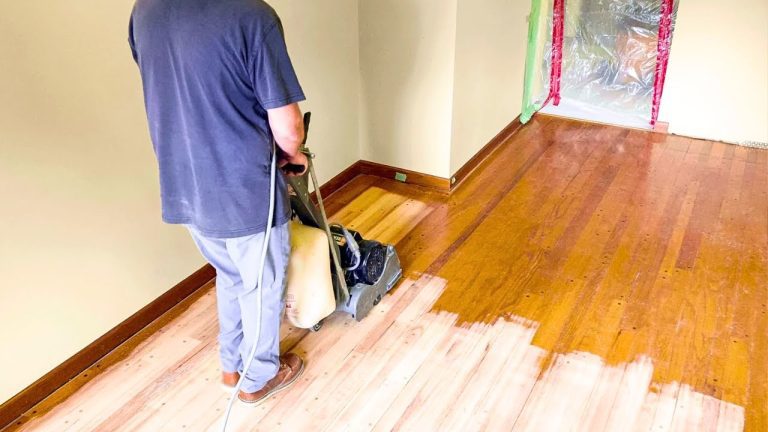
Step 1: The All-Important Prep Work
You can’t get a great finish on a poorly prepared surface. Your floor must be perfectly sanded, smooth, and spotlessly clean. Any dust, hair, or debris left on the floor will get trapped in the finish forever.
- Final Sanding: Your final sanding pass should be with a fine-grit paper (around 120-grit) to ensure the surface is smooth.
- Vacuum Thoroughly: Vacuum every inch of the floor. Use a brush attachment to get along the baseboards and in the corners.
- Wipe it Down: Go over the entire floor with a tack cloth or a slightly damp microfiber cloth to pick up any remaining fine dust.
- Safety First: If you are working on a home built before 1978, be sure to follow the EPA’s guidelines for lead-safe work practices. Safety is always the top priority.
Step 2: Apply the First Coat (The Sealer Coat)
Stir your polyurethane can gently but thoroughly. Never shake it! Shaking creates bubbles that will ruin your finish. Your goal is to apply a thin, even coat.
- Start at the corner farthest from your exit door.
- Apply the polyurethane in the direction of the wood grain.
- Use long, smooth strokes. Overlap each stroke slightly to avoid lines.
- Work your way methodically across the room until the entire floor is covered.
Step 3: Let it Dry and Lightly Sand
Patience is key. Check the can for the manufacturer’s recommended drying time.
- For Water-Based: Wait 2-4 hours.
- For Oil-Based: Wait 8-12 hours.
Once it’s fully dry, the floor needs to be lightly sanded, or “abraded.” This isn’t about removing the coat; it’s about scuffing the surface to create a better grip for the next coat. Use 220-grit sandpaper and a very light touch. The goal is to just dull the finish. After sanding, vacuum and wipe with a tack cloth again to remove all dust.
Step 4: Apply the Second Coat
Repeat the exact same process as the first coat. Apply a thin, even layer, working with the grain and moving methodically across the room. The floor will look much more uniform and start to build a nice sheen after this coat.
Step 5: Repeat for the Final Coat(s)
Once the second coat is dry, repeat the light sanding and cleaning process one more time. Then, apply your third and final coat. This is your “money” coat, so take your time and be meticulous. If you’ve decided to go with a fourth coat for extra durability, you’ll repeat this entire step one more time.
After the final coat, let the floor cure completely. You can typically walk on it in socks after 24 hours, but avoid placing furniture or rugs for at least 72 hours to a full week. Check your product’s instructions for specific curing times.
Common Mistakes to Avoid (Learn from My Experience!)
Over the years, I’ve seen a few common mistakes that can trip up even the most careful DIYer. Here’s what to watch out for:
- Shaking the Can: This is the #1 mistake. Shaking creates bubbles that get trapped in your finish. Always stir gently.
- Applying Coats Too Thickly: It’s tempting to lay it on thick to get the job done faster, but this leads to drips, bubbles, and a very long drying time. Multiple thin coats are always better than one thick one.
- Skipping the Sanding Between Coats: If you don’t lightly sand between coats, the next layer won’t stick properly and can peel or flake off later.
- Not Cleaning Enough: Any spec of dust or hair you miss will be immortalized in your floor. Be obsessed with cleaning between each step.
- Rushing the Dry Times: Applying a new coat before the previous one is fully dry can result in a gummy, tacky mess that never cures properly.
Frequently Asked Questions (FAQ)
1. Can you put too many coats of polyurethane on a floor?
Yes, it’s possible. While an extra coat in a high-traffic area is good, applying too many (like 5 or 6) can make the finish look thick, plasticky, and can sometimes lead to issues with chipping or cracking over time. For residential floors, it’s best to stick to 3 or 4 coats.
2. Do I really have to sand between every coat of polyurethane?
Yes, you absolutely should. This light sanding, or “abrading,” does two critical things: it smooths out any minor imperfections or dust nibs in the previous coat, and more importantly, it creates a microscopic “tooth” for the next coat to grip onto, ensuring a strong bond between layers.
3. How long should I wait between coats of polyurethane?
This depends on the product. Always check the manufacturer’s instructions on the can. As a general rule: for water-based polyurethane, wait 2-4 hours. For oil-based polyurethane, wait 8-12 hours. Wait until the surface is no longer tacky to the touch.
4. What happens if you don’t put enough coats of polyurethane on?
Applying too few coats (one or two) will leave your hardwood floors vulnerable. The finish will wear away quickly, especially in high-traffic areas, leaving the bare wood exposed to scratches, water damage, and stains. The floor will look dull and worn out much sooner than it should.
5. Is 2 coats of polyurethane enough for hardwood floors?
In almost all cases, no. Two coats are not sufficient for proper protection. The first coat acts mainly as a sealer that soaks into the wood. The second coat starts to build the protective layer, but you need a third coat to provide adequate durability for everyday life.
6. What type of applicator is best for applying polyurethane?
For cutting in along edges, a high-quality brush is great. Use a natural bristle brush for oil-based poly and a synthetic (nylon) brush for water-based poly. For the main floor area, many professionals and DIYers love using a T-bar applicator or a weighted lambswool applicator. These help apply thin, even coats over large areas quickly.
Finishing Your Floors with Confidence
So, there you have it. The answer to “how many layers of polyurethane on hardwood floors” is almost always a solid three, with a fourth coat as a powerful option for those extra-busy areas of your home. It’s not just about slapping on a finish; it’s about building a durable, beautiful shield one thoughtful layer at a time.
I know it can feel like a big project, but don’t be intimidated. By taking your time, preparing your surface properly, and following these steps, you can achieve a finish that looks like it was done by a pro. You’re giving your floors the protection they need to look beautiful for many years to come.
You’ve got this! Now go enjoy that stunning, freshly finished floor. You earned it.