How Much Does Landscape Lighting Cost: Essential Guide
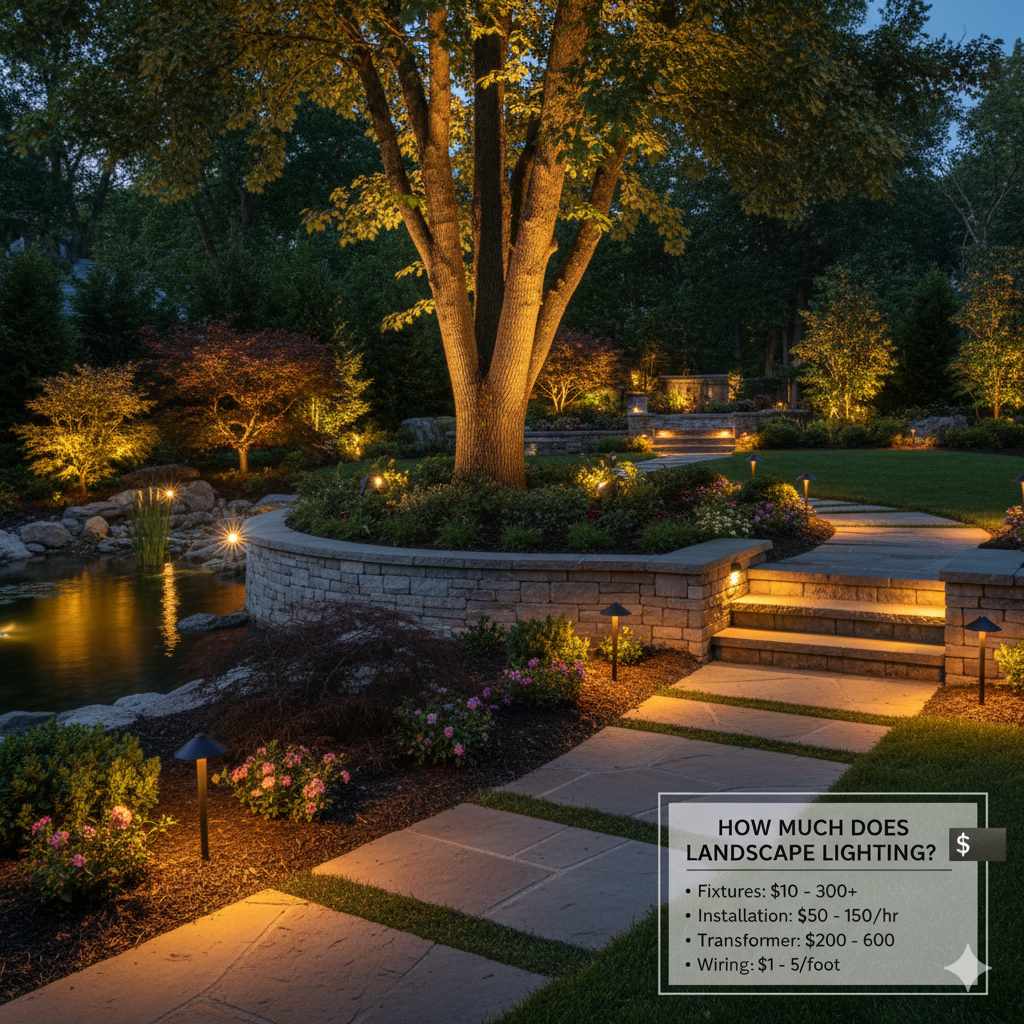
How Much Does Landscape Lighting Cost? This Essential Guide Breaks Down the Price Tag for Your Home!
Planning to add landscape lighting? You’re in for a treat! Beautiful outdoor lighting can transform your home, boosting curb appeal, enhancing safety, and creating a magical ambiance for evenings. But before you grab your tools, you’re probably wondering, “How much does landscape lighting cost?” This guide will walk you through everything, from understanding the factors that influence price to getting a clear picture of your budget. We’ll make it simple and stress-free, just like a good DIY project should be!
Welcome! I’m Md Meraj, and I love helping folks like you tackle home improvement projects with confidence. Adding landscape lighting might seem daunting, but it’s a fantastic way to elevate your home’s look and feel. You might be surprised at how accessible it can be. Many homeowners get stuck on the cost, unsure of what to expect. That’s where I come in! We’ll break down the expenses piece by piece, so you know exactly what you’re investing in. Let’s shine a light on the subject and get you ready to create a stunning outdoor space.
Understanding the Factors That Influence Landscape Lighting Costs
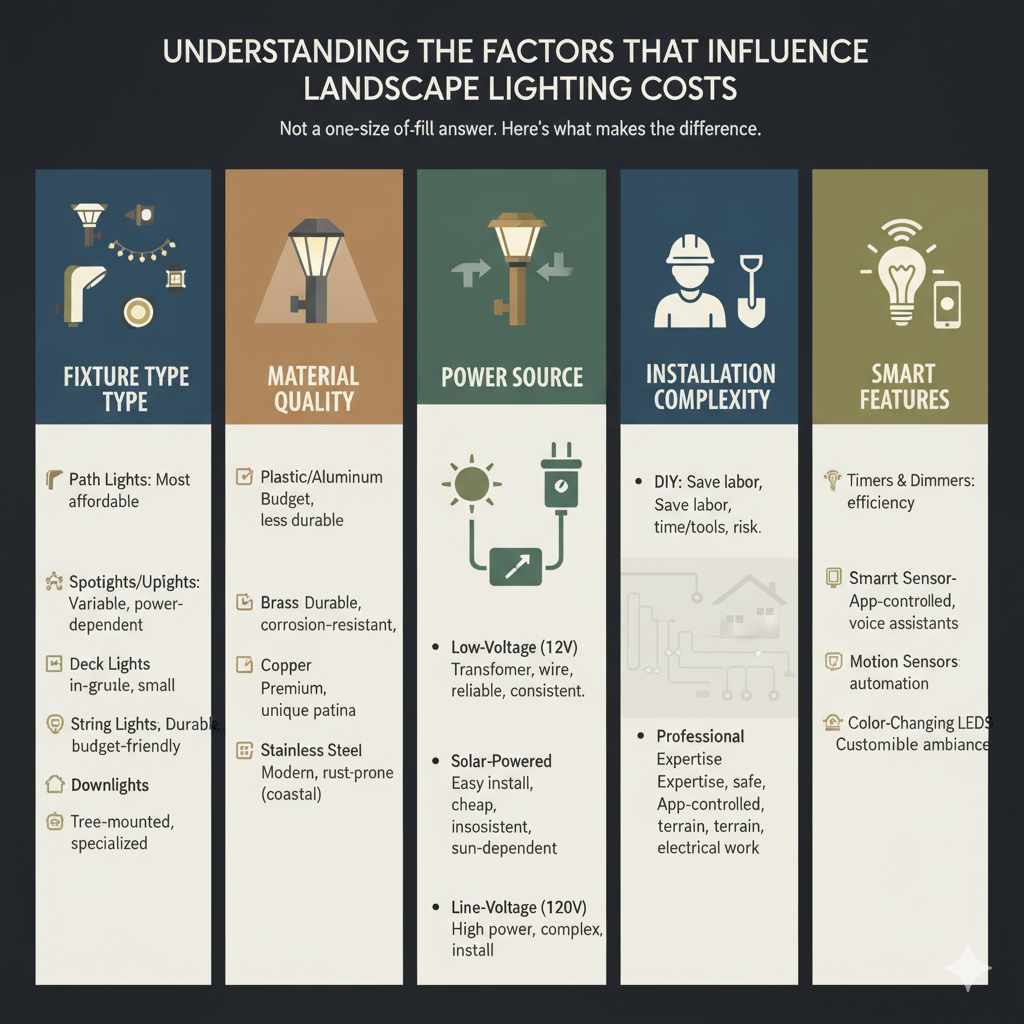
When we talk about the cost of landscape lighting, it’s not a one-size-fits-all answer. Several key elements come into play, and understanding them will help you get a more accurate estimate for your specific needs. Think of it like building a sturdy workbench – the size, the wood you choose, and the features you add all affect the final price. Let’s look at what makes the biggest difference.
1. The Number and Type of Fixtures
This is often the biggest driver of cost. More lights mean more materials and more installation time. But it’s not just about quantity; the type of fixture matters a lot.
- Path Lights: These are typically the most affordable, designed to illuminate walkways and garden paths.
- Spotlights/Uplights: Used to highlight architectural features or trees, these can vary in price depending on their power and durability.
- Deck/Patio Lights: Often smaller and designed for subtle illumination, their cost can range from basic to premium.
- Well Lights: Installed in the ground to wash light upwards on walls or trees, these are usually more expensive due to their robust, in-ground design.
- String Lights/Bistro Lights: Great for ambiance, these can be a budget-friendly option for patios and pergolas.
- Downlights: Mimic natural moonlight by being mounted in trees. These can be pricier due to their specialized mounting and aiming.
2. Material Quality and Durability
Just like choosing the right lumber for a project, the materials used in your landscape lights will impact both the upfront cost and how long they last.
- Plastic/Aluminum: Often the most budget-friendly options. They are lightweight but can be less durable and may fade or become brittle over time, especially in harsh weather.
- Brass: A popular choice for its excellent durability and resistance to corrosion. Brass fixtures develop a beautiful patina over time and can last for decades. They are a significant investment but often worth it in the long run.
- Copper: Similar to brass in its longevity and resistance to corrosion. Copper also develops a unique patina and is a premium material, reflecting a higher cost.
- Stainless Steel: Offers good durability and a modern look, but can be susceptible to rust in coastal or heavily salted environments.
3. Power Source and System Type
How your lights are powered is a crucial factor. The most common options are low-voltage and solar.
- Low-Voltage Systems (12V): These are the most common and recommended for permanent landscape lighting. They require a transformer to step down the voltage from your home’s electrical system. While the initial setup might be more involved, they offer consistent brightness, reliability, and the ability to use a wider range of fixtures. The cost includes the transformer, wire, and connectors.
- Solar-Powered Lights: These are the easiest to install and often the cheapest upfront. Each light has its own solar panel and battery. However, their brightness can be inconsistent, dependent on sunlight, and they may not last as long or offer the same lighting quality as low-voltage systems. They are great for accentuating smaller areas or for those on a very tight budget.
- Line-Voltage Systems (120V): Less common for typical landscape lighting due to safety concerns and the need for professional electrical work. These are usually reserved for specific applications like powering larger floodlights.
4. Complexity of Installation
Are you planning a simple setup for your front path, or an elaborate system covering your entire property? The complexity of the installation directly impacts labor costs if you hire a professional, or the amount of time and effort you’ll spend if you’re doing it yourself.
- DIY Installation: You save on labor costs, but you’ll need to factor in your time, any tools you need to buy or rent, and potential mistakes.
- Professional Installation: This involves hiring electricians or specialized landscape lighting companies. Their expertise ensures a safe, efficient, and aesthetically pleasing setup, but it adds significantly to the overall cost. Factors like trenching for wires, navigating difficult terrain, or integrating with existing electrical systems will increase labor time and cost.
5. Additional Features and Technology
Modern landscape lighting offers more than just illumination. Smart features can add to the cost but also provide convenience and energy savings.
- Timers and Dimmers: Allow you to control when lights turn on/off and their brightness.
- Smart Home Integration: Wi-Fi or Bluetooth controlled systems that can be managed via a smartphone app, often compatible with systems like Alexa or Google Home.
- Motion Sensors: Enhance security by turning lights on when movement is detected.
- Color-Changing LEDs: Offer customizable ambiance for special occasions.
Average Costs: What to Expect
Now that we’ve covered the influencing factors, let’s talk numbers. It’s important to remember that these are averages, and your project could fall above or below these ranges. Getting quotes from local professionals is the best way to get a precise figure for your home.
DIY Landscape Lighting Costs
If you’re a hands-on person ready to tackle this yourself, your costs will primarily be for materials and tools.
- Basic Solar Lights: You can find sets of solar path lights for as little as $30 to $100 for a dozen.
- Basic Low-Voltage Kits: Entry-level low-voltage kits, often including 4-6 fixtures, wire, and a small transformer, can range from $150 to $400.
- Mid-Range DIY System: For a more comprehensive DIY setup with better quality fixtures and more lights, expect to spend anywhere from $500 to $1,500. This might include 10-20 fixtures, a good transformer, and sufficient wire.
- High-End DIY System: If you opt for premium materials like brass and multiple types of fixtures, a DIY system could cost $1,500 to $3,000 or more.
Professional Landscape Lighting Installation Costs
Hiring professionals means you’re paying for their expertise, labor, and often higher-quality materials and warranties. This typically results in a higher overall cost but can save you time, hassle, and potential mistakes.
- Small Project (e.g., front walkway): For a few path lights and perhaps one uplight, professional installation might range from $500 to $1,500.
- Medium Project (e.g., front yard and some accent lighting): Covering the front of the house with a mix of fixtures could cost between $1,500 and $4,000.
- Large Project (e.g., entire property, complex design): A comprehensive system for the front and back yards, including uplighting, downlighting, and path lighting, can easily range from $4,000 to $10,000 or even more, depending on the scale and complexity.
Cost Breakdown Table (Example for a Mid-Size Project)
Here’s a look at how the costs might break down for a mid-size landscape lighting project, assuming professional installation. Remember, these are estimates and can vary widely.
| Component | Estimated Cost Range (Professional Installation) | Notes |
|---|---|---|
| Fixtures (10-15 lights) | $300 – $1,500 | Varies by material (aluminum vs. brass), type (path, spot, etc.) |
| Low-Voltage Transformer | $100 – $400 | Size depends on total wattage of fixtures |
| Wire and Connectors | $100 – $300 | Amount of wire depends on property size and layout |
| Labor (Design, Installation, Testing) | $1,000 – $3,000 | Includes trenching, wiring, fixture placement, adjustments |
| Optional Features (Timers, Smart Control) | $50 – $500+ | Adds to the overall cost but offers convenience |
| Total Estimated Cost | $1,550 – $5,700+ | This is a general estimate for a mid-sized property. |
DIY vs. Professional Installation: Weighing the Pros and Cons
Deciding whether to go the DIY route or hire a pro is a big decision. Both have their advantages and disadvantages, and the best choice depends on your budget, skills, and time.
DIY Landscape Lighting
Pros:
- Cost Savings: Significantly lower overall cost as you eliminate labor fees.
- Control and Customization: You have complete control over fixture selection, placement, and design.
- Sense of Accomplishment: The satisfaction of completing a project yourself.
- Flexibility: You can work at your own pace.
Cons:
- Time Commitment: Can be time-consuming, especially if you’re new to electrical work or landscaping.
- Potential for Mistakes: Incorrect wiring or installation can lead to system failures, safety hazards, or damage to your property.
- Tool Requirements: You may need to purchase or rent specific tools like trenchers or wire strippers.
- Limited Expertise: You might not have the design eye or technical knowledge for optimal placement and effect.
- Warranty Issues: Some manufacturers may void warranties if installation isn’t done by a certified professional.
Professional Landscape Lighting Installation
Pros:
- Expertise and Design: Professionals can create a cohesive, effective, and aesthetically pleasing lighting plan.
- Safety and Compliance: They ensure all work meets electrical codes and safety standards, crucial for outdoor electrical systems. For insights on electrical safety, the National Fire Protection Association (NFPA) offers valuable resources.
- Efficiency and Speed: They can complete the installation much faster than a DIYer.
- Quality Materials and Warranties: Professionals often use higher-quality fixtures and offer warranties on both materials and labor.
- Less Stress: You can relax knowing the job is being handled by experts.
Cons:
- Higher Cost: Labor and professional markups significantly increase the overall price.
- Less Control: You have less direct control over the day-to-day installation process.
- Scheduling: You need to work around the installer’s schedule.
Budgeting for Your Landscape Lighting Project
Creating a realistic budget is key to a successful project. Here’s how to approach it:
1. Define Your Goals
What do you want your landscape lighting to achieve? Is it for:
- Safety: Illuminating pathways, steps, and entryways.
- Security: Deterring intruders with well-lit areas.
- Aesthetics: Highlighting architectural features, trees, or garden beds.
- Ambiance: Creating a relaxing or entertaining outdoor living space.
Your goals will determine the types and number of fixtures you need, directly impacting the cost.
2. Assess Your Property
Walk around your property and note areas you want to illuminate. Consider the size of your yard, the number of trees, shrubs, and any features you want to highlight. Think about power sources – where is your nearest outdoor outlet if you’re going low-voltage?
3. Research Fixture Costs
Visit local hardware stores, home improvement centers, or online retailers to get an idea of fixture prices. Consider the materials (plastic, aluminum, brass) and brands. Remember that cheaper fixtures might need replacement sooner.
4. Get Multiple Professional Quotes (If Applicable)
If you’re hiring professionals, don’t settle for the first quote. Get at least three detailed quotes from reputable landscape lighting companies. Ensure the quotes specify the types of fixtures, the warranty, and a clear breakdown of costs.
5. Factor in Hidden Costs
Beyond the lights themselves, consider:
- Wire: You’ll need plenty of low-voltage wire.
- Transformers: Essential for low-voltage systems.
- Connectors and Splices: For secure electrical connections.
- Tools: If doing it yourself, you might need to buy or rent trenchers, wire strippers, shovels, etc.
- Permits: In some areas, electrical work might require permits. Check with your local municipality.
- Maintenance: Occasional cleaning, bulb replacement, or adjustments.
6. Consider Phased Installation
If your dream lighting system is beyond your current budget, consider a phased approach. Start with essential areas like the front path and entryway, and add more features in subsequent years. This allows you to spread the cost over time.
Types of Landscape Lighting Systems and Their Costs
The system you choose will significantly influence the cost and complexity. Let’s dive a bit deeper.
Low-Voltage Systems
These are the workhorses of landscape lighting. They run on 12 volts, making them safe and energy-efficient. A transformer converts your home’s 120-volt power down to 12 volts.
- Components: Transformer, low-voltage wire, fixtures, connectors.
- Pros: Reliable, consistent brightness, wide variety of fixtures, safe for DIY installation (though professional installation is recommended for optimal results and safety).
- Cons: Requires a transformer and running wires, higher upfront cost than solar.
- Cost: As mentioned, DIY kits can start around $150-$400, while professional installations for a moderate setup might be $1,500-$4,000. A good quality transformer alone can cost $100-$400.
Solar-Powered Systems
Each light has a small solar panel and battery, making them completely independent.
- Components: Individual lights, each with a solar panel and battery.
- Pros: Extremely easy to install (just stake them in the ground), no wiring needed, very low upfront cost, environmentally friendly.
- Cons: Dependent on sunlight for charging, brightness can be inconsistent, battery life can be short, limited fixture styles and brightness, may not last as long.
- Cost: Very affordable, with basic sets available for $30-$100. Higher-end solar lights with better battery life and brightness can cost $20-$50 per fixture.
Line-Voltage Systems (120V)
These use standard household voltage. They are less common for typical landscape lighting because they require more complex wiring and are generally less safe for DIY projects.
- Components: Standard electrical wiring, fixtures, possibly timers or photocells.
- Pros: Can power brighter, more powerful lights for larger areas.
- Cons: Requires professional electrical installation, higher safety risks, more expensive to install due to specialized wiring and labor.
- Cost: Significantly more expensive than low-voltage systems due to the need for licensed electricians and potentially more robust fixtures. This is typically for commercial applications or very specific needs.
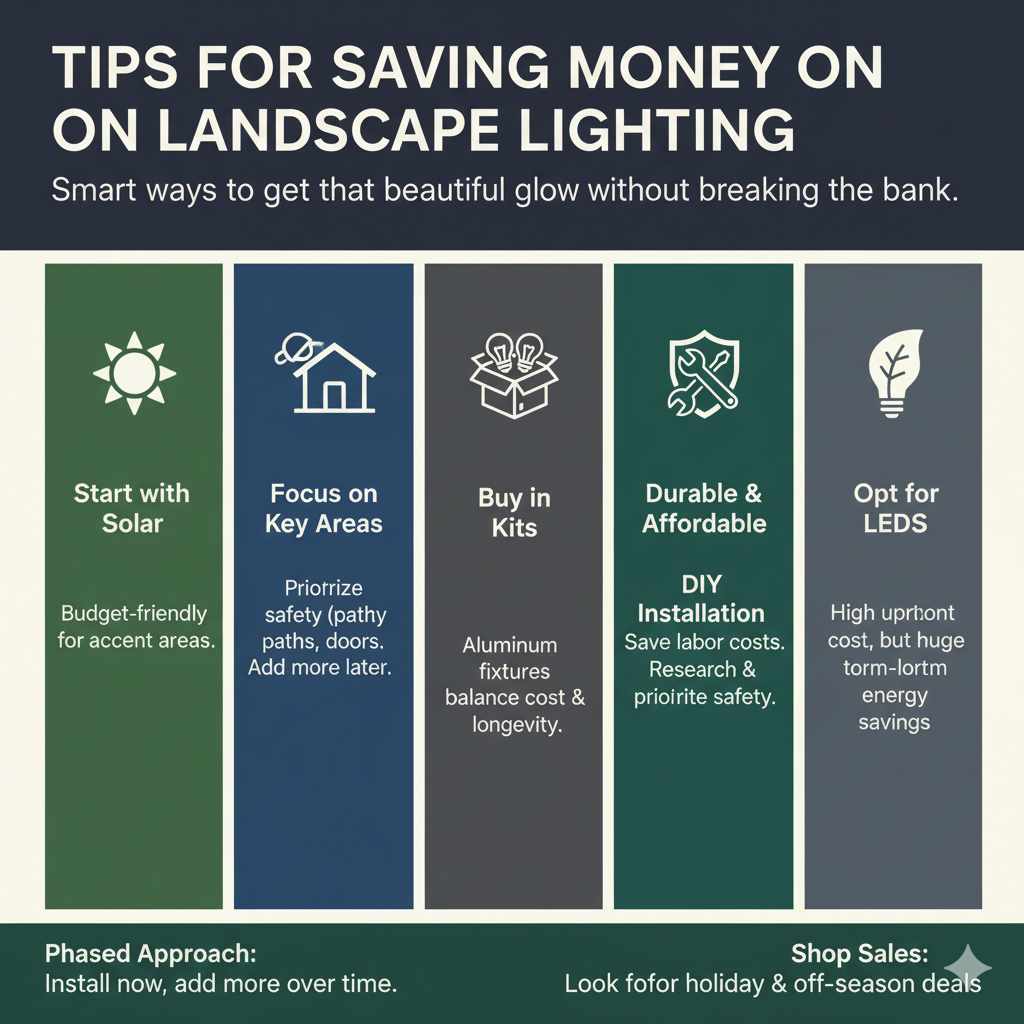
Tips for Saving Money on Landscape Lighting
Want to get that beautiful glow without breaking the bank? Here are some smart ways to save:
- Start with Solar: For areas where high brightness isn’t critical, solar lights are a great budget-friendly option.
- Focus on Key Areas: Prioritize safety and security. Light your front door, pathways, and any dark corners first. You can always add more later.
- Buy in Kits: Low-voltage kits often offer better value than buying individual components.
- Choose Durable but Affordable Materials: Aluminum fixtures are often a good balance between cost and durability compared to brass or copper.
- DIY Installation (for the brave!): If you’re comfortable with basic electrical work and have the time, DIY installation can save you hundreds or even thousands. Watch plenty of tutorials and prioritize safety. For guidance on basic electrical safety, check out resources from organizations like the Consumer Product Safety Commission (CPSC).
- Shop Sales and Off-Season: Look for deals during holiday sales or consider purchasing in the fall or winter when demand might be lower.
- Phased Approach: Install only what you can afford now and add more lights over time as your budget allows.
- Opt for LEDs: While the upfront cost of LED bulbs might be slightly higher, they use significantly less energy and last much longer than traditional bulbs, saving you money on electricity and replacements over time.
Frequently Asked Questions (FAQ)
Q1: How long does landscape lighting typically last?
With proper installation and quality materials, low-voltage landscape lighting systems can last 10-20 years or even longer. Solar lights typically have a shorter lifespan, often 3-5 years for the battery and the unit itself, though some higher-quality ones can last longer.
Q2: Is landscape lighting worth the investment?
Yes, most homeowners find it to be a worthwhile investment. It enhances curb appeal, increases property value, improves safety and security, and creates a more enjoyable outdoor living space. The aesthetic and functional benefits often outweigh the cost.
Q3: What is the average cost per light fixture?
The cost per fixture can range from $15-$30 for basic plastic solar lights, $30-$100 for decent quality low-voltage aluminum path lights, and $70-$200+ for premium brass or copper uplights and specialty fixtures.
Q4: Do I need an electrician to install low-voltage landscape lighting?
While low-voltage systems are safer than line-voltage systems, professional installation by a licensed electrician or a certified landscape lighting installer is highly recommended. They ensure the system is installed correctly, safely, and to code, which can prevent future problems and ensure optimal performance.
Q5: What is the cheapest way to add landscape lighting?
The cheapest way is to purchase basic solar-powered lights. They require no wiring or professional installation. However, their performance and longevity are often limited.
Q6: How much does a transformer for landscape lighting cost?
A low-voltage transformer can cost anywhere from $100 to $400 or more, depending on its wattage capacity (which determines how many lights it can power) and features like timers or photocells.
Q7: Can I use my existing outdoor outlets for landscape lighting?
For low-voltage systems, you would connect the transformer to an outdoor outlet. For line-voltage (120V) landscape lighting, you would also use an outdoor outlet, but this requires more caution and often professional electrical work to ensure it’s safe and properly grounded.
Conclusion
As you can see, the cost of landscape lighting is a spectrum, influenced by many factors from the number of fixtures to the materials you choose and whether you DIY or hire a pro. For a basic DIY solar setup, you might spend under $100. For a comprehensive, professionally installed low-voltage system using premium brass fixtures, you could be looking at $5,000 to $10,000 or more.
The key is to understand your needs, research your options, and get clear quotes. Whether you’re aiming for a subtle glow on your garden path or a dramatic illumination of your entire home’s facade, there’s a landscape lighting solution for almost every budget. By planning carefully and making informed choices, you can confidently add beauty, safety, and value to your home. Happy lighting!