How Soon Can Pressure Treated Wood Be Painted? Expert Tip
Learning How Soon Can Pressure Treated Wood Be Painted? Expert Tip can feel a bit tricky for newcomers. Many wonder if they can just grab a brush and get to work right away.
This common question pops up because pressure treated wood is wet when you buy it. It needs time to dry out properly before paint sticks. We’ll walk you through this step-by-step, making it super simple so your painted wood looks great.
Understanding Pressure Treated Wood Drying Times
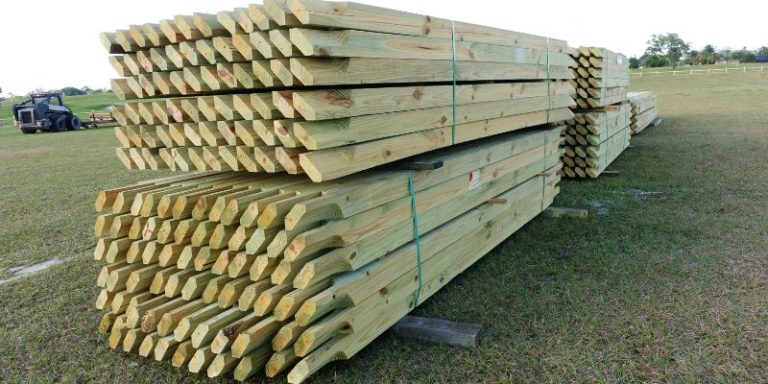
Pressure treated wood is a popular choice for outdoor projects because it resists rot and insects. It’s treated with chemicals forced deep into the wood fibers under pressure. This process ensures long-lasting protection.
However, the treatment also adds a lot of moisture to the wood. This moisture is the main reason you can’t paint it immediately. For paint to adhere well and last a long time, the wood must be dry enough.
If you paint too soon, the moisture trapped inside can cause the paint to peel, blister, or bubble. This is a common problem that can ruin the look of your project.
The Science Behind Drying
When lumber is pressure treated, it’s placed in a sealed cylinder. A special solution, typically containing copper compounds, is then forced into the wood under high pressure. This infusion protects the wood from decay and pests.
The process adds a significant amount of liquid to the wood. Think of it like a sponge soaking up water. This liquid needs to evaporate from the wood’s surface and from within its cells before it can accept a coating like paint or stain.
The drying process is influenced by several factors. These include the humidity in the air, the temperature, and how much air circulation the wood receives. Wood left out in a breezy, warm environment will dry faster than wood stacked in a damp, shaded area.
The type of wood and how deeply it was treated also play a role. Softer woods might dry quicker than denser hardwoods.
Common Misconceptions About Drying
One frequent misunderstanding is that if the surface of the pressure treated wood feels dry to the touch, it’s ready for paint. This is rarely the case. The surface might feel dry because the outer layer has had a chance to air out, but the core of the wood could still be saturated with treatment solution and water.
This trapped moisture will eventually try to escape. When it encounters a solid layer of paint, it can push the paint off, leading to failure of the coating.
Another myth is that a primer will automatically solve the problem of painting wet wood. While primers are designed to help paint adhere, they are not magic solutions for moisture issues. A good primer needs a stable surface to bond to.
If the wood is still releasing moisture, even the best primer will struggle to create a lasting bond. This can result in premature paint failure, despite using a primer.
How Soon Can Pressure Treated Wood Be Painted Expert Tip
The core question, How Soon Can Pressure Treated Wood Be Painted? Expert Tip, has a simple answer: patience is key. The wood needs time to dry to a specific moisture content.
This ensures a durable and attractive finish. This section provides the expert advice you need to get it right the first time.
The Moisture Meter Test
The most reliable way to know when your pressure treated wood is ready for painting is by using a moisture meter. This is a small, handheld device with two metal probes that you insert into the wood. It measures the percentage of moisture content in the wood.
For most paint and stain applications on pressure treated wood, you’re looking for a moisture content of around 15-20%. Some manufacturers might suggest even lower, like 12-15%, for optimal results. Always check the paint or stain manufacturer’s recommendations if available.
Using a moisture meter takes the guesswork out of the process. You can get accurate readings by testing several spots on the wood. Make sure to test in different areas, especially on thicker pieces.
The probes only measure a small depth, so testing in multiple locations helps you get a good average. If the meter shows a reading above your target range, the wood needs more time to dry.
Moisture meters are relatively inexpensive and can be found at most hardware stores or online retailers. They are a worthwhile investment for anyone who frequently works with wood, especially pressure treated lumber. Having one ensures your projects are built to last and look their best.
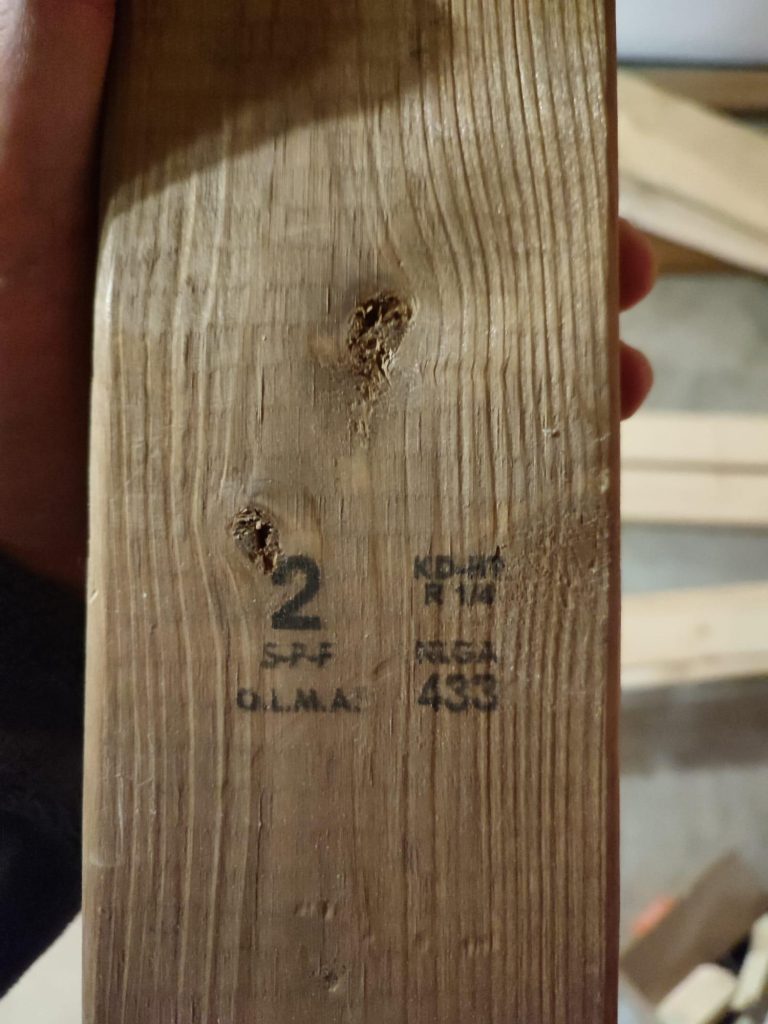
Visual Cues and Feel Test
While a moisture meter is the most accurate method, there are visual and tactile cues you can use as a preliminary check. When you first buy pressure treated wood, it often looks darker, and you might see a slight greenish tint. It will also feel damp to the touch.
As it dries, the color will lighten, and it will feel dry and much lighter in weight.
However, relying solely on these cues can be misleading. Wood can appear dry on the surface while still holding significant moisture internally. For instance, a hot, sunny day might dry the outside of a board quickly, but the inside could remain wet for weeks.
Therefore, it’s always best to use these visual and feel tests as a supplement to, not a replacement for, using a moisture meter.
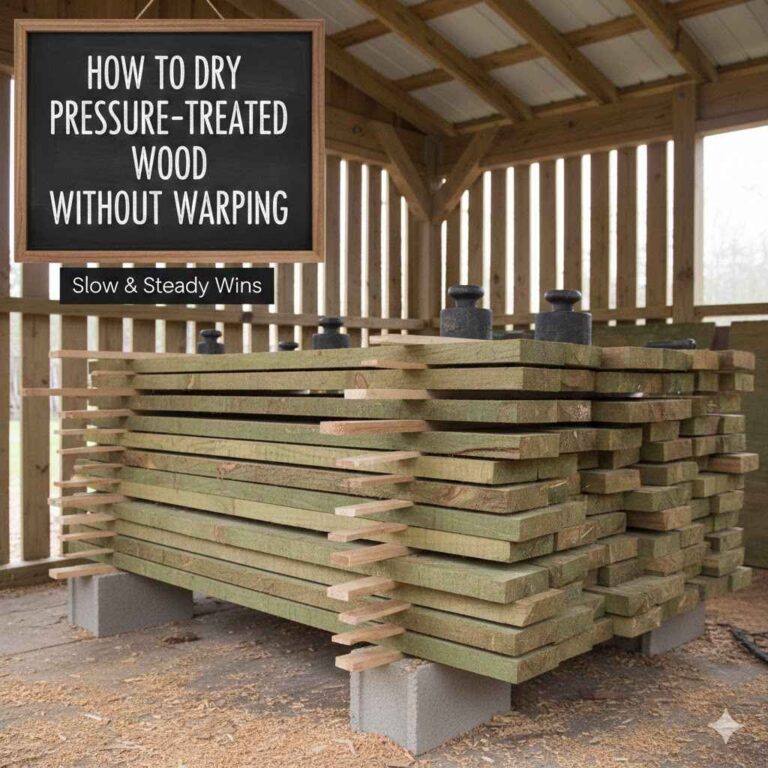
The Waiting Game Timeframes
So, how long is “the waiting game”? The exact drying time for pressure treated wood can vary greatly. It typically ranges from a few weeks to several months.
Several factors influence this timeframe:
- Environmental Conditions: Warm, dry, and breezy weather speeds up drying. Cold, humid, or stagnant conditions slow it down significantly.
- Wood Thickness: Thicker boards take longer to dry than thinner ones.
- Treatment Level: Wood treated for ground contact might hold more moisture than wood treated for above-ground use.
- Wood Species: Denser woods take longer to dry than porous woods.
A common guideline is to allow at least one to two weeks of drying time for every inch of thickness. However, this is just a rough estimate. For example, a 2×6 board might take 4-8 weeks to dry sufficiently in good weather.
A thicker 4×4 post could take 2-3 months or even longer. It’s always better to be safe and let it dry longer than you think it needs to.
A good rule of thumb is to let it dry until it has lost its noticeable greenish hue and feels significantly lighter. Then, confirm with a moisture meter. If you’re planning a project, factor in this drying time when you start.
Purchasing the wood a few months in advance of when you plan to paint or stain is often a wise strategy.
Preparing Pressure Treated Wood for Painting
Once your pressure treated wood has reached the correct moisture content, preparation is key. This ensures the paint adheres properly and gives you a smooth, long-lasting finish. Skipping these steps can lead to paint peeling or an uneven appearance, even after proper drying.
Cleaning the Wood Surface
After the wood has dried, it’s essential to clean the surface. Over time, dirt, dust, mildew, and other debris can accumulate. These contaminants can prevent paint from adhering to the wood.
You can clean the wood using a stiff brush and a solution of water and a mild detergent. For tougher grime or mildew, a specialized wood cleaner or a solution of 1 part bleach to 3 parts water can be used. Always wear protective gear like gloves and eye protection when using cleaning solutions.
Rinse the wood thoroughly after cleaning to remove any residue from the detergent or cleaning solution. Allow the wood to dry completely after washing before proceeding to the next step. This might take a day or two, depending on the weather.
Ensuring the surface is clean and dry is a critical step for achieving a professional-looking paint job.
Sanding for a Smooth Finish
Sanding is an important step to create a smooth surface for paint application. It also helps to remove any loose fibers or splinters that may have appeared during the drying process. Start with a medium-grit sandpaper, such as 80 or 100 grit, to remove any rough patches.
If the wood is particularly rough or has raised grain, you might need to start with a coarser grit.
After using the medium-grit paper, follow up with a finer-grit sandpaper, like 150 or 180 grit. This will create a smooth surface that is ideal for paint. Always sand in the direction of the wood grain.
After sanding, be sure to wipe away all dust with a clean cloth or a tack cloth. This removes any remaining dust particles that could mar the paint finish.
Priming for Maximum Adhesion
Applying a quality primer is crucial for painting pressure treated wood. A good exterior-grade primer will seal the wood, provide a uniform surface, and improve the adhesion of your topcoat of paint. It also helps to block any potential tannins that might bleed through from the wood and stain the paint.
Choose a primer specifically designed for exterior use and compatible with your chosen paint. Look for stain-blocking primers that can handle the alkaline nature of pressure treated wood. Apply the primer evenly and allow it to dry completely according to the manufacturer’s instructions.
This might take several hours or overnight. Proper priming is the foundation for a durable and attractive paint finish.
Choosing the Right Paint and Application Methods
Selecting the appropriate paint and using the correct application methods will ensure your project looks great and lasts for years. Pressure treated wood, once properly dried and prepped, can be painted with various exterior-grade paints.
Types of Exterior Paint
For pressure treated wood, it’s best to use high-quality exterior-grade paints. These paints are formulated to withstand the elements, including sun, rain, and temperature fluctuations. The two most common types are:
- 100% Acrylic Latex Paint: This is often the preferred choice for exterior applications. Acrylic latex paints are flexible, durable, and offer excellent adhesion. They are also relatively easy to clean up with water. Their flexibility allows them to expand and contract with the wood as temperatures change, reducing the risk of cracking or peeling.
- Oil-Based (Alkyd) Paint: Oil-based paints offer excellent durability and adhesion, often providing a harder finish than latex paints. They are known for their ability to cover stains and provide a smooth, uniform surface. However, they are less flexible than acrylics and cleanup requires mineral spirits.
When choosing a paint, always check the product label to ensure it is suitable for exterior use and compatible with pressure treated wood. Some paints may specifically mention compatibility with treated lumber.
Application Techniques
Proper application techniques are as important as the paint itself. Whether you choose to brush, roll, or spray, ensure you apply thin, even coats.
- Brushing: Brushing provides the most control, especially for detailed areas or intricate designs. Use a good quality brush that holds its shape well. Work in long, even strokes, following the grain of the wood. Avoid applying too much paint at once, which can lead to drips and uneven coverage.
- Rolling: Rolling is a faster method for larger, flat surfaces like decks or fences. Use a roller with a nap length appropriate for the wood’s texture. A medium nap (3/8 to 1/2 inch) is usually suitable. Apply even pressure and overlap each pass slightly to ensure full coverage.
- Spraying: Spraying is the quickest method for large projects and can provide a very smooth, uniform finish. However, it requires more preparation to protect surrounding areas from overspray. Ensure you have the right spray tip for the paint’s viscosity and use consistent, overlapping passes. You may still need to back-brush or back-roll to ensure the paint is worked into the wood grain.
Regardless of the application method, apply two thin coats of paint rather than one thick coat. Allow the first coat to dry completely according to the manufacturer’s instructions before applying the second. This will result in a more durable and aesthetically pleasing finish.
Maintenance and Longevity
Even with careful preparation and application, painted pressure treated wood will require maintenance. Regular cleaning will help to keep the paint looking fresh and prevent the buildup of dirt and mildew. Inspect the painted surfaces annually for any signs of chipping, peeling, or fading.
Touch up any areas as needed to maintain the protective coating.
Most high-quality exterior paints can last anywhere from 5 to 10 years or more before a full repainting is necessary, depending on exposure and maintenance. Proper care will significantly extend the life and beauty of your painted project.
Case Studies and Real-World Scenarios
Seeing how others have handled painting pressure treated wood can provide valuable insights. These real-life examples highlight common challenges and successful outcomes.
Scenario 1 Building a Deck Railing
Sarah wanted to build a new railing for her deck. She purchased standard pressure treated lumber for the posts and rails. She knew she wanted to paint it a bright white to match her house trim.
Initially, she was tempted to paint it a week after building the railing, as the wood felt dry enough on the surface. However, she remembered reading about drying times.
Sarah decided to wait a full month. During this time, she stored the wood in a place with good airflow. She used a moisture meter and found that most of the pieces were reading around 18-20% moisture.
She then cleaned the wood, sanded it, and applied a stain-blocking exterior primer. After the primer dried, she applied two coats of high-quality exterior acrylic latex paint.
The result was a beautifully finished railing that has held up exceptionally well for over three years. She avoided the common problem of paint peeling because she allowed the wood to dry sufficiently before painting.
Scenario 2 A Backyard Fence Project
Mark was building a privacy fence around his yard. He used pressure treated 4×4 posts and 6-foot fence boards. He bought the lumber in late spring.
He planned to paint the fence a dark brown. He initially thought about painting it within a few weeks, but the weather was cool and damp, which made the wood feel and look very wet for a long time.
Mark decided to be patient. He let the lumber sit uncovered in his yard for about three months, through the warmer summer months. He checked the moisture content periodically.
By late summer, his moisture meter consistently read between 15% and 19%. He then proceeded with cleaning, sanding, priming with an exterior oil-based primer for extra durability, and applying two coats of a dark brown exterior paint.
His fence looks fantastic and has shown no signs of paint failure even after a couple of harsh winters. This extended drying time, influenced by the weather and wood thickness, was crucial for his project’s success.
Factors Affecting Drying Time Data
Data from lumber treatment facilities indicates that freshly treated lumber can have moisture content levels ranging from 20% up to 60% or more, depending on the wood species and treatment process. For above-ground applications like fences and railings, a target moisture content below 20% is generally recommended for optimal coating adhesion. For ground-contact applications, the moisture content might be less critical for painting success, as these areas are often stained or left to weather naturally, but for paint, drying is still paramount.
A study by a wood coatings manufacturer found that painting wood with a moisture content above 20% led to an adhesion failure rate of over 50% within one year, compared to less than 5% failure for wood painted at or below 15% moisture content. This underscores the importance of accurate moisture measurement.
Frequently Asked Questions
Question: Can I paint pressure treated wood as soon as I get it home?
Answer: No, you should not paint pressure treated wood as soon as you get it home. It needs to dry out significantly first, which can take weeks or even months, to ensure the paint adheres properly.
Question: How long does it typically take for pressure treated wood to dry enough for painting?
Answer: Drying times vary greatly but generally range from a few weeks to several months. Factors like wood thickness, weather conditions, and wood species play a big role.
Question: What is the best way to check if pressure treated wood is dry enough to paint?
Answer: The most accurate method is to use a moisture meter. You are typically looking for a moisture content of 15-20% or lower, according to paint manufacturer guidelines.
Question: What happens if I paint pressure treated wood too soon?
Answer: If you paint pressure treated wood before it’s dry, the trapped moisture can cause the paint to bubble, peel, or blister as it tries to escape through the paint layer.
Question: Do I need to use a primer on pressure treated wood before painting?
Answer: Yes, using a quality exterior-grade primer is highly recommended. It helps seal the wood, improve paint adhesion, and block potential stains from bleeding through.
Summary
To successfully paint pressure treated wood, wait until it’s adequately dry. Use a moisture meter to confirm it’s at 15-20% or lower. Clean, sand, and prime the wood thoroughly.
Then apply two thin coats of quality exterior paint. This patient approach ensures a lasting and beautiful finish for your projects.