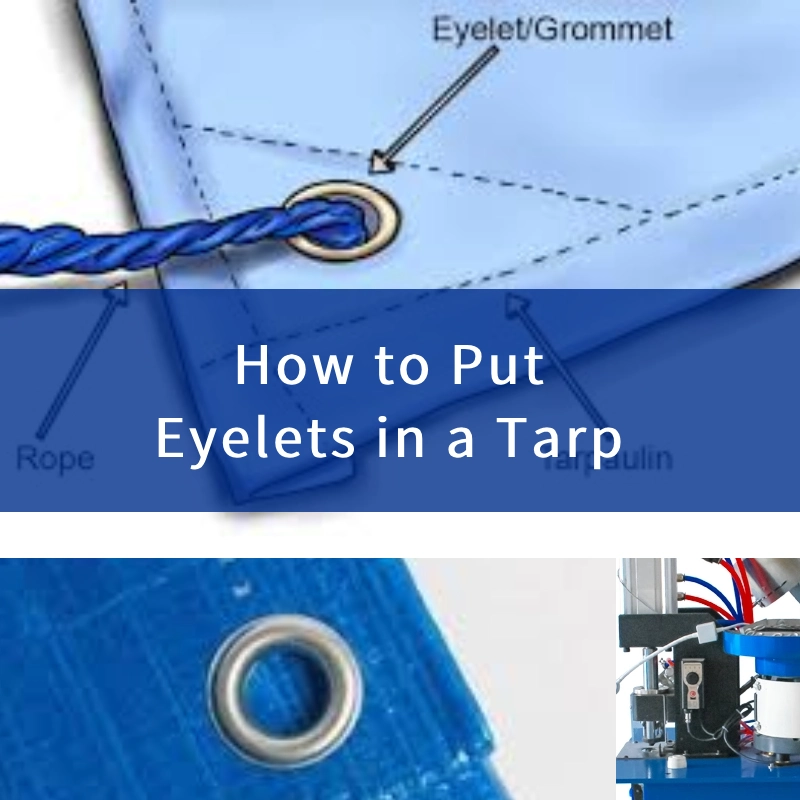
How to Add Grommets to Tarp: DIY Guide for Durability
Have you ever struggled with securing your tarp during a camping trip or outdoor event? If you have, then you know how frustrating it can be when the wind keeps pulling it loose or rainwater sneaks underneath.
Adding grommets to your tarp can be the game-changer you need. Imagine a hassle-free setup that stays put no matter what Mother Nature throws your way. This guide will show you exactly how to add grommets to your tarp, making your outdoor adventures more enjoyable and stress-free.
With just a few simple tools and steps, you can transform your tarp into a reliable, easy-to-use cover that meets your needs. Ready to discover the secret to a secure tarp? Let’s dive in and master this useful skill together!
Credit: qcmachinery.com
Choosing The Right Tools
Essential Grommet Kitsare very useful. They have all the tools you need. You can find them at stores. Kits usually come with a hole cutter. They have a setting tool too. These tools help you add grommets easily. You can also find kits online. Check the kit size before buying. Some kits have many sizes. Pick the size that fits your tarp.
Selecting the Correct Sizeis important. Grommets come in different sizes. Small grommets fit small holes. Large grommets fit large holes. Measure your tarp first. Use a ruler to check hole size. Pick the right grommet size. Wrong size may not fit well. The right size ensures a strong hold. It prevents tearing. Your tarp stays strong and lasts longer.
Preparing The Tarp
Make sure the tarp is clean. Dirt can cause problems. Use a damp cloth to wipe it. Let it dry completely. Measuring the tarp is important. Use a tape measure. Check the size twice. This helps in the next steps. Mark the corners and edges. Be careful not to tear the fabric.
Decide where to place the grommets. Use a pencil or chalk. Mark spots along the edges. Keep space between marks equal. This ensures balance. Common distance is every 2 feet. Use a ruler for accuracy. Double-check the marks. This step is crucial for good results.
Punching Holes
To add grommets, you need a hole cutter. Place the tarp on a hard surface. Align the cutter where the grommet will go. Hammer the cutter to make a clean hole. Make sure the hole is round and smooth. This helps the grommet fit well. Cut gently to avoid tearing the tarp.
Proper alignment is key for grommets. Use a ruler to mark spots on the tarp. Place marks at equal distances. This keeps your grommets even and straight. Check twice before cutting. This avoids mistakes. Good alignment makes the tarp look neat.
Installing Grommets
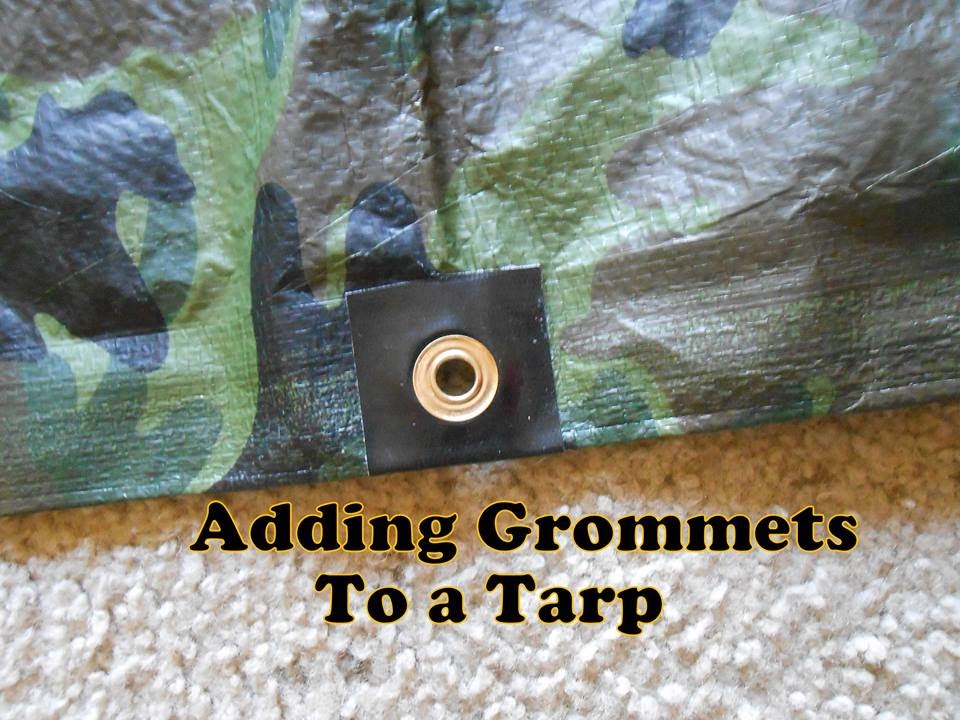
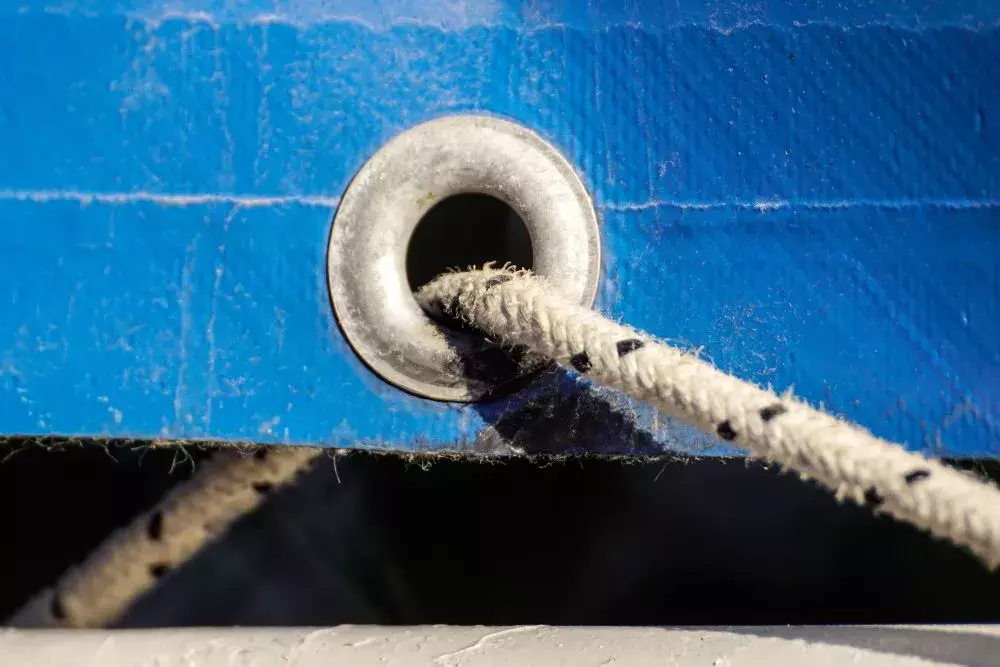
First, mark where you want each grommet. Use a pencil or a pen. Make sure the marks are not too close to the edge. This helps the tarp stay strong. Use a hole punch to make holes on the marks. The hole should be the same size as the grommet. Now, place the grommet into the hole. The grommet should fit snugly.
Next, put the other part of the grommet on top. Use a grommet setter to help hold it. Hit the setter with a hammer. Do it gently at first. Check if the grommet is tight. If not, hit again. Make sure it is secure. The grommet should not move or fall off. Repeat these steps for each grommet.
Testing For Durability
Grommets must be durable. They hold tarps securely. Start by pulling the tarp tight. Check if grommets stay firm. Loose grommets can cause problems. They might rip or tear. Ensure they are strong and well-fixed. This helps in bad weather. A secure tarp is important. It keeps things safe and dry.
Checking For Secure Fit
Tarp must fit tightly. Ensure grommets hold well. Test by pulling edges. Make sure they don’t move. A tight fit stops wind from lifting the tarp. Secure grommets prevent damage. They keep the tarp in place. This is very important. It protects your things from rain and wind.
Reinforcing Weak Spots
Some areas might be weak. Reinforce them with extra layers. Use tape or fabric patches. This adds strength to the tarp. Weak spots can tear easily. Reinforcing makes them strong. It helps in tough conditions. A strong tarp lasts longer. Protect your belongings with care.
Credit: www.goldstartool.com
Maintenance Tips
Adding grommets to a tarp ensures secure and durable usage. Start by marking where grommets are needed, then punch holes carefully. Place grommet pieces on either side and press firmly. This simple technique helps maintain tarp integrity and usability.
Regular Inspection
Checking the tarp often is important. Look for any holes or tears. A small problem can become a big one quickly. Use your eyes and hands to find issues. Feel for any soft spots or weak areas. Catching problems early keeps your tarp strong.
Repairing Damaged Areas
Fixing problems right away helps the tarp last longer. Use tape or a patch kit for tears. Make sure the patch is on tight. It should cover the damaged area completely. Check the edges of the patch. They should stick well to the tarp. Doing this will keep your tarp in good shape.

Credit: www.youtube.com
Frequently Asked Questions
How Do You Secure Grommets On A Tarp?
To secure grommets on a tarp, ensure a tight fit by using a grommet kit. Punch a hole, insert the grommet, and hammer it securely. This prevents tearing and ensures durability. Properly installed grommets enhance the tarp’s functionality and longevity, making it more efficient for various uses.
What Tools Are Needed For Adding Tarp Grommets?
To add grommets to a tarp, you’ll need a grommet kit, a hammer, and a hole punch. The kit usually includes grommets, washers, and setting tools. These essential tools ensure a secure and professional finish, making your tarp more durable and versatile for outdoor applications.
Can You Add Grommets To Any Tarp?
Yes, you can add grommets to most tarps, including vinyl and canvas. Ensure the material is strong enough to handle the grommet pressure. Thinner tarps might tear, so reinforce them if needed. Properly added grommets enhance tarp functionality, providing secure tie-down points for various applications.
How Do You Reinforce Tarp Grommet Holes?
To reinforce grommet holes, use extra tarp material or fabric patches. Apply adhesive or sew around the hole before installing grommets. This strengthens the area, preventing tearing and extending the tarp’s lifespan. Reinforcement is crucial for heavy-duty applications or when using thinner tarp materials.
Conclusion
Adding grommets to a tarp is simple and rewarding. With the right tools, you can make your tarp more durable. Secure your tarps with ease for any outdoor task. Remember to measure and mark carefully. This ensures perfect placement of each grommet.
Use a hammer or a grommet tool for best results. Protect your belongings from wind and weather. Your tarp will last longer with added grommets. Practice makes perfect, so start today. Enhance your outdoor projects with this easy skill. Enjoy the benefits of a well-prepared tarp.