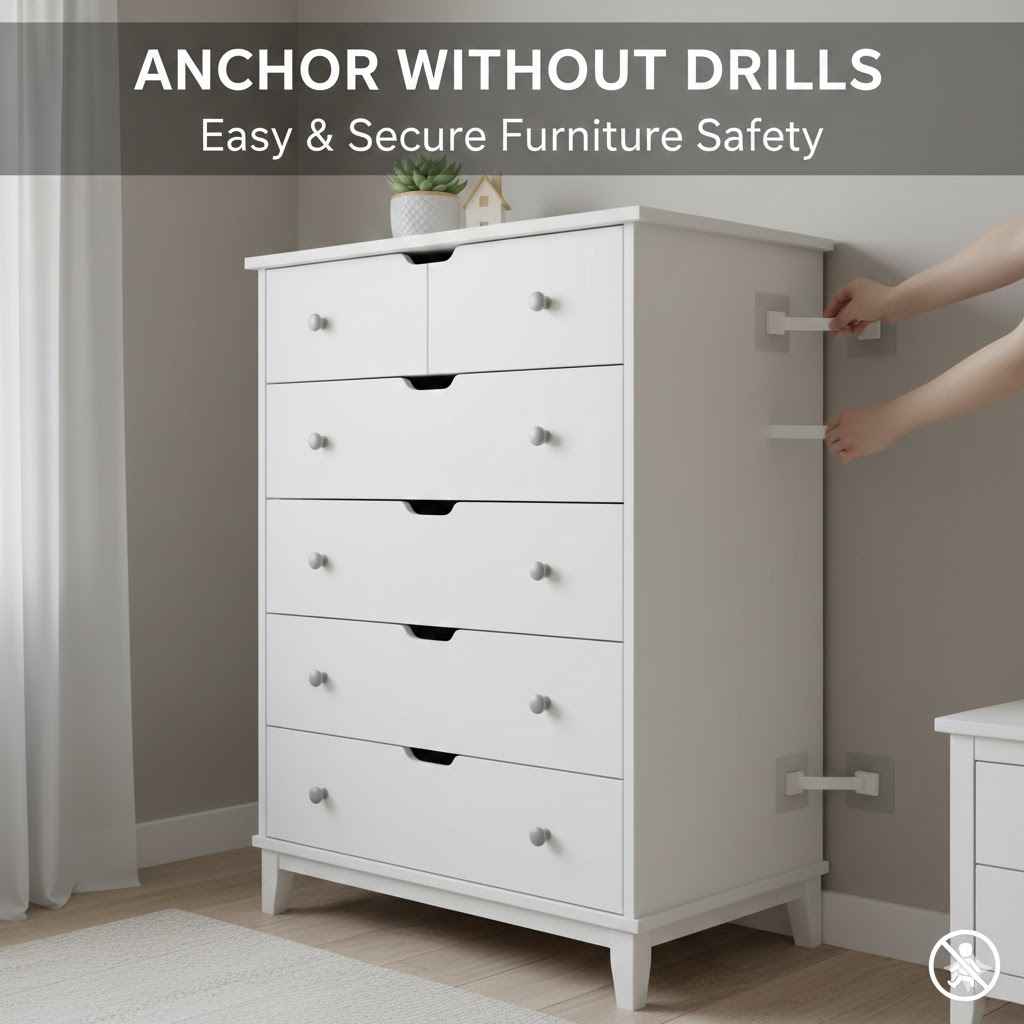
How to Anchor Furniture Without Drilling
Many people worry about anchoring their furniture to the wall. This is especially true for beginners who might not have many tools. Drilling holes can seem like a big commitment, and not everyone wants to leave permanent marks.
But keeping your furniture safe and preventing tip-overs is super important. Don’t worry, there are easy ways to do this! We’ll show you simple steps to anchor furniture securely without ever touching a drill.
Get ready to make your home safer, the easy way.
Secure Furniture Without Drilling Explained
Keeping your furniture stable is a top priority, especially in homes with kids or pets. Tipping furniture can cause serious accidents. Many people want to secure their belongings but are hesitant to drill holes into their walls.
This is often because they rent their homes, prefer to avoid visible damage, or simply don’t have the right tools or confidence. The good news is that you don’t need to be a DIY expert or make permanent holes to achieve a safe setup. This section will walk you through the core reasons why anchoring is vital and introduce the main strategies for doing so without any drilling.
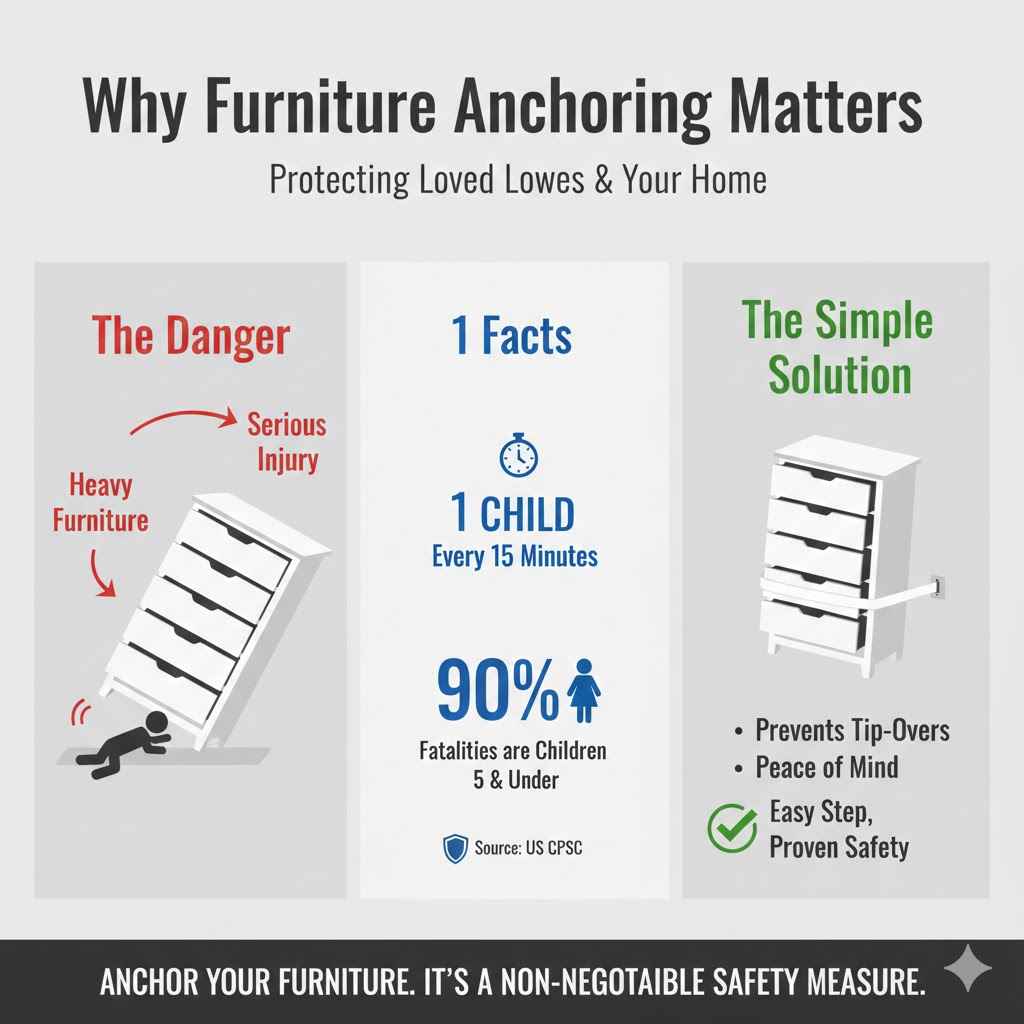
Why Furniture Anchoring Matters
Furniture tip-overs are a real danger. Heavy dressers, bookshelves, and TVs can easily fall if they are not secured. This is especially a risk in homes with young children who might climb on furniture.
Even pets can accidentally knock things over. Anchoring furniture is the most effective way to prevent these accidents. It adds a layer of safety that protects everyone in the house.
According to the U.S. Consumer Product Safety Commission (CPSC), someone is injured by furniture tip-overs every 15 minutes. Tragically, children are most at risk.
These incidents can lead to severe injuries or even fatalities. This statistic highlights the critical need for proper furniture anchoring in every household, making it a non-negotiable safety measure for any responsible homeowner or renter.
Safe anchoring ensures that furniture stays upright even when it’s bumped or climbed on. It provides peace of mind, knowing that your home is a safer place for everyone, especially the youngest members. This simple step can prevent devastating accidents and costly damages.
Understanding Different Furniture Types
Not all furniture is the same, and neither are the risks. Tall, top-heavy items like bookshelves and dressers pose a higher tip-over risk. They have a greater center of gravity that makes them unstable.
Smaller, heavier items like TV stands might also require anchoring, especially if they have drawers or doors that can be pulled open.
Consider the weight and height of the furniture you need to secure. A lightweight, low-profile coffee table might not need anchoring, but a tall, slender bookshelf certainly does. Assess each piece individually to determine its potential hazard.
This thoughtful approach ensures you’re focusing your efforts where they are most needed.
Key Benefits of Non-Drilling Anchors
The main advantage is avoiding wall damage. This is perfect for renters or anyone who doesn’t want to make holes. These anchors are often temporary and leave no trace when removed.
They are also usually very easy to install, often requiring no special tools. This makes safety accessible to everyone, regardless of their DIY skill level.
Non-drilling anchors offer a fast and simple way to secure furniture. They are a great option for those who need a quick safety solution. You can set them up in minutes, making your home safer right away.
Plus, they are often very affordable, so safety doesn’t have to cost a lot.
Popular Methods for Anchoring Without Drilling
When you want to anchor furniture without drilling, you have several effective options. These methods rely on strong adhesives, tension, or specialized straps that attach to existing features. They are designed to provide stability without altering your walls permanently.
We’ll explore some of the most common and reliable techniques that can make your furniture much safer.
Adhesive Furniture Straps and Mounts
These are strips that stick to both the furniture and the wall. They use a very strong adhesive, often a heavy-duty VHB (Very High Bond) tape. One end of the strap attaches to the back or top of your furniture.
The other end sticks firmly to the wall. They are great for lighter to medium-weight items.
The key to these straps is the adhesive quality. High-quality VHB tape creates a powerful bond that can hold significant weight. It’s important to clean both surfaces thoroughly before application.
This ensures maximum adhesion and a secure hold. The straps themselves are usually made of durable nylon or plastic, designed to withstand pulling forces.
How they work:
- Clean Surfaces: Wash the wall and furniture surface with rubbing alcohol and let them dry completely. This removes any dust or grease that could prevent the adhesive from sticking.
- Apply Adhesive: Peel the backing off one side of the adhesive strip and press it firmly onto the furniture. Hold it for about 30 seconds to ensure a good bond.
- Attach to Wall: Do the same for the other end of the strap, pressing it firmly onto the wall. Again, hold for 30 seconds.
- Let it Cure: Many adhesives need time to reach their full strength. Check the product instructions, but often it’s best to let them cure for 24-72 hours before putting stress on them.
Real-life example: Sarah needed to secure her daughter’s heavy changing table. She didn’t want to drill into the newly painted nursery walls. She used adhesive furniture straps, one on the back of the table and the other on the wall behind it.
After letting the adhesive cure for two days, the table felt very stable. She felt much more at ease knowing it wouldn’t tip over.
Pros:
- Easy to install, no tools required.
- Leaves no permanent marks on walls.
- Affordable and widely available.
Cons:
- Adhesive strength can vary; may not be suitable for very heavy items.
- May not stick well to certain textured or painted surfaces.
- Adhesive can sometimes be difficult to remove without damaging paint.
Tension-Based Furniture Anchors
These anchors work by creating a tight fit between your furniture and the wall. They usually involve a tension rod or a system that wedges between the furniture’s top and the ceiling or wall. This method is excellent for items that have a flat top surface and can be placed close to a wall.
Tension anchors leverage the power of compression. They are designed to push outwards against the furniture and inwards against the wall or ceiling. This creates a stable, locked-in position that prevents tipping.
They are particularly good for furniture that is already positioned right against a wall, as they use the wall for support.
How they work:
- Measure Space: Determine the gap between the top of your furniture and the wall or ceiling.
- Adjust Rod: Most tension rods are adjustable. Extend the rod to fit snugly into the space.
- Secure Furniture: Position the rod so one end rests firmly on the furniture and the other against the wall or ceiling. Ensure it’s tight enough to create tension.
- Test Stability: Gently push on the furniture to check that the anchor is holding it securely in place.
Sample scenario: You have a large bookshelf that you want to keep from tipping. You place it against a wall. You then install a tension-based anchor at the top of the bookshelf, with one end pressing against the shelf and the other against the wall.
The tension created holds the bookshelf firmly.
Pros:
- No drilling required, no wall damage.
- Easy to adjust and remove.
- Can support significant weight depending on the design.
Cons:
- Requires furniture to be placed close to a wall.
- May not work with all furniture designs or wall types.
- Can sometimes loosen over time, requiring re-tightening.
Furniture Straps That Utilize Existing Fixtures
Some anchoring systems use straps that attach to your furniture and then connect to existing sturdy fixtures. This could include furniture legs or even heavy floor vents. This method is less common for general furniture but can be useful in specific situations, especially for items like entertainment centers or aquarium stands.
These straps are designed to distribute force effectively. Instead of relying on adhesive or tension alone, they use the structure of the room or furniture for support. They are often made of strong webbing and have robust buckles or clips for secure attachment.
The goal is to create a point of stability that prevents movement.
How they work:
- Attach to Furniture: Securely fasten one end of the strap to a strong part of the furniture.
- Identify Fixture: Find a solid, immovable object in the room to attach the other end of the strap to. This could be a very heavy piece of furniture already anchored or a structural element if safe.
- Connect and Tighten: Connect the two ends of the strap and tighten it until it is taut.
- Check Security: Ensure the fixture you attached to is strong enough and that the strap is not allowing any significant wobble.
Pros:
- Can be very secure if a suitable fixture is available.
- No drilling into walls is necessary.
- Versatile for certain types of setups.
Cons:
- Requires finding a suitable, strong fixture in the room.
- May not be aesthetically pleasing.
- Can be difficult to find the right kind of strap for specific furniture.
Advanced Non-Drilling Anchoring Solutions
Beyond the basic methods, there are more sophisticated options for securing furniture without making holes in your walls. These often involve more robust materials and clever design to provide maximum stability. They might be more involved to install but offer superior security for heavier or more critical items.
Heavy-Duty Adhesive Strips with Wall Grips
These are a step up from standard adhesive straps. They often feature a wider adhesive surface area and specialized “wall grip” technology designed to adhere strongly to various wall surfaces. Some may even come with a bracket that attaches to the furniture, and a separate grip pad for the wall, connected by a strong strap.
The innovation here lies in the material science of the adhesives. Manufacturers use advanced formulations that create an incredibly strong bond. Some use micro-suction technology or special polymers that conform to wall textures.
These are engineered to hold considerable weight, rivaling the strength of some drilled solutions.
How they work:
- Prepare Surfaces: Thoroughly clean and dry both the furniture surface and the wall area where the anchor will be applied.
- Attach Furniture Bracket: Adhere the bracket or strap end to the furniture. Apply firm pressure and allow it to set according to product instructions, often 24-72 hours for full cure.
- Apply Wall Grip: Peel the backing from the wall grip pad and press it firmly onto the prepared wall surface. Again, hold for a specified time.
- Connect and Test: Connect the strap between the furniture and the wall grip. Gently test the connection to ensure it is secure.
Real-life example: A family with a large, heavy entertainment center wanted to secure it without drilling. They opted for heavy-duty adhesive strips with specialized wall grips. They carefully cleaned the wall and the back of the entertainment center.
The adhesive pads created a very strong hold. The system effectively kept the unit stable, preventing any accidental movement.
Pros:
- Can support substantial weight, suitable for larger furniture.
- Offers a strong, reliable hold without drilling.
- Designed to be less damaging upon removal than basic adhesives.
Cons:
- Can be more expensive than simpler adhesive options.
- Removal might still require some care to avoid paint damage.
- Requires a smooth, clean surface for best adhesion.
Adjustable Furniture Braces (No-Drill Types)
Some braces are designed to brace furniture against a wall or ceiling using adjustable tension and friction. These are not the kind you drill into the wall. Instead, they might have rubberized feet that grip the floor and a padded top that presses firmly against the wall, creating a stable support system.
These braces work by using outward force against the furniture and inward force against the wall. They create a strong wedging effect. The adjustable nature allows them to be fitted to various furniture heights and depths.
The rubber or foam pads prevent slipping and protect both the furniture and the wall surface.
How they work:
- Position Furniture: Place the furniture against the wall in its desired location.
- Adjust Brace Height: Extend the brace so it fits snugly between the top of the furniture and the wall.
- Apply Tension: Tighten the brace until it creates firm, consistent pressure. You want it to hold the furniture steady.
- Ensure Stability: Check that the furniture does not wobble and that the brace is securely in place.
Sample scenario: You have a tall wardrobe that feels a bit wobbly. Instead of drilling, you use an adjustable no-drill brace. You place one end on top of the wardrobe and the other against the wall above it.
By extending and tightening the brace, you create a firm support that stops the wardrobe from tilting.
Pros:
- Excellent stability without any drilling.
- Adjustable to fit various furniture and wall heights.
- Protects surfaces with padded ends.
Cons:
- Might not be suitable for all furniture shapes or wall angles.
- Can be bulky and may be visible behind some furniture.
- Requires careful adjustment to ensure proper tension.
Furniture Anchoring Kits for Specific Items
There are specialized kits designed for specific furniture types, like cribs, changing tables, or even media consoles. These kits often contain a combination of adhesives, straps, and sometimes specialized connectors tailored to the item’s design. They offer a more integrated solution for unique anchoring needs.
These kits are the result of extensive testing and design to address the particular challenges of securing certain furniture pieces. They leverage the best aspects of different anchoring technologies and adapt them for optimal performance. The components are chosen to work together seamlessly for maximum safety and ease of use.
Example: Crib Anchoring Kit: Such a kit might include wide adhesive straps that attach to the crib’s base and the wall. It may also have corner connectors to prevent the crib from sliding sideways. The goal is to provide a complete safety system for the crib.
Pros:
- Tailored solutions for specific furniture safety needs.
- Often include multiple components for comprehensive anchoring.
- Designed for ease of installation by consumers.
Cons:
- Can be more expensive than generic anchoring solutions.
- May only be suitable for the specific furniture piece they are designed for.
- Availability might be limited to certain furniture brands or types.
How to Choose the Right No-Drill Anchor
Selecting the best way to anchor your furniture without drilling depends on a few key factors. You need to think about the furniture itself, your walls, and your budget. Making the right choice ensures your furniture is safe and the anchor works well for your situation.
Assessing Your Furniture’s Weight and Size
The most critical factor is how heavy and tall your furniture is. Lighter items like small side tables might only need basic adhesive straps. For heavier items like large dressers, bookshelves, or entertainment centers, you’ll need stronger solutions.
Check the furniture’s specifications if possible, or estimate its weight and stability.
Weight Considerations:
- Lightweight (under 50 lbs): Basic adhesive straps or VHB tape can often suffice.
- Medium Weight (50-150 lbs): Heavy-duty adhesive strips or tension anchors are recommended.
- Heavyweight (over 150 lbs): Consider advanced adhesive systems or, if possible, explore options that might involve minimal, discreet drilling. However, focus remains on non-drill solutions.
Size and Shape: Tall, narrow furniture is more prone to tipping than short, wide furniture. Furniture with a high center of gravity needs extra attention. Ensure the anchor you choose can effectively counteract these tipping forces.
Understanding Your Wall Type
The surface you’re attaching to makes a big difference. Most adhesive anchors work best on smooth, clean surfaces like painted drywall or finished wood. Textured walls, wallpaper, or delicate finishes can be more challenging for adhesives to stick to securely.
Common Wall Types and Adhesion:
- Smooth Painted Drywall: Excellent for most adhesive anchors.
- Textured Drywall: May require stronger adhesives or specialized grips. Always test in an inconspicuous area.
- Wallpaper: Adhesives may not stick well and can damage the wallpaper upon removal.
- Plaster Walls: Can be durable but may have uneven surfaces that challenge adhesives.
- Tile/Glass: Certain heavy-duty adhesives can work, but ensure they are suitable for these materials.
If you have textured walls or wallpaper, you might need to use a small piece of smooth tape or a specialized grip pad on the wall first, then attach the anchor to that. This creates a better surface for the adhesive.
Budget and Availability
No-drill anchoring solutions vary in price. Basic adhesive straps can be found for a few dollars, while heavy-duty kits can cost significantly more. Consider how many pieces of furniture you need to anchor and choose a solution that fits your budget while still providing adequate safety.
These products are widely available. You can find them at most home improvement stores, large retailers, and online. Checking product reviews can help you find reliable options that offer good value for money.
Always compare prices and features before making a purchase.
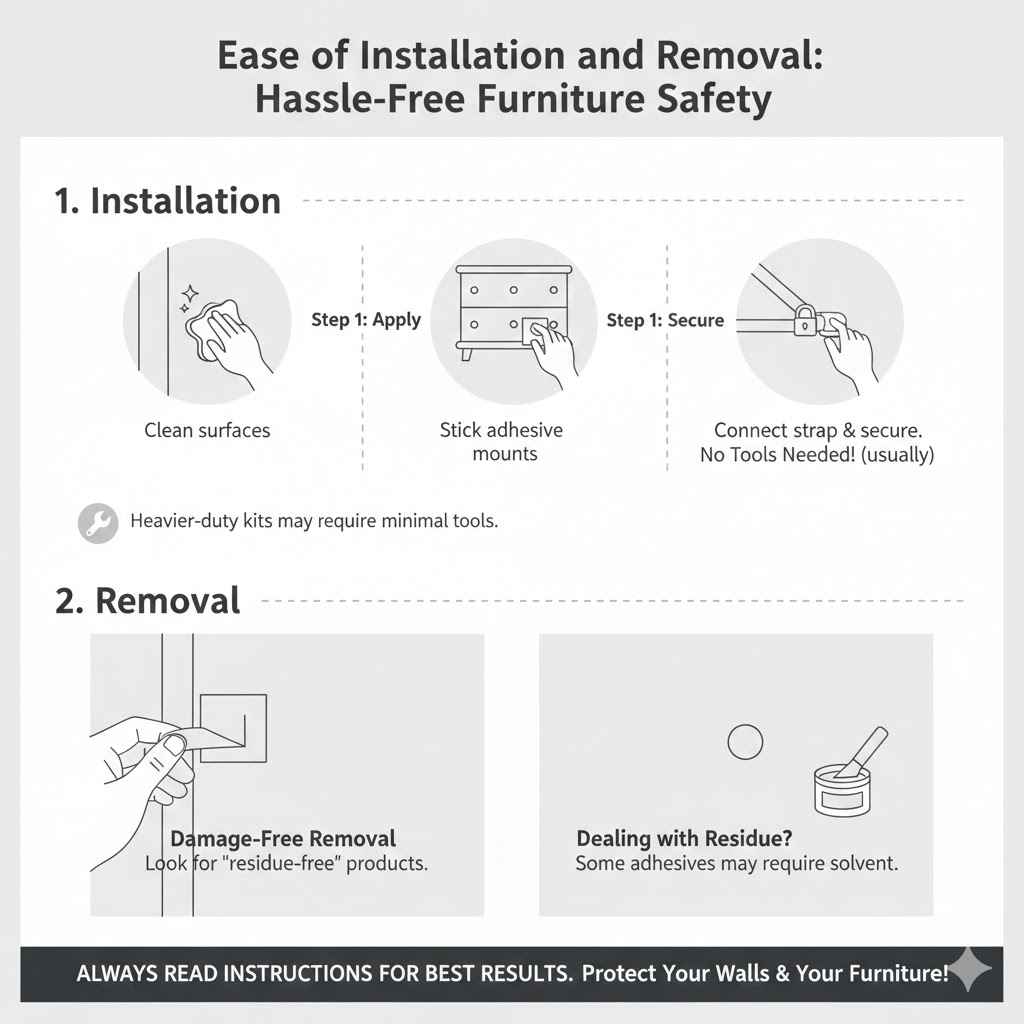
Ease of Installation and Removal
For many people, the main appeal of non-drilling anchors is their simplicity. Most can be installed in minutes without any tools. However, some heavier-duty options might require a bit more effort.
Also, consider how easy the anchor will be to remove later. Some adhesives can leave residue or damage paint.
Read product instructions carefully. They will give you a clear idea of the installation process and any specific requirements, like cure times for adhesives. For removal, look for products that state they are “damage-free” or “residue-free” if that is a primary concern for you.
FAQ
Question: Can furniture anchors really hold heavy items without drilling
Answer: Yes, many heavy-duty non-drilling anchors are designed to hold significant weight. They use advanced adhesives and strong materials to create a secure bond. Always check the weight limit specified by the manufacturer.
Question: Will adhesive anchors damage my painted walls when I remove them
Answer: It depends on the adhesive and the paint. High-quality, furniture-specific adhesive anchors are often designed for damage-free removal. However, it’s always a good idea to test in an inconspicuous area or use a hairdryer on low heat to soften the adhesive before pulling.
Question: How do I know if my wall is suitable for adhesive anchors
Answer: Most adhesive anchors work best on smooth, clean, and dry surfaces like painted drywall. Textured walls, wallpaper, or very porous surfaces might not provide a strong enough bond. Always clean the surface thoroughly before application.
Question: Are tension-based anchors safe for all types of furniture
Answer: Tension-based anchors work best with furniture that has a flat, stable top surface that can press firmly against a wall or ceiling. They might not be suitable for furniture with irregular shapes or where there isn’t a firm contact point.
Question: How often should I check my furniture anchors
Answer: It’s wise to check your furniture anchors periodically, especially after a few weeks of use. Gently test them to ensure they are still secure. Re-tighten or reapply any anchors that seem to have loosened over time.
Summary
Anchoring furniture without drilling is completely achievable. You can use strong adhesives, tension systems, or specialized straps. Always consider your furniture’s weight and your wall type.
Choose anchors designed for your specific needs. Easy installation means you can quickly make your home safer for everyone.