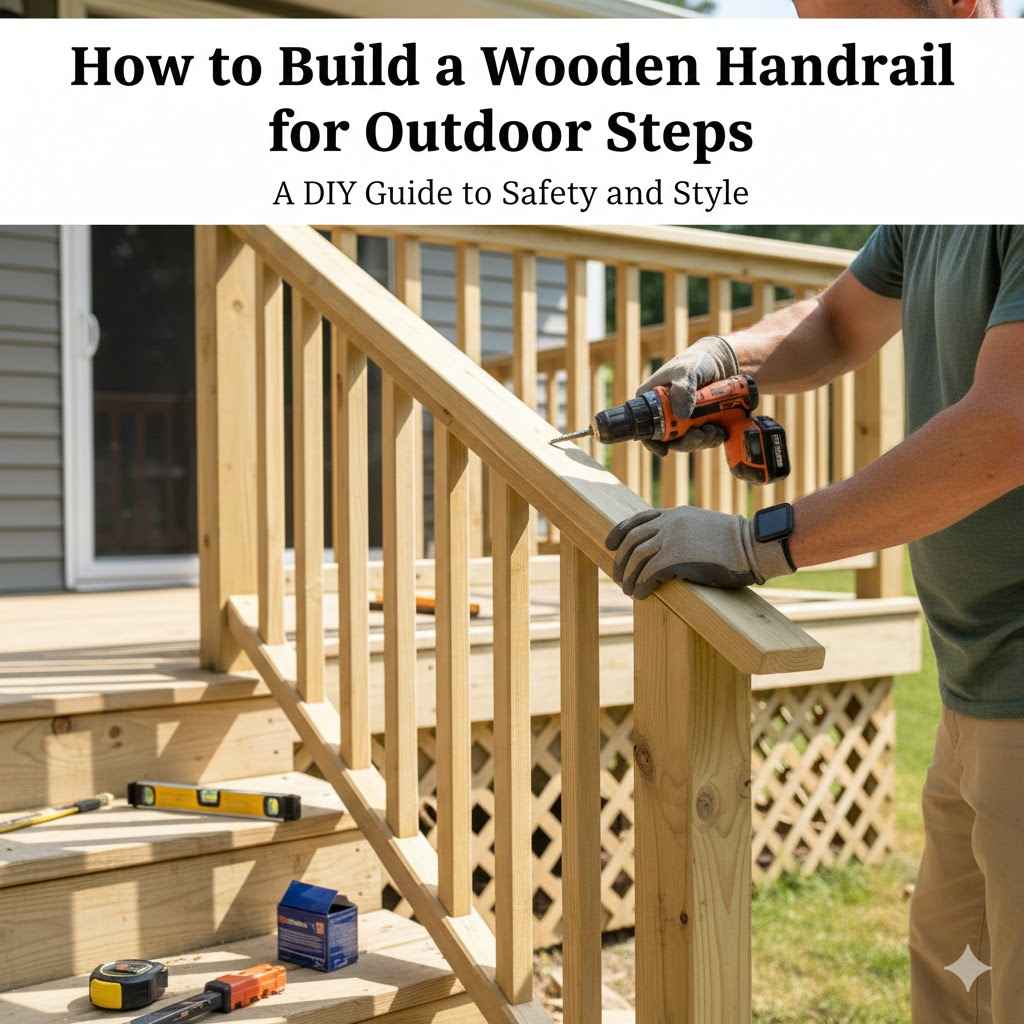
How to Build a Wooden Handrail for Outdoor Steps
Building a wooden handrail for your outdoor steps can seem like a big project, especially if you’re new to DIY. Many people find it tricky to know where to start with measurements, materials, and making sure it’s strong and safe. But don’t worry!
This guide breaks downHow to Build a Wooden Handrail for Outdoor Steps into simple steps. We’ll go through everything you need to know to make your steps safer and look great. Let’s get started on making your home more accessible and secure.
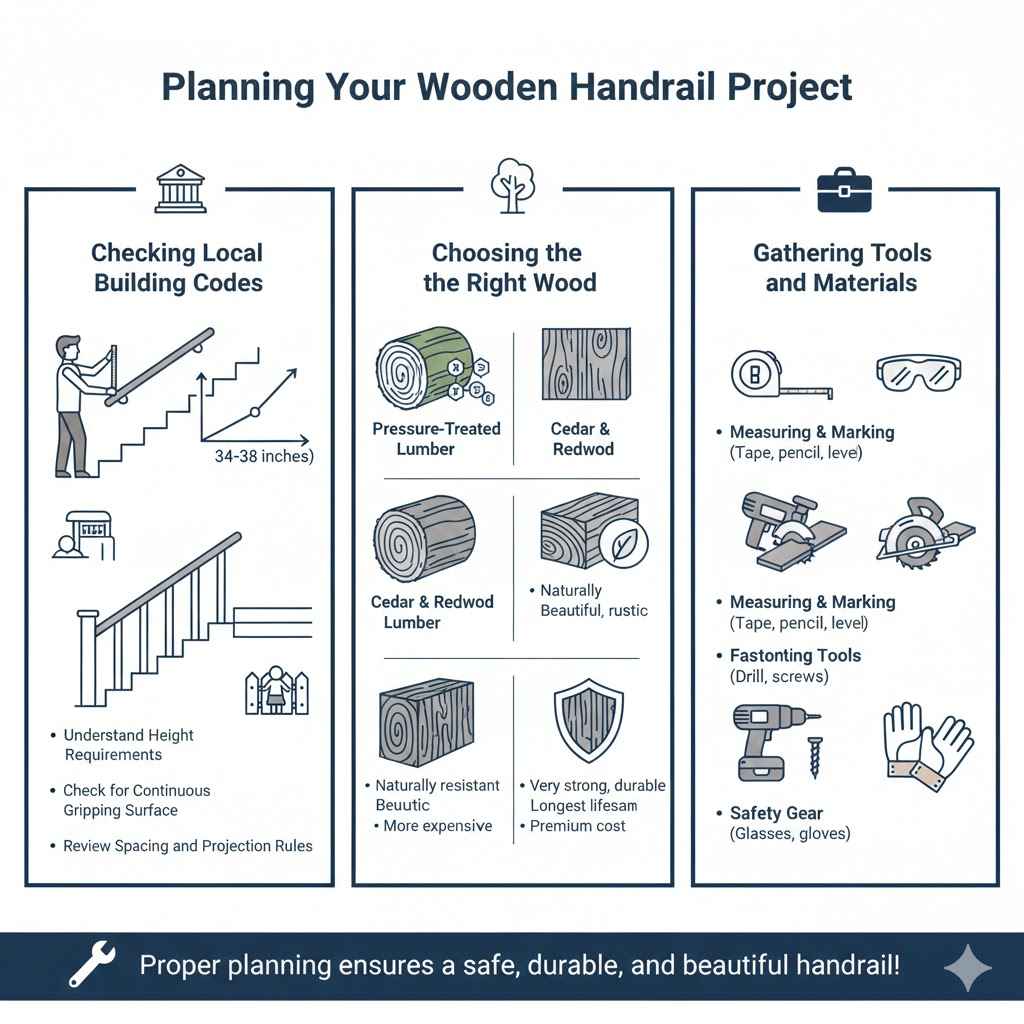
Planning Your Wooden Handrail Project
This part is all about getting ready so your building goes smoothly. Good planning stops you from making mistakes and wasting money on materials. We’ll cover checking local rules, picking the right wood, and gathering all the tools you’ll need.
This upfront work saves a lot of time and frustration later. It ensures your handrail is not just good-looking but also safe and built to last against weather.
Checking Local Building Codes
Before you buy any wood or tools, it’s smart to check your local building codes. These rules often tell you how high a handrail needs to be, how strong it must be, and what materials are acceptable. They are there to make sure your handrail is safe for everyone who uses it, including kids and older folks.
Ignoring these rules could mean you have to redo your work, which is a waste of time and money.
- Understand Height Requirements. Most codes require handrails to be between 34 and 38 inches high, measured from the edge of the step tread. This height is designed for comfortable grip and optimal support. A rail too low might not offer enough leverage, while one too high can be awkward to use. Always verify local regulations as they can vary.
- Check for Continuous Gripping Surface. Codes usually specify that handrails must be continuous along the entire length of the stairs. This means there shouldn’t be any breaks or obstructions that would prevent someone from maintaining a firm grip. If your stairs have turns, you’ll need to ensure the handrail follows that turn smoothly.
- Review Spacing and Projection Rules. Some codes might have rules about how far the handrail can stick out from the wall or any adjacent structures. They also often set minimum distances for balusters or railing posts to prevent small children from getting stuck. These details ensure general safety around the structure.
Choosing the Right Wood
The kind of wood you choose greatly affects how long your handrail lasts and how it looks. For outdoor projects, you need wood that can handle rain, sun, and bugs. Some woods are naturally better at resisting rot and decay, which is important for anything exposed to the weather.
Picking the right type means your handrail will stay strong and look good for many years without needing frequent repairs.
- Pressure-Treated Lumber. This is a very popular choice for outdoor projects. It’s treated with chemicals to resist rot, decay, and insect damage. It’s also usually less expensive than naturally resistant woods. However, some people prefer to avoid pressure-treated wood due to the chemicals used, though modern treatments are considered safe for most uses.
- Cedar and Redwood. These are naturally resistant to rot and insects because of the oils and tannins they contain. They have a beautiful natural color and can be left unfinished for a rustic look or stained to match your home. They are generally more expensive than pressure-treated pine but offer excellent durability and a natural aesthetic.
- Hardwoods like Oak or Ipe. Hardwoods are very strong and durable, making them excellent choices for handrails that see a lot of use. Ipe, in particular, is an extremely dense tropical hardwood known for its incredible resistance to decay and insects. These woods are typically the most expensive but offer the longest lifespan and a premium appearance.
Gathering Tools and Materials
Having all your tools and materials ready before you start building makes the job much easier. It prevents interruptions and ensures you have what you need when you need it. Think about safety gear, measuring tools, cutting tools, and fastening tools.
Having the right supplies on hand will help you complete the project efficiently and safely.
- Measuring and Marking Tools. You’ll need a tape measure, a pencil, and possibly a level and a speed square. Accurate measurements are key to getting a good fit and ensuring the handrail is installed correctly. The speed square is great for marking straight lines and checking angles.
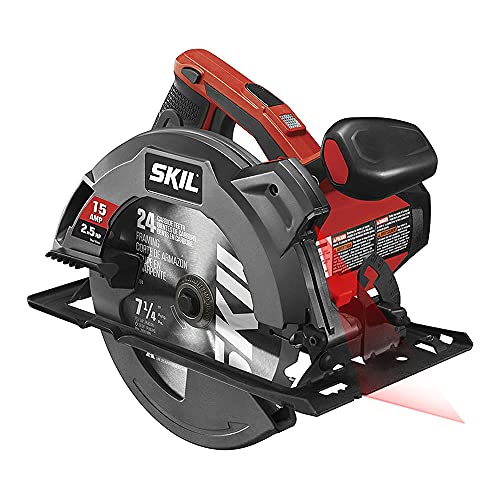
- Cutting Tools. A hand saw or a power saw, like a circular saw or miter saw, will be needed to cut your wood to the right lengths. A miter saw is especially useful for making clean, accurate angled cuts if your stairs have turns or if you want a professional finish.
- Fastening Tools. You’ll need a drill with various drill bits for pilot holes and driving screws. Screws should be exterior-grade to prevent rust. You might also need a hammer if you decide to use any nails, though screws are generally preferred for their holding power.
- Safety Gear. Always wear safety glasses to protect your eyes from sawdust and flying debris. Gloves are also a good idea to protect your hands, especially when working with rough wood or power tools. Hearing protection is recommended if using loud power tools.
Measuring and Cutting Your Handrail Components
Accurate measurements are the backbone of any successful building project, and this is especially true for handrails. A handrail needs to be the correct length and angle to fit your stairs perfectly and provide safe support. We will walk through how to measure your existing steps and then cut the wood pieces to match.
Getting these cuts right means your handrail will attach smoothly and function as intended.
Measuring Your Staircase
Before you cut anything, you need to know the exact dimensions of your staircase. This involves measuring the length of the stairs where the handrail will run, as well as the height and width of each step. It’s also important to note any changes in direction or slope.
Taking these measurements carefully will ensure your handrail fits snugly and safely.
- Measure the Total Length. Start at the top of the stairs and measure along the slope down to the bottom. This gives you the overall length the handrail needs to cover. It’s often easiest to measure this diagonally following the line where the handrail will be.
- Determine the Height. The standard height for a handrail is usually between 34 and 38 inches above the nose of the steps. You’ll need to measure this height at various points along the stairs to ensure consistency. A consistent height is crucial for usability and code compliance.
- Note the Slope and Angle. If your stairs have a consistent slope, you’ll likely only need one long piece of handrail. However, if there are landings or turns, you’ll need to measure the angle at each turn to cut multiple pieces that join together seamlessly. A speed square or angle finder can help here.
Cutting the Handrail Material
Once you have your measurements, it’s time to cut the wood. The goal is to get precise cuts that match your measurements exactly. For straight runs, this is straightforward.
For angled sections, it requires careful use of a miter saw or careful marking and cutting with a hand saw. Making clean cuts ensures that pieces fit together well and that the handrail looks professional.
- Straight Cuts. For simple, straight staircases, you’ll cut one or more lengths of wood to match the measured length of the railing run. Ensure your cuts are perfectly square (90 degrees) to the length of the wood. This makes it easy to attach components later.
- Angled Cuts for Turns. If your stairs turn, you’ll need to make angled cuts, often called miter cuts. The angle of the cut will depend on the angle of the turn (e.g., 45 degrees for a square corner). Precise angled cuts allow two pieces of wood to meet flush, creating a smooth transition.
- Smooth the Edges. After cutting, always lightly sand the cut edges to remove any splinters or rough spots. This is important for safety and for the finished look of the handrail. A smooth edge is comfortable to grip and reduces the chance of injury.
Cutting Posts and Brackets
Besides the handrail itself, you’ll need posts to support it and possibly brackets to attach it to a wall. The length of your posts will depend on the height you need to achieve and how they will be secured to the ground or stairs. Brackets need to be strong and spaced correctly to hold the handrail firmly in place.
- Determining Post Length. Posts need to extend from their base (ground or stair tread) up to the desired handrail height. Measure the distance from where the post will be anchored to the required handrail height. Add extra length for secure anchoring into the ground or for attaching to the stair structure.
- Preparing Brackets. If you are using wall-mounted brackets, measure the correct placement on your wall. Ensure they align with the height of your handrail. If you are attaching posts directly to the stairs, you’ll need to figure out the best way to secure them, perhaps with lag bolts.
- Cutting to Size. Ensure all your posts are cut to the exact same length if they are for a straight run. If they are for angled stairs, their length might vary slightly depending on their position. Any support pieces or decorative elements should also be cut to their specific dimensions.
Assembling the Handrail Structure
Now that you have your measured and cut pieces, it’s time to put them together. This section focuses on how to build the frame for your handrail, starting with securely mounting the posts or supports. A strong foundation is key to a safe handrail.
We’ll cover attaching posts, connecting them, and preparing them for the actual handrail.
Installing Support Posts
The support posts are what hold your handrail up and give it strength. They need to be installed very securely. This might mean digging holes and setting them in concrete for ground-level posts, or firmly bolting them to the stair treads for elevated steps.
Proper post installation ensures the handrail is stable and can support weight safely.
- Setting Posts in the Ground. For ground-level stairs, dig holes below the frost line in your area. The depth ensures the posts won’t shift with ground movement. Place the posts in the holes, ensure they are plumb (perfectly vertical) using a level, and then fill the holes with concrete. Let the concrete cure fully before proceeding.
- Attaching Posts to Stairs. If your stairs are raised, you may attach posts directly to the stair stringers or treads. Use strong lag bolts and washers to ensure a secure connection. Pre-drill holes to avoid splitting the wood. Make sure the posts are vertical and spaced appropriately to support the handrail.
- Using Concrete Anchors. For concrete stairs or landings, you can use specialized concrete anchors to secure your posts. These anchors are driven into pre-drilled holes and provide a very strong mechanical connection. Ensure the anchors are rated for the load your handrail will carry.
Connecting Handrail Sections
If your handrail has multiple sections due to turns or length, you need to connect them smoothly and strongly. This is where those angled cuts you made earlier come into play. The goal is to make the connection look like one continuous piece, without any gaps or weak points.
A well-connected handrail is both safe and visually appealing.
- Using Miter Joints. For angled turns, a miter joint is best. This is where two pieces of wood are cut at an angle and joined together. The angles must be precise so the two pieces meet perfectly. A little wood glue can add extra strength before screwing them together.
- Using Splines or Biscuits. For added strength on long runs or at critical connection points, you can use splines or biscuits. A spline is a thin strip of wood inserted into matching grooves on both pieces. Biscuits are small, oval wooden pieces that fit into slots cut by a special tool. These methods create a much stronger bond than just screws alone.
- Checking for Alignment. After joining sections, always check that they align perfectly with each other and with your support posts. A slight misalignment can be noticeable and weaken the overall structure. Use a straight edge to confirm the line of the handrail.
Attaching Brackets or Supports
In some designs, especially for handrails attached to a wall, you’ll use special brackets. If you’re not using posts, these brackets become your primary support system. For designs that use both posts and wall support, brackets provide extra stability.
The number and spacing of these supports are critical for a safe handrail.
- Positioning Wall Brackets. Brackets should be placed at regular intervals along the length of the handrail, typically every few feet. They must be screwed into wall studs or solid framing for maximum strength. Use a stud finder to locate these structural elements accurately.
- Securing to Posts. If your handrail design includes posts, you might also use brackets or specialized connectors to attach the handrail to the tops of these posts. This connection needs to be very strong to transfer any force applied to the handrail down to the posts.
- Ensuring Levelness and Straightness. As you attach brackets, constantly check that they are all at the same height and aligned with the intended line of the handrail. Use a level to ensure the handrail will sit straight and at the correct angle.
Installing the Handrail
This is the part where your project really takes shape. You’ve planned, measured, cut, and assembled the supports. Now, you’ll attach the actual handrail to the structure you’ve built.
This process needs to be done carefully to ensure the handrail is strong, comfortable to grip, and looks good. Safety and usability are the top priorities here.
Attaching the Handrail to Supports
This is where the handrail piece connects to the posts or brackets you’ve already installed. You need to make sure this connection is solid. The handrail needs to feel secure when you lean on it.
This usually involves pre-drilling holes and using strong screws that won’t rust.
- Pre-Drilling Pilot Holes. Before driving screws, always drill pilot holes. These are smaller holes that guide the screw and prevent the wood from splitting, especially near the ends of the wood. The size of the pilot hole should be slightly smaller than the screw’s core diameter.
- Using Exterior-Grade Screws. For any outdoor project, it’s vital to use screws designed for outdoor use. These are typically made of stainless steel or have a protective coating to resist rust and corrosion. Rusting screws can weaken the connection and stain the wood.
- Ensuring a Tight Fit. Drive screws until they are snug but not so tight that they strip the wood or the screw head. The handrail should feel firmly attached to each support. Gently wiggle the handrail after screwing to confirm there’s no looseness.
Confirming Strength and Stability
Once the handrail is attached, give it a good test. Lean on it, push on it, and check for any wobble or movement. It should feel solid and reliable.
If you find any weak spots, reinforce them immediately. This step is crucial for safety. A handrail that feels loose or unstable is dangerous.
- The Push Test. Apply firm, steady pressure to different points along the handrail. Push down, pull up, and sideways. Listen for any creaking or watch for any movement at the connection points. A safe handrail should not budge significantly.
- Checking All Connection Points. Inspect where the handrail meets the posts, brackets, or wall. Ensure all screws are tight and that there are no gaps. If any connection feels weak, add an extra screw or reinforce it with a stronger bracket.
- Weight Bearing Test. If possible, have a couple of people lean on the handrail simultaneously to simulate its intended use. This helps identify any structural weaknesses that might not be apparent with a single person’s weight.
Finishing Touches and Protection
To make your handrail look great and last longer, you’ll want to add a protective finish. This could be paint, stain, or a sealant. The finish not only enhances the appearance but also shields the wood from sun, rain, and moisture, which can cause it to warp, rot, or fade over time.
- Sanding for Smoothness. Before applying any finish, give the entire handrail a final sanding. Start with a medium-grit sandpaper and finish with a fine-grit one. This will make the surface smooth to the touch and prepare it for the finish.
- Applying Stain or Sealant. Stains add color and can enhance the natural beauty of the wood. Sealants protect the wood from moisture. For outdoor use, choose products specifically designed for exterior wood and that offer UV protection. Apply multiple thin coats for best results.
- Painting. If you prefer a painted look, use a high-quality exterior primer followed by two coats of exterior paint. Lighter colors can help keep the handrail cooler in the sun. Ensure the paint is fully dry and cured before using the handrail regularly.
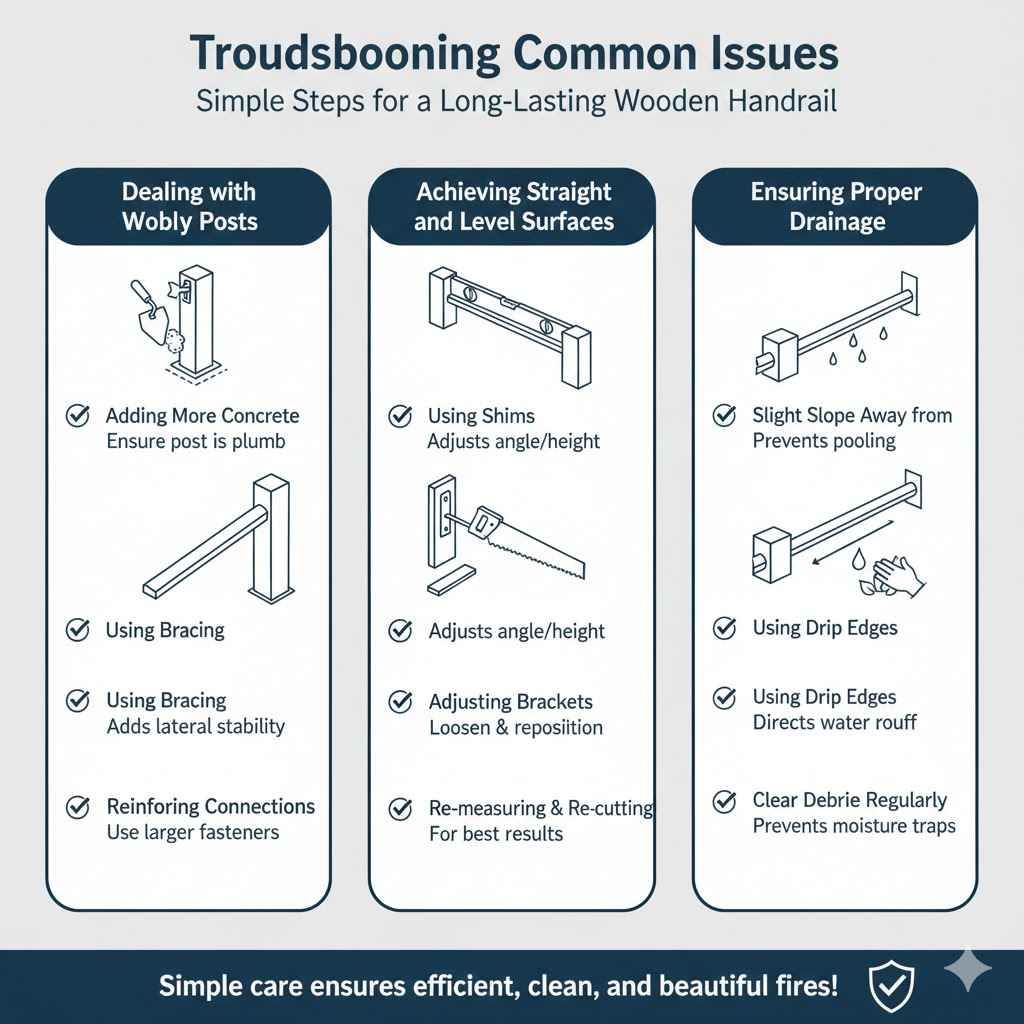
Troubleshooting Common Issues
Even with careful planning, you might run into a few snags. This section addresses common problems people face when building outdoor handrails and offers simple solutions. Knowing how to fix these issues will save you time and ensure your project turns out right.
We’ll cover things like wobbly posts and uneven surfaces, providing practical advice to get you back on track.
Dealing with Wobbly Posts
If your support posts aren’t as stable as you’d like, there are a few ways to fix it. Often, it’s a matter of the ground settling or the connection not being strong enough. We’ll look at how to reinforce posts that are giving you trouble so your handrail is completely safe.
A solid post means a safe handrail.
- Adding More Concrete. If posts are set in concrete, and they’ve started to loosen, you might need to add more concrete around the base. Chip away loose concrete and reapply new concrete, ensuring the post remains plumb as it sets.
- Using Bracing. For temporary or less permanent solutions, you can add diagonal braces from the post down to the ground or stair tread. These braces add significant lateral stability and can help support a wobbly post.
- Reinforcing Connections. If the issue is with how the post attaches to the stair or a base, check the bolts or screws. Ensure they are tight and consider using larger or more fasteners if the original ones seem inadequate for the load.
Achieving Straight and Level Surfaces
Sometimes, despite best efforts, a handrail might not end up perfectly straight or level. This can happen if the ground isn’t level, or if the supports aren’t installed perfectly plumb. We’ll discuss how to correct these issues to give your handrail a professional and safe finish.
A level handrail is both functional and looks much better.
- Using Shims. If a post or bracket is slightly off, small, thin pieces of wood called shims can be used to adjust the angle or height. Shims are inserted between the post/bracket and the mounting surface, allowing for fine-tuning of alignment.
- Adjusting Brackets. For wall-mounted brackets, you might be able to slightly loosen and reposition them to achieve the correct line. Always ensure brackets are securely re-tightened after adjustment.
- Re-measuring and Re-cutting. In some cases, the best solution might be to remove the problematic section and re-measure and re-cut it. While this can be frustrating, it often leads to a better, safer final product.
Ensuring Proper Drainage
Water can be the enemy of any outdoor wooden structure. If water pools on your handrail or around its supports, it can lead to rot and decay much faster. We’ll talk about how to make sure water can drain away easily, keeping your handrail in good condition for longer.
Good drainage is key to a long-lasting wooden structure.
- Slight Slope Away from Wall. If the handrail is attached to a wall, ensure it has a very slight slope away from the wall. This allows water that hits the top of the handrail to run off rather than collecting against the wall.
- Using Drip Edges. For a more professional finish, you can add a drip edge along the underside of the handrail. This is a small strip of metal or wood that forces water to drip off rather than running along the surface.
- Clear Debris Regularly. Keep the handrail and the area around its supports clear of leaves and other debris. This debris can trap moisture, so regular cleaning helps prevent prolonged dampness on the wood.
Frequently Asked Questions
Question: How long does a wooden handrail typically last outdoors
Answer: With proper wood selection and regular maintenance like sealing or staining, a wooden handrail can last anywhere from 10 to 20 years or even longer, depending on the type of wood and the climate.
Question: What is the best type of wood for an outdoor handrail
Answer: Pressure-treated pine is a budget-friendly and durable option. Cedar and redwood offer natural resistance to rot and insects, while hardwoods like Ipe are the most durable but also the most expensive.
Question: Do I need a permit to build an outdoor handrail
Answer: It’s best to check with your local building department. Some areas require permits for structural additions like handrails, especially if they affect accessibility or safety standards.
Question: How far apart should handrail posts be
Answer: Posts are typically placed every 4 to 6 feet, but this can vary based on local building codes and the span of the handrail. They should be close enough to provide solid support without obstruction.
Question: What tools are essential for building a wooden handrail
Answer: Essential tools include a tape measure, pencil, saw (hand or power), drill with bits, screws, safety glasses, gloves, and a level. A speed square is also very helpful for accurate marking.
Conclusion
You now have a clear roadmap for building a wooden handrail for your outdoor steps. By following these steps, you can create a safe, sturdy, and attractive addition to your home. Remember to plan carefully, measure accurately, and use the right materials.
Your new handrail will provide security and peace of mind for everyone who uses your steps.