How to Change a Faucet Cartridge: Step-by-Step Guide
Are you tired of that annoying drip-drip-drip sound coming from your faucet? Or maybe you’ve noticed a drop in water pressure that makes washing dishes a chore?
The culprit might be a worn-out faucet cartridge. But don’t worry—changing a faucet cartridge is simpler than you think. Even if you’re not a seasoned DIY enthusiast, you can tackle this small yet impactful home improvement project. Imagine the satisfaction of fixing it yourself and having a perfectly functioning faucet again.
Ready to restore peace to your home and save a little money in the process? Let’s dive into the step-by-step guide that will empower you to change your faucet cartridge with confidence.
Tools And Materials Needed
Gather the right toolsfor the job. You will need an adjustable wrenchand a screwdriver. A towelor rag can help catch water drips. Have a bucketready to hold water. You might need plierstoo. Keep a new faucet cartridgenearby. This is important. Make sure it matches the old one. Check the sizeand typebefore buying.
Do not forget the plumber’s grease. It helps parts slide smoothly. This makes installation easy. A flashlightmight be useful. Some places are dark. Light helps you see better. Have all items ready before starting. It saves time and effort.
Credit: helpcenter.elkay.com
Preparing Your Workspace
Ensure the sink area is free of clutter. Remove all items from the countertop. This includes soap, brushes, and towels. Open cabinets below the sink. Clear out any cleaning supplies or boxes. This provides easy access to the faucet. Turn off the water supply. Locate the valves under the sink. Twist them to the off position. This prevents water leakage during the process.
Gather necessary supplies for the task. You need a screwdriver and an adjustable wrench. Make sure you have a replacement cartridge. A clean cloth is useful too. This helps wipe away excess water. Consider using a bucket to catch drips. Having these supplies ready saves time. It also ensures a smooth process.
Turning Off Water Supply
Locating the Shut-off Valveis important to begin. Find it under the sink. Turn the knob to the right. This stops water from flowing. Ensure the valve is tight. Check it carefully. No water should drip.
Draining Remaining Wateris next. Open the faucet. Let the water run until empty. Catch drips with a towel. This keeps your area clean. Make sure all water is drained. Now the faucet is ready for repair.
Removing The Old Cartridge
First, turn off the water supply. This stops water flow. Then, find the screw on the faucet handle. It’s usually under a small cap. Use a screwdriver to take out the screw. Pull the handle up gently. It should come off easily. If it’s stuck, wiggle it a bit. Be careful not to break anything.
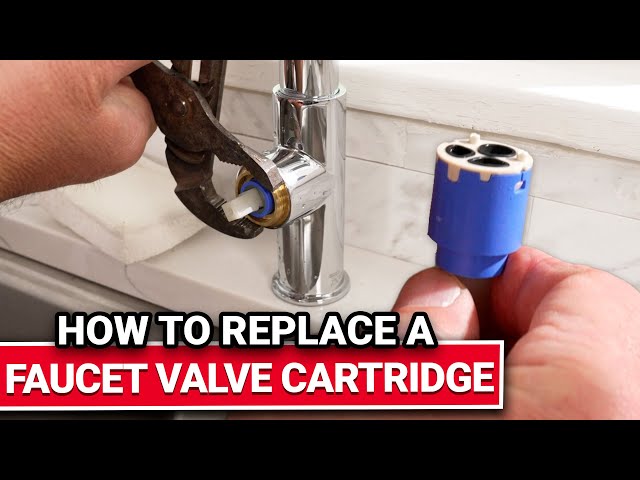
Once the handle is off, see the cartridge. It looks like a small cylinder. Use pliers to grab it. Gently pull it out. If it’s tight, twist it first. This loosens it. Don’t use too much force. It might break. Check for any leftover pieces. Make sure the area is clean.
Installing The New Cartridge
Start by removing the old cartridge. Carefully take it out of the faucet. Then, take the new cartridge. Make sure it matches the old one. Align the new cartridge with the faucet holes. Push it gently into place. Ensure it sits correctly. The cartridge should not be loose. Check its position before moving ahead.
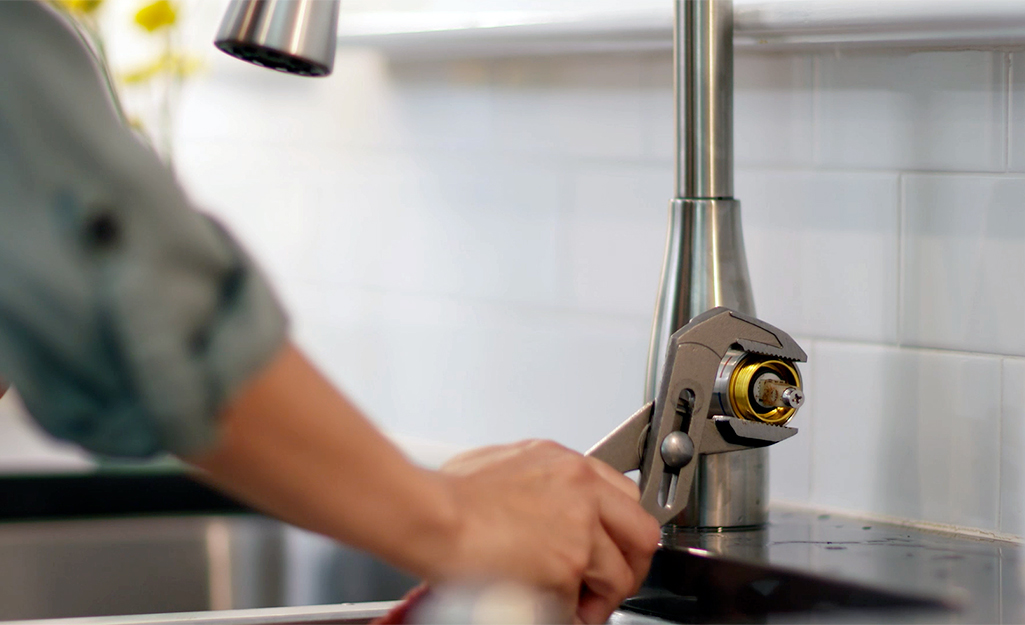
Once positioned, secure the cartridge with the retaining nut. Use a wrench to tighten the nut. Ensure it is snug but not too tight. Over-tightening can cause damage. Double-check that the cartridge is secure. Turn the faucet handle to test. It should turn smoothly. If it feels stiff, adjust again. Make sure everything is in place.
Reassembling The Faucet
Attaching the faucet handleis simple. Place the handle back on the stem. Align it correctly. Use a screwdriver to tighten the screw. Make sure it is snug. Too loose, and it might wobble. Too tight, and it might break.
Next, turn on the water supply. Check the handle. It should move smoothly. If not, adjust the screw. Test the water flow. Both hot and cold should work. Feel the water temperature. It should change easily.
Checking for leaksis important. Look under the sink. Touch the pipes. They should be dry. Turn the faucet on and off. Watch for drips. If there are leaks, tighten connections. Watch again. No drips mean you are done.
Testing The New Cartridge
Turn on the main water valve slowly. This prevents any sudden rush of water. Once the valve is open, go to the faucet. Turn on the faucet handle. Check for any leaks around the area. If you see water leaking, you may need to tighten the cartridge. Make sure the handle moves easily. It should not stick or feel tight. Listen for any strange noises. The water flow should be smooth and steady.
Test the hot and cold settings. Make sure the water changes temperature correctly. This is important for safety. Check that the water pressure is normal. It should not be too weak or too strong. Look for any drips when the faucet is off. If it drips, there might be a problem. Fix it before using the faucet regularly. Enjoy the new, smoothly working faucet.

Credit: www.youtube.com
Troubleshooting Common Issues
Fixing a leaky faucet often involves changing the cartridge. Identify the problem by turning off the water supply. Then, remove the faucet handle to access the cartridge. Carefully replace it, ensuring all parts are secure. Finally, turn the water back on and check for leaks.
Identifying Leaks
A leakaround the faucet can be annoying. First, check the baseof the faucet. Water should not pool there. Look under the sink as well. Wet spots might indicate a leak. A cartridgemay need replacing if the faucet drips. Tighten any loose parts to fix the leak. Use a wrench carefully. Do not over-tighten, as parts might break. Always dry the area after checking.
Addressing Stiff Handles
A handle that does not turn easily is frustrating. This often means the cartridgeis worn out. To fix, remove the handle. Then, check the cartridgeinside. It might need cleaning or replacement. Use a cloth to wipe away dirt and grime. If necessary, replace the old cartridgewith a new one. Ensure it fits snugly. Reassemble the handle and test for smooth movement. Handles should turn easily now.
Credit: www.homedepot.com
Frequently Asked Questions
How Do I Identify The Faucet Cartridge Type?
To identify the faucet cartridge type, remove the handle and inspect the cartridge. Look for brand logos or part numbers on the cartridge itself. Alternatively, take the cartridge to a hardware store for assistance. Identifying the cartridge type ensures you purchase the correct replacement part.
Can I Change A Faucet Cartridge Myself?
Yes, you can change a faucet cartridge yourself. Turn off the water supply and remove the faucet handle. Extract the old cartridge using pliers and replace it with a new one. Follow the manufacturer’s instructions for best results. This simple DIY task can save you money on plumbing services.
What Tools Are Needed To Change A Faucet Cartridge?
To change a faucet cartridge, you’ll need a wrench, screwdriver, and pliers. These tools help remove the faucet handle and extract the old cartridge. Having the right tools ensures a smooth and efficient replacement process. Always keep these basic tools handy for minor plumbing repairs.
How Long Does It Take To Replace A Faucet Cartridge?
Replacing a faucet cartridge typically takes 20 to 30 minutes. This includes turning off the water supply, removing the handle, and replacing the cartridge. With the right tools and preparation, you can efficiently complete this task. Timely replacement helps prevent leaks and maintains faucet functionality.
Conclusion
Changing a faucet cartridge is simple with the right steps. Gather tools like a wrench and screwdriver. Turn off the water supply first. Remove the handle and old cartridge. Check for leaks after installing the new one. This task saves money on plumber fees.
It also keeps your faucet working well. A small effort can bring big rewards. Try it yourself and enjoy a leak-free faucet. Regular maintenance prevents future problems. You now have the knowledge to do it confidently. Happy fixing!