A Simple Guide to Changing a Pendant Light
I remember the first time I tried to change a pendant light in my kitchen. It was a wobbly old fixture, and I wanted a bright, modern one to make dinners feel special. With a few tools and some patience, I got it done—and you can too! In this guide, I’ll show you how to change a pendant light step by step. It’s easy, even if you’re new to this. We’ll cover what a pendant light is, the tools you need, simple steps to follow, and tips to save money and avoid mistakes. Let’s make your space shine!
What Is a Pendant Light?
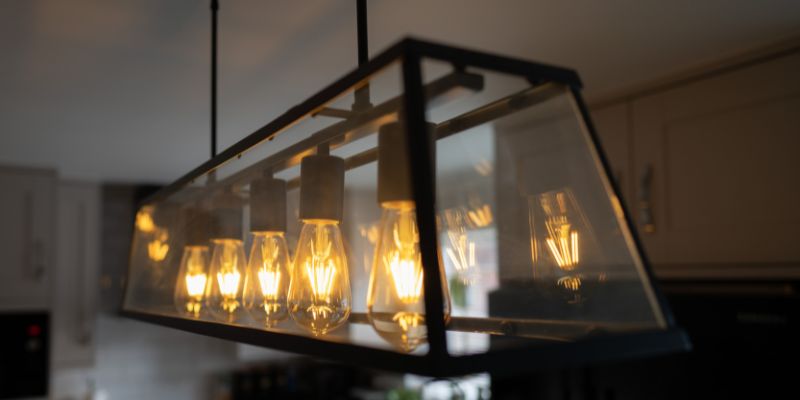
A pendant light hangs from the ceiling by a cord, chain, or rod. It’s like a fancy lamp that lights up your kitchen, dining room, or bedroom. People love pendant lights because they look stylish and focus light where you need it, like over a table. They come in many shapes, like glass globes or metal shades. Knowing what a pendant light is helps you pick the right one for your home.
Why Change a Pendant Light?
You might want a new pendant light to match your style or brighten a room. Old lights can flicker or look outdated. Changing one can save energy if you pick an LED bulb. It’s also a fun project to make your space feel fresh. I once swapped a dull light for a sleek glass pendant, and it changed my whole living room!
Tools and Materials You Need
Before you start, gather some simple tools and materials. You don’t need fancy stuff, and you can find these at stores like Home Depot.
- Screwdriver: A flathead or Phillips to remove screws.
- Wire stripper: To cut and strip wires safely.
- Voltage tester: To check if the power is off.
- New pendant light: Pick one that fits your style and room.
- Wire nuts: To connect wires securely.
- Ladder: To reach the ceiling safely.
Here’s a table to help you choose tools:
| Tool | Purpose | Cost (Approx.) |
|---|---|---|
| Screwdriver | Remove fixture screws | $5–$10 |
| Wire stripper | Prepare wires for connection | $10–$20 |
| Voltage tester | Ensure power is off | $10–$15 |
Caption: Basic tools needed to change a pendant light.
Step-by-Step Guide: How to Change a Pendant Light
Here’s an easy guide to replace your pendant light. Follow these steps, and you’ll have a new light up in no time. Always stay safe and take your time.
Step 1: Turn Off the Power
Safety comes first! Go to your home’s circuit breaker and turn off the power to the light. Use a voltage tester to check that no electricity is flowing. I once forgot this step and got a small shock—don’t make that mistake!
Step 2: Remove the Old Light
Climb your ladder carefully. Unscrew the old pendant light from the ceiling. Most lights have a base plate held by screws. Gently pull the fixture down to see the wires. Take a picture of the wiring to remember how it looks.
Step 3: Disconnect the Wires
Look for the black (hot), white (neutral), and green or copper (ground) wires. Unscrew the wire nuts to separate them. If the wires are old, check for damage. I’ve seen frayed wires that needed replacing to avoid problems.
Step 4: Prepare the New Light
Open your new pendant light’s box and read the instructions. Some lights need assembly, like attaching the shade. Make sure the wires are ready to connect. Strip about half an inch of insulation from the ends if needed.
Step 5: Connect the Wires
Match the wires from the new light to the ceiling wires. Connect black to black, white to white, and green to green using wire nuts. Twist them tightly to keep them secure. I always double-check to avoid loose connections.
Step 6: Mount the New Light
Attach the new light’s base plate to the ceiling with screws. Make sure it’s firm and level. Tuck the wires neatly into the ceiling box. Then, attach the light’s shade or cover as the instructions say.
Step 7: Test the Light
Turn the power back on at the circuit breaker. Flip the light switch to see if your new pendant light works. If it doesn’t, check the wires or bulb. I had a bulb that wasn’t screwed in tightly once, and that fixed it!
Here’s a quick checklist for success:
- Turn off power before starting.
- Match wires correctly (black to black, white to white).
- Secure all screws tightly.
- Test the light after installation.
Benefits of Changing a Pendant Light
Changing a pendant light makes your room look better. It can save money if you use LED bulbs, which use less electricity. A new light can also make tasks like cooking easier with brighter light. The downside? It takes a little time, and you need to be careful with electricity. You could hire an electrician, but doing it yourself saves about $100.
Common Mistakes to Avoid
Here are mistakes I’ve made or seen others make:
- Forgetting to turn off power: Always use the circuit breaker.
- Mixing up wires: Check colors carefully to avoid shorts.
- Not securing the light: A loose light can fall, so tighten screws.
This table compares common errors and fixes:
| Mistake | Fix |
|---|---|
| Power left on | Use voltage tester before work |
| Wrong wire connections | Match wire colors correctly |
| Loose screws | Tighten all screws securely |
Caption: Avoid these mistakes when changing a pendant light.
My Personal Tips for Success
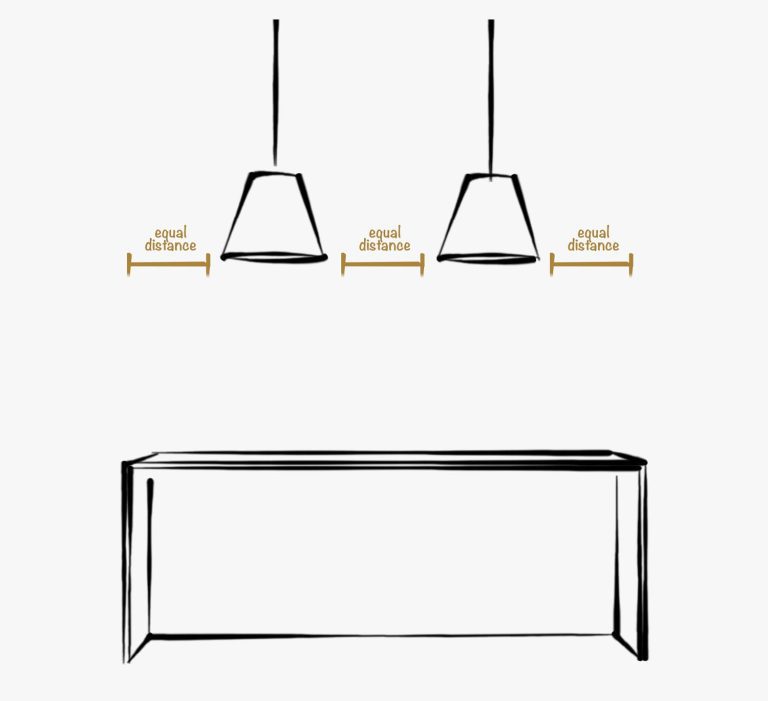
I’ve changed many pendant lights, and here are my best tips. Pick a light that fits your room’s size—big lights look odd in small spaces. Check the bulb type before buying; some lights only take special bulbs. If you’re nervous, practice with the power off first. I once installed a light upside down, so always double-check the instructions!
Other Lighting Options
If a pendant light isn’t your style, try these:
- Chandeliers: Fancy lights for big rooms.
- Flush-mount lights: Simple lights that hug the ceiling.
- Track lighting: Adjustable lights for focused areas.
This table compares lighting options:
| Light Type | Best For | Cost (Approx.) |
|---|---|---|
| Pendant Light | Kitchens, dining rooms | $20–$200 |
| Chandelier | Large, fancy spaces | $100–$500 |
| Flush-mount | Small rooms, hallways | $10–$50 |
Caption: Compare pendant lights with other options.
Visual Ideas for Clarity
To make this easier, imagine these visuals (not included):
- A diagram showing wire connections (black, white, green).
- A photo of tools laid out on a table.
- A sketch of a pendant light installed over a kitchen island.
These could help you see each step clearly.
Conclusion
Changing a pendant light is a fun, easy project. You need a few tools, some care, and a new light to brighten your space. Follow the steps, stay safe, and avoid common mistakes. You’ll love how a new light makes your room feel. Try it this weekend, and share your project with friends! Check out Home Depot for lights or This Old House for more tips. Have fun lighting up your home!
Frequently Asked Questions
How long does it take to change a pendant light?
It takes about 30–60 minutes to change a pendant light. Beginners might need an hour to go slowly and check everything. If the wiring is tricky or the light needs assembly, add 15–20 minutes. Always turn off the power first to stay safe.
Is it safe to change a pendant light myself?
Yes, it’s safe if you follow safety steps. Turn off the power at the circuit breaker and use a voltage tester. Don’t touch wires until you’re sure the power is off. If you’re unsure, ask an electrician for help.
What if my new pendant light doesn’t work?
Check if the bulb is tight and works in another socket. Make sure the wires are connected correctly (black to black, white to white). If it still doesn’t work, turn off the power and recheck the wire nuts or call an electrician.
Can I change a pendant light without an electrician?
Yes, you can do it yourself with basic tools and care. Follow the steps in this guide, and always turn off the power. If the wiring looks damaged or complex, hire an electrician to be safe. It saves about $100 doing it yourself.
What kind of bulb should I use?
Check the new light’s instructions for bulb type. Most pendant lights use LED, CFL, or incandescent bulbs. LED bulbs save energy and last longer. Make sure the wattage matches what the light allows, usually 40–60 watts.
How do I pick the right pendant light?
Choose a light that fits your room’s size and style. Measure the space—big lights suit large rooms, small ones fit cozy spaces. Glass or metal shades work well in kitchens. Check HGTV for style ideas.
Do I need special tools to change a pendant light?
No, basic tools like a screwdriver, wire stripper, and voltage tester are enough. A ladder helps you reach the ceiling safely. You can buy these at hardware stores for $20–$50 total. Check the table above for details.