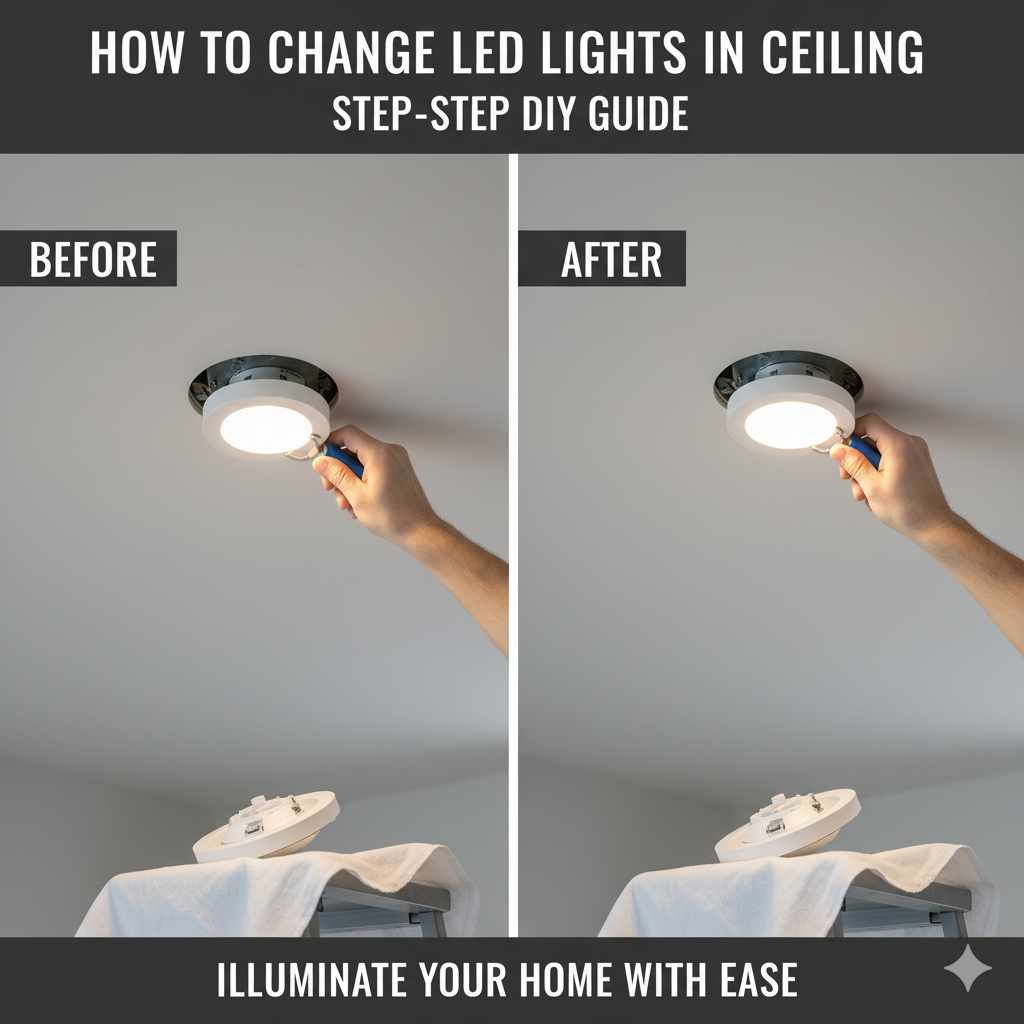
How To Change LED Lights In Ceiling: Effortless Guide
Quick Summary:
Changing LED ceiling lights is a straightforward DIY project. This guide provides easy, step-by-step instructions, essential tools, and safety tips to help you replace your old or faulty LED fixtures with confidence, ensuring a well-lit and updated home.
Hello there! Md Meraj here, your go-to guide for making home improvement projects feel less like a chore and more like a satisfying accomplishment. If you’ve ever looked up at a flickering ceiling light or a fixture that’s seen better days, you’ve probably wondered, “Can I really do this myself?” The answer is a resounding yes! Replacing an LED ceiling light might sound daunting, but with a little guidance, the right tools, and a focus on safety, it’s a project that even a beginner can tackle with confidence. We’ll walk through every step, from gathering your supplies to flipping that switch for the first time with your new, bright light.
Let’s get your home looking its best and feeling brighter, one ceiling at a time. We’ll break down the process so it’s clear, simple, and safe. Get ready to feel that surge of pride as you complete this valuable home upgrade!
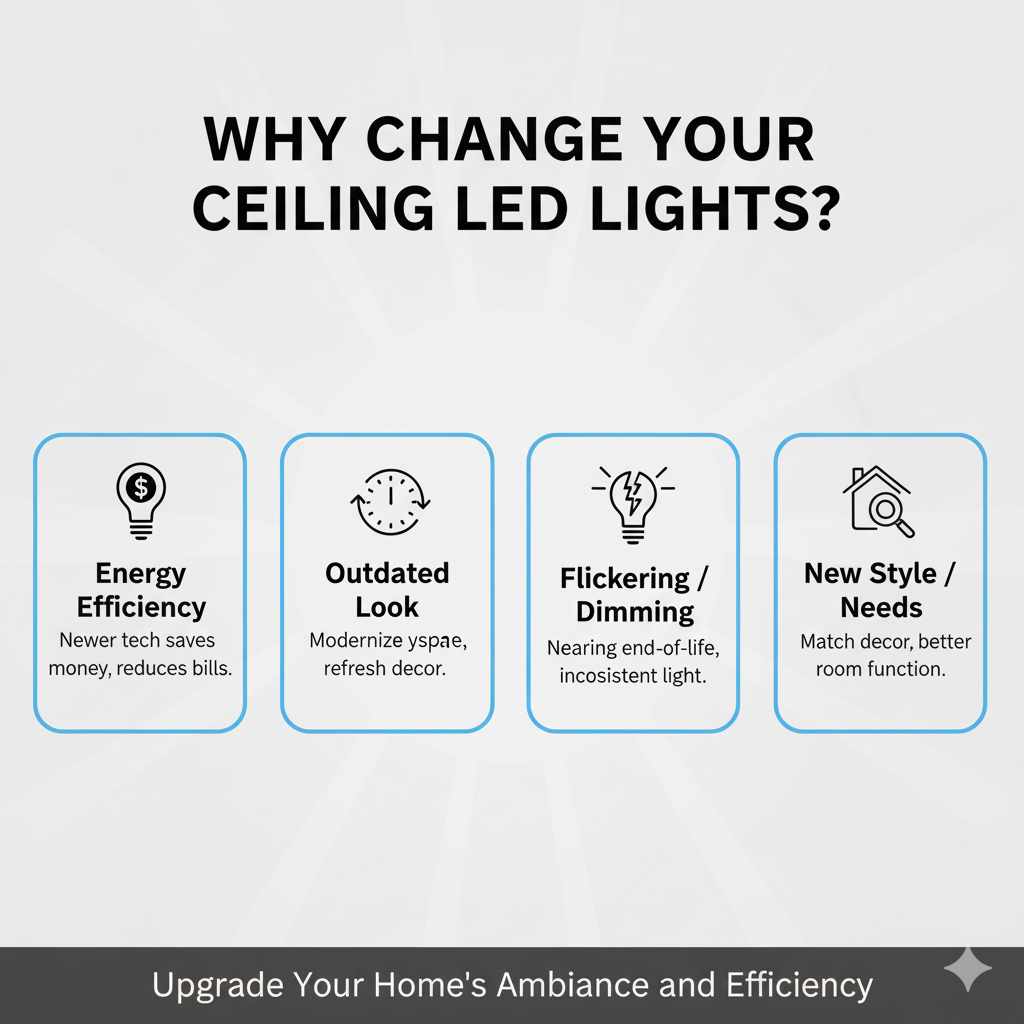
Why Change Your Ceiling LED Lights?
There are several good reasons to consider changing your ceiling LED lights. Maybe your current fixture is outdated, and you’re looking for a more modern look. Perhaps the LED is starting to flicker or dim, signaling it’s nearing the end of its lifespan. Energy efficiency is another big driver; newer LED technology is often even more efficient, saving you money on your electricity bills. Or, it could be as simple as wanting a different style of light to better suit your room’s decor or functional needs. Whatever your reason, upgrading your ceiling lights is a fantastic way to refresh your space.
Safety First: Essential Precautions
Before we even think about touching a screwdriver, let’s talk about safety. Working with electricity can be dangerous if you’re not careful. My top priority is always ensuring you can complete your projects without any mishaps. Following these safety steps is non-negotiable:
- Turn Off the Power: This is the absolute most crucial step. Locate the circuit breaker that controls the light fixture you’ll be working on and flip it to the OFF position. It’s a good idea to use a voltage tester to double-check that the power is indeed off at the fixture itself.
- Use a Sturdy Ladder: Ensure your ladder is stable and placed on a level surface. Don’t overreach; move the ladder as needed.
- Wear Safety Glasses: Protect your eyes from dust, debris, or anything that might fall from the ceiling.
- Avoid Working Alone: If possible, have someone with you, especially if you’re new to this. They can help hold things steady or call for assistance if needed.
- Understand Your Fixture: Familiarize yourself with the type of fixture you have. Some might have unique installation or removal methods.
Remember, if you feel uncomfortable or unsure at any point, it’s always best to consult a qualified electrician. Safety is paramount!
Tools and Materials You’ll Need
Gathering the right tools beforehand makes the whole process go much smoother. You don’t need a professional workshop for this; most of these are common household items.
Essential Tools:
- Screwdrivers: A Phillips head and a flathead screwdriver are usually necessary. A set with various sizes is helpful.
- Wire Strippers/Cutters: For preparing electrical wires.
- Voltage Tester: A non-contact voltage tester is a simple and safe way to confirm power is off.
- Ladder or Step Stool: For reaching the ceiling fixture safely.
- Pliers: Can be useful for gripping wires or small parts.
- Work Gloves: For better grip and protection.
- Safety Glasses: To protect your eyes.
Materials:
- New LED Ceiling Light Fixture: Make sure it’s compatible with your ceiling type and desired style.
- Wire Nuts (Optional): Sometimes new fixtures come with them, but it’s good to have a few extras in case the old ones are damaged or you need different sizes.
- Electrical Tape: For securing wire connections if needed.
Step-by-Step: How to Change Your LED Ceiling Light
Now, let’s get down to the exciting part – replacing the light! I’ll guide you through each step clearly, so you can follow along with ease.
Step 1: Turn Off the Power (Again!)
I can’t stress this enough. Go to your electrical panel and find the breaker that controls the light you’re working on. Flip it to the OFF position. To be absolutely sure, use your non-contact voltage tester near the existing fixture. If it lights up or beeps, the power is still on. Go back to the breaker and try again. Once you’re certain the power is off, you can proceed.
Step 2: Remove the Old Fixture Cover
Most ceiling light fixtures have a cover or shade. This might be held in place by screws, clips, or a threaded collar. Carefully remove the cover. If it’s glass, be extra gentle. Set the cover aside in a safe place.
Step 3: Unscrew and Remove the Old Fixture Base
Once the cover is off, you’ll see the base of the fixture attached to the ceiling electrical box. There will likely be screws holding it in place. Unscrew these. As you do, support the weight of the fixture so it doesn’t just hang by the wires. Once the screws are out, gently pull the fixture away from the ceiling. It will still be connected by wires.
Step 4: Disconnect the Wiring
This is where your voltage tester is essential again. Even though you’ve turned off the breaker, a quick check is wise. You’ll see wires coming from the ceiling electrical box (usually black, white, and sometimes a bare copper or green ground wire) connected to the wires of the old fixture. These connections are typically made with wire nuts. Unscrew the wire nuts. Carefully separate the wires. You might need pliers to gently twist the wires apart if they’re stuck.
Note how the wires are connected:
- Black wire (hot) from the ceiling connects to the black wire of the fixture.
- White wire (neutral) from the ceiling connects to the white wire of the fixture.
- Bare copper or green wire (ground) from the ceiling connects to the ground wire of the fixture.
Once disconnected, you can gently tuck the ceiling wires back into the electrical box for now. You might need to remove the old fixture’s mounting bracket from the ceiling box if it’s different from the one your new fixture uses.
Step 5: Install the New Mounting Bracket
Your new LED fixture will come with its own mounting bracket or hardware. Follow the instructions that came with your new light. Typically, you’ll attach this new bracket to the electrical box in the ceiling using the screws provided. Ensure it’s secure and level.
Step 6: Connect the New LED Fixture Wires
Now, it’s time to wire up the new fixture. It’s like a mirror image of how you disconnected the old one. Refer to the wiring diagram that came with your new light, but generally, you’ll connect:
- The black wire from the ceiling to the black wire of the new fixture.
- The white wire from the ceiling to the white wire of the new fixture.
- The ground wire from the ceiling to the ground wire of the new fixture.
Use the provided wire nuts to secure these connections. Twist the wire nuts clockwise onto the ends of the wires until they are snug. Give each wire a gentle tug to ensure the connection is secure. For extra security, you can wrap the wire nut and the connection point with electrical tape, but this isn’t always necessary if the wire nuts are the correct size and fully tightened.
A helpful resource for understanding basic electrical wiring safety can be found on the Consumer Product Safety Commission (CPSC) website, which offers valuable tips for homeowners.
Step 7: Mount the New Fixture
Carefully lift the new LED fixture up to the ceiling. Align it with the mounting bracket you installed earlier. Most fixtures have screws or a mechanism to secure them to the bracket. Once the fixture is attached to the bracket, gently push the wires and connections up into the electrical box to make room for the fixture. Tighten any screws that hold the fixture base to the mounting bracket.
Step 8: Attach the New Fixture Cover
Now, attach the cover or shade of your new LED fixture. This will be the reverse of how you removed the old one. Make sure it’s seated correctly and secured firmly.
Step 9: Restore Power and Test
Go back to your circuit breaker panel and flip the breaker back to the ON position. Head back to your newly installed light and flip the wall switch. Your new LED light should illuminate brightly! If it doesn’t, don’t panic. Immediately turn the power off at the breaker and re-check your wiring connections. Often, a loose wire nut or a misconnected wire is the culprit.
Comparing Old Incandescent/Halogen vs. New LED Ceiling Lights
Making the switch to LED is a smart move for many reasons. Here’s a quick comparison to highlight the benefits:
| Feature | Incandescent/Halogen | LED (Light Emitting Diode) |
|---|---|---|
| Energy Efficiency | Low. Most energy is lost as heat. | Very High. Uses up to 80% less energy. |
| Lifespan | Short (approx. 1,000-2,000 hours) | Very Long (approx. 15,000-50,000+ hours) |
| Heat Output | High. Can increase room temperature. | Low. Generates very little heat. |
| Durability | Fragile glass bulbs. | Solid state, more durable. |
| Initial Cost | Low. | Higher, but costs have decreased significantly. |
| Running Cost | High due to energy consumption. | Very Low. |
| Light Quality | Warm, familiar light. | Wide range of color temperatures (warm to cool), dimmable options. |
As you can see, the long-term savings and benefits of LED technology are substantial. For more detailed information on LED lighting technology and its benefits, you might find resources from the U.S. Department of Energy’s Energy Saver website very informative.
Troubleshooting Common Issues
Even with careful work, sometimes things don’t go perfectly the first time. Here are a few common issues and how to address them:
-
Light Doesn’t Turn On:
- Double-check the circuit breaker is ON.
- Verify the wall switch is ON.
- Turn power OFF at the breaker again and re-check all wire connections, especially the wire nuts. Ensure wires are making good contact.
- Test the voltage at the fixture wires again (with power OFF at the breaker).
-
Light Flickers:
- This can sometimes happen with older dimmer switches not compatible with LED. Ensure your dimmer is LED-compatible or replace it with a standard switch.
- Check for loose wire connections.
- The LED driver (if your fixture has one) might be faulty, or the fixture itself could be defective.
-
Fixture Seems Loose:
- Ensure the screws holding the fixture to the mounting bracket are tight.
- Check that the mounting bracket itself is securely fastened to the electrical box.
-
Buzzing Sound:
- This can sometimes occur with non-LED-compatible dimmer switches.
- Loose wire connections can also cause buzzing.
- Some LED drivers might produce a very faint hum, which is normal for certain types of fixtures.
If you encounter an issue you can’t resolve, don’t hesitate to call a professional electrician. It’s better to be safe!
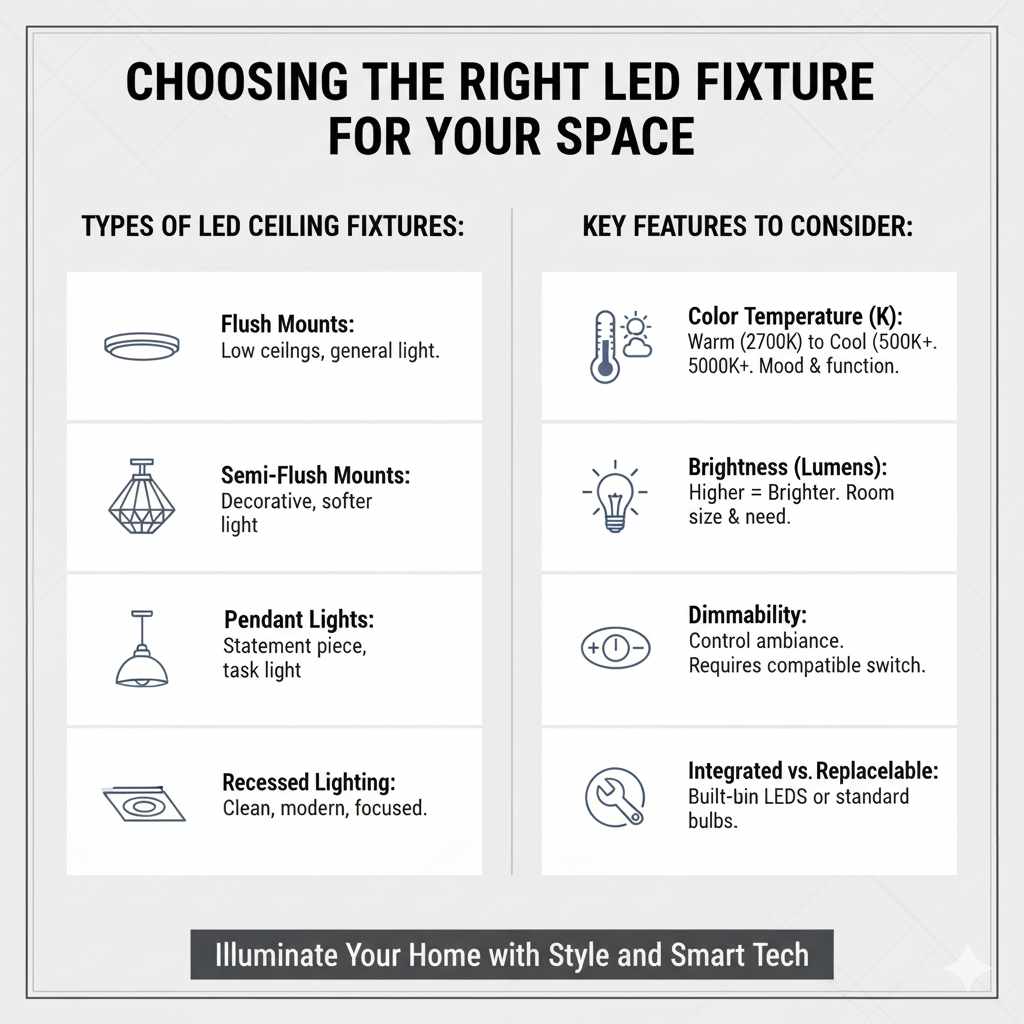
Choosing the Right LED Fixture for Your Space
With so many options available, picking the right LED ceiling light can be exciting. Consider these factors:
Types of LED Ceiling Fixtures:
- Flush Mounts: These sit directly against the ceiling, great for lower ceilings and general room lighting.
- Semi-Flush Mounts: These hang down a few inches from the ceiling, offering a bit more decorative style and often diffusing light more softly.
- Pendant Lights: While often used over tables or islands, some can serve as a ceiling light in smaller spaces, offering a statement piece.
- Recessed Lighting (Can Lights): These are installed directly into the ceiling, providing a clean, modern look with focused light. (Note: Replacing recessed lighting cans is a more involved project than changing a surface-mounted fixture and may require different steps).
- Track Lighting: Offers flexibility with adjustable heads to direct light where needed.
Key Features to Consider:
- Color Temperature: Measured in Kelvin (K). Lower numbers (2700K-3000K) are warm, like incandescent bulbs. Higher numbers (3500K-5000K+) are cooler, whiter light. Choose based on the room’s mood (e.g., warm for living rooms, cooler for kitchens/offices).
- Brightness (Lumens): This indicates how much light the fixture produces. Higher lumens mean a brighter light. The amount you need depends on the room size and its function.
- Dimmability: If you like to control the ambiance, ensure the fixture is dimmable and that you have a compatible LED dimmer switch installed.
- Style and Finish: Match the fixture to your room’s decor. Finishes like brushed nickel, chrome, oil-rubbed bronze, or matte black are popular.
- Integrated vs. Replaceable LED: Some fixtures have LEDs built-in, meaning the entire fixture needs replacing when the LEDs eventually fail. Others use standard LED bulbs that you can unscrew and replace.
Frequently Asked Questions (FAQs)
Q1: How long does it take to change a ceiling LED light?
A1: For a beginner, expect to spend about 30 minutes to an hour. If you’re experienced, it can be as quick as 15-20 minutes.
Q2: Do I need to hire an electrician?
A2: If you are comfortable and careful with the safety steps, especially turning off the power at the breaker and using a voltage tester, most homeowners can do this themselves. If you have any doubts, always call a qualified electrician.
Q3: What if my new LED fixture doesn’t come with wire nuts?
A3: You can purchase standard wire nuts at any hardware store. Ensure you get the correct size for the wires you’re connecting. They are very inexpensive.
Q4: Can I replace an old incandescent fixture with a new LED fixture?
A4: Yes, absolutely! In fact, this is a very common upgrade. Just ensure you follow the wiring steps carefully to connect the new LED fixture to the existing wiring in your ceiling.
Q5: My new LED light is very dim, what could be wrong?
A5: First, ensure you’ve removed any protective plastic films from the fixture. Then, double-check that you have the correct wattage/lumen output for your needs and that the fixture isn’t being overpowered by an incompatible dimmer switch. If it’s an integrated LED fixture, there might be a fault with the fixture itself.
Q6: What is a “ground wire” and why is it important?
A6: The ground wire (usually bare copper or green) is a safety feature. In case of an electrical fault, it provides a safe path for electricity to flow to the ground, preventing shock. Always connect the ground wire from the ceiling to the ground wire on your new fixture.
Q7: How do I know if my dimmer switch is compatible with LED lights?
A7: Look for markings on the dimmer switch itself or its packaging that indicate “LED compatible” or “ELV” (Electronic Low Voltage) or “MLV” (Magnetic Low Voltage) compatibility, depending on the type of LED fixture. If unsure, consult the manufacturer of the dimmer or light fixture, or consider replacing the dimmer with a standard on/off switch.
Conclusion
And there you have it! Changing your ceiling LED lights is a perfectly manageable DIY project that can significantly update the look and feel of your home while also improving energy efficiency. By following these straightforward steps, prioritizing safety above all else, and gathering the right tools, you can confidently tackle this upgrade. Remember to always turn off the power, double-check your connections, and if anything feels beyond your comfort level, don’t hesitate to call in a professional.
You’ve taken a great step towards making your home brighter and more modern. Enjoy the beautiful, efficient light your new fixture provides! I’m Md Meraj, and I’m always happy to guide you through your next home improvement adventure. Happy DIYing!