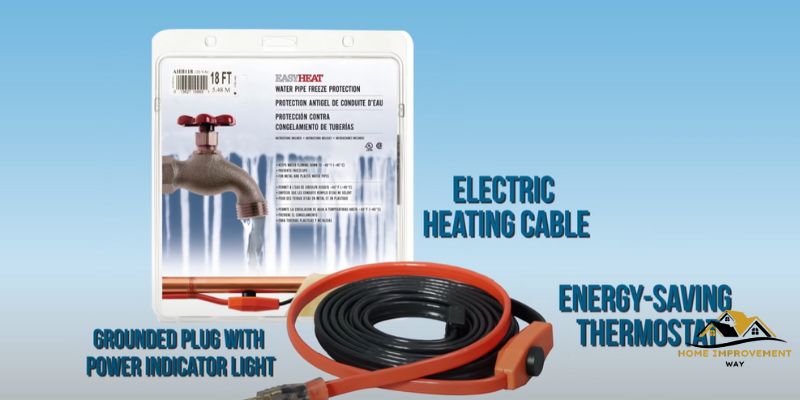
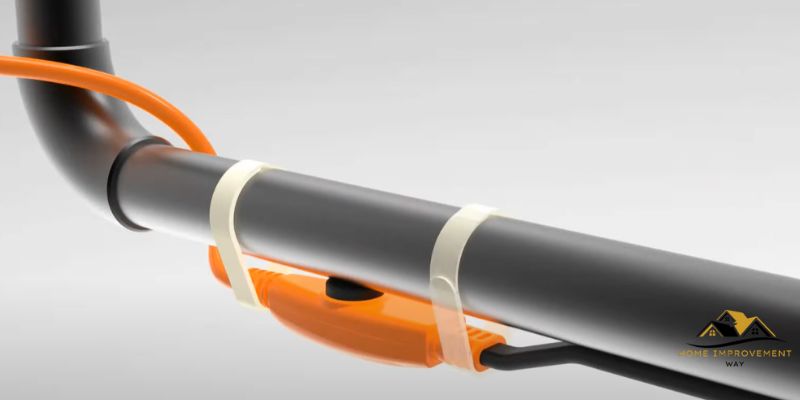
To check if heat tape is working, feel the area where the heat tape is applied for warmth and use a digital thermometer to measure the temperature produced. Additionally, inspect the heat tape for any visible signs of damage or fraying.
Proper heat tape operation is crucial to ensuring the prevention of frozen pipe lines and potential water damage in cold weather. Therefore, regular maintenance and testing is necessary to confirm that the heat tape is functioning effectively. Use these simple steps to verify the functionality of your heat tape and protect your pipes from icy conditions.
Signs Of A Faulty Heat Tape
If you suspect that your heat tape is faulty, there are a few signs to look out for. Check for areas that are not heating up, inconsistent temperature, strange noises, or visible damage to the tape. Regularly inspecting your heat tape can help ensure it is working properly.
If you rely on heat tape to keep your pipes and gutters free from freezing during the chilly winter months, it’s essential to ensure that it is in proper working condition. A faulty heat tape may lead to costly repairs and potential damage to your property. By knowing the signs of a faulty heat tape, you can take necessary action before it becomes a major issue.
No Heat Output
Lack of heat output is one of the most obvious signs that your heat tape is not functioning correctly. When your heat tape is operational, it should generate enough heat to prevent freezing. If your pipes or gutters still freeze despite having the heat tape installed, it’s time to investigate the cause. Check all the connections and make sure that power is reaching the heat tape. If there’s no heat output, it is likely that your heat tape has malfunctioned and may require replacement.
Visible Damage
Visually inspecting your heat tape is another way to determine its condition. Look for any visible signs of damage such as fraying, exposed wires, or cracks in the outer covering. These issues can compromise the effectiveness and safety of your heat tape. Additionally, inspect the power cord for any cuts or nicks that may disrupt the power supply. If you notice any visible damage, it is crucial to take immediate action to repair or replace the heat tape.
Regular maintenance and inspection of your heat tape can help you detect any issues before they escalate into major problems. By looking out for signs of a faulty heat tape, such as no heat output and visible damage, you can ensure that your pipes and gutters remain protected from freezing temperatures. Don’t overlook the importance of a well-functioning heat tape, as it can save you from potential headaches and costly repairs in the long run.

Methods To Check Heat Tape
Wondering how to check if your heat tape is working? Here are a few methods you can try to ensure that your heat tape is functioning properly, keeping your pipes safe and warm during the cold weather.
Checking if your heat tape is working properly is crucial to prevent any potential damage or hazards. Here are three methods you can use to ensure your heat tape is functioning as it should:
1. Visual Inspection
Performing a visual inspection is the first step in checking the functionality of your heat tape. Start by examining the tape for any signs of wear and tear, such as cracks, frayed wires, or visible damage. Ensure that the tape is securely fastened and hasn’t come loose.
If you notice any physical damage or loose connections, it’s important to address them promptly to avoid any safety risks or inefficiencies in your heat tape’s performance.
2. Using A Multimeter
A multimeter is a handy tool that can help you determine if your heat tape is working effectively. To use a multimeter, follow these simple steps:
- Disconnect the power supply to the heat tape.
- Set the multimeter to measure resistance (Ω).
- Place the multimeter probes at the ends of the heat tape.
- Check the multimeter display for a reading. A reading close to the manufacturer’s specification indicates that the heat tape is functioning properly.
If the multimeter displays an open circuit or a significantly different reading than expected, it may indicate a problem with the heat tape that needs further investigation.
3. Monitoring Performance
An additional method to check if your heat tape is working is by monitoring its performance during cold weather conditions. Here’s how:
- Choose a particularly cold day or wait for freezing temperatures.
- Observe if the heat tape effectively prevents ice or snow buildup on the intended areas, such as roofs, gutters, or pipes.
- If the heat tape successfully melts the ice or snow and ensures proper drainage, it indicates that the system is operating as expected.
However, if you notice any uneven or incomplete melting of ice or snow, it could be a sign of a malfunctioning heat tape that requires professional attention.
Regularly checking the functionality of your heat tape using these methods can save you time, effort, and potential damage in the long run. By ensuring that your heat tape is working correctly, you can effectively protect your home or property from the perils of freezing temperatures.

How To Troubleshoot And Fix Issues
Is your heat tape working properly? Follow these steps to troubleshoot and fix any issues.
If you’re experiencing problems with your heat tape, it’s crucial to identify and resolve them promptly to protect your pipes from freezing. In this section, we will discuss two common issues that may arise when using heat tape: replacing faulty heat tape and checking electrical connections. By following these troubleshooting steps, you can ensure that your heat tape is working efficiently.
Replacing Faulty Heat Tape
If your heat tape is not providing the required heat, it may be time to replace it. Follow these simple steps:
| Steps | Actions |
|---|---|
| Step 1 | Switch off the power to the heat tape by disconnecting it from the power source. |
| Step 2 | Inspect the tape for any visible signs of damage or wear, such as fraying or exposed wiring. If you notice any, it’s time for a replacement. |
| Step 3 | Measure the length of the pipe to determine the appropriate size of the replacement heat tape. |
| Step 4 | Choose a reputable brand of heat tape with the correct wattage for your needs. |
| Step 5 | Install the new heat tape according to the manufacturer’s instructions, ensuring you secure it tightly to the pipe. |
| Step 6 | Connect the heat tape to the power source, making sure all connections are secure. |
| Step 7 | Switch on the power and test the heat tape to ensure it is functioning correctly. |
Checking Electrical Connections
An issue with the electrical connections can also cause heat tape problems. Here’s how you can check and resolve these connection issues:
- Begin by turning off the power to the heat tape.
- Inspect the connections between the heat tape and the power source, ensuring they are securely fastened.
- If you find any loose or damaged connections, replace them with new ones.
- Use electrical tape to properly insulate the connections, protecting them from moisture and external elements.
- Once all the connections are secure, switch on the power and test the heat tape’s functionality.
By following these troubleshooting steps, you can diagnose and fix common heat tape issues. Remember to always prioritize safety when working with electrical connections and consult a professional if you encounter any difficulties or uncertainties.
Conclusion
Regularly checking the functionality of your heat tape is crucial to ensure effective protection against frozen pipes and potential damage to your property. By following simple steps such as feeling for heat distribution, monitoring your electricity bill, and inspecting for any signs of ice buildup, you can quickly determine if your heat tape is working efficiently.
Taking proactive measures to maintain your heat tape will give you peace of mind during the cold winter months. Stay prepared and safeguard your plumbing system from freezing woes.


