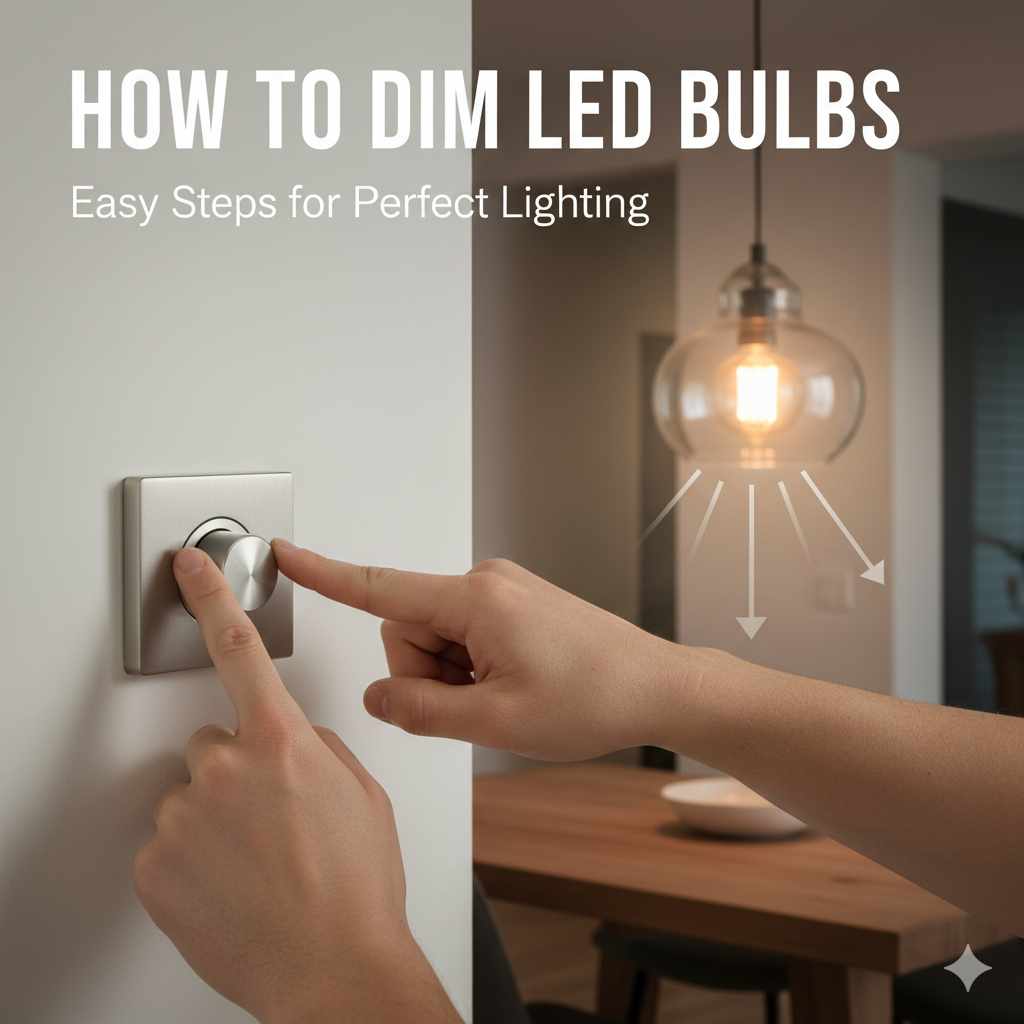
How to Dim LED Bulbs: Essential Guide
Quick Summary
Dimming LED bulbs is achievable with the right dimmer switch and compatible LED bulbs. Not all LEDs are dimmable, so check the packaging. Replacing your standard switch with a compatible LED dimmer is the most common and effective method for controlling light brightness.
Hey there, DIY enthusiasts and home improvers! Md Meraj here. Ever found yourself squinting in a room because the light is just too bright, or wishing you could create a cozier atmosphere with just a flick of a switch? Many of us have been there, especially with the newer LED bulbs. They’re fantastic for saving energy and lasting ages, but sometimes, they can feel a bit… intense. The good news is, getting that perfect lighting level is totally within your reach. You don’t need to be an electrician to figure this out. We’re going to walk through exactly how to dim LED bulbs, making your home lighting more comfortable and versatile. Get ready to transform your spaces!
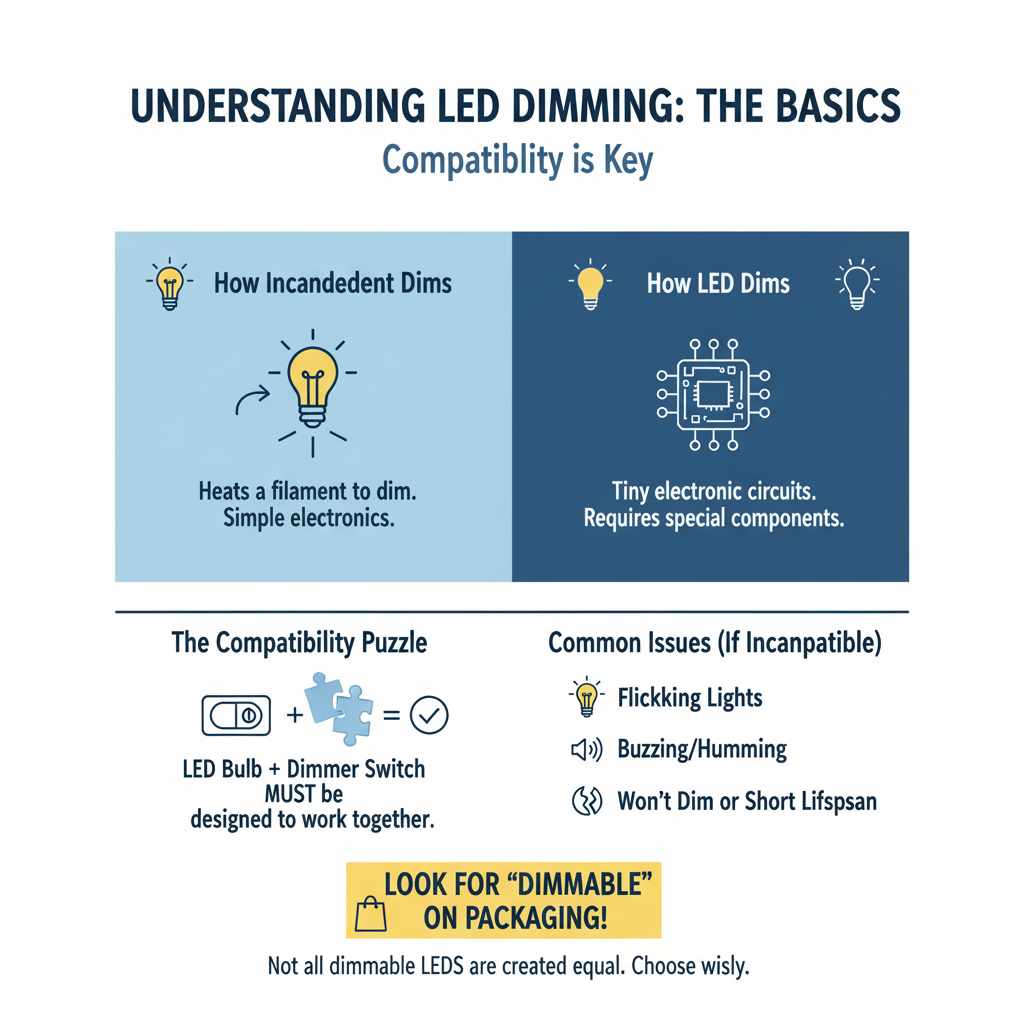
Understanding LED Dimming: The Basics
LEDs are different from old incandescent bulbs. Incandescent bulbs dim by heating up a filament, which is simple to control. LEDs work with tiny electronic circuits. To dim them, we need special components that can talk to these circuits. This means you can’t just put any LED bulb into a dimmer socket and expect it to work. It’s like trying to play a record on a CD player – they just aren’t designed for each other.
The key to successful LED dimming lies in compatibility. Think of it like a puzzle: you need the right pieces to fit together. For LED dimming, these pieces are the LED bulb itself and the dimmer switch you use. If they’re not designed to work together, you might experience flickering, buzzing, or the bulb might not dim at all. Sometimes, it can even shorten the lifespan of the bulb or the dimmer.
When you’re looking at LED bulbs, you’ll often see the word “dimmable” printed right on the packaging. This is your first clue. If it doesn’t say “dimmable,” it’s best to assume it’s not designed for dimming. Even then, not all dimmable LEDs are created equal. Some work better with certain types of dimmer switches than others. We’ll get into the details of choosing the right components so you can achieve smooth, flicker-free dimming.
Why Can’t I Just Use Any LED Bulb with a Dimmer?
This is a super common question, and it boils down to how LEDs and traditional dimmers interact. Old-fashioned dimmers, often called “leading-edge” or “incandescent” dimmers, work by chopping up the power wave going to the bulb. This works fine for simple heating elements like in incandescent bulbs. However, LEDs have built-in electronics (drivers) that manage their power. These drivers can get confused by the chopped-up power wave from an old dimmer.
When an LED driver encounters this interrupted power, it can cause a few annoying problems:
- Flickering: The bulb might rapidly flash on and off, or seem to pulse.
- Buzzing: You might hear an audible hum or buzz coming from the bulb or the dimmer switch.
- Poor Dimming Range: The bulb might only dim a little bit, or not at all, before turning off completely.
- Reduced Lifespan: The constant struggle of the driver to interpret the power can wear out the bulb’s electronics faster.
- Damage: In some cases, incompatible components can cause damage to both the bulb and the dimmer.
Modern dimmer switches are designed specifically for LEDs. These are often called “trailing-edge” or “universal” dimmers. They work in a way that’s much more compatible with the sensitive electronics inside LED bulbs, providing a smoother and more reliable dimming experience. Understanding this difference is crucial for a successful LED dimming setup.
How to Dim LED Bulbs: The Step-by-Step Process
Dimming your LED bulbs is a straightforward process, but it requires the right components. Here’s how you can do it, focusing on the most common and reliable method: replacing your existing light switch with an LED-compatible dimmer switch.
Step 1: Identify Your Needs and Check Compatibility
Before you buy anything, think about what you want. How many bulbs will be on the circuit? What kind of lighting effect are you going for? Most importantly, you need to ensure your LED bulbs are dimmable. Look for “dimmable” on the bulb’s packaging or printed directly on the bulb itself. If it’s not there, it’s not dimmable.
For dimmer switches, you’ll want one specifically designed for LEDs. These are often labeled as “LED compatible,” “universal dimmer,” or “trailing-edge dimmer.” Check the dimmer’s packaging for a list of compatible LED wattages. This is important because LEDs use much less power than old incandescent bulbs, and a dimmer designed for high wattage might not work well with low-wattage LEDs.
You can find helpful resources from manufacturers like Lutron, which offers a wide range of dimmers and compatibility guides. For instance, Lutron’s LED Compatibility Matrix can help you find dimmers that work well with specific LED bulb models.
Step 2: Gather Your Tools and Materials
You’ll need a few basic tools for this DIY project:
- New LED-compatible dimmer switch: Make sure it’s rated for the total wattage of the LED bulbs you’ll be dimming.
- Screwdrivers: A Phillips head and a flathead screwdriver are usually necessary.
- Voltage tester (non-contact is safest): To ensure the power is off before you start. This is a crucial safety step!
- Wire strippers/cutters: For preparing wires if needed.
- Wire nuts: To connect wires securely.
- Pliers: Can be helpful for gripping wires.
- Owner’s manual for the dimmer switch: Always read the instructions that come with your new dimmer.
Step 3: Turn Off the Power! (Safety First!)
This is the MOST IMPORTANT step. You absolutely must turn off the power to the light circuit you’ll be working on. Go to your home’s electrical panel (breaker box) and find the breaker that controls the lights in the room. Flip it to the “OFF” position. To be extra sure, try flipping the light switch in the room; if the light doesn’t turn on, the power is off. It’s also a good idea to use your non-contact voltage tester on the wires inside the switch box to confirm there’s no power before touching anything.
Step 4: Remove the Old Light Switch
Once you’re certain the power is off, remove the faceplate of the old switch. You’ll usually find two screws holding it on. Then, unscrew the old switch from the electrical box. Gently pull the switch out from the wall, but don’t disconnect the wires yet. Note how the wires are connected to the old switch – usually, there are wires connected to screw terminals on the sides or pushed into holes in the back.
Step 5: Connect the New Dimmer Switch
Your new dimmer switch will come with specific wiring instructions, so always refer to those. Generally, you’ll need to connect the wires from your wall to the wires on the dimmer. Most dimmers have at least two wires (or terminals) for the “line” (power coming in) and the “load” (power going to the light). There might also be a ground wire.
- Ground Wire: This is usually a bare copper wire or a green wire. Connect it to the green screw or green wire on the dimmer.
- Line/Load Wires: These are typically black or red wires. Match the wires from your wall to the corresponding wires or terminals on the dimmer switch according to the manufacturer’s instructions. Often, you’ll use wire nuts to connect them securely. If your old switch had two wires connected to the same color terminal (like two black wires), one is likely your “line” and the other is your “load.” The dimmer instructions will clarify which is which.
Make sure all connections are tight and secure. Loose connections can be a fire hazard and cause the dimmer to malfunction.
Step 6: Install the New Dimmer Switch and Faceplate
Carefully tuck the wires back into the electrical box. You might need to gently push them in to make space for the dimmer. Screw the new dimmer switch into the electrical box. Then, attach the new faceplate. Make sure it sits flush against the wall.
Step 7: Restore Power and Test
Go back to your electrical panel and flip the breaker back to the “ON” position. Now, try out your new dimmer! Turn the light on and off, and then try dimming it. Adjust the brightness to its lowest and highest settings. Listen for any unusual buzzing sounds and watch for flickering. If everything works smoothly, congratulations! You’ve successfully installed an LED dimmer.
Alternative Methods for Dimming LEDs
While replacing the wall switch is the most common and effective way, there are a couple of other options to consider, though they often come with their own limitations:
1. Dimmable LED Bulbs with Built-in Controls
Some specialized LED bulbs offer dimming capabilities without needing a dimmer switch. These often use a remote control or a smartphone app to adjust brightness. They might connect via Bluetooth or Wi-Fi.
- How it works: The dimming circuitry is built directly into the bulb. You simply screw them into a standard socket, and then use the associated app or remote to control them.
- Pros: No electrical wiring is required, making it very beginner-friendly. You can often control individual bulbs or groups of bulbs, and some systems offer color-changing features.
- Cons: Can be more expensive per bulb. You lose the ability to control the light with a traditional wall switch unless you buy smart bulbs that also integrate with smart home systems.
2. Plug-in Dimmer Switches
These are devices that plug into a standard wall outlet, and then your lamp plugs into the dimmer. They offer a simple way to dim lamps without any wiring.
- How it works: You plug the dimmer into the wall, then plug your lamp into the dimmer. The dimmer typically has a slider, dial, or buttons to control the brightness.
- Pros: Extremely easy to use, requires no electrical knowledge, and can be moved between rooms.
- Cons: Only suitable for lamps that plug into an outlet, not for ceiling fixtures. Ensure the plug-in dimmer is rated for LED loads, as many are designed for incandescent bulbs and may cause issues with LEDs.
3. Low-Voltage DC Dimming
This method is more common in specialized applications like RVs, boats, or some modern home designs where lighting runs on low-voltage DC power. It often involves specific controllers that manage the DC power supplied to the LED fixtures.
- How it works: A DC dimmer module is installed in line with the low-voltage power supply to the LEDs.
- Pros: Can offer very precise control and is efficient for DC systems.
- Cons: Not applicable for standard household AC wiring and requires specialized knowledge and components.
For most homeowners looking to dim their standard overhead lights or lamps, replacing the wall switch with an LED-compatible dimmer is the most practical and widely available solution. Always prioritize safety and compatibility when choosing any dimming method.
Choosing the Right LED Dimmer Switch
With so many options out there, picking the right LED dimmer switch can feel a bit overwhelming. But don’t worry, it’s easier than it sounds! The key is to match the dimmer to your bulbs and your needs. Here’s what to look for:
Types of LED Dimmers
The technology behind dimmers has evolved significantly to accommodate LEDs. Here are the main types you’ll encounter:
- Leading-Edge (TRIAC) Dimmers: These are the traditional dimmers designed for incandescent and halogen bulbs. They work by “chopping” the power waveform. While some newer leading-edge dimmers are advertised as “LED compatible,” they might not offer the best performance with all LED bulbs, potentially causing flickering or humming.
- Trailing-Edge (ELV – Electronic Low Voltage) Dimmers: These are generally considered superior for dimming LEDs. They work by “smoothing” the power waveform, which is much more compatible with the sensitive electronics in LED drivers. They often provide smoother dimming and are less likely to cause noise or flickering. Many “universal” dimmers incorporate both leading- and trailing-edge technology to work with a wider range of loads.
- Universal Dimmers: These are designed to work with a variety of bulb types, including incandescent, halogen, CFL, and LED. They often have a small adjustment dial or switch to fine-tune their performance for specific LED bulbs.
Key Features to Consider
When selecting a dimmer, keep these features in mind:
- LED Wattage Rating: This is crucial. LED bulbs use significantly less wattage than incandescent bulbs. A dimmer switch will have a minimum and maximum wattage rating for LEDs. Make sure the total wattage of all the LED bulbs on the circuit falls within the dimmer’s specified range. For example, if you have five 8-watt dimmable LED bulbs, your total is 40 watts. You’d need a dimmer that can handle at least 40 watts of LED load.
- Compatibility List: Reputable dimmer manufacturers, like Lutron and Leviton, often provide compatibility lists or matrices on their websites. These lists show which LED bulb models have been tested and confirmed to work well with their specific dimmer models. This is your best bet for ensuring smooth, flicker-free operation.
- Adjustable Low-End Trim: Some dimmers have a small dial or switch that allows you to adjust the lowest dimming level. This is very useful for preventing LEDs from flickering or shutting off prematurely when dimmed to very low levels.
- Smoothness of Dimming: Look for dimmers that advertise smooth dimming. This usually correlates with trailing-edge technology or universal dimmers with good compatibility.
- Ease of Installation: While most dimmers follow standard wiring practices, some might have slightly different connection methods. Check reviews or product descriptions for comments on installation ease.
- Aesthetics: Dimmers come in various styles, colors, and finishes to match your home’s decor.
Calculating Total LED Wattage
To determine the total wattage for your circuit, simply multiply the wattage of a single LED bulb by the number of bulbs you’ll be connecting to the dimmer. For example:
5 LED bulbs x 9 watts/bulb = 45 watts total
Always choose a dimmer with a maximum LED wattage rating that is higher than your calculated total to ensure the dimmer isn’t overworked.
Troubleshooting Common LED Dimming Issues
Even with the right components, you might occasionally run into a snag. Here are some common problems and how to fix them:
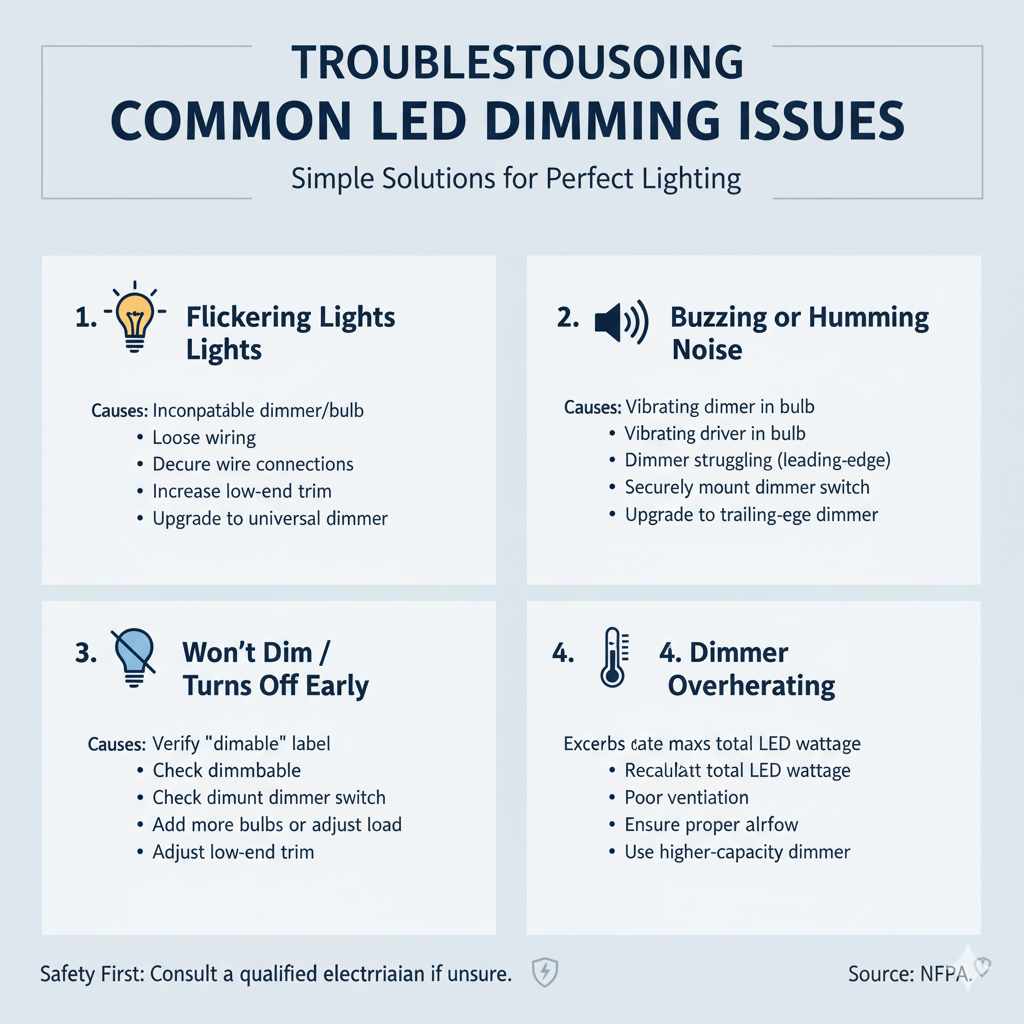
Problem: Flickering Lights
- Cause: Incompatible dimmer and bulb, loose wiring, or the dimmer’s low-end trim is set too low.
-
Solution:
- Check the dimmer’s compatibility list with your specific LED bulb model.
- Ensure all wire connections are secure.
- If your dimmer has a low-end trim adjustment, try increasing it slightly.
- Consider trying a different brand or model of dimmable LED bulb.
- If using a leading-edge dimmer, consider upgrading to a trailing-edge or universal dimmer.
Problem: Buzzing or Humming Noise
- Cause: Often caused by vibration in the bulb’s driver or the dimmer struggling to regulate power, especially with leading-edge dimmers.
-
Solution:
- Try a different brand or model of dimmable LED bulb, as some are quieter than others.
- Ensure the dimmer switch is securely mounted in the electrical box; vibrations can amplify noise.
- Upgrade to a trailing-edge or universal dimmer designed for LEDs, as they operate more smoothly.
Problem: Bulbs Don’t Dim or Turn Off Prematurely
- Cause: The LED bulbs are not actually dimmable, the dimmer is not compatible, or the minimum load requirement of the dimmer is not met.
-
Solution:
- Double-check that the LED bulbs are explicitly labeled as “dimmable.”
- Verify that the dimmer switch is designed for LED loads and is compatible with your bulbs.
- If the dimmer has a minimum wattage requirement, and your total LED wattage is below it, you may need to add more bulbs or use a different dimmer.
- Adjust the low-end trim on the dimmer if available.
Problem: Dimmer Overheating
- Cause: The total wattage of the LED bulbs exceeds the dimmer’s maximum rating, or the dimmer is installed in an enclosed fixture without proper ventilation.
-
Solution:
- Recalculate the total wattage of your LED bulbs and ensure it is well within the dimmer’s maximum LED wattage rating.
- If the dimmer is in an enclosed fixture, ensure there is adequate airflow. Some dimmers are not suitable for enclosed fixtures.
- Consider a dimmer with a higher wattage capacity.
Problem: Lights Don’t Turn On at All
- Cause: Power is not restored, wiring is incorrect, or the dimmer/bulb is faulty.
-
Solution:
- Double-check that the circuit breaker is turned back on.
- Carefully re-inspect your wiring connections against the dimmer’s manual.
- Test the circuit with a known working standard (non-dimmable) bulb and switch to rule out other electrical issues.
- If all else fails, the dimmer or bulb might be faulty and need replacement.
Remember, safety is paramount. If you’re ever unsure or uncomfortable with electrical work, it’s always best to consult a qualified electrician. Resources like the National Fire Protection Association (NFPA) provide excellent safety guidelines for electrical work.
Cost Considerations
When planning to dim your LED bulbs, it’s helpful to have an idea of the costs involved. The price can vary quite a bit depending on the type of solution you choose and the brands you opt for.
Dimmer Switches
Standard LED-compatible dimmer switches are quite affordable. You can find basic models from reputable brands for around $15 to $30. Higher-end models with more features, advanced technology (like smart home integration or sophisticated dimming controls), or premium finishes can range from $40 to $100 or even more.
Dimmable LED Bulbs
Dimmable LED bulbs are generally a bit more expensive than their non-dimmable counterparts, but the price difference has narrowed considerably. You can typically find individual dimmable LED bulbs for $5 to $15 each. Specialty bulbs, like those with smart home capabilities (Wi-Fi or Bluetooth), can cost $15 to $30 or more per bulb.
Plug-in Dimmer Switches
These are a budget-friendly option for lamps. You can find simple plug-in dimmers for $15 to $40.
Professional Installation
If you decide to hire an electrician, the cost will depend on your local rates and the complexity of the job. For a single switch replacement, expect to pay anywhere from $100 to $250 for labor, in addition to the cost of the dimmer switch itself.
Table: Estimated Cost Breakdown
| Component/Service | Estimated Cost Range (USD) | Notes |
|---|---|---|
| Basic LED Dimmer Switch | $15 – $30 | Good for standard needs. |
| Premium/Smart Dimmer Switch | $40 – $100+ | Advanced features, smart home integration. |
| Dimmable LED Bulb | $5 – $15 | Standard dimmable bulbs. |
| Smart Dimmable LED Bulb | $15 – $30+ | Wi-Fi/Bluetooth controlled. |
| Plug-in Dimmer Switch | $15 – $40 | For lamps; no wiring needed. |
| Professional Electrician (Labor) | $100 – $250+ | For complex installations or if uncomfortable with DIY. |
For most DIYers, the most cost-effective solution is to purchase a compatible LED dimmer switch and dimmable LED bulbs. This approach offers excellent control and functionality without the added expense of professional installation, provided you’re comfortable with basic electrical work.
FAQ: Your LED Dimming Questions Answered
Q1: Can I use any LED bulb with an LED dimmer switch?
No, not all LED bulbs are dimmable. You must use LED bulbs that are specifically labeled as “dimmable.” Even then, compatibility between the dimmer and the bulb is important for optimal performance.
Q2: What happens if I use a non-dimmable LED bulb with a dimmer switch?
Using a non-dimmable LED bulb with a dimmer switch can cause flickering, buzzing, reduced bulb lifespan, or the bulb may not dim at all and could potentially damage the bulb or the dimmer.
Q3: How do I know if my LED bulbs are dimmable?
Look for the word “dimmable” printed on the bulb’s packaging or directly on the bulb itself. If it doesn’t explicitly state it’s dimmable, assume it is not.
Q4: Do I need a special dimmer switch for LED bulbs?
Yes, it’s highly recommended. While some older dimmers might work with some LEDs, using a dimmer specifically designed for LEDs (often labeled “LED compatible,” “trailing-edge,” or “universal”) will provide the best performance, preventing issues like flickering and buzzing.
Q5: How many LED bulbs can I connect to one dimmer switch?
You need to check the dimmer switch’s maximum LED wattage rating. Calculate the total wattage of all the LED bulbs on the circuit (number of bulbs x wattage per bulb) and ensure it is below the dimmer’s maximum rating.
Q6: My LED lights are flickering. What should I do?
Flickering often means there’s an incompatibility issue. Check that your bulbs are dimmable and compatible with your dimmer. Ensure all wiring is secure. Some dimmers have an adjustment dial (low-end trim) that might need tweaking. If problems persist, try different bulbs or a different dimmer model.
Q7: Can I dim LED strip lights?
Yes, LED strip lights can often be dimmed, but it requires specific components. You’ll need dimmable LED strip lights and a compatible LED dimmer designed for low-voltage DC power, often used in conjunction with a suitable power supply (driver).
Conclusion
Dimming your LED bulbs is a fantastic way to enhance the ambiance of your home, save energy, and create the perfect lighting for any activity. By understanding the importance of compatibility between your LED bulbs and your dimmer switch, and by following the straightforward steps outlined in this guide, you can confidently tackle this project yourself. Remember to always prioritize safety by turning off the power before you begin any electrical work, and don’t hesitate to consult the manufacturer’s compatibility lists or a professional if you encounter any difficulties.
Whether you’re aiming for a cozy movie night glow or bright, functional task lighting, the right dimming setup will give you precise control. With the right tools and a little know-how, you’re well on your way to enjoying more comfortable and versatile lighting in your home. Happy DIYing!