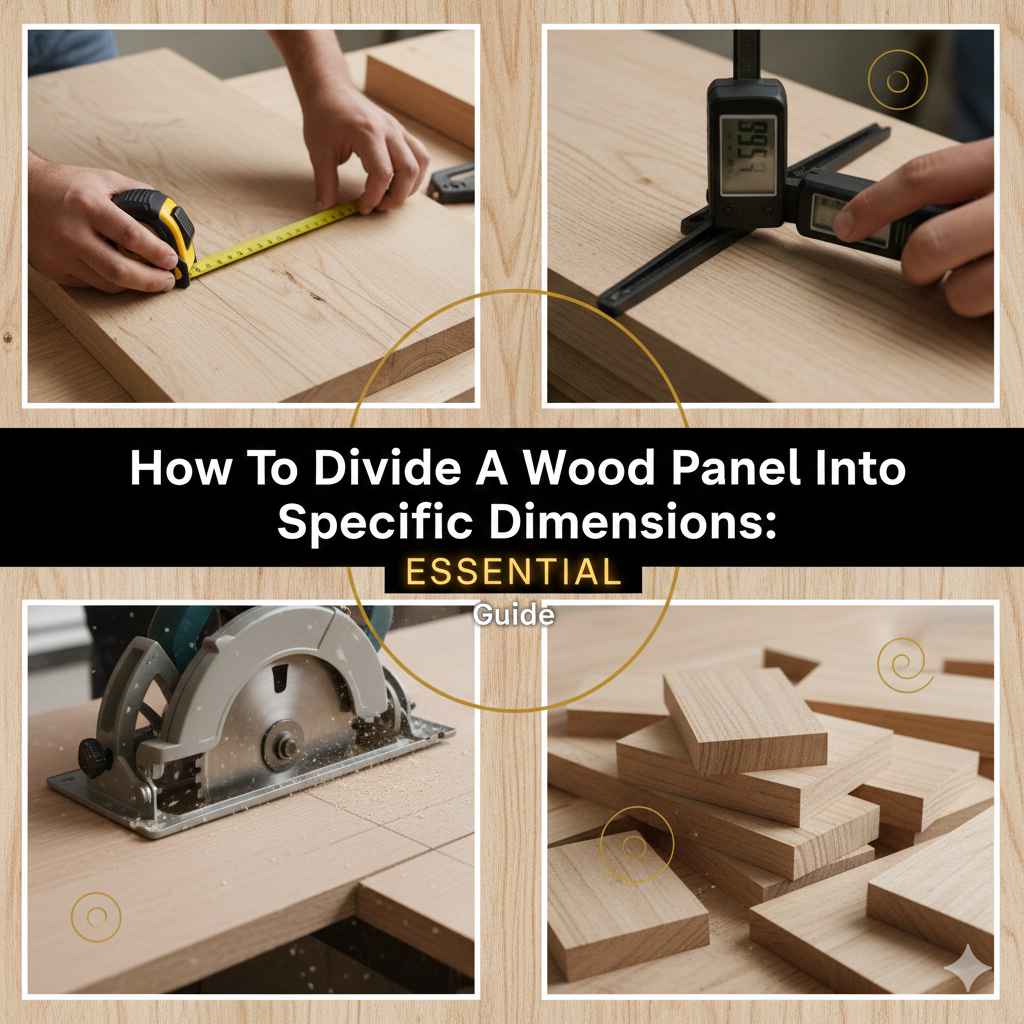
How To Divide A Wood Panel Into Specific Dimensions: Essential Guide
To divide a wood panel accurately, measure twice, mark clearly using a sharp pencil and a reliable square, and then choose the right tool—like a circular saw with a guide or a table saw—to ensure straight, repeatable cuts. Always prioritize safety gear and test cuts for perfect results.
Are you staring at a big sheet of plywood or MDF, needing to break it down into smaller, precise pieces for a project? It can feel intimidating when those measurements have to be perfect. Getting those lines straight and those dimensions exact is the first big step in any successful build, but it doesn’t have to be scary. We are going to walk through this process together, step-by-step, using simple techniques that even first-time DIYers can master. By the end of this guide, you will have the confidence to tackle panel sizing like a pro. Ready to turn that big sheet into perfectly sized components? Let’s get started by gathering what we need.
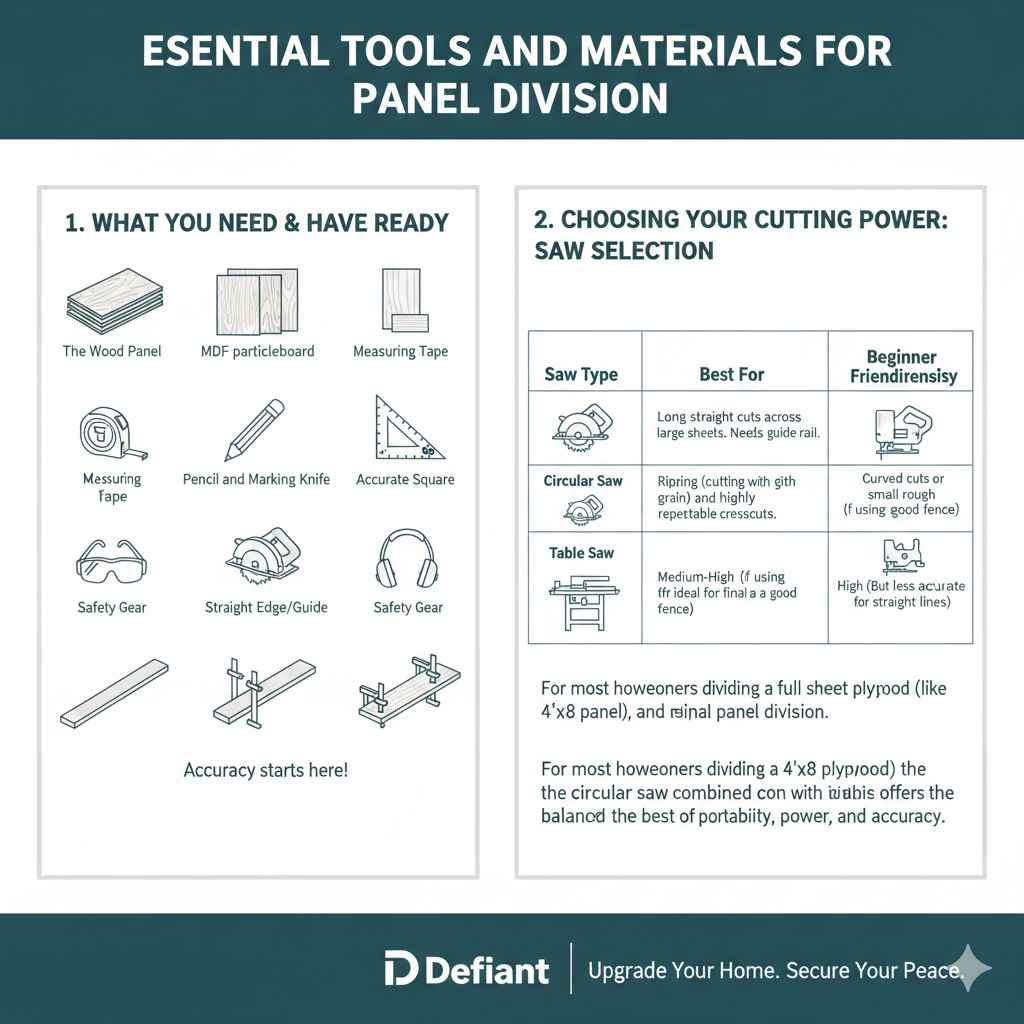
Essential Tools and Materials for Panel Division
Before we make a single mark, having the right gear makes all the difference. You don’t need a massive professional shop to get great results. Sometimes, the simplest tools, used correctly, are the best. Think of these as your foundational toolkit for accurate cutting.
What You Need to Have Ready
Gathering these items first prevents frustrating stops midway through your project. Accuracy starts here!
- The Wood Panel: Plywood, MDF, particleboard, or hardwood panel.
- Measuring Tape: Must be accurate and easy to read.
- Pencil and Marking Knife: A sharp pencil or a marking knife for fine lines.
- Accurate Square: A reliable combination square or framing square to ensure 90-degree angles.
- Safety Gear: Safety glasses and hearing protection are non-negotiable.
- The Cutting Tool: This is key—options include a circular saw, jigsaw, or table saw.
- Straight Edge/Guide: A long, perfectly straight piece of wood or a factory edge to guide your saw.
Choosing Your Cutting Power: Saw Selection
The tool you use determines how clean and accurate your cut will be, especially on large panels. Here is a quick breakdown for the beginner:
- Beginner Friendliness
| Saw Type | Best For | |
|---|---|---|
| Circular Saw | Long, straight cuts across large sheets. Needs a guide rail. | Medium (Requires steady hands) |
| Table Saw | Ripping (cutting with the grain) and highly repeatable crosscuts. | Medium-High (If using a good fence) |
| Jigsaw | Curved cuts or small, rough dimensioning. Not ideal for final panel division. | High (But less accurate for straight lines) |
For most homeowners dividing a full sheet of plywood (like a 4’x8’ panel), the circular saw combined with a clamped guide rail offers the best balance of portability, power, and accuracy.
Step 1: Planning and Measuring Twice (The Golden Rule)
Woodworkers live by the motto: “Measure twice, cut once.” Rushing the layout guarantees a bad result, wasting both time and material.
Determine Your Final Dimensions
First, you need to know exactly what pieces you need. Let’s say you have a 48-inch wide panel and you need three pieces: one 18-inch wide, one 16-inch wide, and the remainder.
- Write down the exact width and length needed for every single piece.
- Account for the thickness of your blade—this is called the kerf.
What is Kerf? The kerf is the material removed by the saw blade as it cuts through the wood. A typical blade removes about 1/8th of an inch of material. If you don’t account for it, your pieces will end up slightly smaller than planned.
For simplicity in this beginner guide, we will try to make all cuts along the same dimension (e.g., all crosscuts) so we only account for the kerf on one side of the panel once. For highly precise projects, you should check your specific saw blade’s kerf and adjust your plans accordingly. For general shelving, a small adjustment is often enough.
Marking for Accuracy
This is where your square and pencil become crucial allies.
- Measure from the Edge: Always measure from the known good edge of your panel. Place the tip of your tape measure precisely on the edge.
- Make Your First Mark: Mark the required dimension (e.g., 18 inches) lightly on the top surface of the panel.
- Verify with the Square: Place your combination square firmly against the edge of the panel. The head of the square must be snug against the edge. Draw a line extending from your measurement mark all the way across the panel. This line must be perfectly perpendicular (90 degrees) to the edge.
- Use a Marking Knife (Optional but Recommended): If you want a guide that resists tear-out, lightly score your cut line with a sharp marking knife instead of just using a pencil. The knife creates a tiny groove for the saw blade to follow.
If you are cutting multiple pieces across the panel’s width, measure and mark all your lines before you set up your saw. This saves setup time and confirms your layout adds up correctly.
Step 2: Setting Up Your Guide for Straight Cuts
Freehand cutting large panels results in wavy lines and dangerous situations. To get professional results with a circular saw, you must use a fence or guide rail. This guide ensures the saw stays perfectly straight along your marked line.
Creating a Homemade Rip Fence or Guide Rail
For a circular saw, you will clamp a straight board to your panel to act as a fence.
How to Calculate Your Guide Placement
This is the part where beginners often get confused, but it’s purely mathematical. You need to know the distance from the edge of your saw’s base plate (the shoe) to the blade itself. This measurement is your offset.
Safety Note on External Resources: For information on blade alignment and circular saw setup, reputable sources like those provided by the Woodworking Forums often offer excellent real-world calibration tips specific to saw models.
- Measure the Offset: Place your circular saw on a flat surface. Measure the exact distance from the edge of the saw’s base plate (the part that rides on the wood) to the cutting edge of the blade. Let’s call this measurement ‘O’.
- Determine Your Cut Line: This is the line you drew on the panel (e.g., 18 inches from the edge).
- Calculate Guide Position: Subtract the offset (O) from your desired cut line measurement. The result is where you must clamp your guide rail. Example: If the blade is 6 inches from the edge of the shoe (O=6”) and you want to cut at 18”, you clamp your guide rail at 18” – 6” = 12” from the original edge.
- Mark the Guide Position: Measure the calculated guide position (12” in our example) from the edge of the panel and lightly mark this spot.
Clamping the Guide Rail Securely
Your guide rail must not move once you start cutting.
- Take a long, perfectly straight piece of material (a factory-edge piece of plywood works well). This is your guide rail.
- Align the edge of your guide rail exactly over the mark you calculated in the step above.
- Use at least two strong clamps (one near the front, one near the back) to secure the guide rail to the panel. Clamp it down firmly onto the waste side of the cut (the side you are discarding).
Step 3: Making the First Accurate Cut (The Practice Run)
This initial cut sets the stage for all subsequent cuts. Take your time here.
Setting Up the Saw for the Cut
If you are using a circular saw, you must set the depth correctly.
The Rule of Blade Depth: Set your saw blade depth so that it extends only about 1/8″ to 1/4″ deeper than the thickness of the panel you are cutting. Cutting with too much blade exposed is dangerous, increases tear-out, and makes the saw harder to control. Consult your saw’s manual on how to safely adjust blade depth if you are unsure.
Executing the Cut with the Guide
This is where your measurement and setup pay off.
- Position the Saw: Place your circular saw base plate firmly against the guide rail. The blade should align perfectly over your pencil/knife line when viewed from above.
- Start Away from the Line: Start the saw before the blade touches the wood. Bring the saw up to full speed while the blade is hovering over the waste material, not the wood you are keeping.
- Maintain Contact: Keep the saw base pressed firmly against the guide rail throughout the entire cut. Do not let it lift or shift.
- Push Smoothly: Use a steady, consistent feeding speed. Don’t force the saw; let the motor do the work. Forcing it can cause the blade to wander or overheat.
- Finish Strong: Keep holding the saw down as the blade exits the wood. Use a clamp or have a helper gently support the offcut so it doesn’t snap off suddenly and chip the final edge.
Step 4: Dimensioning the Remaining Panel
Once you have one perfectly straight reference edge created by your first cut, dividing the rest of the panel becomes much easier and more accurate.
Using the Factory Edge or the New Cut Edge as a Reference
You no longer need complex offset calculations for the subsequent cuts, provided you are working off the same initial dimension (e.g., width).
A. Cutting Panels Squarely (Crosscuts)
If you need to cut the long panel down to a specific length, use the edge you just cut (which is perfectly straight) as your reference side for the second cut.
- Lay the panel down with the straight edge facing you.
- Measure the required length from the square factory edge (e.g., 24 inches). Mark your line clearly.
- Important Shift: Now, the straight edge you just created acts as your perfect fence. You can often clamp a long, straight board parallel to your new mark, using the factory edge as the fixed reference point, simplifying alignment.
- Repeat the guide setup and cutting process from Step 3.
B. Ripping Panels (Cutting Parallel to the Grain)
If you are making several pieces of different widths (ripping), always work toward the center from one reference edge.
Let’s go back to our 48-inch panel that needs 18″ and 16″ pieces. After your first 18-inch cut, you have two pieces: the 18-inch piece you need, and the remainder (48 – 18 = 30 inches, minus kerf).
- Isolate the First Piece: Set aside the perfect 18-inch piece.
- Set up the Next Cut: You need a 16-inch piece from the remaining 30-inch wide section. Measure 16 inches from the newly cut (straight) edge. Mark and set up your guide rail just as you did in Step 2, ensuring you measure the offset correctly relative to your saw shoe, referencing the 16″ line.
- Cut the 16″ Piece: Make the cut. You now have a 16-inch piece and a remaining scrap piece.
By systematically removing one exact dimension piece at a time, you build confidence, and errors do not compound across the entire sheet.
Advanced Tips for Preventing Tear-Out
Tear-out (splintering along the cut line) is the bane of panel projects, especially with veneer plywood or MDF. Here are two pro tricks to minimize it:
1. The Painter’s Tape Trick
Before marking and cutting, apply a strip of standard blue painter’s tape tightly over the area where the cut will be made. When you cut through the tape, the tape holds the wood fibers together, drastically reducing chipping. Peel the tape off immediately after the cut.
2. Blade Selection Matters
The type of blade on your saw is arguably more important than the saw itself for finish quality.
| Blade Type | Tooth Count (TPI) | Best Use |
|---|---|---|
| Ripping Blade | Low (24T) | Fast, rough cuts with the grain. |
| Crosscut Blade | Medium (40T) | Good for general panel cuts perpendicular to the grain. |
| Plywood/Fine Finish Blade | High (60T or more) | Best for clean, chip-free cuts on veneers and MDF. Look for carbide-tipped blades. |
If you are cutting MDF or high-quality decorative veneer plywood, invest in a fine-tooth blade. This is money well spent on achieving a professional, clean edge.
Safety Considerations: Protecting Yourself First
Woodworking, even simple panel division, involves powerful tools. My commitment to you is not just good cuts, but safe cuts. Always respect your equipment.
- Unplug When Adjusting: Always unplug your circular saw or lift the blade guard only when making adjustments, changing blades, or setting the depth.
- Stable Support: Ensure the panel is supported across its entire length, especially the offcut. If a piece hangs off the edge of your workbench, it can pull the saw off course or pinch the blade. Use sawhorses or sturdy supports.
- Wear Your PPE: Safety glasses protect against flying debris. Hearing protection prevents long-term damage from the noise, especially when working with powerful saws.
- Keep Hands Clear: Never place your hands in line with the path of the blade. Always position your body and hands to push or guide the saw away from your body.

FAQ: Beginner Questions About Dividing Wood Panels
Q1: What is the easiest way for a complete beginner to cut a panel straight?
The easiest way is to use a circular saw clamped tightly against a known straight edge (a factory edge or a store-bought level/straight edge) that acts as a guide fence. Measure the offset from your blade to the shoe correctly, clamp the guide, and let the saw ride along it.
Q2: Should I cut on the marked line or slightly beside it?
You should aim to cut exactly on the line. However, since saw blades remove material (the kerf), you must account for this. If you are keeping the material on the side you marked, you need to set your guide so the blade cuts slightly to the side of the line, leaving your marked dimension intact. If you are discarding the material on the marked side, you adjust the guide so the blade cuts right on your line.
Q3: How do I stop the panel from tipping or chattering when cutting it in half?
Chatter and tipping happen when the cut isn’t supported. For large panels, use at least two sturdy sawhorses. For the final few inches of the cut, have a helper support the offcut weight gently, or clamp a sacrificial piece of scrap wood directly behind the cut line to support the wood right through the finish.
Q4: Can I just use a utility knife and snap the wood like laminate?
This method works great for very thin materials like 1/4-inch paneling or hardboard, but it rarely works well for standard 1/2-inch or 3/4-inch plywood or MDF. For thicker panels, cutting with a saw is much safer and guarantees a better edge quality.
Q5: How important is blade sharpness when dividing panels?
It is extremely important. A dull blade will wander, require excessive force (which is dangerous), and cause severe tear-out. Always use a sharp, high-tooth-count blade when cutting finished panel surfaces.
Q6: What if my panel is warped or bowed?
If the panel is significantly bowed, clamp a long, flat piece of wood (like a 2×4 or another perfectly straight board) across the top of the panel to flatten it slightly before marking. When using the circular saw guide, make sure the guide is clamped to the flatter side and that the saw’s base plate is in full contact with the guide rail throughout the cut.
Conclusion: Building Confidence Through Precision
Mastering how to divide a wood panel into specific dimensions is one of the most foundational skills in all of DIY and woodworking. We’ve covered everything from the importance of the marking knife to calculating your saw’s offset for a perfect guide rail setup. Remember, precision isn’t about luck; it’s about process. Measure twice, mark once with a square, use a solid guide, and always respect your tools. Every cut you make builds on the last one, so taking the time to set up that first cut correctly will make the remaining cuts fast and easy. You have the knowledge now to take that raw sheet of material and turn it into the exact components your project demands. Go ahead, grab those tools, and build with confidence—you’ve got this!