How to Drill into a Stud: Expert Techniques for Secure Mounting
To drill into a stud, use a stud finder to locate the center of the stud, then mark the position and drill a pilot hole to guide the larger drill bit. To ensure a secure hold, use a drill bit that matches the size of the screws or bolts you plan to use.
Drilling into a stud is an essential skill for any DIY enthusiast or professional contractor. Whether you’re hanging shelves, installing a TV mount, or securing heavy fixtures, knowing how to drill into a stud properly ensures a strong and stable connection.
By following a few simple steps and using the right tools, you can confidently drill into a stud without causing damage to your walls or compromising the integrity of the stud. This guide will walk you through the process, providing practical tips and techniques for successful stud drilling.
Understanding The Basics Of Studs
When it comes to home improvement projects, understanding the basics of studs is crucial. As the vertical framing members in a building’s wall, studs provide the crucial support needed to hang heavy fixtures, shelves, and cabinets. This guide will walk you through the importance of studs, common materials and sizes, and the proper tools and equipment needed to drill into them.
Identifying The Importance Of Studs
Studs play a critical role in ensuring the structural integrity of a wall. They serve as the framework onto which drywall and other wall materials are attached, providing the necessary support for the overall structure. Without properly securing items to studs, there’s a risk of wall fixtures coming loose and causing potential damage or injury.
Common Materials And Sizes Of Studs
Studs are typically made of wood, metal, or engineered wood products such as laminated veneer lumber (LVL) or oriented strand board (OSB). The most common sizes for wooden studs are 2×4 and 2×6, while metal studs are typically available in thicknesses ranging from 25 to 18 gauge. Understanding the materials and sizes of studs is essential to choose the right drilling technique and tools.
Proper Tools And Equipment Needed
When drilling into a stud, it’s important to have the proper tools and equipment at hand. This includes an electric drill with the right drill bit for the material of the stud, a stud finder to locate the exact position of the studs behind the wall, safety goggles, and ear protection. Additionally, using a level to ensure straight drilling is crucial for a secure and professional finish.
Techniques For Locating A Stud
Before you start drilling into a wall, it is crucial to find a stud to ensure that your fasteners are securely anchored. Here are some essential techniques for locating a stud to help you with your drilling project.
Using Electronic Stud Finders
Electronic stud finders are incredibly efficient tools for locating studs within your walls. These devices work by detecting changes in density to pinpoint the location of the studs. To use an electronic stud finder:
- Place the stud finder flat against the wall and activate it.
- Glide the device horizontally across the surface while following the indicator lights or beeps.
- When the stud finder detects a change in density, it indicates the presence of a stud.
Locating Studs Without A Stud Finder
If you don’t have access to an electronic stud finder, there are alternative methods to locate studs using simple tools and techniques. You can employ the following methods to locate studs without a stud finder:
- Look for visual clues such as nails, screws, or dimples in the wall, as these are often positioned along the studs.
- Tap the wall lightly and listen for a solid, sturdy sound, which indicates the presence of a stud.
- Measure from a corner to find the first stud and use standard stud spacing from there.
Marking The Stud For Accuracy
Once you’ve located the stud, it’s vital to mark its position accurately to ensure precision when drilling. You can mark the stud using the following steps:
- Use a pencil to make a small mark at the edges of the stud’s position.
- Double-check the location by running your electronic stud finder over the area again.
- Place a small piece of painter’s tape at the center of the stud to provide a clear drilling target.
Choosing The Appropriate Drill For Studs
When it comes to drilling into studs, choosing the right drill is crucial for a successful outcome. There are several factors to consider, including the type of drill, drill bit materials and sizes, as well as the proper drill speed and torque. In this guide, we’ll explore the different aspects of choosing the appropriate drill for drilling into studs.
Impact Vs. Hammer Drills
Impact drills and hammer drills are both powerful tools suitable for drilling into studs. However, it’s important to understand the differences between these two types of drills to make an informed choice.
Impact drills are ideal for driving screws and drilling small holes in studs. They deliver rapid bursts of force, making them effective for tasks that require precision.
On the other hand, hammer drills are designed for more heavy-duty tasks, such as drilling into masonry and concrete. They feature a hammering function that provides additional impact, making them suitable for drilling into tough materials.
Understanding Drill Bit Materials And Sizes
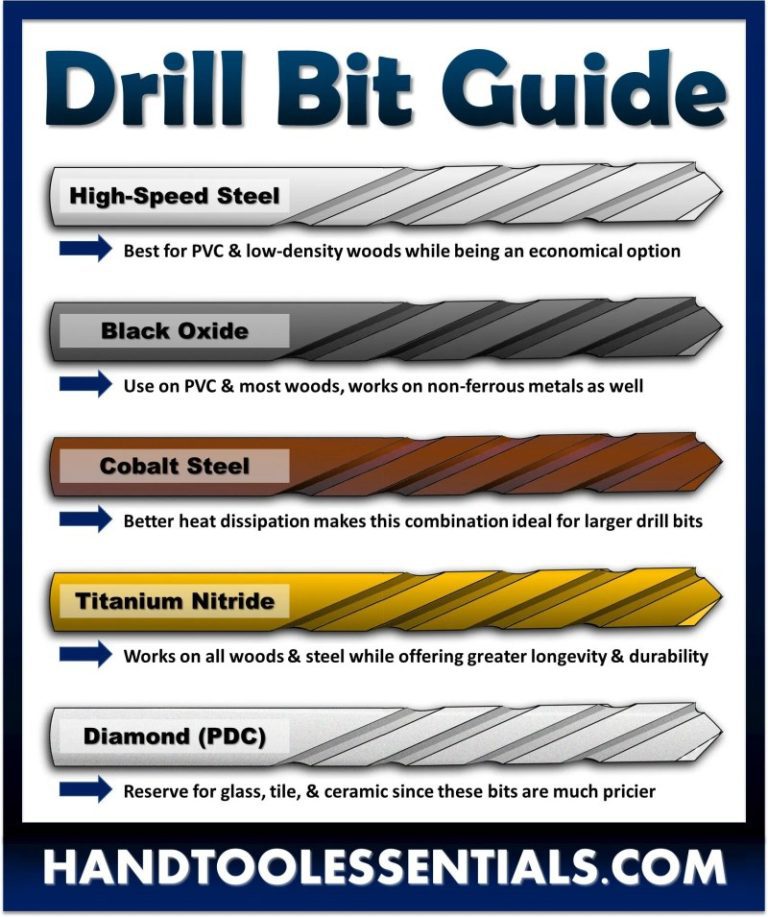
Choosing the right drill bit is essential for successfully drilling into studs. Drill bits are available in a variety of materials, including high-speed steel (HSS), cobalt, and carbide. Each material has its own unique properties and is suitable for specific applications.
Additionally, drill bit sizes play a crucial role in determining the diameter of the hole drilled into the studs. It’s important to select the appropriate size based on the intended use and the size of the screws or fasteners being used.
Importance Of Proper Drill Speed And Torque
When drilling into studs, maintaining the proper drill speed and torque is essential for a successful outcome. Using the correct speed settings ensures that the drill bit does not overheat or dull prematurely, while adequate torque provides the necessary power to penetrate the stud effectively.
It’s crucial to adjust the drill speed and torque based on the material of the studs and the type of drill bit being used. Failure to do so can result in damage to the drill bit or the studs themselves.

Proper Techniques For Drilling Into The Stud
When it comes to DIY home projects, drilling into a stud is a common task. Proper techniques for drilling into the stud are crucial to ensure safety and success. Whether you are hanging heavy objects or installing fixtures, drilling into a stud provides the necessary support. Here are some essential tips to consider for a successful drilling experience.
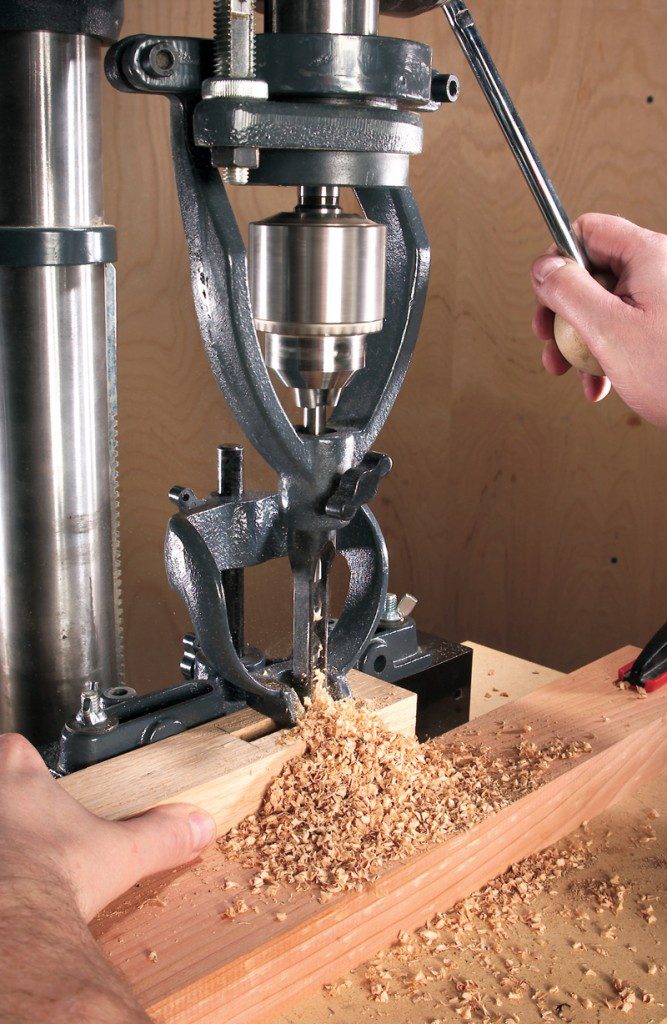
Maintaining Steady Pressure And Speed
When drilling into a stud, maintaining steady pressure and speed is essential. Avoid applying excessive force, as it can lead to uneven drilling and potential damage to the stud. Instead, maintain a consistent, moderate pressure to allow the drill bit to penetrate the stud smoothly, ensuring a clean and precise hole.
Depth And Angle Considerations
Proper depth and angle considerations are vital for drilling into a stud. Ensure that the drill bit is long enough to penetrate the entire width of the stud, but be cautious not to drill too deeply, potentially causing damage to hidden electrical wires or plumbing. Additionally, angling the drill bit slightly can help create a cleaner and more secure hole, especially when using larger screws or bolts.
Tips To Avoid Splintering And Damage
- Use a sharp drill bit to minimize splintering. A dull bit can tear the wood fibers, leaving a jagged hole.
- Pilot holes can prevent splitting by providing a guide for the larger drill bit to follow.
- Applying masking tape over the drill area can help reduce splintering and ensure a neater hole.
Installing Anchors For Secure Mounting
When it comes to installing anchors for secure mounting into a stud, it’s essential to select the right type of anchors, properly install and secure the mounting hardware, and perform checks for stability and adjustments. This ensures that your fixtures, shelves, or any other household items are safely and securely mounted to the studs, preventing any accidents or damage to your walls. In this guide, we’ll explore the different types of anchors suitable for studs and provide step-by-step instructions for installing and securing the mounting hardware.
Types Of Anchors Suitable For Studs
Before installing anchors into a stud, it’s crucial to choose the right type that can effectively support the weight of the item you want to mount. Here are some popular types of anchors suitable for studs:
- Screw-in Anchors: Designed to be screwed directly into the stud, providing a strong hold for heavy items.
- Toggle Bolts: Consisting of a spring-loaded mechanism, they expand behind the wall, providing support for heavy loads.
- Metal Wall Anchors: Ideal for securing medium-weight items to studs, these anchors spread out behind the wall, distributing the weight.
- Plastic Ribbed Anchors: Suitable for lighter items, these anchors grip the stud’s surface, providing adequate support.
Installing And Securing The Mounting Hardware
Once you’ve chosen the appropriate anchor for your mounting needs, it’s time to proceed with installing and securing the mounting hardware. Follow these steps for a secure installation:
- Mark the Placement: Use a stud finder to locate the center of the stud and mark the placement for your anchor.
- Pre-drill the Hole: Using a drill bit that matches the size of the anchor, carefully drill a hole into the stud at the marked placement.
- Insert the Anchor: Depending on the type of anchor, insert it into the drilled hole and follow the specific instructions for securing it in place.
- Attach the Mounting Hardware: Once the anchor is securely in place, attach the mounting hardware to the anchor, ensuring it is tight and properly aligned for the item you intend to mount.
Checking For Stability And Adjustments
After installing the anchors and mounting hardware, it’s crucial to perform stability checks to ensure the mounting is secure:
- Test the Weight Capacity: Before placing the item on the mounting hardware, test its weight capacity by applying pressure or using a similar weighted object.
- Make Adjustments if Necessary: If the mounting hardware feels unstable or shows signs of weakness, make necessary adjustments to reinforce the anchor and hardware for a secure mount.
Frequently Asked Questions For How To Drill Into A Stud
How Do I Find A Stud In The Wall For Drilling?
To find a stud in the wall for drilling, use a stud finder or tap the wall to listen for a solid sound, indicating the presence of a stud. Alternatively, look for electrical outlets, as they are often attached to a stud.
What Kind Of Drill Bit Should I Use For Drilling Into A Stud?
For drilling into a stud, use a high-speed steel twist drill bit for wood, with a diameter slightly smaller than the screw or anchor being used. This ensures a proper grip while minimizing the risk of splitting the wood.
What Precautions Should I Take Before Drilling Into A Stud?
Prior to drilling, ensure there are no electrical wires or plumbing pipes behind the stud. Use a wire and pipe detector or visually inspect for any obstructions before proceeding with the drilling process. Always wear protective eyewear and work gloves.
Conclusion
Mastering the technique of drilling into a stud is an essential skill for any DIY enthusiast or professional. By following the correct steps, using the right tools, and maintaining safety precautions, you can successfully complete your project without damaging the wall or compromising the structural integrity of the stud.
With practice and patience, this task will become second nature, empowering you to tackle more complex projects with confidence.