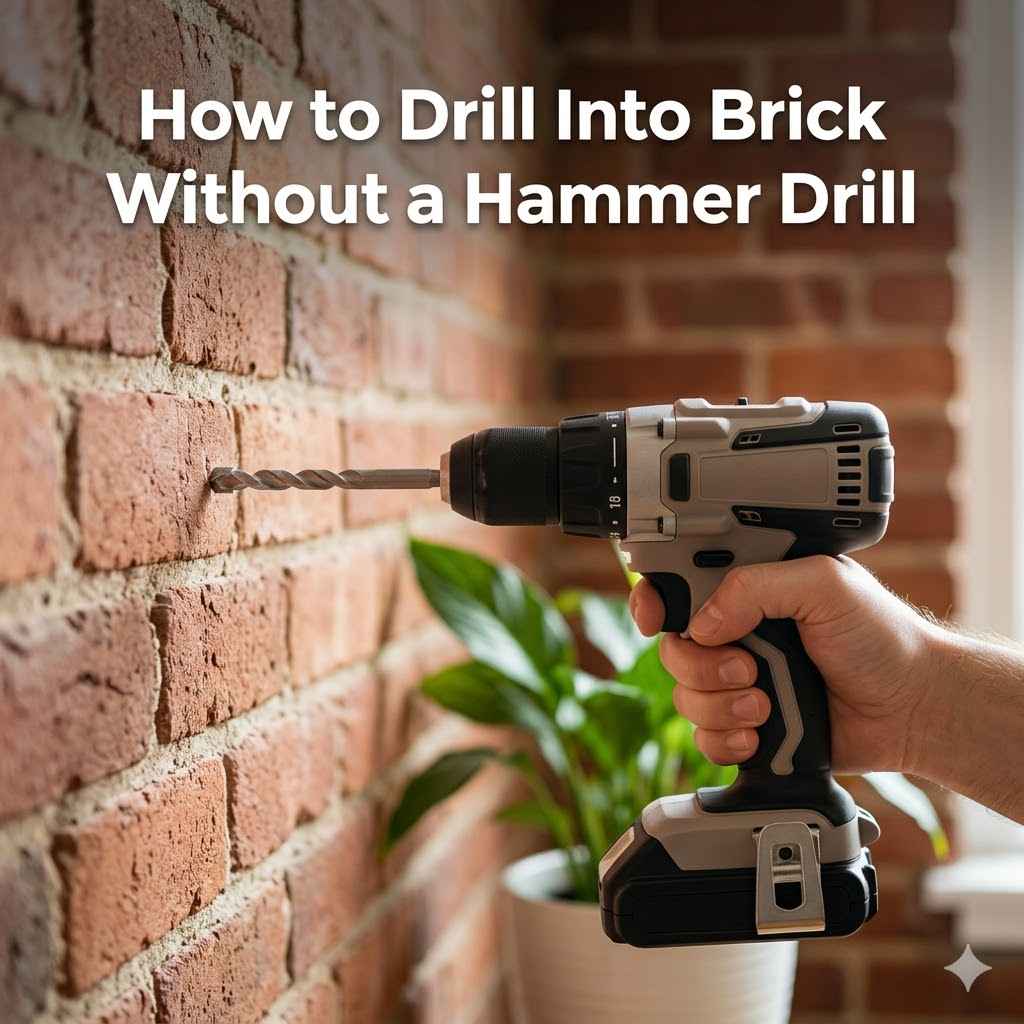
How to Drill Into Brick Without a Hammer Drill
Drilling into brick can seem tough, especially if you don’t have a fancy hammer drill. Many folks worry they’ll damage their wall or the drill bit. It’s a common puzzle for DIYers.
But don’t let it stop you! You can totally get the job done with the right steps and a regular drill. We’ll show you exactly how to drill into brick without a hammer drill easily.
Essential Tools for Drilling Brick
Before you start drilling, having the right tools makes all the difference. It’s not just about the drill itself. You need specific bits and some safety gear.
Using the wrong tools can lead to frustration, broken bits, or even a damaged wall. Gathering everything beforehand ensures a smooth and successful drilling experience. This section covers the must-have items for tackling brick.
Choosing the Right Drill Bit
The drill bit is your most important tool when drilling into hard surfaces like brick. For brick, you absolutely need a masonry drill bit. These bits are specially designed to withstand the hardness and abrasive nature of materials like concrete, stone, and brick.
They typically have a carbide tip, which is much tougher than regular steel bits. If you try to use a standard wood or metal drill bit, it will dull very quickly, overheat, and likely won’t make much progress. The carbide tip is shaped to chip away at the material, allowing the bit to bore into the brick effectively.
When selecting a masonry bit, look for one that matches the diameter of the screw or anchor you plan to use. Most masonry bits come in standard sizes like 3/16 inch, 1/4 inch, 3/8 inch, and 1/2 inch.
Masonry drill bits come in various lengths too. For most common tasks, a standard length bit is fine. However, if you need to drill deeper into the brick, you’ll want a longer bit.
Always ensure the bit is compatible with your drill’s chuck. Most modern drills use a keyless chuck, meaning you can tighten and loosen the bit by hand.
- Carbide-Tipped Bits: These are the gold standard for drilling masonry. The hard carbide tip can take the brunt of the impact and friction. It allows the bit to grind through tough materials like brick and concrete. Without a carbide tip, your drill bit will become useless very quickly.
- Sizes Matter: Always match your drill bit size to the fastener you’ll be using. For example, if you’re inserting a 1/4-inch anchor, you’ll need a 1/4-inch masonry bit. Using a bit that’s too small will make it hard to insert the anchor, and a bit that’s too large will create a hole that’s too big, compromising the anchor’s holding power.
- Drill Depth Markings: Some masonry bits have depth markings etched onto them. This is useful if you need to drill to a specific depth, such as for mounting a shelf or a bracket. It helps ensure consistency across multiple holes.
Safety Gear for Drilling
Safety is paramount when any DIY project, and drilling into brick is no exception. Brick dust is not good to breathe in, and flying debris can cause eye injuries. Wearing the right protective gear ensures you stay safe and comfortable throughout the job.
Think of it as your personal protective bubble for drilling.
- Safety Glasses: This is non-negotiable. Always wear safety glasses or goggles to protect your eyes from dust and small chips of brick that can fly off. Regular eyeglasses are not sufficient. Make sure they fit snugly to prevent debris from getting around the edges.
- Dust Mask or Respirator: When you drill into brick, you create a lot of fine dust. This dust can irritate your lungs. A simple dust mask is good for light jobs, but for more extensive drilling, a respirator offers better protection against fine particles. Ensure it fits well against your face.
- Gloves: Work gloves protect your hands from splinters, sharp edges, and the vibration of the drill. They also help maintain a good grip on the drill, which is important for control.
Other Helpful Supplies
Beyond the drill and bits, a few other items can make the process of drilling into brick much easier and cleaner. These supplies help with preparation, accuracy, and cleanup.
- Masking Tape or Painter’s Tape: This is incredibly useful for marking your drilling spots and for preventing the drill bit from wandering when you start. By applying a piece of tape over your mark, the bit can get a better initial grip on the surface, especially on smoother brick.
- Vacuum Cleaner: Having a vacuum cleaner handy, ideally one with a hose attachment, can help catch dust as you drill. You can even have someone hold the hose near the drilling spot to suck up the dust as it’s produced.
- Pencil or Marker: For marking where you want to drill.
- Level: If you are hanging something that needs to be straight, like a shelf or a picture frame, a level will help you mark accurate spots.
Preparing Your Drill and Work Area
Getting ready is key to a successful drilling project. Proper preparation means your drill will work better, and you’ll get cleaner holes. It also makes the whole process safer and less messy.
Taking a few minutes to prepare your drill and the area around where you’ll be drilling will save you a lot of trouble later.
Understanding Your Drill Settings
Most standard drills have a few settings that are important for drilling into tough materials like brick. You’ll need to adjust these correctly. Using the wrong settings can damage your drill or make it ineffective.
- Speed Setting: Your drill likely has a variable speed trigger, and sometimes a high/low speed switch. For drilling into brick, you generally want to use a slower speed. High speeds generate more heat, which can overheat your drill bit and the drill itself, making them less effective and potentially causing damage. Slower speeds also give you more control.
- Torque Setting (Clutch): Many drills have a clutch setting, often shown as a ring with numbers around the chuck. This setting controls how much torque the drill applies before it “slips” or stops turning. For drilling into brick, you typically want to set this to a higher number, closer to the maximum setting, or even turn it off if your drill has a dedicated “drill” mode that bypasses the clutch. The clutch is more for driving screws; for drilling, you want consistent power.
- Drill Mode vs. Hammer Mode: Standard drills have a “drill” mode. Hammer drills have an additional “hammer” mode. Since we are exploring how to drill into brick without a hammer drill, you will exclusively use the “drill” mode on your regular drill. Do NOT engage any hammer function if your drill has it, as this is distinct from the continuous hammering action of a hammer drill, and a standard drill’s hammer action is not designed for masonry.
Marking Your Drilling Spots Accurately
Precision is important when you’re drilling into brick. You want the holes to be exactly where you need them. This is where a pencil, tape, and level come in handy.
Making sure your marks are clear and correct before you start drilling prevents mistakes and saves you from having to fill unnecessary holes.
- Use a Level: If you’re drilling multiple holes that need to be in a straight line, use a level. Hold the item you want to hang against the wall, or just use the level itself, to mark your first spot. Then, use the level to mark subsequent spots in a straight line. This is essential for anything functional or decorative.
- Tape for Accuracy: Before making your mark with a pencil, stick a piece of painter’s tape over the spot. Then, mark the center of your desired hole on the tape. This not only helps your pencil mark stand out but also prevents the drill bit from sliding on the smooth surface of the brick when you begin drilling. The tape provides a bit more grip.
- Clear and Visible Marks: Make sure your marks are dark enough to see easily. If you’re drilling in a dimly lit area, use a brighter marker or ensure your work light is good. Clear marks help you position the drill bit precisely.
Preparing the Brick Surface
Sometimes, the brick surface itself needs a little attention before drilling. This can involve cleaning or making sure the area is stable. A clean and stable surface ensures your drill bit can start properly and that you won’t encounter unexpected problems.
- Clean the Area: Brush away any loose dirt, dust, or debris from the spot where you plan to drill. This makes it easier to see your mark and ensures that the drill bit starts cleanly without grinding through excess grime. A stiff brush works well for this.
- Check for Cracks: Before you drill, quickly inspect the brick for any existing cracks. If the brick is already significantly cracked, drilling into it might cause it to crumble further. In such cases, you might need to reconsider your mounting location or use a different type of fastener.
- Secure Loose Bricks: If you notice any bricks that are loose or wobbly, it’s best to address that issue before drilling. Drilling into an unstable brick could worsen the problem and lead to damage.
Step-by-Step Guide to Drilling Brick
Now that you’re prepared, let’s get to the actual drilling. This step-by-step process breaks down exactly how to drill into brick safely and effectively using a regular drill. Follow these steps closely for the best results.
Step 1 Starting the Hole
This is where you initiate the drilling process. The key here is to start slowly and carefully. Getting the initial engagement right prevents the bit from skipping and creating an unwanted mark or larger hole.
The painter’s tape you applied earlier will be very helpful in this step.
- Position the Drill Bit: Place the tip of your masonry drill bit directly on the mark you made on the brick. Ensure the drill is held straight and perpendicular to the wall. This is crucial for making a straight hole.
- Engage the Drill Slowly: With the drill bit in place, gently squeeze the trigger to start the drill at a very slow speed. Apply light, steady pressure straight into the brick. You should feel the bit begin to bite into the surface.
- Create a Pilot Indentation: For the first few seconds, use just enough pressure to create a small indentation or start a shallow hole. This “pilot” indentation ensures the drill bit won’t wander when you increase speed and pressure. If the bit starts to slip, ease off the trigger and reposition.
Step 2 Drilling Deeper
Once you have a good starting point, you can begin to bore deeper into the brick. This phase requires consistent pressure and managing the heat that builds up. Taking breaks is important for both your drill and the bit.
- Increase Speed and Pressure Gradually: Once the bit is securely engaged, you can gradually increase the drill’s speed and apply steady, firm pressure. Don’t force the drill; let the bit do the work. Pushing too hard can overheat the bit and motor, and might even break the bit.
- Periodically Withdraw the Bit: As you drill, dust and debris will build up in the hole. To clear this out and prevent the bit from getting stuck or overheating, periodically pull the drill bit partway out of the hole while it’s still spinning slowly. This action helps to eject the dust and allows air to cool the bit and the hole. Repeat this every 10-20 seconds of drilling.
- Listen to Your Drill: Pay attention to the sound your drill makes. If it starts to strain or overheat, slow down or take a break. Overheating is a common cause of drill bit failure and can also damage your drill motor over time.
Step 3 Clearing Dust and Debris
Keeping the hole clear of dust is vital for efficient drilling and for ensuring your fasteners will fit properly. A clean hole means a secure hold. This step is often overlooked but makes a big difference.
- Use a Vacuum Cleaner: As mentioned earlier, a vacuum cleaner with a hose attachment can be extremely helpful. Position the hose near the hole as you drill to suck up the dust as it’s created. This significantly reduces airborne dust and keeps the hole clearer.
- Blowing Out the Hole: After you’ve drilled to your desired depth, you can use compressed air (if you have it) or even gently blow into the hole to clear out any remaining dust. Be sure you are wearing your dust mask for this!
- Brush and Scrape: For stubborn dust buildup, you might need to use a small brush or even a bent coat hanger to scrape the inside of the hole and dislodge packed debris, then blow or vacuum it out.
Step 4 Finishing the Hole
Once you’ve reached the desired depth and the hole is clean, you’re almost done. The final steps ensure the hole is ready for its intended purpose, whether it’s for a screw, anchor, or other hardware.
- Check the Depth: Use a tape measure or simply insert the screw or anchor you plan to use to check if the hole is the correct depth. If it’s not deep enough, repeat steps 2 and 3.
- Clean Around the Hole: Wipe away any remaining dust or debris from the surface of the brick around the hole. This makes for a neater finish and ensures any adhesive or sealant you might use will stick properly.
- Inspect for Smoothness: Run your finger (carefully!) around the edge of the hole to ensure there are no sharp or jagged edges. If there are, you can use the drill bit briefly to smooth them out, or a small file if needed.
Troubleshooting Common Drilling Issues
Even with careful preparation, sometimes things don’t go as planned. There are a few common issues you might run into when drilling brick with a standard drill. Knowing how to fix them can save your project.
Drill Bit Not Biting or Slipping
This is a frustrating problem, but it usually has a simple cause. Often, the drill bit isn’t getting a good enough start, or it’s the wrong type of bit.
- Ensure Correct Bit Type: Double-check that you are using a masonry drill bit with a carbide tip. A regular drill bit will not work effectively on brick.
- Use Painter’s Tape: If the bit is slipping, try applying a piece of painter’s tape over your mark. This provides a better surface for the bit to grip initially.
- Start Slow and Gentle: Make sure you’re starting the drill at a very low speed with light pressure until the bit creates a small indentation. Then, gradually increase speed and pressure.
- Check Drill Bit Sharpness: Even masonry bits can become dull with use. If your bit is old or has been used extensively, it might be time for a new one.
Drill Overheating
When drilling into hard materials, heat is the enemy of your drill and bits. Overheating can lead to damage or premature wear.
- Use Lower Speeds: Avoid using the highest speed setting on your drill. Slower speeds generate less friction and heat.
- Take Frequent Breaks: Don’t drill continuously for long periods. Pull the bit out of the hole every 10-20 seconds to clear dust and allow for cooling. Let the drill and bit rest for a minute or two if they feel very hot.
- Lubricate (Sparingly): For very tough drilling, a tiny bit of water or cutting fluid applied to the bit occasionally can help with cooling. However, be cautious, as too much liquid can damage some drill motors. Dry drilling with frequent pauses is usually sufficient and safer.
Hole is Too Big or Too Small
Making the hole the right size is critical for your anchor or screw to hold securely.
- Too Small: If the hole is too small for your anchor or screw, you can often enlarge it carefully. Use the same masonry bit or a slightly larger one and drill a bit deeper or gently widen the hole. Be careful not to overdo it.
- Too Big: If the hole is too large, you might be able to use a larger anchor or a different fastening method. Sometimes, you can use a “wall anchor repair kit” which is a type of compound you can use to fill the hole and then re-drill. For brick, this is less common than for drywall, but epoxy anchors can sometimes work if the hole is slightly oversized.
Real-Life Examples and Scenarios
Seeing how others have successfully drilled into brick without a hammer drill can be very helpful. These examples show practical applications and problem-solving.
Example 1: Hanging a Heavy Mirror
- Sarah wanted to hang a large, heavy mirror on her brick fireplace. She didn’t own a hammer drill.
- She chose strong masonry anchors and appropriate masonry drill bits.
- She carefully marked the spots for the anchors, using a level to ensure they would be straight.
- She applied painter’s tape over the marks to help the drill bit grip.
- Using her standard cordless drill on a slow setting with steady pressure, she drilled into the brick, pulling the bit out frequently to clear dust.
- Once the holes were deep enough and clean, she inserted the anchors and securely mounted the mirror. The mirror is still hanging securely today.
Scenario 1: Installing a Garden Hose Holder
- You need to install a bracket on an exterior brick wall to hold your garden hose.
- You have a standard drill, masonry bits, and appropriate anchors for exterior use.
- First, decide exactly where you want the holder. Use a level to ensure it’s positioned correctly.
- Mark the drill points clearly on the brick. For better grip, place a strip of painter’s tape over each mark.
- Select the correct size masonry drill bit for your anchors.
- Set your drill to a low speed and engage the bit onto the mark with light pressure.
- Once the bit has a good bite, increase speed and apply firm, steady pressure.
- Drill to the required depth, pulling the bit out every few seconds to clear the dust.
- After drilling all holes, clean them out thoroughly.
- Insert your anchors and attach the bracket.
Example 2: Mounting a Shelf on an Interior Brick Wall
- John wanted to add a small decorative shelf to his brick accent wall in the living room. He only had a basic corded drill.
- He purchased masonry drill bits that matched the size of the screws he planned to use.
- He used masking tape and a pencil to mark the exact locations for the shelf brackets.
- He started drilling very slowly, letting the bit catch the brick.
- He worked patiently, pulling the bit out often to remove brick dust.
- He successfully drilled the holes and mounted the shelf, which now holds some framed photos.
Scenario 2: Securing Outdoor Lighting Fixtures
- You’re upgrading your home’s exterior lighting and need to attach new fixtures to brick pillars.
- You have a standard cordless drill and a set of masonry drill bits.
- Hold the light fixture in place and mark the mounting screw locations on the brick.
- Ensure your marks are level and straight.
- Apply painter’s tape over your marks.
- Choose the correct masonry drill bit for the screws or anchors that come with the fixtures.
- Set your drill to a slow speed and begin drilling.
- Apply consistent pressure, and periodically withdraw the bit to clear dust.
- Drill to the depth needed for the screws or anchors.
- Clean out the holes and install the lighting fixtures.
Benefits of Using the Right Technique
Mastering how to drill into brick without a hammer drill offers significant advantages. It empowers you to handle more home improvement tasks yourself, saving money and time. It also boosts your confidence as a DIYer.
Knowing you can tackle challenging materials like brick opens up many possibilities for decorating and organizing your home.
- Cost Savings: Not needing a specialized hammer drill means you can complete projects with tools you might already own. This avoids the expense of buying or renting additional equipment, making DIY projects much more budget-friendly.
- Versatility: Once you know how to drill into brick effectively with a standard drill, you can confidently take on a wider range of projects. This includes hanging heavy items, installing shelves, mounting brackets, or even doing minor repairs on brick structures.
- Increased Confidence: Successfully completing a task that seems daunting, like drilling into brick, significantly boosts your DIY confidence. It shows you that with the right knowledge and approach, you can achieve professional-looking results.
Frequently Asked Questions
Question: Can I use a regular drill bit on brick?
Answer: No, you should not use a regular drill bit on brick. You need a specialized masonry drill bit with a carbide tip, designed to cut through hard materials like brick and concrete. Regular bits will dull very quickly and won’t be effective.
Question: How do I prevent the drill bit from slipping on the brick?
Answer: Using painter’s tape over your mark provides a better grip for the drill bit. Also, starting the drill at a very slow speed with light pressure until the bit bites into the surface helps prevent slipping.
Question: How deep should I drill into brick?
Answer: The depth depends on what you are attaching. You generally need to drill slightly deeper than the length of your screw or anchor so that the fastener is fully engaged and secure within the brick or mortar.
Question: What if my drill starts to overheat?
Answer: If your drill or bit is overheating, slow down the drilling speed and take frequent breaks. Pull the bit out of the hole periodically to clear dust and allow for cooling. Do not force the drill.
Question: Can I drill into mortar instead of brick?
Answer: Yes, drilling into mortar is often easier than drilling into solid brick. However, mortar joints are not always as strong as the brick itself, so consider this when determining the holding power needed for your application. Use a masonry bit for either.
Wrap Up
Learning how to drill into brick without a hammer drill is entirely achievable. By using the right masonry drill bits, safety gear, and a steady hand with your standard drill, you can successfully create holes. Remember to prepare your surface, mark accurately, drill slowly, and clear dust regularly.
You’ve got this!