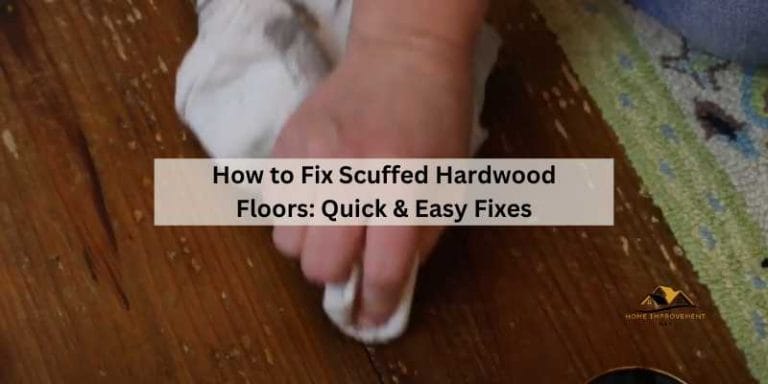
How to Fill Scratches in Hardwood Floor: Quick Fixes!
To fill scratches in hardwood floor, use a baking soda and olive oil combo for small scratches, or apply a wax filler stick. For deeper scratches or cracks, press wood putty or wood filler into the damaged area.
Fixing scratches on hardwood floors is possible with these quick and easy methods. Hardwood floors can be prone to scratches, but with the right approach, you can effectively repair and restore their appearance. Whether it’s a small surface scratch or a deeper gouge, addressing these imperfections promptly can help maintain the beauty and longevity of your hardwood floors.
In this guide, we’ll explore simple yet effective techniques to fill scratches and gouges in hardwood floors, ensuring that your flooring remains in top condition for years to come.
Identifying The Severity Of Scratches
To determine the severity of scratches on hardwood floors, inspect the depth and width of each scratch carefully. For small scratches, consider using a wax filler stick, while deeper scratches may require wood putty or filler pressed into the affected area for effective repair.
Minor Vs. Major Damage
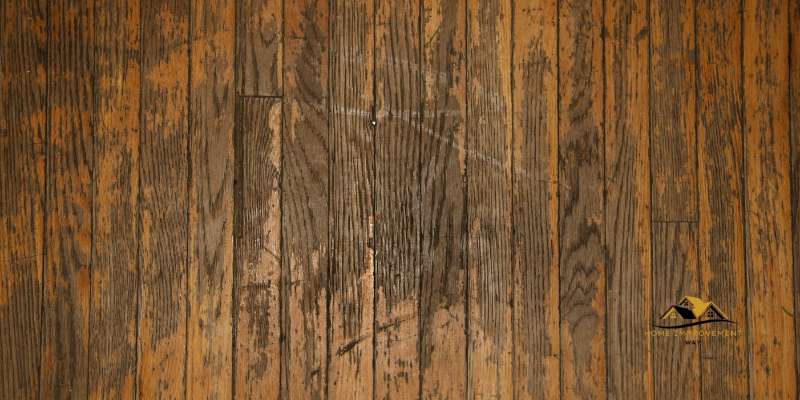
When it comes to scratches on your hardwood floor, it’s important to identify the severity of the damage before attempting to fix it. Understanding whether the scratches are minor or major will help you determine the best course of action.
Minor scratches are surface-level imperfections that do not penetrate the wood deeply. These scratches are typically shallow and can often be easily repaired using DIY methods. On the other hand, major scratches are deeper and more noticeable, requiring professional assistance for a proper fix.
When To Call A Professional
If you have identified major damage on your hardwood floor, it is advisable to call a professional for help. Attempting to fix deep scratches yourself without the necessary expertise can lead to further damage or an unsatisfactory result. Professional floor restoration companies have the knowledge, experience, and specialized tools to effectively repair major scratches and restore your floor’s appearance.
Professional floor repair services can assess the severity of the scratches, determine the best repair method, and ensure a seamless finish that blends seamlessly with the rest of your flooring. They have access to high-quality materials and products that are specifically designed for hardwood floor repairs, guaranteeing a long-lasting and durable solution.
While minor scratches can be addressed with DIY methods, it’s essential to understand your limitations. If you are unsure about the severity of the damage or lack confidence in your ability to fix it, it’s always better to seek professional assistance to avoid potential complications.
In conclusion, identifying the severity of scratches on your hardwood floor is crucial in determining the appropriate course of action. While minor scratches can often be addressed with DIY methods, major scratches require the expertise of a professional. By seeking professional help, you can ensure a high-quality repair that restores the beauty of your hardwood floor.
Cleaning The Scratched Area
To fill scratches in hardwood floors, you can try a few methods. For smaller areas, use a wax filler stick or a baking soda and olive oil combo. For deeper scratches or cracks, press wood putty or wood filler into the affected area.
Alternatively, you can also hide minor scratches by using stain-matching crayons or wax sticks. Remember to clean the area before applying any filling or concealing method.
Choosing The Right Cleaner
When it comes to cleaning the scratched area of your hardwood floor, it’s essential to choose the right cleaner. Using a cleaner that is specifically formulated for hardwood floors will ensure that the cleaning process is effective without causing any damage to the floor.
Prepping The Floor For Repair
Before repairing the scratches in your hardwood floor, it’s important to properly prep the area. This involves cleaning the scratched area and ensuring that it is free from any dirt, debris, or residue that could interfere with the repair process.
Simple Solutions For Minor Scratches
To fill minor scratches in hardwood floors, try mixing equal parts apple cider vinegar and olive oil and dabbing it into the scratches. For deeper scratches, use a baking soda and olive oil mixture or a wax filler stick for smaller areas.
Wood putty or filler can also be pressed into cracks or gouges to fill them. To hide minor scratches, try using stain-matching crayons or wax sticks that include stain and urethane to protect the floor’s finish.
DIY Olive Oil Mixture
If you have minor scratches on your hardwood floor, one simple solution is to create a DIY olive oil mixture. This method works best for small scratches and can help to restore the shine of your floor. To create the mixture, mix equal parts olive oil and apple cider vinegar in a small cup. Then, use a soft cloth to carefully dab the solution into the scratches. Leave the solution in the scratches for a day and then rub it out with a clean, soft cloth. This method can work wonders for minor scratches and is a quick and easy fix for restoring the look of your hardwood floor.
Using Stain-matching Crayons
Another effective solution for minor scratches on your hardwood floor is using stain-matching crayons. These crayons come in a variety of colors and can help you to blend in the scratch with the surrounding area. Simply choose a crayon that matches the color of your floor and rub it gently over the scratch. Then, use a soft cloth to buff the area and remove any excess wax. This method is great for hiding small scratches and can help to restore the appearance of your hardwood floor.
In conclusion, there are simple solutions for minor scratches on your hardwood floor. Whether you choose to use a DIY olive oil mixture or stain-matching crayons, these methods can help to restore the look of your floor and keep it looking beautiful for years to come. So, the next time you notice a scratch on your hardwood floor, don’t panic. Instead, try one of these quick and easy methods and enjoy the results.
Filling In Deeper Scratches
Filling in deeper scratches in hardwood floors can be done using a baking soda and olive oil combo or a wax filler stick for smaller areas. For larger scratches or cracks, wood putty or wood filler can be pressed into the affected area.
For minor scratches, artistic solutions like stain-matching crayons or wax sticks can be used to blend in the scratch.
Filling in Deeper Scratches can be a bit trickier than filling in minor scratches on hardwood floors. But, not to worry, it’s still a relatively straightforward process. The key is to select the right wood putty for your particular flooring and to apply it correctly. In this section, we will cover the steps you need to take to fill in deeper scratches on hardwood floors.
Selecting The Right Wood Putty
First, you need to make sure that you select the right wood putty for your hardwood floor. This is important because different types of wood putty are designed to work with different types of wood. You will want to choose a wood putty that matches the color of your hardwood floor as closely as possible. You can find wood putty at most hardware stores or home improvement centers.
Application Techniques
Once you have selected the right wood putty, it’s time to apply it to the deeper scratches. Follow these steps for best results:
1. Clean the area around the scratch with a soft cloth and some warm water. Allow the area to dry completely before moving on to the next step.
2. Apply the wood putty to the scratch using a putty knife. Be sure to press the putty into the scratch firmly, so that it fills the entire depth of the scratch.
3. Smooth out the putty with the putty knife, so that it is level with the surrounding hardwood floor.
4. Allow the wood putty to dry completely, which usually takes several hours.
5. Once the putty is dry, sand it down with a fine-grit sandpaper to smooth out any rough spots.
6. Wipe the area clean with a soft cloth to remove any dust or debris.
7. Apply a coat of polyurethane to the area, using a brush or roller. This will help to protect the newly filled scratch and blend it in with the surrounding hardwood floor.
In conclusion, filling in deeper scratches on hardwood floors requires a bit more effort than filling in minor scratches, but it is still a relatively simple process. By selecting the right wood putty and following the correct application techniques, you can restore your hardwood floor to its former glory.
Repairing Gouges In Hardwood Floors
You can easily fill scratches in hardwood floors using wood putty for deep gouges or a wax filler stick for smaller areas. Alternatively, try a combination of baking soda and olive oil, or a mixture of apple cider vinegar and olive oil to help remove small scratches without sanding.
One of the most common issues with hardwood floors is the presence of gouges, which are deep scratches or indentations in the wood. These can be unsightly and also pose a risk of further damage if left untreated. Fortunately, there are effective methods for repairing gouges in hardwood floors. In this section, we will explore three key steps: matching putty to wood color, sanding for a smooth finish, and applying a protective coating.
Matching Putty To Wood Color
When it comes to repairing gouges in hardwood floors, it’s important to choose a putty that matches the color of the wood. This will ensure a seamless repair that blends in with the surrounding floor. Start by selecting a wood putty that closely matches the color of your floor. You can find a variety of wood putty shades available at your local hardware store or online. Once you have the matching putty, follow these steps:
- Clean the gouge with a soft cloth to remove any debris or dust.
- Take a small amount of the matching putty and press it into the gouge using a putty knife or your fingers. Make sure to fill the gouge completely.
- Smooth out the surface of the putty using a putty knife or a smooth, flat object.
- Allow the putty to dry according to the manufacturer’s instructions.
- Once the putty is dry, gently sand the repaired area to ensure a smooth and even finish.
Sanding For A Smooth Finish
Sanding is an important step in repairing gouges in hardwood floors as it helps to create a smooth and even surface. Follow these steps to sand the repaired area:
- Start by using a fine-grit sandpaper (around 220 grit) to gently sand the repaired area.
- Move the sandpaper in a circular motion, applying light pressure. Be careful not to sand too aggressively, as this can damage the surrounding wood.
- Continue sanding until the repaired area is smooth and blends in with the rest of the floor.
- Once you are satisfied with the smoothness of the repaired area, use a vacuum or a soft cloth to remove any dust or debris.
Applying A Protective Coating
After repairing and sanding the gouged area, it’s important to apply a protective coating to ensure the longevity of the repair. A protective coating will help prevent future damage and maintain the overall appearance of your hardwood floor. Follow these steps to apply a protective coating:
- Select a high-quality polyurethane or varnish specifically designed for hardwood floors.
- Using a clean brush or a foam applicator, apply a thin and even coat of the protective coating to the repaired area.
- Allow the coating to dry according to the manufacturer’s instructions.
- Repeat the process of applying the protective coating if necessary, following the recommended number of coats.
By following these steps, you can effectively repair gouges in your hardwood floors and restore their natural beauty. Remember to choose a matching putty, sand carefully for a smooth finish, and apply a protective coating for long-lasting results.
Staining Repaired Areas
When it comes to refinishing hardwood floors, staining repaired areas is a crucial step to ensure a seamless finish. By following the right techniques, you can effectively blend the repaired sections with the rest of the floor.
Choosing A Compatible Stain
To achieve a uniform look, selecting a stain that matches the existing floor color is essential. Ensure the stain is compatible with the type of wood you are working with for optimal results.
Applying Stain For Consistency
- Prepare the repaired areas by sanding lightly to create a smooth surface.
- Apply the stain with a brush or cloth, following the grain for even coverage.
- Allow the stain to dry completely before applying a protective finish.
Sealing And Protecting The Floor
When it comes to filling scratches in hardwood floors, the final step is crucial – sealing and protecting the floor. Proper sealing not only conceals the scratches but also safeguards the floor from future damage, extending its lifespan.
Selecting The Right Sealer
- Choose high-quality polyurethane sealers for durability.
- OPT for water-based sealers for easier application and faster drying time.
- Ensure the sealer is compatible with the existing floor finish.
Polyurethane Application Tips
- Clean the floor thoroughly before applying polyurethane.
- Use a clean brush or applicator for even distribution.
- Apply thin coats to prevent drips and bubbles.
- Allow each coat to dry completely before applying the next.
Prevention And Maintenance Tips
Looking for prevention and maintenance tips for filling scratches in hardwood floors? You can try using a baking soda and olive oil combo or a wax filler stick for smaller areas. For deeper scratches or cracks, wood putty or wood filler can be pressed into the affected areas.
Avoid sanding by using a mixture of apple cider vinegar and olive oil to remove small scratches.
Prevention and Maintenance Tips Routine Cleaning Advice
Regularly sweep and vacuum hardwood floors.
Use a microfiber mop with a gentle cleaner to remove dirt.
Avoid using harsh chemicals that can damage the floor.
Consider using rugs in high-traffic areas to minimize scratches.
Preventing Future Scratches
Place felt pads under furniture legs to prevent scratching.
Trim your pet’s nails regularly to avoid floor damage.
Use area rugs or mats in front of doors to trap dirt and debris.
Consider adding protective coatings like polyurethane to the floor.
In conclusion, by following these prevention and maintenance tips, you can keep your hardwood floors looking beautiful and scratch-free for years to come.

Frequently Asked Questions
Can You Fill Scratches In Wood Floor?
Yes, you can fill scratches in wood floors. For smaller areas, you can use a wax filler stick or a baking soda and olive oil combo. For deeper scratches or cracks, press wood putty or wood filler into the affected area.
Another option is to use stain-matching crayons or wax sticks to hide minor scratches.
How Do You Get Scratches Out Of Hardwood Floors Without Sanding?
To remove scratches from hardwood floors without sanding, try mixing equal parts apple cider vinegar and olive oil. Dab the solution into the scratches and leave it for a day, then rub it out with a clean, soft cloth. For deeper scratches, consider using wood putty or a wax filler stick.
How Do You Fill Gouges In Hardwood Floors?
To fill gouges in hardwood floors, use wood putty to fill deep gouges and cracks. Choose a wood putty color that matches your hardwood floor for seamless blending. Apply the wood putty into the gouges and cracks, then smooth it out for a sturdy and aesthetically pleasing repair.
Can You Hide Scratches On Hardwood Floors?
Yes, you can hide scratches on hardwood floors using methods such as using a baking soda and olive oil combo, applying a wax filler stick, or using stain-matching crayons or sharpie pens. For deeper scratches, wood putty or wood filler can be pressed into the cracks.
Conclusion
Fixing scratches in hardwood floors is manageable with simple DIY methods. Using solutions like apple cider vinegar and olive oil, or applying wax filler sticks can effectively conceal scratches. For deeper gouges, wood putty offers a reliable solution. These easy methods can help maintain the pristine appearance of your hardwood floors without the need for extensive repairs.