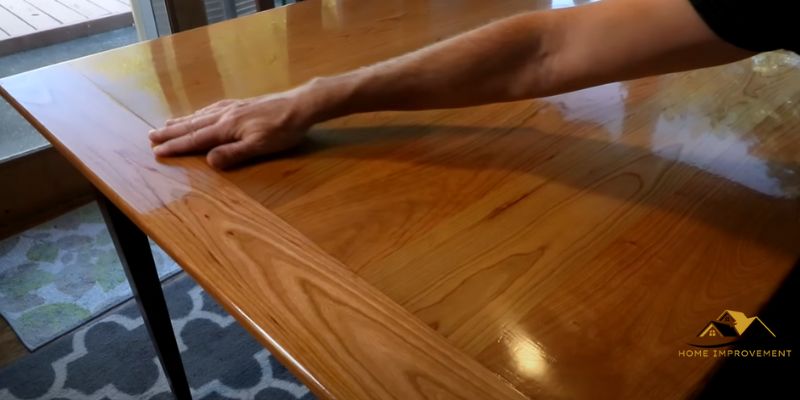
To fix a bad stain job, sand the surface and remove the old stain before applying a new coat of stain and finish. Are you frustrated with a bad stain job on your furniture or woodwork?
Don’t worry! There is a simple solution. By following a few easy steps, you can fix the problem and achieve the beautiful, even stain finish you desire. We will discuss the process of fixing a bad stain job. We will provide you with a step-by-step guide on how to effectively remove the old stain, prepare the surface, and apply a new coat of stain and finish.
By the end of this article, you will have the knowledge and confidence to correct any staining mishaps and restore the beauty of your woodwork. So, let’s get started!
Cognizance The Problem
Understanding the problem is crucial when it comes to fixing a bad stain job. By identifying the issue and its common causes, you can take the necessary steps to correct it effectively. In this section, we will explore how to identify a bad stain job and the common reasons for it.
Identifying A Bad Stain Job
If you’re unsure whether your stain job is up to par, there are a few key signs to look out for. By identifying these indicators, you can determine if your stained surface requires fixing:
- Uneven color distribution
- Patchy or streaky appearance
- Inconsistent or poor coverage
- Dull, lackluster finish
- Blotches or splotches
These visible issues can detract from the aesthetic appeal of your stained surface, leaving you dissatisfied with the overall result. Understanding these signs will help you take the necessary measures to fix and improve the stain job.

Common Causes Of A Bad Stain Job
There are several factors that can contribute to a poorly executed stain job. It’s important to be aware of these common causes so you can address them effectively:
- Improper surface preparation: Inadequate cleaning, uneven sanding, or failure to remove previous finishes can all affect the stain’s absorption and adherence.
- Inadequate application technique: Applying the stain too thick or too thin, using the wrong tools, or rushing through the process can lead to an unsatisfactory result.
- Incompatible products: Using stain and finish products that are not designed to work together can result in uneven color, poor adhesion, or other negative effects.
- Insufficient drying time: Failing to allow the stain enough time to fully dry and cure before applying a finish can cause issues such as tackiness or a compromised final appearance.
- Environmental conditions: Factors such as temperature, humidity, and airflow can impact the stain’s performance and drying process. Failure to consider these conditions may result in a subpar stain job.
Understanding the common causes of a bad stain job will help you pinpoint the specific issue and take corrective actions accordingly. By addressing these underlying problems, you can achieve a professional-looking stain job that enhances the beauty of your project.
Steps To Fix A Bad Stain Job
If you’ve recently discovered that your stain job didn’t turn out as expected, don’t worry. With a little know-how and some time, you can fix a bad stain job and restore the beauty of your woodwork. Follow these simple steps to rectify the issue and achieve the desired results:
Assess The Severity Of The Issue
The first step in fixing a bad stain job is to assess the severity of the issue. Take a close look at the stained surface and identify any areas of concern. Determine whether the problem is limited to uneven color or if there are any major flaws, such as blotches or streaks. This assessment will help guide your approach to fix the stain job.
Prepare The Surface For Re-staining
Before applying a new coat of stain, it’s crucial to prepare the surface properly. Start by removing the existing stain using a stain stripper or sandpaper. This will help create an even base for the new stain. Ensure that the surface is clean and free from any dust or debris. Use a wood cleaner and a soft cloth to wipe away any residues.
Choosing The Right Stain And Color
Next, you’ll need to choose the right stain and color for your project. Consider the type of wood you’re working with and the desired end result. Whether you’re looking for a darker or lighter stain, it’s essential to select a stain that complements the wood’s natural beauty. Test a small area with different stains to find the perfect match.
Apply The New Stain Correctly
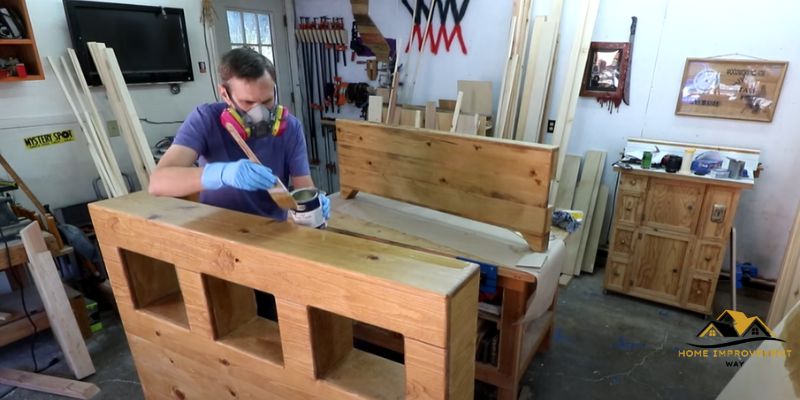
To fix a bad stain job, apply the new stain correctly. Use a clean brush, sponge, or rag to apply an even coat of stain, following the wood grain. Work in small sections to ensure thorough coverage. Let the stain penetrate the wood for the recommended time and then wipe off any excess with a cloth. Apply additional coats if desired, allowing each coat to dry completely before applying the next.
Ensure Proper Drying And Curing
After applying the new stain, it’s crucial to ensure proper drying and curing. Allow the stained surface to dry according to the manufacturer’s instructions. This will typically take a few hours to a couple of days, depending on the stain and environmental conditions. Avoid touching or moving the stained wood during this time to prevent any unwanted marks or smudges. Once the stain is fully dried, consider applying a protective finish to enhance the longevity and appearance of the wood.
By following these steps, you can fix a bad stain job and achieve the beautiful, consistent finish you desire. Take your time and be patient throughout the process, and soon enough, your woodwork will be restored to its former glory.

Prevention And Maintenance
When it comes to achieving a flawless stain job, prevention and maintenance are key factors. By taking the necessary precautions and implementing regular upkeep, you can ensure long-lasting and beautiful results. In this section, we will explore how to avoid common staining mistakes and the importance of regular maintenance.
Avoiding Common Staining Mistakes
By learning about the common pitfalls of staining and taking the necessary precautions, you can save yourself from headaches and frustrations down the road.
- Prepare the surface properly by removing any dirt, dust, or previous finishes. This will allow the stain to penetrate evenly and give you a smooth and even color.
- Always test the stain on a small, inconspicuous area before fully committing. This will help you gauge how it will look on the wood and make any necessary adjustments.
- Apply the stain in thin layers, allowing each coat to dry completely before adding another. This will prevent the occurrence of blotches and uneven color.
- Use the right tools for the job. Brushes, foam applicators, or staining pads can all be suitable, depending on the project. Make sure to choose the appropriate tool for the surface you are staining.
- Follow the manufacturer’s instructions carefully to ensure proper application and drying times. Improper application can result in poor adhesion and premature wear.
- Protect yourself and your surroundings by wearing safety goggles, gloves, and working in a well-ventilated area. Also, cover any nearby objects or surfaces that you don’t want to stain.
Regular Maintenance For Long-lasting Results
Maintaining your stained surfaces is essential to keep them looking their best and prolong their lifespan. Here are some maintenance tips to follow:
- Regularly clean the stained surfaces with a mild detergent and warm water. This will remove dirt, grime, and any potential stains, keeping the surface looking fresh.
- Consider applying a protective topcoat or sealant to the stained surface. This will provide an extra layer of protection against wear, UV rays, and moisture.
- Inspect the stained areas periodically for any signs of damage or wear. If you notice any issues, address them promptly to prevent further damage.
- Be mindful of placing hot objects directly on stained surfaces, as this can cause burns and discoloration. Always use coasters or trivets to protect the surface.
- Avoid using harsh chemicals or abrasive cleaners on stained surfaces, as they can strip away the protective finish and damage the wood.
- If you need to touch up or repair any areas, follow the same staining process as before, ensuring proper preparation and application techniques are followed.
By following these preventative measures and implementing regular maintenance, you can enjoy the beauty of your stained surfaces for years to come. So, take the time to care for your stain job, and it will reward you with lasting beauty and durability.
Conclusion
Fixing a bad stain job can seem daunting, but with the right steps, it is achievable. By assessing the damage, sanding the surface, and applying a new coat of stain, you can restore the appearance of your wood surface. Remember to take your time, follow the instructions carefully, and be patient throughout the process.
With these tips, you can transform a messy stain job into a beautiful, flawless finish. Happy staining!


