How to Fix a Leaky Bathtub Faucet Double Handle: Quick Guide
Fixing a leaky bathtub faucet with double handles is simple. Most leaks stem from worn-out washers or seals.
With a few tools and some patience, you can resolve this issue yourself. A leaky faucet can waste water and increase bills. It might seem daunting, but repairing it is easier than you think. Understanding the basic structure of your faucet is key.
Double-handle faucets have separate controls for hot and cold water. These faucets can leak due to loose or damaged parts. With the right guidance, you can save money on plumbing fees. In this guide, we’ll walk you through the steps to fix your faucet. You’ll learn how to identify the problem, gather tools, and make repairs. Let’s dive in and tackle this issue together!
Tools And Materials Needed
Fixing a leaky faucet needs some important tools. A wrench is very useful. It helps to loosen or tighten parts. A screwdriver is also needed. It helps remove screws. Pliers are handy too. They help grip and turn things. Make sure you have a bucket. It catches any water that drips.
You will need some replacement parts. Check the type of faucet first. Get the right washers. Seals might be needed too. Some faucets need a cartridge. A small tube of plumber’s grease is helpful. It keeps parts moving smoothly. Don’t forget rags. They help keep things clean.
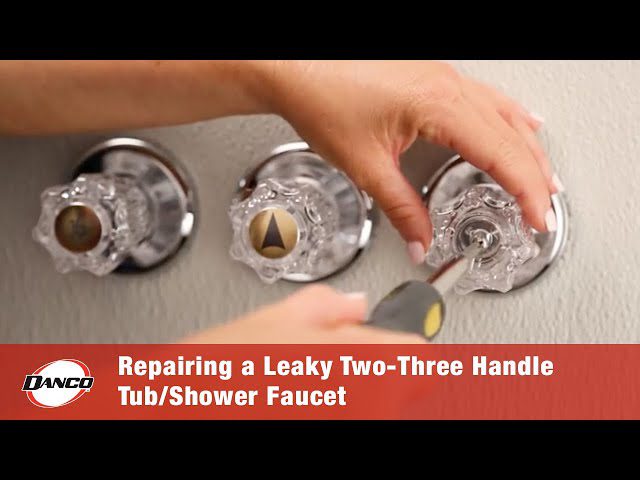
Identifying The Type Of Faucet
Compression faucets have two handles. One for hot water, another for cold. These handles turn and tighten like a screw. Leaks often occur when the rubber washers wear out. To fix, you need to replace the washer. Turn off the water supply first. Then, remove the handle. Next, unscrew the packing nut. Take out the stem and replace the washer at the bottom. Reassemble in the reverse order. Turn water back on and check for leaks.
Cartridge faucets look similar to compression faucets. They also have two handles. But they don’t tighten like a screw. Leaks here usually mean the cartridge needs replacing. Begin by turning off the water supply. Remove the handle and the retaining nut. Pull out the cartridge and replace it with a new one. Reassemble everything. Turn the water back on to test for leaks.
Shutting Off Water Supply
Finding the Shutoff Valve is the first step. Look under the sink or near the tub. You might find it in the basement or utility room. Turn the valve clockwise. This stops water from flowing.
Draining Remaining Water is important. Turn on the faucet handles. Let the water flow out completely. This ensures no water is left in the pipes. Now you can work on the faucet safely.

Credit: www.familyhandyman.com
Removing Faucet Handles
First, find the screw on the handle. Use a screwdriver to loosen it. Turn the screw to the left. Keep turning until it comes out. Be careful not to drop it. Place the screw in a safe spot. Look under the handle cover. Check for any dirt or rust.
Grip the handle firmly. Gently pull it away from the faucet. Wiggle it if needed. Do not force it. Ensure you don’t damage the faucet. Place the handle aside. Check the exposed parts. Inspect for leaks or damage. Clean if necessary.
Inspecting And Replacing Washers
First, turn off the water supply. Use a screwdriver to remove the faucet handles. Then, expose the faucet stem. Check the washers at the end of the stem. Look for signs of wear, such as cracks or rough edges. Worn washers can cause leaks. Replace them if necessary. Keep the area clean and dry.
Choose the right size washer. Place the new washer at the end of the stem. Make sure it fits snugly. Tighten it securely to avoid leaks. Reattach the faucet handle. Turn the water supply back on. Check for any leaks. Tighten connections if needed. Enjoy your leak-free faucet!
Examining And Replacing Cartridges
Begin by turning off the water supply. Use a wrench to remove the faucet handle. Look inside to find the cartridge. Inspect for any cracks or wear. Damaged cartridges cause leaks. Gently pull out the cartridge. Check for mineral buildup. Clean with a soft brush if needed. If it looks worn, replace it. A new cartridge stops the leak.
Align the new cartridge with the faucet slots. Push it into place firmly. Ensure it’s seated properly. Reattach the faucet handle. Tighten with a wrench. Turn the water supply back on. Test for leaks by turning the faucet. No leak? Great! The new cartridge is working. You’ve fixed the leak.
Reassembling Faucet Components
Attaching handles is an important step in fixing the faucet. First, align the handle with the valve stem. Make sure it fits snugly. Use a screwdriver to tighten the screw. This helps keep the handle in place. Be careful not to over-tighten.
Securing handle covers is easy. Place the cover over the handle. Press down gently. The cover should click into place. If it feels loose, check the alignment. Ensure it is secure. This protects the faucet’s inner parts.
Testing For Leaks
Turn the water supply back on slowly. Listen for any unusual sounds. Check around the faucet for water. See if there are any visible leaks. If there is no leak, you have done well. If you see water, there is a problem. You may need to check the faucet parts again.
Look closely at the faucet. Is it dripping? Use a dry cloth to wipe the faucet. This helps see any new drips. Watch the faucet for a minute or two. Make sure no water is dripping. If you spot a drip, tighten the handles. Sometimes, loose handles cause drips. If the drip continues, the issue might be deeper. Consider replacing worn parts.
Preventive Maintenance Tips
Fixing a leaky bathtub faucet with double handles can prevent water waste and reduce bills. Start by turning off the water supply. Next, remove the handle and replace worn-out washers or seals. Reassemble the parts and turn the water back on.
Regular checks ensure longer-lasting fixtures.
Regular Inspections
Check your bathtub faucet often. Look for drips or leaks. Inspect the handles. Make sure they turn smoothly. Watch for rust or corrosion. Replace old parts quickly. Clean the faucet regularly. Remove dirt and grime. Use a soft cloth. Avoid harsh cleaners. Keep an eye on water pressure. Ensure it stays steady. Listen for unusual sounds. Fix them fast. Monitor the faucet’s condition. This helps prevent big problems.
Quick Repairs
Act fast when you see a leak. Tighten loose screws. Replace worn-out washers. Use a wrench carefully. Turn off the water supply first. Follow instructions. Check for more leaks. Test the faucet after repairs. Avoid delay. Prevent further damage. Save time and water. Fix small issues quickly. Maintain the faucet often. Ensure it works well. Protect your home from water damage.
:max_bytes(150000):strip_icc()/repair-a-two-handle-cartridge-faucet-1824887_05_buy_4915-5fdf148cf7fc44e4bf91871558e69936.jpg)
Credit: www.thespruce.com

Credit: www.youtube.com
Frequently Asked Questions
How To Fix A Leaky Double Handle Faucet?
Turn off the water supply. Remove faucet handles using a screwdriver. Replace faulty washers or O-rings. Reassemble the faucet and test for leaks.
How To Get A Bathtub Faucet To Stop Dripping?
Replace worn-out washers or cartridges in the faucet. Tighten loose parts using a wrench. Clean the valve seat with vinegar to remove mineral deposits. If issues persist, consider replacing the entire faucet to prevent further leaks. Regular maintenance helps ensure the faucet functions efficiently without dripping.
What Is The Most Common Cause Of A Leaky Tub Faucet?
The most common cause of a leaky tub faucet is a worn-out washer or cartridge. These components can deteriorate over time, leading to drips. Regular maintenance and timely replacement of these parts can prevent leaks. Ensure the faucet is tightly closed to avoid unnecessary water wastage.
Does A Two Handle Faucet Have A Cartridge?
Yes, many two-handle faucets use cartridges. Each handle usually controls a separate cartridge for hot and cold water. Cartridges regulate water flow and temperature, ensuring smooth operation. Always check your faucet model, as designs can vary. Replacing cartridges can fix leaks and improve functionality.
Conclusion
Fixing a leaky bathtub faucet is simple with the right steps. Start by identifying the problem. Then, gather your tools and necessary parts. Follow the instructions carefully to prevent further leaks. These repairs can save money and reduce water waste.
Regular maintenance keeps your faucet in good condition. Check for drips and tighten handles as needed. Small efforts now prevent bigger problems later. Feel confident in your DIY skills. A leak-free faucet means a more efficient bathroom. Enjoy the peace of mind from a job well done.