How to Easily Fix a Shower Diverter Gate: Step-by-Step Guide
To fix a shower diverter gate, follow these simple steps: Remove the shower handle and escutcheon, unscrew the diverter gate, replace with a new one, and reassemble the handle and escutcheon.
Understanding The Shower Diverter Gate
The shower diverter gate is a crucial component in your bathroom that helps control the flow of water between the showerhead and bathtub faucet. If you’re experiencing issues with your shower diverter gate, here are some tips to fix it and ensure a smooth showering experience.
What Is A Shower Diverter Gate?
A shower diverter gate is an essential component of a shower system that controls the flow of water between different outlets. It is typically found in shower control valves and is responsible for diverting water from the tub faucet to the showerhead or vice versa. The diverter gate is designed to create a seal and direct the water flow in the desired direction. Understanding how the shower diverter gate works is crucial for fixing any issues that may arise.
Signs Of A Faulty Shower Diverter Gate
There are a few telltale signs that indicate a faulty shower diverter gate. By recognizing these signs, you can address the issue promptly and prevent further damage or inconvenience. Here are the most common signs to look out for:
1. Inadequate water pressure: If you notice a significant decrease in water pressure when using the shower, it could indicate a problem with the diverter gate. The blockage or malfunctioning of the gate can restrict the water flow, resulting in reduced pressure.
2. Dripping or leaking: A faulty diverter gate may cause water to continuously drip or leak from the showerhead, even when the tub faucet is running. This wastage of water can increase your utility bills and lead to water damage if left unattended.
3. Difficulty switching between the showerhead and tub faucet: A properly functioning diverter gate should allow you to easily switch between the showerhead and tub faucet. If you encounter resistance or find it challenging to engage the gate, it could indicate a problem.
4. Strange noises during operation: Unusual sounds, such as squeaking, grinding, or rattling, when using the shower diverter, can indicate internal damage or misalignment of the gate. These noises are often accompanied by difficulty in diverting the water flow.
5. Visual inspection reveals damage: If you can visually inspect the shower diverter gate and notice any signs of physical damage, wear, or corrosion, it is likely affecting its performance. Damaged or worn-out gates may require replacement to restore the proper functioning of your shower.
By being aware of these signs, you can promptly address any issues with your shower diverter gate. In the next section, we will explore the steps to fix a faulty gate and restore your shower’s functionality.
Tools And Materials Needed
In order to successfully fix a shower diverter gate, there are several tools and materials that you will need to have on hand. These essential items will help you complete the task quickly and efficiently, allowing you to enjoy a fully functioning shower once again.
List Of Necessary Tools:
- Adjustable wrench
- Phillips screwdriver
- Flathead screwdriver
- Utility knife
- Plumber’s tape
- Replacement shower diverter gate
Required Materials And Supplies:
- New shower diverter gate
- Teflon tape
- Bucket or basin
- Towels
- Gloves
Having these tools and materials ready before you begin the repair process will save you time and frustration. Make sure to gather everything you need and have it easily accessible before you start working on your shower diverter gate.
Step-by-step Guide To Fixing A Shower Diverter Gate
Is your shower diverter gate giving you trouble? Don’t worry, fixing it yourself is easier than you think. In this step-by-step guide, we will walk you through the process of fixing a shower diverter gate, saving you time and money on calling a plumber.
Step 1: Turn Off The Water Supply
To begin, turn off the water supply to your shower. Look for the shut-off valve, usually located near the shower handle or in the basement. Turn it clockwise until the water stops flowing. This step is crucial to prevent any water leakage or accidents during the repair process.
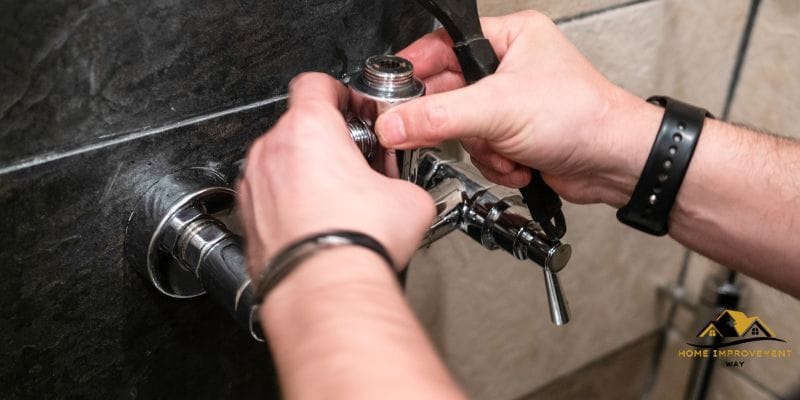
Step 2: Remove The Shower Handle
Next, remove the shower handle. Depending on the type of handle you have, you may need a screwdriver, Allen wrench, or a set of pliers. Carefully unscrew or remove the handle, setting aside any screws or small parts for reassembly later.
Step 3: Access The Diverter Gate Mechanism
Now, you need to access the diverter gate mechanism. Behind the handle, you’ll find a cover plate or trim that hides the diverter gate. Use a screwdriver to remove it and expose the mechanism underneath. Take your time and be gentle to avoid damaging any components.
Step 4: Inspect And Clean The Diverter Gate
Inspect the diverter gate for any signs of damage or debris buildup. Remove any accumulated dirt, grime, or mineral deposits using a soft brush or cloth. Ensure that the gate moves freely without any obstructions. This step will improve the gate’s functionality and prevent future issues.
Step 5: Replace Or Repair The Diverter Gate
If you notice any significant damage to the diverter gate, you may need to replace it. Look for a replacement part that matches your shower model and follow the manufacturer’s instructions for installation. Alternatively, if the gate is in relatively good condition, you can try repairing it by adjusting any loose screws or connections.
Step 6: Reassemble The Shower Handle
Now, it’s time to reassemble the shower handle. Place the cover plate or trim back onto the mechanism and secure it with the screws you set aside earlier. Carefully align the handle and gently tighten it, ensuring it is firmly in place. Take a moment to double-check that all the parts are correctly installed.
Step 7: Test And Check For Leaks
Before completing the repair process, run a test to ensure everything is working correctly. Turn the water supply back on and activate the shower. Check for any leaks around the handle or diverter gate area. If you notice any leaks, tighten connections or consider replacing faulty parts. Once you are confident there are no leaks, your shower diverter gate repair is complete.
By following this step-by-step guide, you can easily fix a shower diverter gate. Remember to exercise caution and use the appropriate tools during each step. Now, you can enjoy a properly functioning shower without the hassle of a malfunctioning diverter gate.
Preventive Maintenance And Troubleshooting Tips
If you want to ensure that your shower diverter gate functions smoothly and avoids any unnecessary issues, regular preventive maintenance is key. By taking a few simple steps, you can keep your shower diverter gate in top condition and save yourself from the hassle of costly repairs. Additionally, having a troubleshooting plan in place will help you quickly identify and fix any problems that may arise. Let’s explore some preventive maintenance and troubleshooting tips for your shower diverter gate.
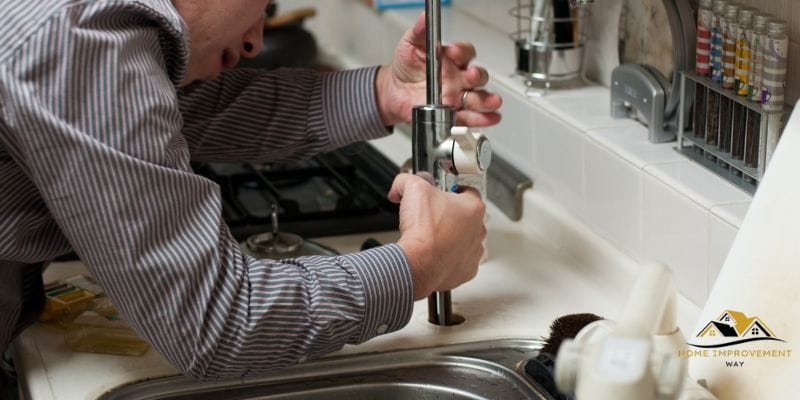
Regular Cleaning And Maintenance
Regular cleaning and maintenance are essential to keep your shower diverter gate in optimal condition. Here are some important measures you can take:
- Clean the diverter gate: Remove the shower handle and clean any debris or mineral deposits that may have built up around the diverter gate. This will help ensure proper functionality.
- Inspect the washers: Check the washers for wear and tear. If they are damaged or worn out, replace them to prevent leaks or drips.
- Grease the diverter gate: Apply a small amount of plumber’s grease to the diverter gate to reduce friction and ensure smooth operation.
- Check for leaks: Regularly inspect the shower area for any signs of leaks or water damage. If you notice any, promptly address the issue to prevent further damage.
- Test the diverter gate: Periodically test the diverter gate to ensure it is diverting the water properly between the showerhead and tub spout. If you notice any issues, take action before the problem worsens.
Common Troubleshooting Issues And Solutions
Despite regular maintenance, your shower diverter gate may encounter some common issues. Here are a few troubleshooting tips to help you resolve them:
| Issue | Solution |
|---|---|
| Dripping or leaking showerhead: | Check the washers and O-rings for any signs of damage. Replace them if necessary. If the problem persists, it may be time to replace the diverter gate. |
| Weak or uneven water flow: | Remove any mineral deposits or debris that may be obstructing the diverter gate. Clean the showerhead thoroughly to ensure proper water flow. |
| Diverter gate not switching water flow: | Inspect the diverter gate for any blockages or obstructions. Clean it gently to remove any buildup that may be affecting its operation. |
| Stuck or difficult to operate diverter handle: | Apply some lubricant or plumber’s grease to the diverter handle and mechanism. Lubrication should make it easier to switch the water flow. |
By following these preventive maintenance and troubleshooting tips, you can keep your shower diverter gate functioning smoothly and avoid any inconvenience. Remember, regular cleaning, inspection, and prompt action are key to preserving the longevity of your shower diverter gate.
Conclusion
Fixing a shower diverter gate can be a simple DIY task that saves you time and money. By following the steps outlined in this blog post, you can easily address any issues with your shower diverter gate. Remember to test the functionality after completing each step to ensure proper functioning.
With these tips, you can enjoy a hassle-free shower experience in no time.