
How to Fix Blinds String: Effortless Solutions for a Perfectly Functional Window Treatment
To fix the blinds string, start by removing the blinds from the window. Then, carefully untangle and rest the blinds, ensuring they are properly aligned and functioning smoothly.
Identifying The Problem
When your blinds are not functioning properly, it can be frustrating. However, identifying the problem is the first step towards finding a solution. Understanding what has gone wrong will enable you to fix the issue efficiently. In this section, we will guide you through the process of examining the blinds and determining the cause, so you can get those blinds working flawlessly again.
Examining The Blinds
Examining your blinds thoroughly is essential for identifying the problem. Take a close look at the strings that control the movement of the blinds. Observe if they are tangled, frayed, or have come loose from the mechanism. Look for any visible signs of damage or wear and tear. Ensure that the blinds are properly aligned and there are no obstructions in their path.
If you notice any issues with the strings, it is important to inspect them individually. Gently pull each string to check for any resistance or lack of movement. This will help determine if the problem lies in a specific string or if it is a more widespread issue. Make a note of any irregularities or abnormalities you observe during this examination process.
Determining The Cause
Once you have examined the blinds, it’s time to determine the cause of the problem. In most cases, an issue with the string is the likely culprit. The strings may have become tangled, worn out, or come loose from the mechanism. If this is the case, you will need to repair or replace the string to restore functionality.
Another possible cause could be an obstruction within the blind mechanism. Dust, dirt, or debris may have accumulated over time, hindering the smooth operation of the blinds. In such instances, cleaning the mechanism or removing the obstruction may solve the issue.
It’s also worth considering the age and overall condition of the blinds. Over time, general wear and tear can lead to problems with the strings, mechanisms, or other components. If the blinds are old and have undergone extensive use, it may be necessary to replace them entirely.
By examining the blinds carefully and determining the cause of the problem, you will set yourself up for success when it comes to fixing the issue. In the following sections, we will explore some common problems you may encounter and provide step-by-step instructions on how to fix them.

Replacing The Cord
Learn how to fix blind strings by replacing the cord in just a few easy steps. This DIY solution will have your blinds working like new again in no time.
Replacing the cord of your blinds is a straightforward process that can restore the functionality and appearance of your window treatments. Whether the cord is broken, frayed, or simply worn out, following these steps will allow you to replace it with ease. In this section, we will guide you through the process of measuring the cord length, removing the old cord, and installing the new one.
Measuring The Cord Length
Before you begin the process of replacing the cord, it is crucial to measure the correct length for your blinds. This ensures that the new cord will fit perfectly and operate smoothly. To do this, follow these steps:
- Extend the blinds fully to their open position.
- Measure the length of the old cord from the top of the blinds to the bottom.
- Make sure to add a few extra inches to account for knots and to allow for easy installation.
By precisely measuring the cord length, you can ensure a seamless replacement process and optimal functionality for your blinds.
Removing The Old Cord
Once you have measured the cord length, the next step is to remove the old cord from your blinds. Follow these simple steps:
- Securely hold the blinds to prevent them from falling or causing any damage.
- Locate the cord lock mechanism, typically found at the bottom of the blinds.
- Carefully release the cord lock and untie any knots or fastenings keeping the old cord in place.
- Gently pull out the old cord, ensuring you keep it straight to avoid tangling.
- Remove any remaining pieces of the cord from the blinds, being cautious not to damage any other parts.
By following these steps, you can successfully remove the old cord from your blinds, preparing them for the installation of the new one.
Installing The New Cord
With the old cord removed, it’s time to install the new cord. Follow these steps for a seamless installation:
- Thread the new cord through the cord lock mechanism at the bottom of the blinds.
- Make sure the cord passes through any holes or guides along the way, following the path of the original cord.
- Tie a knot at the bottom end of the cord to secure it in place.
- Gently pull the cord upwards to ensure it moves smoothly through the cord lock mechanism.
- If necessary, tie additional knots or fastenings to prevent the cord from slipping or loosening.
- Finally, test the functionality of the cord by opening and closing the blinds multiple times to ensure they work properly.
By diligently following these installation steps, you can successfully replace the cord of your blinds, restoring their functionality and enhancing the overall appearance of your windows.
Repairing The Tilt Mechanism
Repairing the tilt mechanism on blinds is a simple process that can be done at home. By following a few steps, such as replacing broken strings and untangling knots, you can easily fix your blinds and restore their functionality.
Assessing the Tilt Mechanism:
To fix blind string effectively, it is essential to assess the tilt mechanism properly. This mechanism controls the movement of the blinds, allowing you to adjust the angle and amount of light entering the room. Start by examining the tilt wand, which is the long rod used to operate the blinds. Check for any signs of damage or wear, such as cracks or bends.
If there are issues with the tilt wand, it may need to be replaced. Next, take a look at the tilt gears, which are responsible for the overall functioning of the mechanism. Ensure that they are not broken or jammed, as this can lead to difficulties with tilting the blinds. Assessing the tilt mechanism thoroughly will help you identify the specific components that require repair or replacement.
Replacing Broken Components:
Once you have identified any broken or damaged components of the tilt mechanism, it is time to replace them. Begin by removing the old parts carefully. This can vary depending on the specific style of blinds but often involves unscrewing or unhinging the necessary components. Take note of the position and arrangement of each part to ensure proper reassembly later. With the broken components removed, it is time to install the new ones.
Make sure to use the appropriate replacement parts, as using incorrect pieces can lead to further damage. Carefully follow the manufacturer’s instructions for installation. Tighten screws securely but avoid over-tightening, as this can damage the mechanism. When all the necessary components are replaced, move on to reassembling the tilt mechanism.
Reassembling the Tilt Mechanism:
To ensure the proper functioning of the tilt mechanism, reassembly must be done correctly. Begin by aligning the various components according to their original positions. Use the reference marks or notes you made during the removal phase to guide you. Insert the screws or hinges back into their respective places, making sure they are securely attached.
Double-check that all parts are properly aligned and in the correct orientation. Once reassembled, test the tilt mechanism by operating the tilt wand. It should move smoothly and without any obstructions. If you find any issues, such as stiffness or uneven movement, you may need to adjust or tighten the components. Taking the time to reassemble the tilt mechanism accurately will ensure the longevity and functionality of your blinds.
In conclusion, repairing the tilt mechanism of blind string involves assessing the components, replacing any broken parts, and reassembling them properly. By following these steps, you can restore the functionality of your blinds and enjoy the benefits of a well-operating window treatment. Remember to pay attention to details and use the correct replacement parts to ensure optimal results. With a little patience and effort, you can fix the tilt mechanism of your blinds and enjoy their precise control of light and privacy once again.
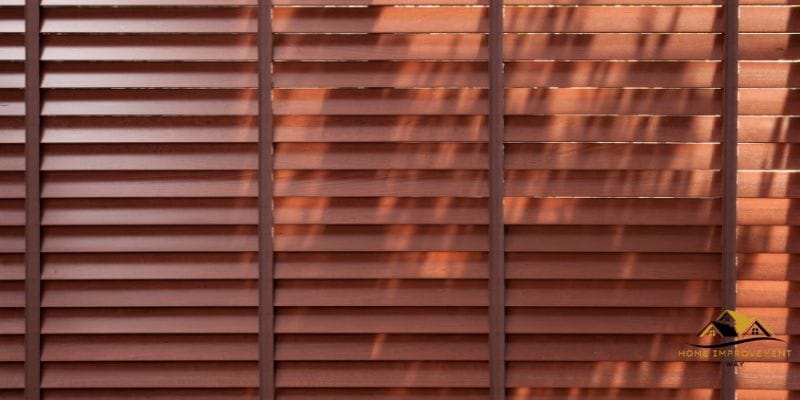
Fixing The Slats
Learn how to easily fix the slats of your blinds by repairing the string. Follow our step-by-step guide for a quick and cost-effective solution.
When it comes to fixing blind strings, one of the most common issues you may encounter is with the slats. The slats are the individual horizontal pieces that make up the blinds, and over time they can become loose or even damaged. In this section, we will focus on how to inspect the slats, reattach any loose ones, and replace any damaged ones. Let’s dive in!
Inspecting the Slats
To start fixing the blind strings, you’ll need to inspect the slats. This will help you identify any issues and plan your next steps accordingly. Here’s what you need to do:
1. Carefully lower the blinds halfway to ensure easy access to the slats.
2. Start at the top and visually inspect each slat for any signs of damage or looseness.
3. Look out for cracks, chips, or warping in the slats, as these indicate damage.
4. Check if any slats are loosely hanging or detached from the string.
Now that you’ve inspected the slats, let’s move on to reattaching any loose slats.
Reattaching Loose Slats
If you’ve identified any loose slats during the inspection, it’s crucial to secure them back in place. Follow these steps to reattach them:
1. Gently lift the bottom rail of the blinds to release the tension on the strings.
2. Slide the loose slat back into its correct position, aligning it with the surrounding slats.
3. Once in position, hold the slat firmly and carefully thread the string through the holes on both sides.
4. Slowly release the bottom rail, allowing the tension to hold the slat securely in place.
5. Test the blinds by raising and lowering them to ensure the slat stays in position.
Great job! You’ve reattached the loose slats. But what if you come across a damaged slat? Don’t worry, we’ve got you covered in the next section.
Replacing Damaged Slats
If a slat is beyond repair, it’s time to replace it. Here’s how you can do it:
1. Start by removing the blind from the window, following the manufacturer’s instructions.
2. Lay the blind on a flat surface and locate the damaged slat.
3. Carefully unthread the string from the damaged slat, removing it from both sides.
4. Measure the length and width of the damaged slat to ensure you get the right replacement.
5. Purchase a new slat of the same size and material from a blind supplier or home improvement store.
6. Thread the strings back through the holes in the new slat, making sure they are securely in place.
7. Reattach the bottom rail and then rehang the blinds in your window.
Replacing damaged slats is an excellent way to prolong the life of your blinds and keep them looking as good as new.
Maintaining And Cleaning Blinds
Proper maintenance and regular cleaning are essential for keeping your blinds looking their best and functioning smoothly. By following a few simple steps, you can ensure that your blinds remain in top condition for years to come. This section will cover important tips on dusting and vacuuming, spot-cleaning stains, and preventing future issues.
Dusting And Vacuuming
Regular dusting and vacuuming are crucial for keeping your blinds clean and free from dirt and debris. Here’s how you can effectively remove dust and prevent it from accumulating:
- Use a feather duster or a microfiber cloth to gently sweep away dust from the slats. Start from the top and work your way down, taking care not to bend or twist the blinds.
- You can also use a vacuum cleaner with a brush attachment to thoroughly clean between the slats. Set the vacuum to a low or medium setting to prevent any damage to the blinds.
- Make sure to clean both sides of the blinds to ensure a thorough dust removal.
Spot Cleaning Stains
Accidents happen, and blinds can sometimes develop stains. Here are some steps to tackle those stubborn spots:
- Start by identifying the type of stain on your blinds, as different stains require different cleaning methods.
- For water-based stains, such as food spills or fingerprints, use a mild solution of warm water and gentle dish soap. Dampen a clean cloth with the solution and gently blot the stained area, taking care not to scrub too harshly.
- For oil-based stains, like grease or ink, try using a mild solvent or stain remover specifically designed for blinds. Apply the solution to a clean cloth and carefully dab the stain until it fades away.
- Remember to always test any cleaning solution or solvent on a small, inconspicuous area of the blinds first to avoid any potential damage.
- After spot cleaning, wipe away any excess moisture with a dry cloth and let the blinds air dry completely before operating them.
Preventing Future Issues
Prevention is key when it comes to maintaining the longevity of your blinds. By following these preventive measures, you can avoid potential issues down the road:
- Avoid excessive force or pulling on the blinds’ cords or strings, as this can cause them to become tangled or break.
- Regularly inspect and tighten the hardware of your blinds to ensure they are securely fastened.
- Keep blinds away from areas with high humidity, like bathrooms and kitchens, to prevent moisture damage.
- Consider using blinds with a dust-repellent or stain-resistant coating for easier maintenance.
Conclusion
Overall, fixing blind string is a simple task that can be done in a few easy steps. By following the guidelines mentioned in this blog post, you can ensure that your blinds function properly and continue to serve their purpose effectively.
Remember to be patient and take your time while performing the repairs. With a little effort, you can enjoy fully functional blinds without any hassle.