How to Quickly Repair Cracked Leather Armrests Fast
Match the crack type and wear level first: use leather filler for shallow surface cracks, a patch or panel repair for open splits, and replace the armrest cover if the foam is exposed or the leather is brittle.
Pick the wrong fix and the repair lifts, feels gritty, or fails early. I use a quick 5-minute check to sort car and furniture armrests before I buy anything.
What you’ll need

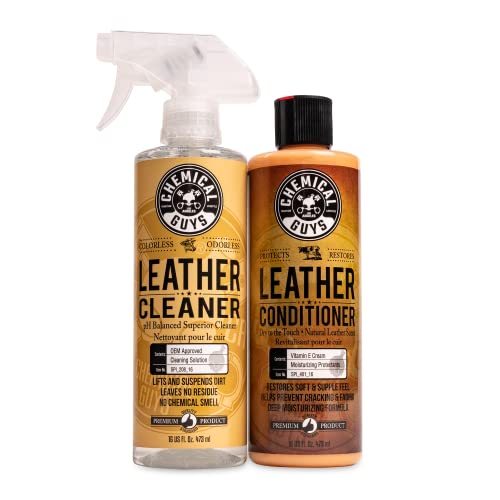

- Leather cleaner
- Microfiber cloths
- Leather conditioner for shallow dryness
- Leather filler or repair compound
- Fine-grit sandpaper
- Leather dye or colorant matched to the armrest
- Leather sealant
- Applicators or a small spatula
- Gloves
- Masking tape for car armrests
- Rubbing alcohol of 70% or more for final wipe-down if the cleaner leaves residue
📊 Coconix says the repair kit price shown is $19.95. Source: How to fix a cracked faux leather chair armrest?.
What to know before you start
Quick repairs work best when the damage is cosmetic and the armrest still feels firm underneath. Cracks in dry leather often respond to cleaning, conditioning, filler, color, and sealant. Open splits, failed seams, shedding faux leather, or soft substrate usually need a reinforced repair or replacement.
Separate genuine leather from faux leather early. Faux leather often sheds at the surface, and Coconix says the repair method applies while the supporting substrate can hold compound. If the backing is collapsing, no filler will stay put.
Which crack type do you have?
Use the surface look and the feel under light pressure to sort the damage. Coconix notes that cracked faux leather armrests can be repaired by removing only loose flakes, while wikiHow points out that cracks often appear when leather dries out or gets too much sun. The fix changes fast once the crack becomes a split.
Crack-diagnosis table
| Damage type | What it looks like | Best repair method | Tool list | Stop-repair threshold |
|---|---|---|---|---|
| Shallow dryness | Fine surface crazing, no opening at the crack line | Clean, then condition | Leather cleaner, microfiber cloth, leather conditioner | Stop if the line opens when flexed |
| Clustered cracks | Several tight cracks in one worn spot | Clean, condition if still closed, then thin filler if the surface is breaking down | Cleaner, conditioner, filler, applicator | Stop if the substrate feels soft or dusty |
| Open split | A visible gap or torn edge | Reinforced repair or patch; filler alone is not enough | Patch material, adhesive, backing support, clamp or tape | Stop if the split runs into structure or foam |
| Shedding substrate | Top layer flakes away or crumbles | Replacement is usually better | Cleaner, tape, replacement cover | Stop if the support will not hold compound |
| Failed seam | Stitching opens or the seam edge separates | Restitch, reinforce, or replace | Needle and thread, adhesive, clamp, replacement part | Stop if the seam load has shifted into torn structure |
How do I repair a cracked leather armrest without replacing it?
Clean the surface first, condition only if the crack is shallow, fill deeper lines in thin coats, smooth the repair after the filler has dried, then recolor and seal it. That path works when the leather is still bonded to a firm support layer and the damage has not become a split or seam failure.
- Wipe the armrest with leather cleaner and a microfiber cloth.
- Test the cleaner in a hidden spot first so it does not darken or streak the finish.
- Mask nearby controls, switches, vents, and trim on car armrests.
- Apply leather conditioner only if the crack is dry and still closed.
- Spread filler in thin layers for deeper cracks, then let each coat dry fully.
- Sand cured filler with fine-grit paper.
- Apply matching dye or colorant in light coats.
- Finish with leather sealant after the color layer is fully dry.
How do I fix cracked leather on a car armrest?
Car armrests need the same repair sequence as furniture armrests, but the risk is higher because the work area sits near controls, airbags, vents, and grip points. Mask the area first, keep liquid products away from buttons and openings, and choose a finish that should not feel too slick under the hand.
If the armrest covers a storage lid or folds around hardware, check movement before repair. A hard repair edge can catch skin or clothing if the part flexes often.
What is the best filler for cracked leather armrests?
Use a leather filler or repair compound made for flexible surface damage, not a hard putty. wikiHow recommends a leather filler cream for deep cracks, and Coconix says to build the repair in thin layers with color-matched compound. That keeps the patch from cracking as the armrest bends.
Pick filler when the surface is still intact but the crack is too deep for conditioner alone. Skip filler on open splits unless the crack has been backed and reinforced first.
When should I condition versus fill cracked leather?
Condition when the leather is dry, dull, and cracked only at the surface. Fill when the crack has a gap, a depressed edge, or a worn valley that will catch a fingernail. Condition rehydrates; filler rebuilds material. They do different jobs, and one will not replace the other.
wikiHow recommends conditioning shallow cracks with a leather conditioner. That step belongs after cleaning, not before, and it should not be used to close torn material.
How do I know if an armrest crack is too deep to repair?
If the crack opens into a split, the seam has failed, or the substrate feels soft, dusty, or hollow, the repair is usually beyond a simple filler fix. The armrest must still hold compound. If it cannot, the patch will sink, peel, or crack again.
Use the fingertip test. Press beside the crack, then flex the area gently. If the edge lifts or the backing sheds, stop and move to replacement or a reinforced patch.
How long does a leather armrest repair take to dry?
Drying time depends on the product and the thickness of each coat. Coconix says the repair needs a 6-hour drying period, and that is a useful minimum reference for small armrest work. Do not sand or use the armrest until the filler and finish feel fully dry.
Coconix estimates 40 minutes of prep and application time, with beginner to intermediate difficulty. That still leaves cure time separate from work time, so plan for the armrest to sit longer than the hands-on portion.
How do I match the color and texture after repairing a leather armrest?
Match the existing armrest color first, then match the finish level. Apply leather dye or colorant in light coats, blending outward from the repair. For texture, keep the surface smooth on low-grain leather and stop short of over-sanding a grained finish so you do not flatten it.
If the original surface has a closed, glossy look, seal lightly. If it is matte and worn, heavy topcoat will stand out. Small repairs blend better when the surrounding area is cleaned and dulled evenly before coloring.
How do I repair cracked leather armrest in car?
For a car armrest, start by masking nearby trim, then clean, condition or fill based on crack depth, and keep products away from switches and vent openings. Refit the armrest only after the finish is fully dry and the surface no longer feels tacky under firm pressure.
Use the car for support only after the repair has cured. If the armrest doubles as a lid or elbow rest, a soft finish can mark quickly during the first day back in service.
How do I repair leather armrest?
A typical repair sequence is clean, assess the damage, condition or fill, smooth, recolor, and seal. That works for small cosmetic damage when the leather still has structure beneath it. If the backing fails the pressure test, switch from repair mode to replacement mode before buying more materials.
- Clean the armrest.
- Identify leather or faux leather.
- Check whether the crack is shallow, split, or shedding.
- Choose conditioner, filler, patch, or replacement.
- Let each coat dry fully before the next step.
- Seal the finished surface.
Common mistakes
Using conditioner on an open crack only makes the area softer and can delay the real fix. Sanding before filler cures leaves ridges and smears. Color-matching too late creates a halo around the repair. Putting the armrest back into use before full dry time ruins the finish fast.
Another common miss is treating faux leather like genuine leather. If the top layer is shedding or the substrate is failing, filler has little to bite into. In that case, replacement beats repeated patching.
Frequently asked questions
How do I repair a cracked leather armrest without replacing it?
Clean it first, then use conditioner for shallow dryness or filler for closed, deeper cracking. After the repair dries, sand lightly, recolor with matched dye, and seal it. If the leather is splitting open or the backing is failing, a no-replacement repair will not last.
What is the best filler for cracked leather armrests?
A flexible leather filler or repair compound is the right choice for deeper surface cracks. It should go on in thin coats and dry fully before sanding. Hard fillers crack when the armrest bends, especially on cars where the armrest gets used constantly.
When should I condition versus fill cracked leather?
Condition when the leather is dry and the cracks stay closed under light flexing. Fill when the crack has depth, a valley, or a visible edge. Conditioner helps surface dryness; filler rebuilds damaged material. They are not interchangeable.
How do I know if an armrest crack is too deep to repair?
If the crack has become a split, the seam has failed, or the support layer crumbles under pressure, stop. Those signs mean the repair will not bond well. At that point, a patch, reinforcement, or full replacement is the safer route.
How long does a leather armrest repair take to dry?
Plan on product-specific drying, not a guess. Coconix gives a 6-hour drying period for its repair workflow, and the surface should be fully dry before use. Thin coats dry faster than thick ones, but rushing sanding or recoloring usually ruins the finish.
How do I match the color and texture after repairing a leather armrest?
Match the dye or colorant to the armrest’s current color, not the original color in the catalog. Apply light coats, then blend the sheen with a sealant that matches the surrounding finish. Smooth leather should stay smooth; grained leather should not be sanded flat.
Sponsored / affiliate links. As an Amazon Associate I earn from qualifying purchases. I may earn additional commission from eligible campaigns.