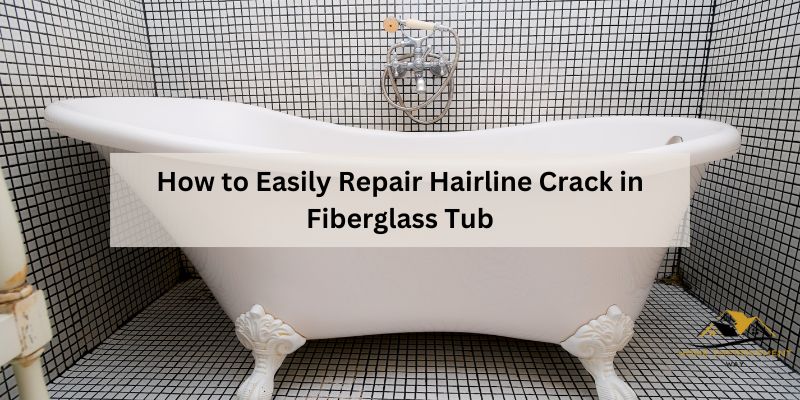
To fix a hairline crack in a fiberglass tub, begin by sanding the cracked area, cleaning it thoroughly, and applying a waterproof epoxy or fiberglass repair kit.
Preparing For The Repair
Before you embark on fixing a hairline crack in your fiberglass tub, it’s essential to properly prepare for the repair. This will ensure that the fix is successful and long-lasting. In this section, we will guide you through the necessary steps to take before diving into the repair process.
Cleaning The Surface
Start by thoroughly cleaning the surface of the fiberglass tub. Use a mild soap or cleaner and a soft cloth or sponge to remove any dirt, grime, or residue. Make sure to rinse the tub well to remove any cleaning product residue.
Gathering The Necessary Tools
Before you begin the repair, gather all the tools you’ll need. This will save you time and ensure that you have everything on hand. The following are the essential tools you’ll need for fixing a hairline crack in a fiberglass tub:
- Fiberglass repair kit
- Safety glasses
- Gloves
- Sanding sponge or sandpaper
- Fiberglass cloth or mat
- Utility knife
- Acetone or rubbing alcohol
- Mixing container
- Stirring stick or paddle
- Paintbrush
- Plastic wrap
Protecting Surrounding Areas
When working on the repair, it’s crucial to protect the surrounding areas to prevent any accidental damage or mess. Cover the edges of the tub, as well as any fixtures or accessories, with plastic wrap or painter’s tape. This will shield them from any repair materials or accidental spills.
By following these steps and adequately preparing for the repair, you’ll set yourself up for a successful fiberglass tub crack fix. Once you’ve completed these preparations, you can move on to the actual repair process, which we will cover in the next section.

Repairing The Crack
Learn how to effectively repair a hairline crack in a fiberglass tub with these easy steps. Fixing the crack will restore the tub’s functionality and appearance, saving you money and the hassle of replacing the entire tub.
Applying The Fiberglass Filler
To begin the process of repairing a hairline crack in a fiberglass tub, you will need to apply a fiberglass filler. This filler is specifically designed to bond with the fibers of the fiberglass, creating a strong and durable repair.
To apply the filler, first, clean the cracked area of the tub using a mild detergent and water. Ensure that the surface is free from any dust, debris, or grease.
Next, mix the fiberglass filler according to the manufacturer’s instructions. Apply the filler to the crack using a putty knife or a plastic spreader. Ensure that the filler completely covers the crack and extends beyond it to provide a solid foundation for the repair.
Allow the filler to dry completely before moving on to the next step. This can take anywhere from a few hours to overnight, depending on the specific product you are using.
Sanding The Repaired Area
Once the filler has dried, it’s time to sand the repaired area. This step helps to smooth out any rough edges and ensures a seamless finish.
Start by using coarse-grit sandpaper to gently sand the repaired area. Be careful not to apply too much pressure, as this can damage the surrounding fiberglass. Sand in a circular motion until the surface is smooth and even.
After using the coarse-grit sandpaper, switch to a finer grit to further refine the surface. Continue sanding until the repaired area blends in seamlessly with the rest of the tub.
Applying A Gel Coat
After sanding the repaired area, it’s time to apply a gel coat to restore the color and finish of the fiberglass tub. A gel coat is a specialized type of paint that is specifically designed for use on fiberglass surfaces.
Before applying the gel coat, make sure the repaired area is clean and free from any dust or debris. Mix the gel coat according to the manufacturer’s instructions, ensuring that it is well blended.
Using a brush or a roller, apply the gel coat evenly to the repaired area. Make sure to feather the edges to create a seamless transition with the surrounding tub surface.
Allow the gel coat to dry completely before using the tub. This typically takes a few hours, but it’s best to consult the manufacturer’s instructions for specific drying times.
By following these steps and properly repairing the hairline crack in your fiberglass tub, you can ensure a seamless and long-lasting repair.
Finishing Touches
Finishing touches are crucial when it comes to repairing a hairline crack in a fiberglass tub. These final steps not only ensure a seamless repair but also help to restore the tub’s aesthetics and longevity. In this section, we will discuss three essential finishing touches: color matching the repaired area, polishing the tub, and sealing the repaired area.
Color Matching The Repaired Area
Color matching is an important step to ensure that the repaired area blends seamlessly with the rest of the tub. To achieve a perfect color match, follow these steps:
- Start by examining the tub’s color, noting any variations or fading.
- Purchase a fiberglass repair kit that includes a color-matching gel coat.
- Take a small amount of the color-matching gel coat and mix it with the catalyst provided in the repair kit until it forms a smooth paste.
- Apply the paste to the repaired area using a brush, making sure to feather the edges for a smooth transition.
- Allow the color-matching gel coat to dry completely before moving on to the next step.
Polishing The Tub
Polishing the tub is essential to achieve a glossy, like-new finish. Follow these steps to polish your fiberglass tub:
- Start by cleaning the entire tub with a mild cleaner to remove any surface dirt and grime.
- Using a soft cloth, apply a fiberglass polish or wax to the entire tub, focusing on the repaired area.
- With a circular motion, buff the polish into the tub’s surface until it shines.
- Repeat the process if necessary, ensuring the tub is thoroughly polished.
Sealing The Repaired Area
Sealing the repaired area is the final step in ensuring the longevity of the repair and preventing future cracking. Follow these steps to seal the repaired area:
- Allow the color-matching gel coat and polish to dry completely.
- Apply a layer of clear acrylic sealer to the repaired area using a brush, ensuring full coverage.
- Let the sealer dry according to the manufacturer’s instructions.
- Once the sealer is dry, gently sand the area to ensure a smooth finish.
- Finally, wipe away any dust or debris and enjoy your restored fiberglass tub.
Preventing Future Cracks
Looking for ways to fix a hairline crack in your fiberglass tub? Prevent future cracks by using a fiberglass repair kit, which includes a gel coat and a fiberglass cloth. Simply follow the instructions provided, and your tub will be good as new.
Proper Tub Maintenance
Regular tub maintenance is crucial for preventing future hairline cracks in your fiberglass tub. Here are a few tips to keep your tub in top-notch condition:
- Keep the tub clean and dry. Moisture can seep into cracks and further damage the fiberglass. Wipe down the tub after each use to remove any excess water.
- Apply a fiberglass-specific wax or polish to the surface of the tub. This protective layer will add an extra barrier and prevent cracks from forming due to daily wear and tear.
- Inspect the tub regularly for any signs of damage or developing cracks. Catching them early allows you to address the issue promptly before it worsens.
Avoiding Impact Or Heavy Objects
Avoiding impact or heavy objects in and around your fiberglass tub is essential to prevent hairline cracks. Even a minor impact can cause significant damage. Here’s what you can do:
- Avoid placing heavy objects directly on the tub surface. Instead, use a non-slip mat or a dedicated shower caddy to hold your toiletries and bathing essentials.
- Be cautious while moving any heavy objects near the tub. Accidental bumps and knocks can weaken the fiberglass structure over time.
- Use caution when stepping in and out of the tub, especially if you have long nails or wear metal-soled shoes. These can accidentally scratch or damage the surface, leading to cracks.
Using Non-abrasive Cleaners
Using non-abrasive cleaners is crucial to maintain the integrity of your fiberglass tub surface. Avoid harsh chemicals or scrubbers that can cause micro-abrasions and weaken the fiberglass. Follow these guidelines:
- Choose mild cleaners specifically designed for fiberglass surfaces. Acidic or abrasive cleaners can cause irreparable damage.
- Apply the cleaner using a soft cloth or sponge and gently scrub the surface in circular motions.
- Rinse the tub thoroughly with warm water to remove any residue. Leaving cleaner residue on the tub may lead to discoloration or further damage over time.
By following these simple and practical tips for proper tub maintenance, avoiding impact or heavy objects, and using non-abrasive cleaners, you can significantly reduce the risk of hairline cracks in your fiberglass tub. Remember, prevention is always better than having to fix a crack later on. So, take the necessary steps to protect and preserve your tub for years to come.

When To Call A Professional
If you notice a hairline crack in your fiberglass tub, you may be tempted to fix it yourself. While smaller cracks can be repaired with DIY methods, there are times when calling a professional is the best course of action. Here are a few situations in which it is advisable to seek the expertise of a professional.
Complex Cracks
In some cases, hairline cracks can be more complicated than they appear. There may be underlying structural issues or damage that is not immediately visible. Attempting to fix complex cracks without the necessary knowledge and experience can lead to further damage or ineffective repairs. It is better to let a professional assess the situation and perform any necessary repairs.
Extensive Damage
If the crack in your fiberglass tub is large or extends beyond the surface, it may require more comprehensive repairs. In such cases, a professional will have the skills and tools to handle the job properly. They can evaluate the extent of the damage and implement the most appropriate repair techniques to ensure a long-lasting solution.
Lack Of Diy Experience
While DIY tutorials and videos may make it seem easy, repairing a hairline crack in a fiberglass tub requires a certain level of expertise. If you don’t have prior experience or knowledge of fiberglass repair techniques, it’s best to leave it to the professionals. They have the necessary training and understanding of the materials and processes involved, minimizing the risk of further damage or unsuccessful repairs.
Conclusion
Fixing a hairline crack in a fiberglass tub is a relatively simple process that can save you from costly replacements. By following the steps mentioned in this blog post, you can effectively repair the crack and restore the functionality and appearance of your tub.
Remember to clean the area properly, apply the patching material carefully, and allow sufficient drying time for a durable fix. With these tips, you can easily tackle this DIY project and enjoy a leak-free and beautiful fiberglass tub for years to come.


