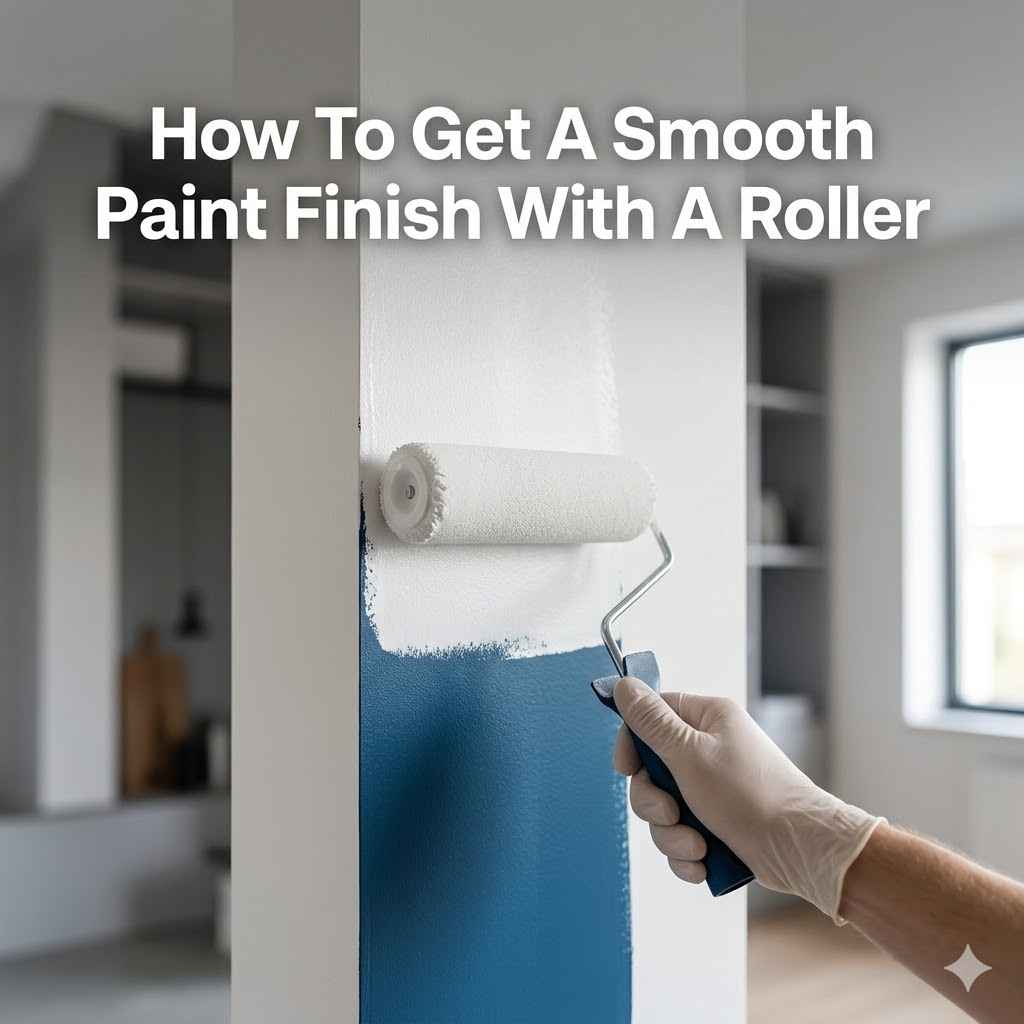
How To Get A Smooth Paint Finish With A Roller
Getting a smooth paint finish with a roller can seem tricky, especially when you’re new to painting. You want that nice, even look, but sometimes you end up with drips or streaks. It’s a common challenge, but don’t worry!
This guide breaks down exactly How to Get a Smooth Paint Finish with a Roller. We’ll walk you through it step-by-step so you can achieve professional-looking results without any fuss.
Choosing the Right Roller Cover
Selecting the correct roller cover is the very first step in achieving a smooth paint finish. The type of cover you choose depends on the surface you’re painting and the kind of paint you’re using. Using the wrong cover can lead to an uneven texture, drips, or even damage to the paint. A good roller cover will hold paint well and apply it evenly without shedding fibers.
Understanding Nap Length
The “nap” of a roller cover refers to the thickness of the fuzzy material on the roller. Nap length is crucial for surface texture and paint absorption.
Short Nap Rollers
Short nap rollers, typically 1/4 to 3/8 inch, are best for smooth surfaces like drywall, plaster, or metal. They hold less paint but apply it in a thin, even layer, which helps prevent drips and runs. These are great for interior walls and doors when you want a very smooth finish.
Medium Nap Rollers
With a nap of 1/2 to 3/4 inch, medium nap rollers are versatile. They work well on slightly textured surfaces like popcorn ceilings or rougher drywall. They hold more paint than short nap rollers, offering good coverage. These are a good all-around choice for many common painting tasks.
Long Nap Rollers
Long nap rollers, usually 1 inch or longer, are designed for heavily textured surfaces. Think brick, stucco, or rough concrete. The longer fibers can get into all the nooks and crannies, ensuring full coverage. However, they hold a lot of paint and can be more prone to drips on smooth surfaces.
Material Matters
The material of the roller cover also impacts the finish. Different materials are suited for different paint types.
Synthetic Fibers
Synthetic rollers, like those made from polyester or nylon, are excellent for latex and water-based paints. They are durable and easy to clean. They tend to release paint smoothly and evenly, reducing the chance of streaks.
Natural Fibers
Natural fiber rollers, such as lamb’s wool or mohair, are traditionally used for oil-based paints and enamels. They can provide a very smooth finish but require more careful cleaning and maintenance. Lamb’s wool, in particular, is known for its ability to apply a very fine finish.
Preparing Your Surface for Painting
A smooth paint finish starts with a smooth surface. No matter how good your roller is, if the wall or surface underneath is uneven, your paint job will reflect that. Proper preparation is key to avoiding bumps, holes, and imperfections showing through the paint. This step takes time, but it’s worth it for the final look.
Cleaning the Surface
Before you do anything else, ensure the surface is clean. Dust, dirt, grease, and cobwebs will all prevent paint from adhering properly and can cause a rough finish.
Dust and Debris Removal
Use a soft brush or a dry cloth to wipe down walls and trim. Pay attention to corners and areas near baseboards where dust can accumulate. This simple step removes loose particles that could get embedded in your paint.
Washing Walls
For most interior walls, a simple wash with mild detergent and water is sufficient. Use a sponge or a soft cloth. Rinse thoroughly with clean water and allow the walls to dry completely before proceeding. If there are greasy spots (like in a kitchen), a degreaser might be necessary.
Repairing Imperfections
Small holes, cracks, and dents can turn into noticeable flaws once painted. Fixing these will make a huge difference.
Filling Holes and Cracks
Use spackling paste or joint compound to fill small holes from nails and minor cracks. Apply with a putty knife, smoothing it flat. Let it dry completely according to the product instructions.
Sanding
Once the spackle or compound is dry, lightly sand the repaired areas until they are smooth and flush with the surrounding wall. Use fine-grit sandpaper (120-220 grit). Sanding creates a smooth transition so the repair blends in seamlessly.
Removing Old Paint Flakes
If there is any loose or peeling paint from previous coats, scrape it away with a putty knife. Sand the edges of the remaining paint to create a smooth transition. This prevents ridges from forming under the new paint.
The Painting Process for a Smooth Finish
The way you apply the paint is just as important as the tools and preparation. Even with the best supplies, a poor application technique can ruin your finish. Following these steps will help you achieve a professional, even coating.
Loading the Roller
Properly loading the roller ensures you apply an even amount of paint. Too little paint leads to thin spots, and too much leads to drips.
Using a Paint Tray
Pour paint into a paint tray, filling it to about half its capacity. This is safer than pouring directly from the can.
Rolling the Roller
Dip the roller into the paint, ensuring the roller cover is thoroughly coated. Then, roll it back and forth in the ribbed section of the paint tray. Do this several times until the roller is evenly saturated with paint. You should see a uniform coating of paint on the roller cover.
Applying the Paint
The technique you use for applying paint with the roller significantly impacts the smoothness of the finish. Consistency is key.
Start in a Corner
Begin painting in a corner of the wall or ceiling. This allows you to get a good feel for how the roller is applying the paint.
Use Overlapping Strokes
Apply the paint in a series of overlapping strokes. Start at the top and work your way down. Roll the paint on in a “W” or “M” pattern.
This pattern helps distribute the paint evenly across the surface. Then, go back over the “W” or “M” area with parallel, overlapping strokes. This “back-rolling” ensures an even coat and eliminates roller marks.
Maintain a Wet Edge
Always work from a “wet edge” to the next section. This means painting into the area you just painted while the paint is still wet. This prevents lap marks, which are visible lines where two sections of paint have dried separately.
Avoid Pressing Too Hard
Don’t press down too hard on the roller. Let the roller do the work. Excessive pressure can cause paint to build up unevenly and create drips or leave roller marks. A light, steady pressure is best.
Dealing with Edges and Cut-In Areas
Corners, edges, and areas around trim or windows require special attention to blend seamlessly with the rolled areas.
Using a Brush for Cut-In
Before you start rolling, use a good quality paintbrush to “cut in” the edges. This means painting a narrow band along ceilings, corners, baseboards, and around trim. Apply the paint neatly and ensure it is slightly feathered at the edge where the roller will meet it.
Blending Rolled Paint into Cut-In
When you roll up to a cut-in area, overlap the rolled paint slightly with the brushed paint. This helps to blend the two applications together. Use light pressure to avoid creating a ridge.
Tips for a Flawless Finish
Beyond the basic steps, a few extra tips can elevate your paint job from good to great. These are the little details that make a big difference.
Quality Tools Make a Difference
Investing in good quality paint rollers, brushes, and paint trays can significantly improve your results. Cheaper tools may shed fibers, leave streaks, or not apply paint evenly.
High-Quality Roller Covers
Look for roller covers with dense, evenly distributed fibers. They should feel substantial and hold paint well without becoming misshapen. A 3/8-inch nap roller is often a good choice for most interior walls.
Good Paint Brush
A quality angled paintbrush (2 to 2.5 inches) is essential for cutting in. It should have synthetic bristles for latex paints and hold its shape well.
Sturdy Paint Tray
A durable paint tray with a deep ribbed section allows for proper paint loading without spills.
Paint Type and Consistency
The paint you choose and its consistency play a role in how smoothly it applies.
Choosing the Right Paint
For interior walls, a good quality latex or acrylic-based paint is generally recommended. These paints are easier to work with, dry faster, and clean up with water.
Stirring Paint Thoroughly
Always stir paint thoroughly before and during use. This ensures pigments are evenly distributed, which leads to consistent color and finish.
Paint Consistency
If the paint seems too thick, you can add a small amount of water (for latex paints) or the appropriate thinner (for oil-based paints). Follow the paint manufacturer’s recommendations for thinning. Over-thinning can affect the paint’s coverage and durability.
Environmental Conditions
The temperature and humidity of the room where you are painting can impact how the paint dries and adheres.
Ideal Temperature and Humidity
The best conditions for painting are typically between 50-85°F (10-29°C) with moderate humidity. Avoid painting in extreme temperatures or very humid conditions, as this can cause paint to dry too quickly or too slowly.
Ventilation
Ensure good ventilation, but avoid direct drafts from fans or open windows that could cause the paint to dry too fast. Proper airflow helps the paint cure evenly.
Multiple Thin Coats vs. One Thick Coat
It is almost always better to apply multiple thin coats of paint rather than one thick coat.
Benefits of Thin Coats
Thin coats dry more evenly and are less prone to drips and runs. They also provide better adhesion and a more durable finish. Each coat fills in minor imperfections from the previous one.
Allowing Proper Drying Time
Always allow each coat of paint to dry completely according to the manufacturer’s instructions before applying the next. Rushing this process can lead to cracking, peeling, or an uneven finish. Drying times can vary significantly based on paint type and environmental conditions.
Achieving a Smooth Finish on Different Surfaces
While the basic principles apply to most surfaces, there are specific considerations for different materials to ensure a smooth finish.
Smooth Walls and Ceilings
For standard drywall or plaster walls and ceilings, the focus is on achieving a uniform sheen and eliminating roller marks.
Using a Roller Extension Pole
An extension pole allows you to reach higher areas and maintain consistent pressure without overexertion. It also helps keep your body out of the way, reducing the chance of accidental marks or drips.
Back-rolling Technique
As mentioned earlier, back-rolling is crucial. After applying paint in a W or M pattern, go over it with light, parallel strokes to even out the coverage. This is particularly effective on larger, flat surfaces.
Even Sheen
If you are painting over a previously painted surface with a different sheen, you may need to apply more coats to ensure the new sheen is uniform across the entire area. This is especially true when going from a matte to a satin or semi-gloss finish.
Wood Trim and Doors
Painting wood requires a slightly different approach, as wood has grain and can absorb paint differently.
Sanding Between Coats
For trim and doors, sanding between coats of paint is essential. After the first coat dries, lightly sand any rough spots or imperfections with fine-grit sandpaper. This smooths the surface and ensures good adhesion for the next coat.
Using a High-Quality Brush
While rollers can be used for larger door panels, a high-quality brush is often best for the detailed work on trim. It allows for more control and a smoother application on edges and profiles.
Spraying for a Factory Finish
For the absolute smoothest finish on trim and doors, professional painters often use sprayers. However, with careful brushwork and sanding, a beautiful smooth finish can be achieved by hand.
Metal Surfaces
Metal surfaces require specific primers and paints to prevent rust and ensure adhesion.
Rust Prevention
Ensure you are using a rust-inhibiting primer on any metal surfaces that may be prone to rust. This is vital for long-term durability and a smooth finish that won’t bubble or peel.
Adhesion Promoters
Some metal surfaces may benefit from an adhesion promoter before priming. This ensures the primer and subsequent paint coats bond well to the metal.
Smooth Application
Apply paint in thin, even coats. Metal can sometimes show roller marks more readily than porous surfaces. Work methodically and use techniques like back-rolling to ensure a smooth, uniform appearance.
Troubleshooting Common Issues
Even with the best preparation and technique, you might encounter problems. Knowing how to fix them is part of the process.
Roller Marks and Streaks
These are often caused by uneven pressure, an overloaded roller, or painting over a dry edge.
Fixing Roller Marks
If you notice roller marks immediately after painting, you can often smooth them out by lightly rolling over the area again with a damp (not wet) roller. If the paint has already started to dry, you may need to wait until it is fully dry and then lightly sand the marks down before applying another thin coat.
Preventing Streaks
Ensure your roller is evenly loaded with paint and that you are overlapping your strokes correctly. Always work towards a wet edge.
Drips and Runs
These happen when there’s too much paint on the roller or the surface.
Fixing Drips and Runs
While the paint is still wet, use your brush to gently smooth out drips. For dried drips, let them harden completely, then scrape them off carefully with a putty knife. Sand the area smooth and apply another thin coat of paint.
Preventing Drips
Don’t overload your roller. Roll off excess paint in the tray’s ribbed section. Avoid letting paint pool at the edges of your roller.
Uneven Sheen
This can occur if you apply paint too thinly in some areas or if you are painting over different sheen levels without adequate coverage.
Fixing Uneven Sheen
Applying another thin, even coat of paint can often resolve uneven sheen issues. Ensure your roller is loaded properly and you are using the back-rolling technique.
Using the Same Paint Type
When touching up, always use the exact same type and sheen of paint. Even slight variations can be noticeable.
Conclusion
Achieving a smooth paint finish with a roller is all about preparation, the right tools, and a consistent application technique. By carefully cleaning and repairing your surfaces, choosing the correct roller cover, and applying paint in thin, even coats with overlapping strokes, you can achieve professional results. Remember to work methodically, maintain a wet edge, and don’t be afraid to sand lightly between coats for trim and doors.
Frequently Asked Questions
Question: What is the best roller nap length for painting drywall?
Answer: For smooth drywall, a short nap roller cover, typically 1/4 to 3/8 inch, is best. It applies paint evenly in thin layers, which helps prevent drips and creates a smooth finish.
Question: How do I avoid lap marks when rolling?
Answer: Lap marks occur when paint dries between roller passes. To avoid them, always work from a wet edge, meaning you overlap your fresh strokes into the area you just painted while it’s still wet. This creates a seamless blend.
Question: Can I use a roller for painting trim?
Answer: While a brush is often preferred for intricate trim work, you can use a small foam roller for flat areas on trim or doors. Ensure you use a high-quality paint and apply thin, even coats.
Question: How many coats of paint are usually needed for a smooth finish?
Answer: For a truly smooth and opaque finish, two thin coats of paint are generally recommended. This allows for better coverage and a more uniform appearance than one thick coat.
Question: What should I do if my roller leaves fuzzy bits on the wall?
Answer: This usually means the roller cover is shedding. If it’s a new roller, try rinsing it first. If it continues, the quality might be low.
Gently pick off any fuzz while the paint is wet, or let it dry and lightly sand the area smooth before repainting.
Summary
Mastering how to get a smooth paint finish with a roller involves careful preparation, selecting appropriate tools, and applying paint with a consistent technique. Clean and repair surfaces, use the right roller nap, and employ overlapping strokes with a wet edge. Thin coats and proper drying are key to preventing drips and achieving a flawless look. You can achieve beautiful results with a little patience and practice.