How to Glue Metal to Metal: The Ultimate Guide for a Strong and Lasting Bond
To glue metal to metal, use a strong adhesive specifically designed for metal surfaces.
Preparing The Metal Surfaces
Before attempting to glue metal to metal, it is crucial to properly prepare the metal surfaces to ensure a strong and durable bond. This process involves two essential steps: cleaning the metal surfaces and sanding the metal surfaces.
Cleaning The Metal Surfaces
To achieve a successful bond between two metal surfaces, it is important to remove any dirt, dust, grease, or rust that could hinder the adhesive’s effectiveness. Follow these simple steps to clean the metal surfaces:
- Start by wiping down the metal surfaces with a clean, lint-free cloth to remove loose debris.
- If there are any grease or oil stains, use a mild detergent mixed with warm water to clean the surfaces thoroughly.
- Rinse the metal surfaces with clean water to remove any detergent residue.
- Dry the surfaces completely with a clean towel or allow them to air dry.
Sanding The Metal Surfaces
Sanding the metal surfaces helps create a roughened texture, which enhances the adhesive’s ability to adhere to the metal. Follow these steps to effectively sand the metal surfaces:
- Start by selecting an appropriate sandpaper grit. Coarse grits (around 80 to 120) are ideal for removing any existing coatings or roughing the surface, while finer grits (around 220 to 400) are suitable for smoothing and preparing the surface for bonding.
- Wrap the sandpaper securely around a sanding block or use a sanding attachment for a power tool to ensure even and consistent sanding.
- Apply gentle pressure and move the sandpaper in a circular or back-and-forth motion over the metal surfaces.
- Continue sanding until the surfaces feel slightly rough to the touch.
- Once sanding is complete, wipe away any dust or debris with a clean cloth or air blower.
By following these steps to clean and sand the metal surfaces, you’ll create an optimal foundation for gluing metal to metal. This preparation ensures maximum adhesive strength, resulting in a reliable bond that stands the test of time.
Choosing The Right Adhesive
When it comes to bonding metal to metal, selecting the right adhesive is crucial for ensuring a strong and durable connection. With various options available in the market, it can be overwhelming to determine the best adhesive for your specific project. This section will guide you through the different types of adhesives suitable for metal-to-metal bonding and provide essential considerations to help you make an informed choice.
Types Of Adhesives For Metal To Metal Bonding
There are several types of adhesives that are commonly used for bonding metal to metal. Each adhesive has its own unique properties and suitability for different applications. Here are the most commonly employed adhesive options:
| Adhesive Type | Features |
|---|---|
| Epoxy Adhesive | A two-component adhesive that provides high strength and excellent resistance to temperature, chemicals, and moisture. |
| Clear Metal Bonding Adhesive | A transparent adhesive specifically designed for metal bonding, creating an invisible bond line. |
| Cyanoacrylate Adhesive | Also known as super glue, cyanoacrylate adhesive offers fast curing and excellent bond strength. |
| Structural Adhesive | An adhesive primarily used for heavy-duty applications, providing exceptional strength and resistance to impact. |
| Multi-purpose Adhesive | A versatile adhesive suitable for various surfaces, including metal, with medium bond strength and relatively quick drying time. |
Considerations For Selecting The Adhesive
When selecting the appropriate adhesive for your metal-to-metal bonding project, certain considerations should be taken into account. Here are a few crucial factors to consider:
- Bond Strength: Evaluate the required level of strength for your specific application. Consider factors such as weight and stress that will be placed on the bond.
- Surface Preparation: Ensure that the metal surfaces are clean, dry, and free from any contaminants like grease or rust. Proper surface preparation enhances the bonding performance.
- Application Method: Different adhesives may have specific application requirements, such as mixing ratios, drying time, or curing process. Follow the instructions provided by the manufacturer for optimal results.
- Environment: Consider the temperature and humidity conditions that the bonded metal will be exposed to, as certain adhesives may have better resistance to extreme temperatures or chemicals.
- Appearance: If aesthetics are important, choose an adhesive that dries clear or matches the color of the metal to maintain a clean and professional finish.
By taking into account these considerations and understanding the different types of adhesives available, you can confidently select the most suitable adhesive for your metal-to-metal bonding needs. Remember to always follow the manufacturer’s instructions for proper usage and ensure a successful bond that will stand the test of time.
Applying The Adhesive
To glue metal to metal, start by applying the adhesive evenly on both surfaces. Press them firmly together and let the adhesive dry completely for a strong bond.
Applying The Adhesive To Both Surfaces
Before applying the adhesive to your metal surfaces, it is crucial to ensure that both surfaces are clean and free of any dust, dirt, or grease. Use a clean cloth or paper towel to wipe the surfaces and remove any contaminants that could potentially affect the bond.
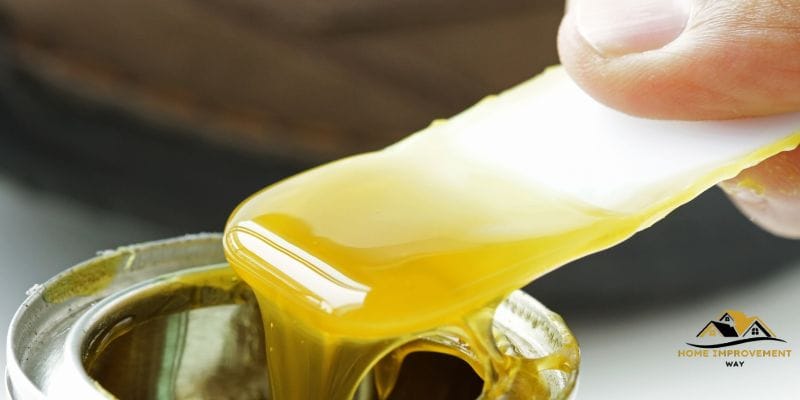
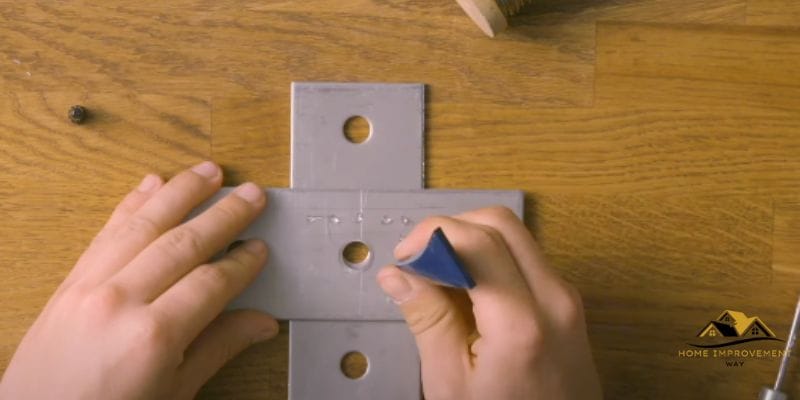
Next, apply the adhesive to both surfaces. It’s best to use a thin layer of adhesive to ensure proper bonding without any excess. You can use a brush or a small spatula to apply the adhesive evenly, making sure to cover the entire surface area.
Remember, the key here is to create a strong and durable bond between the two metal surfaces, so take your time and ensure that every spot is adequately covered with adhesive.
Using The Correct Amount Of Adhesive
Using the correct amount of adhesive is crucial when gluing metal to metal. Too little adhesive may result in a weak bond, while excessive adhesive can cause messy overflow or a longer curing time.
To determine the ideal amount of adhesive, refer to the manufacturer’s instructions or follow these general guidelines:
- Identify the recommended coverage area specified by the adhesive manufacturer.
- Measure the surface area of both metal pieces that need to be bonded together.
- Calculate the amount of adhesive required by multiplying the surface area by the recommended coverage thickness.
- Apply the calculated amount of adhesive, ensuring that it is spread evenly across the surfaces.
By using the correct amount of adhesive, you can ensure a strong bond while minimizing any potential mess or wastage.
Clamping And Curing
When it comes to gluing metal to metal, it’s important to have a strong and lasting bond. Clamping and curing are two crucial steps in the process that can make all the difference. By using clamps for proper bonding and allowing sufficient curing time, you can ensure a successful and durable metal-to-metal bond.
Using Clamps For Proper Bonding
Clamps are essential tools for achieving a secure bond between metal surfaces. They help to maintain constant pressure during the curing process, ensuring that the adhesive spreads evenly and creates a strong connection. Here are a few tips for using clamps effectively:
- Choose the right type of clamp for your project. There are various types available, such as C-clamps, bar clamps, and Vise-Grip clamps. Consider the size and shape of the metal pieces being bonded, and select the appropriate clamp that can provide enough pressure.
- Position the clamps strategically. Place the clamps along the edges of the metal pieces to distribute the pressure evenly. Avoid placing them too close to the bonding area, as this may disrupt the adhesive or create uneven pressure.
- Tighten the clamps gradually. Start by applying light pressure and gradually increase it until the metal pieces are firmly held together. Be careful not to overtighten, as this can deform the metal or squeeze out excess adhesive.
- Check for adhesive squeez-out. After clamping, inspect the bonding area for any adhesive that may have squeezed out. Wipe away any excess adhesive using a clean cloth or the appropriate solvent, depending on the adhesive’s instructions.
Allowing Sufficient Curing Time
The curing time is the duration required for the adhesive to fully bond the metal surfaces together. It’s crucial to follow the manufacturer’s instructions regarding the recommended curing time. Here’s why allowing sufficient curing time is important:
- Achieve maximum bond strength: Allowing the adhesive to cure fully ensures that it reaches its maximum bond strength. Rushing the curing process may result in a weaker bond that can easily fail under stress.
- Promote durability: Proper curing time allows the adhesive to form a strong and durable bond. This is especially important for projects that involve heavy loads or frequent movement, as a well-cured bond can withstand such stress.
- Prevent premature bond failure: If you disturb or stress the bond before it’s fully cured, it may lead to premature failure. Avoid handling, moving, or exposing the bonded metals to extreme conditions until the recommended curing time has elapsed.
Remember, the curing time can vary depending on the type of adhesive used, so it’s essential to refer to the manufacturer’s instructions for accurate information. Patience during the curing process will ultimately lead to a stronger and longer-lasting metal-to-metal bond.
Finishing And Testing The Bond
Once you have glued the metal pieces together, it is important to take some additional steps to ensure a strong and durable bond. This includes removing any excess adhesive and testing the strength of the bond.
Removing Excess Adhesive
Before testing the bond, you need to remove any excess adhesive that may have seeped out during the gluing process. Here’s how you can do it:
- Wait for the adhesive to dry completely.
- Use a scraper or a plastic putty knife to gently scrape off the excess adhesive.
- If the adhesive is still sticky, dampen a cloth with a solvent suitable for the particular adhesive you used. Gently wipe the excess adhesive until it comes off.
- Be careful not to scratch the metal surfaces while removing the adhesive.
- Once all the excess adhesive is removed, clean the metal surface with a mild soap and water solution. This will ensure a clean and smooth surface for proper bonding.
Testing The Strength Of The Bond
Before considering your metal-to-metal bond complete, it is essential to test its strength. Here are a few methods you can use:
- Visual inspection: Carefully examine the bonded area. Look for any gaps or signs of weakness. A strong bond should have no visible separation between the metal pieces.
- Manual stress test: Apply pressure or try to separate the bonded metal pieces using your hands. If the bond holds firmly without any movement or detachment, it indicates a strong and secure bond.
- Weight-bearing test: If possible, subject the bonded metal assembly to the same level of stress it will encounter in its intended use. Apply a gradual and controlled weight to test the bond’s ability to withstand the desired load.
- Impact resistance test: Gently tap the bonded area with a small hammer or a metal object. A strong bond should not crack or show signs of weakness upon impact.
By following these steps and conducting proper tests, you can ensure that your metal-to-metal bond is strong, reliable, and ready for use. Remember, a thorough bond finishing and testing process is crucial for the success and longevity of your project.
Conclusion
Finding the right adhesive and following proper preparation and application techniques are key to successfully gluing metal to metal. Remember to clean the surfaces thoroughly, choose the appropriate adhesive for the specific metals being bonded, and allow ample curing time.
By taking these steps, you can ensure a strong and durable bond. Happy bonding!