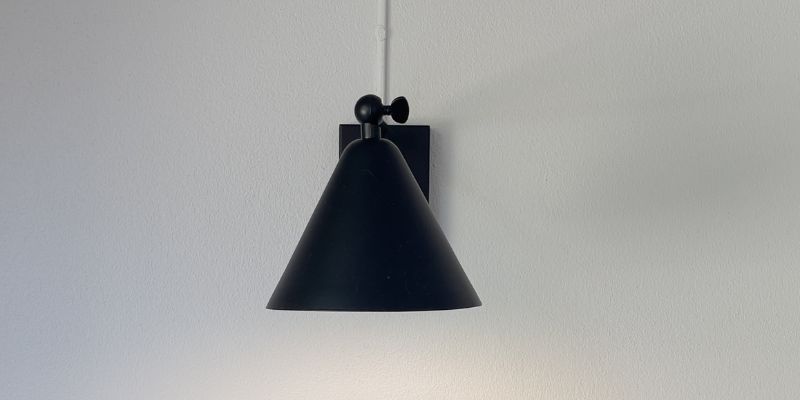
How to Hang a Pendant Light from Ceiling
Hey there! Picture us in your garage, sipping coffee, and brainstorming ways to spruce up the space for your next car project. You’ve got tools, a workbench, and a sweet ride, but the lighting? It’s a bit dim. That’s when I started thinking about how to hang a pendant light from the ceiling. I’ve tackled this project myself for my automotive blog’s workshop, and let me tell you, a stylish pendant light can make your garage or showroom pop.
It’s not just about looks—it’s about bright, focused light for working on cars. I’m excited to share what I’ve learned in this DIY journey. Let’s dive in and light up your space together!
Why Choose a Pendant Light for Your Automotive Space?
Pendant lights are awesome for garages or car showrooms. They hang from the ceiling, directing light exactly where you need it—like over a workbench or a display car. Unlike bulky fluorescents, pendants add style and focus. When I hung a sleek pendant in my garage, it made my workspace feel like a pro shop and lit up my car’s details perfectly.
They’re also versatile. You can pick industrial-style pendants for a rugged vibe or modern ones for a showroom feel. Plus, LEDs in pendants save energy and last forever. If you’re tired of dim or boring lighting, a pendant is a game-changer.
Understanding Pendant Light Basics
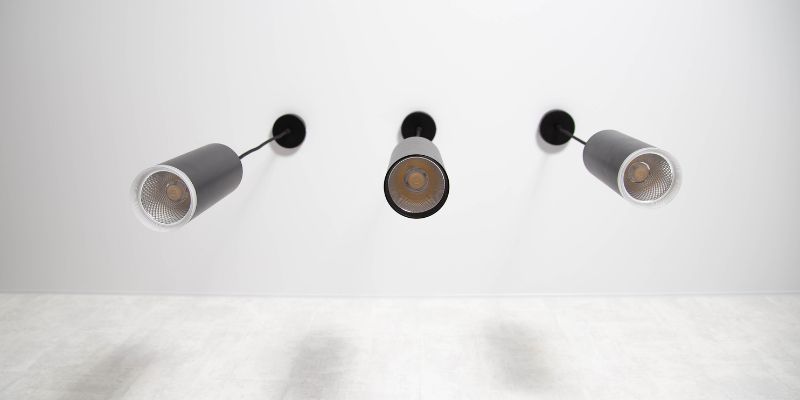
Before we start, let’s get what a pendant light is. It’s a single fixture that hangs from the ceiling, usually by a cord, chain, or rod. It has a bulb (often LED) and a shade to direct light. Some have one bulb; others have multiple for extra brightness.
Pendants come in all shapes—drum, dome, or exposed bulb styles. For automotive work, I like ones with adjustable height and bright, focused light. You’ll also need to know your ceiling type (drywall, concrete, or exposed beams) because it affects installation. My garage has drywall, which made things straightforward, but I’ll cover other ceilings too.
Tools and Materials You’ll Need
Hanging a pendant light is a fun DIY project, and you don’t need a ton of tools. Here’s what I used in my garage:
- Screwdriver (Phillips and flathead)
- Drill with bits
- Voltage tester
- Wire stripper
- Wire nuts
- Electrical tape
- Ladder or step stool
- Pendant light kit (with canopy, cord/chain, and fixture)
- Ceiling anchor or mounting bracket (if not included)
- Safety glasses and gloves
I bought a $50 LED pendant kit with a 1,000-lumen bulb—bright enough for detailing cars. Check that your kit includes a canopy (the part that covers the ceiling wiring) and matches your ceiling type. If your ceiling is concrete, you’ll need special anchors.
Safety First: Power Off and Prep
Safety is huge when working with electricity. Before you touch anything, turn off the power at your breaker box. Find the circuit for your garage or room and flip it off. Use a voltage tester to confirm the wires are dead. I always test twice because getting shocked is no fun.
Wear safety glasses and gloves to protect against dust or wire scraps. My garage’s old junction box had some grime, and gloves kept my hands clean. Clear your workspace and set up a sturdy ladder. I learned to double-check the ladder’s stability after a wobbly moment—yikes!
Finding the Right Spot for Your Pendant Light
Choosing where to hang your pendant is key. In my garage, I wanted it over my workbench for focused light. Think about where you need light most—maybe over a car lift or a display area. Measure the spot to ensure the pendant won’t hang too low or block your work.
For height, aim for 7-8 feet above the floor for general lighting or 30-36 inches above a workbench for task lighting. I hung mine 32 inches above my bench, and it’s perfect for seeing small parts. Mark the spot on the ceiling with a pencil. If you’re replacing an old fixture, you’re already set with a junction box.
Removing an Old Fixture (If Needed)
If there’s an old light where you’re installing the pendant, you’ll need to remove it. I had an old fluorescent fixture in my garage that had to go. Here’s how:
- Turn off the power (you already did this, right?).
- Unscrew the fixture from the ceiling.
- Disconnect the wires—black (hot), white (neutral), and green/bare (ground).
- Remove any mounting hardware.
My old fixture was a pain to unscrew, but a steady hand got it down. Keep the wires accessible in the junction box for your new pendant. If there’s no existing box, you’ll need to install one, which I’ll cover next.
Installing a Junction Box (For New Locations)
If you’re hanging a pendant in a new spot without a junction box, you’ll need to add one. This is where the wires connect safely. I did this in my garage to move my light. Here’s the process:
- Mark your spot and check for ceiling joists with a stud finder.
- Cut a hole for the junction box using a drywall saw (for drywall ceilings).
- Run electrical wiring from a nearby power source to the new box (you may need an electrician for this).
- Secure the box to a joist or use a ceiling fan-rated box for heavy pendants.
I called an electrician for the wiring part since my skills stop at basic connections. It cost $150 but ensured safety. If you’re not comfy with wiring, do the same.
Mounting the Pendant Light
Now, let’s hang that pendant! Most kits come with a canopy and mounting bracket. Here’s how I did it:
- Attach the mounting bracket to the junction box with screws.
- Feed the pendant’s cord or chain through the canopy.
- Connect the wires: black to black, white to white, ground to ground. Use wire nuts and wrap with electrical tape.
- Secure the canopy to the bracket with screws.
My kit had an adjustable cord, so I set the height before tightening everything. Double-check your connections—loose wires can cause flickering or outages.
Adjusting the Pendant Height and Angle
One thing I love about pendants is how adjustable they are. After installing mine, I tweaked the height to sit just right over my workbench. Most pendants let you shorten the cord or chain by coiling it in the canopy or cutting it (follow the kit’s instructions).
Some pendants also swivel to angle the light. I tilted mine slightly to hit my tool rack perfectly. Play with the height and angle until it feels right for your space. It’s like aiming a spotlight on your car’s best features.
Testing Your New Pendant Light
Time for the moment of truth! Turn the power back on at the breaker and flip the switch. If your pendant lights up, you’re golden. If not, check your wiring or ensure the bulb is screwed in tightly. My first try didn’t work because I missed a wire nut—easy fix once I spotted it.
Test the light at different times of day. I noticed my pendant was perfect at night but a bit bright during the day. Adding a dimmer (LED-compatible) gave me more control.
Why LED Pendants Are Great for Automotive Spaces
I’m a huge fan of LED pendants for garages. They’re bright—800-1,500 lumens is ideal for automotive work. They use less energy (my 15W LED matches a 75W incandescent) and last 25,000-50,000 hours. That’s years without changing a bulb.
LEDs also stay cool, which is great in a garage where heat builds up. The crisp light shows true colors, so you can spot a paint chip or a dirty engine part easily. My LED pendant makes my car’s red paint pop like it’s on a showroom floor.
Common Mistakes to Avoid
I’ve made a few goofs, so let me save you some trouble. Don’t skip the voltage tester—always confirm the power’s off. Don’t buy a pendant without checking its weight; heavy ones need a sturdy junction box. My first pendant was too heavy for my standard box, so I had to upgrade.
Don’t ignore the ceiling type. Concrete or plaster ceilings need special anchors. And don’t rush the wiring—double-check every connection. I had a loose ground wire once that caused flickering. Taking your time avoids headaches later.
Cost of Hanging a Pendant Light
Let’s talk budget. A good pendant light kit costs $30-$150, depending on style and brand. I got a sleek industrial LED pendant for $60. A junction box is $5-$20, and mounting hardware might add $10-$30. If you need new wiring or an electrician, expect to pay $100-$300 for labor.
My total was about $80 for the pendant and supplies, plus $150 for an electrician to run new wiring. Doing it yourself saves money, but safety comes first. It’s a solid investment for a brighter, better workspace.
Maintaining Your Pendant Light
Once your pendant’s up, it’s low-maintenance. Dust the shade monthly with a microfiber cloth to keep it bright. I wipe mine down while cleaning my tools—it takes two minutes. Check the wires yearly for wear, especially if the pendant’s adjustable.
If you use an LED bulb, you won’t need to replace it for years. If it dims or flickers, swap it out and check the connections. My pendant’s been going strong for two years with zero issues.
Troubleshooting Common Issues
If your pendant doesn’t work, don’t panic. First, check the bulb—make sure it’s tight and not burned out. Test the wiring with a voltage tester to ensure power’s reaching the fixture. Loose wire nuts are a common culprit; tighten them if needed.
If the light flickers, it might be an incompatible dimmer or a bad bulb. I had flickering with an old dimmer—switching to an LED-compatible one fixed it. If the pendant sags, check the mounting bracket; it might need tighter screws or a stronger box.
Enhancing Your Automotive Space with Pendants
Pendants aren’t just practical—they make your garage or showroom look awesome. In my workshop, the pendant over my workbench gives it a pro vibe, like something out of a car magazine. It highlights my car’s curves and makes late-night projects feel special.
For showrooms, pendants can spotlight display cars, drawing customers’ eyes. In a garage, they focus light on tasks, reducing eye strain. I love how my pendant makes detailing sessions easier—no more squinting at scratches.
Here’s a quick table to summarize the process:
| Step | Tools Needed | Tips |
|---|---|---|
| Turn Off Power | Voltage tester | Test twice for safety |
| Remove Old Fixture | Screwdriver | Keep wires accessible |
| Install Junction Box | Drill, drywall saw | Use a fan-rated box if heavy |
| Mount Pendant | Screwdriver, wire nuts | Match wires correctly |
| Adjust and Test | Ladder | Set height for your needs |
Conclusion
What a ride! We’ve gone from wondering how to hang a pendant light from the ceiling to mastering every step. From picking the perfect spot to wiring safely, you now have the know-how to transform your garage or showroom. A pendant light isn’t just about brightness—it’s about creating a space that feels professional and inspiring.
I hope you’re as pumped as I was when I flipped the switch and saw my garage glow. Whether you’re working on a classic car or showing off a new ride, a pendant light makes every moment shine. Grab your tools, pick a stylish pendant, and light up your automotive world. You’ve got this, and I can’t wait for you to see the difference!
FAQs
What tools do I need to hang a pendant light?
You’ll need a screwdriver, drill, voltage tester, wire stripper, wire nuts, electrical tape, a ladder, and safety gear. Most are basic household tools, and the pendant kit includes mounting hardware.
Can I hang a pendant light myself?
Yes, it’s a DIY-friendly project if you’re careful. Turn off the power, use a voltage tester, and follow the kit’s instructions. If you need new wiring, consider hiring an electrician for safety.
How do I choose the right pendant light for my garage?
Pick an LED pendant with 800-1,500 lumens for bright, focused light. Choose a style that matches your space—industrial for garages, modern for showrooms. Ensure it fits your ceiling type and junction box.
How much does it cost to hang a pendant light?
A pendant light kit costs $30-$150. A junction box and hardware add $15-$50. If you need an electrician for wiring, expect to pay $100-$300. Doing it yourself keeps costs low.
Why use an LED pendant light for automotive work?
LEDs are energy-efficient, long-lasting (25,000-50,000 hours), and produce bright, clear light. They stay cool and show true colors, making it easier to spot details like scratches or dirt on cars.