How to Install a Floating Shelf Without Drilling
Many people want to add style to their homes with floating shelves. But the thought of drilling holes in walls can be scary, especially for beginners. You might worry about making mistakes or not having the right tools.
Don’t worry, learning How to Install a Floating Shelf Without Drilling is totally doable. This guide will show you simple, step-by-step ways to get that stylish shelf up. We’ll cover easy methods that skip the drill.
Installing a floating shelf without making holes in your walls is a common desire for many homeowners and renters. This method offers flexibility, especially for those who can’t or don’t want to alter their walls permanently. It’s a great solution for renters who need to leave their space as they found it, or for anyone who simply prefers a less invasive approach.
The challenge for beginners often lies in believing that a secure installation is possible without traditional hardware like screws. This guide aims to demystify the process, proving that stylish decor is within reach without a drill. We will explore various adhesive and bracket solutions that provide a strong hold.
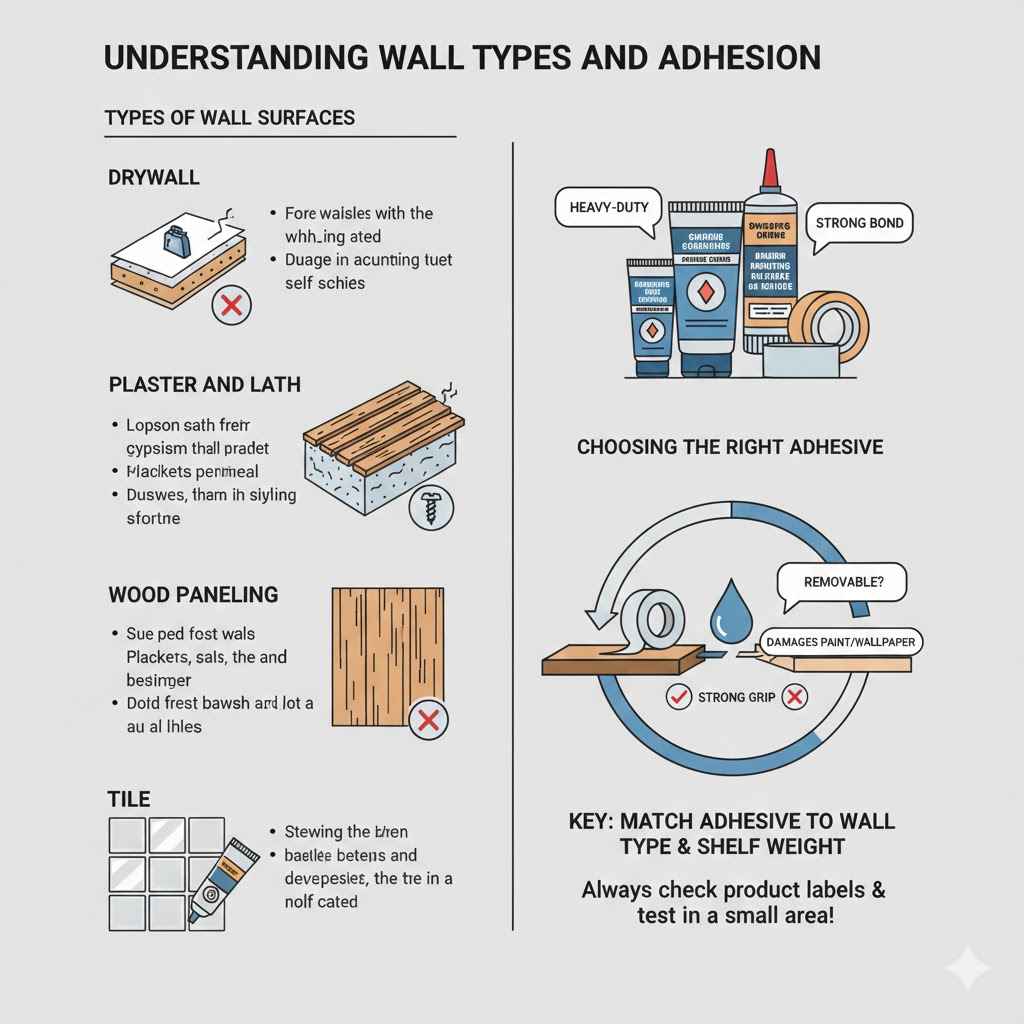
Understanding Wall Types and Adhesion
Before you can even think about attaching a shelf, it’s important to know what kind of wall you’re working with. Different wall materials have different strengths and weaknesses when it comes to holding weight. Most homes have drywall, which is a panel made of gypsum plaster pressed between two thick sheets of paper.
Drywall is common, but it’s not the strongest material. It can be easily damaged if too much weight is applied or if a strong adhesive is removed incorrectly.
Other walls might be plaster and lath, which is an older building material. Plaster walls can be more brittle than drywall, and they might have an uneven surface. Some lucky people might have solid wood walls, which are very strong but less common for interior walls.
Knowing your wall type helps you choose the best adhesive or mounting method. It also helps you understand how much weight your shelf can safely hold.
Choosing the right adhesive is key. Not all adhesives are created equal, and some are much stronger than others. For a floating shelf, you’ll want an adhesive that is designed for heavy-duty use and can bond well with your wall material.
Many are designed to be removable, but even then, care is needed to avoid damaging paint or wallpaper.
Types of Wall Surfaces
- Drywall: This is the most common wall type in modern homes. It’s made of gypsum and paper. While easy to work with, it can be damaged by heavy items or strong adhesives. It’s best for shelves that won’t hold a lot of weight.
- Plaster and Lath: Older homes often feature plaster walls. These are made by applying plaster over strips of wood called lath. Plaster can be prone to cracking, and uneven surfaces can make it hard for adhesives to get a good grip.
- Wood Paneling: If your walls are covered in wood panels, they are generally strong. However, the adhesive needs to bond well with the wood’s finish.
- Tile: Some areas, like kitchens or bathrooms, might have tiled walls. Attaching anything to tile requires special adhesives or methods, as tile surfaces can be smooth and non-porous.
Adhesive Solutions for Floating Shelves
When the goal is how to install a floating shelf without drilling, adhesives are your best friend. They offer a damage-free way to mount shelves. There are several types of adhesives that can work well, but it’s important to pick the right one for the job.
Weight capacity and surface compatibility are the main things to consider.
Heavy-duty mounting tapes are a popular choice. These are often double-sided tapes made with strong acrylic adhesive. They can hold a surprising amount of weight, often specified by the manufacturer.
It’s crucial to follow the application instructions precisely. This usually involves cleaning the wall and the shelf surface, applying the tape, and pressing firmly for a set amount of time.
Command Strips are a well-known brand that offers adhesive solutions designed for hanging items without nails or screws. They come in various weight limits and are often designed to be removed cleanly. For floating shelves, you would look for their strongest options, often labeled for heavy items.
The key to their success is the clean removal process, which usually involves stretching the strip downwards to release the adhesive.
Another option is construction adhesive, sometimes called liquid nails. This is a very strong adhesive that comes in a tube, similar to caulk. It provides a powerful bond but is generally permanent and can be difficult to remove without damaging the wall.
If you choose this, ensure you are absolutely certain about the shelf placement. Application involves applying small beads of the adhesive to the shelf’s mounting bracket or the back of the shelf itself, then pressing it firmly against the wall.
Weight Capacity of Adhesives
- Mounting Tapes: These can typically hold anywhere from 5 to 50 pounds per strip, depending on the brand and product. Always check the packaging. Using multiple strips can increase the total weight capacity.
- Command Strips: Many Command Strips are rated for 1 to 5 pounds, but their heavier-duty options can hold up to 15 pounds. You can use multiple strips to support heavier shelves.
- Construction Adhesive: This is the strongest option, capable of holding 100 pounds or more. However, its strength means it’s very difficult to remove without causing damage.
It’s essential to consider the total weight the shelf will hold, including the shelf itself and the items you plan to put on it. Always err on the side of caution and choose an adhesive that can handle more weight than you expect to need.
Using Adhesive Hooks and Brackets
For a truly “floating” look, the shelf itself appears to be attached directly to the wall with no visible support. However, even without drilling, there’s often a hidden bracket or mechanism involved. When you’re looking at how to install a floating shelf without drilling, you might be using a shelf system that comes with its own adhesive mounting system.
Some manufacturers create floating shelves with integrated adhesive backing on the mounting plate. You simply peel off the protective layer and press the shelf onto the wall. These are usually for lighter shelves.
For heavier shelves, you might use a strong adhesive hook system. You can attach heavy-duty adhesive hooks to the wall, and then design a way for the shelf to slot onto these hooks.
Another clever method involves using very strong adhesive strips to attach a slim mounting bracket to the wall. This bracket then slides into the back of the floating shelf. The key here is ensuring the bracket is perfectly level and securely attached to the wall.
This method requires precision to make sure the shelf sits flush and looks professional.
Imagine wanting to hang a small display shelf for lightweight photos. You could use four strong, clear adhesive hooks placed in a rectangle. Then, a thin wooden plank with small notches on the back could rest on these hooks.
This creates a minimalist floating shelf effect. The weight limit of the hooks is the main concern here.
Sample Scenario for Adhesive Hook Shelf
- Choose four heavy-duty clear adhesive hooks with a weight rating of at least 5 pounds each.
- Clean the wall surface thoroughly with rubbing alcohol to ensure good adhesion.
- Carefully measure and mark where the shelf will go, ensuring the marks for each hook are perfectly level.
- Apply the adhesive hooks according to the manufacturer’s instructions, pressing firmly for the recommended time.
- Allow the adhesive to cure for at least 24 hours before hanging the shelf.
- Place a thin, sturdy shelf board onto the hooks. Ensure the board is securely seated and balanced.
Alternative No-Drill Mounting Options
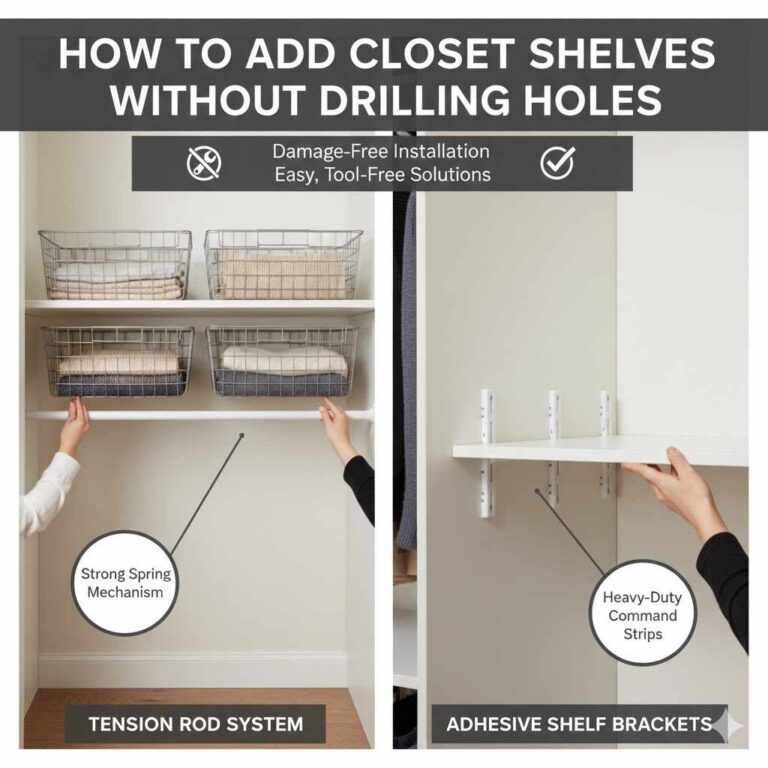
Beyond adhesives, there are other creative ways to mount shelves without reaching for a drill. These methods are ideal for specific situations or when you need to support more weight. One common and effective method involves tension rods or tension shelves that utilize pressure against walls or ceilings.
Tension rods, similar to shower curtain rods, can be used to create a support system in a corner or between two walls. You could potentially use these to support a shelf that rests on top of them. Another related concept is the use of adjustable tension poles.
These poles extend from floor to ceiling or between two walls and can often be fitted with various accessories, including shelves. This is a great option for renters as it leaves no marks and can support significant weight.
Another ingenious solution involves using existing furniture. If you have a bookcase or a large piece of furniture near where you want your shelf, you might be able to attach a shelf to that. For example, you could use strong clamps or even zip ties to secure a shelf to the top of a tall dresser or wardrobe.
This is a less conventional approach but can work for specific decorative needs.
Consider a scenario where you want a small shelf above your bed for a book and a glass of water. Instead of drilling into the wall, you could use a tension rod positioned just above the headboard, spanning across the width of the bed. A narrow shelf could then be placed on top of this rod, providing a convenient and easily removable storage solution.
Benefits of Tension Pole Shelving
- No Wall Damage: Tension poles use pressure to stay in place, meaning no holes or marks on your walls. This is ideal for renters or those who move frequently.
- Versatile Placement: They can be installed in corners, between walls, or even in specific spaces like closets or kitchens. Their height and width can often be adjusted to fit the location.
- Strong Weight Support: Many tension pole systems are designed to hold a considerable amount of weight, often more than adhesive solutions. This makes them suitable for books, plants, or decorative items.
- Easy Installation and Removal: Setting up a tension pole is usually straightforward and can be done by one person. Taking it down is just as simple, leaving no trace behind.
Choosing the Right Shelf Style for No-Drill Methods
When you’re aiming for how to install a floating shelf without drilling, the type of shelf you choose matters a great deal. Some shelves are designed with no-drill mounting in mind, while others will be much harder to adapt. Lightweight shelves are generally easier to manage with adhesive solutions.
Think about shelves made from hollow materials or thin wood.
Shelves that have a built-in channel or a thick back edge are often easier to use with certain no-drill systems. For example, a shelf designed to slide onto a hidden bracket works perfectly if that bracket can be securely adhered to the wall. Shelves with very thin backs might be harder to attach to adhesive brackets.
Consider shelves that have a deeper profile. A thicker shelf can sometimes hide the mounting hardware more effectively. If you’re using adhesive hooks, a shelf with a flat bottom edge will rest more securely than one with a curved or uneven edge.
Always look at the dimensions and design of the shelf to see how it might integrate with a no-drill mounting system.
Weight Considerations for Shelf Types
- Hollow Core Shelves: These are very lightweight and ideal for adhesive mounting. They are made with a frame and a thin covering, making them easy to handle.
- Solid Wood Shelves: These can be heavier. If opting for no-drill methods, ensure the adhesive or bracket system can support the shelf’s weight plus its contents. You might need multiple mounting points.
- Metal Shelves: Depending on the design, metal shelves can range from lightweight to quite heavy. Wire shelves are often lighter and can be secured with strong adhesive hooks if the design allows.
Preparing Your Wall and Shelf
Regardless of the no-drill method you choose, proper preparation is critical for success. This means making sure both the wall surface and the part of the shelf that will make contact with the wall are clean and dry. Any dust, grease, or moisture can prevent the adhesive from sticking properly, leading to the shelf falling down.
For walls, start by wiping down the area where the shelf will be placed with a damp cloth. Once dry, use rubbing alcohol on a clean cloth. This removes any lingering residues and ensures a pristine surface for the adhesive.
If you’re painting the wall, make sure the paint is fully cured. Fresh paint can sometimes interfere with adhesives.
For the shelf itself, check its mounting surface. If it’s a wooden shelf, ensure it’s free of dust or any finish that might prevent adhesion. If you’re using a shelf with a hidden bracket that slides into it, make sure the inside of that channel is clean.
Some products recommend lightly sanding a surface for better grip, but this is rarely needed for strong adhesives and can damage the shelf’s finish.
Take your time with the preparation steps. Rushing this part is a common mistake that can lead to failure. A little extra time spent cleaning and preparing can save you a lot of trouble later on.
This is especially true when you’re trying to achieve how to install a floating shelf without drilling, as the bond needs to be as strong as possible.
Surface Preparation Checklist
- Clean the wall area with mild soap and water, then rinse and dry thoroughly.
- Wipe the wall area again with rubbing alcohol and let it air dry completely.
- Ensure the wall surface is smooth and free of any loose paint or wallpaper.
- Clean the shelf’s mounting surface or any accompanying bracket with a dry cloth.
- If using adhesive strips, ensure the surfaces are completely dry before application.
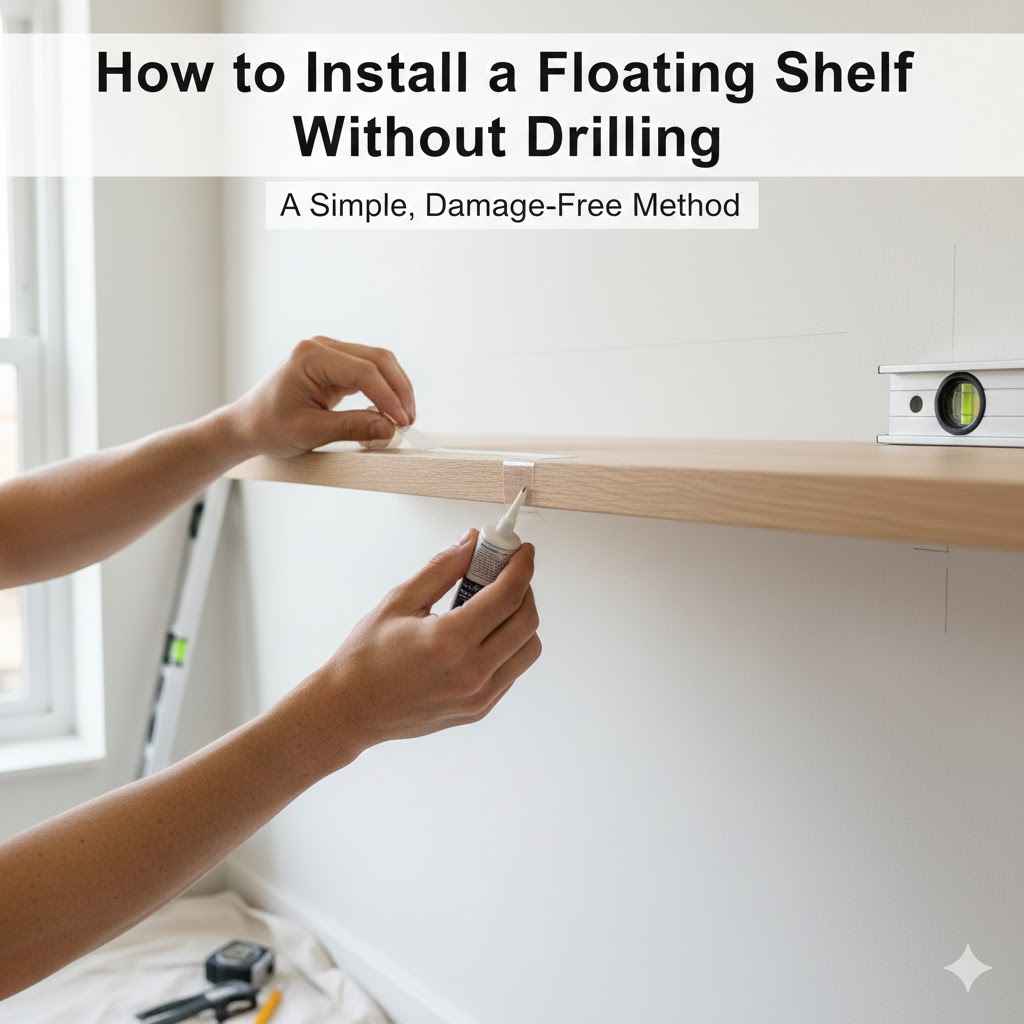
Step-by-Step Installation Guide (Adhesive Mount)
This guide focuses on using strong adhesive strips or Command Strips, a popular and reliable method for how to install a floating shelf without drilling. Always refer to the specific instructions provided with your adhesive product and your shelf.
- Gather Your Supplies: You will need your floating shelf, appropriate heavy-duty adhesive strips (e.g., Command Strips rated for the weight), a level, a measuring tape, and rubbing alcohol with clean cloths.
- Determine Shelf Placement: Decide exactly where you want your shelf. Use a level to ensure your measurements are straight. Mark the desired location lightly with a pencil.
- Prepare the Wall: Clean the marked area of the wall thoroughly with rubbing alcohol. Allow it to dry completely.
- Apply Adhesive Strips to Shelf Bracket: If your shelf has a separate mounting bracket, apply the adhesive strips to the back of the bracket according to the product instructions. For shelves with integrated adhesive, prepare those surfaces. Ensure you use enough strips to cover the area and support the weight.
- Position the Bracket on the Wall: Carefully align the bracket with your pencil marks. Press the bracket firmly against the wall. Hold it in place for the manufacturer’s recommended time (often 30 seconds to a minute).
- Allow Adhesive to Cure: This is a crucial step! Most adhesives require a curing time of at least 24 hours (sometimes up to 72 hours for maximum strength) before you can hang the shelf or place items on it. Do not skip this step, as it’s vital for a strong bond.
- Attach the Shelf: Once the adhesive has fully cured, slide or attach the shelf onto the mounted bracket. Ensure it sits securely and is level.
- Test the Shelf: Gently place a lightweight item on the shelf to test its stability. If it feels secure, you can gradually add more items, staying within the weight limit recommended by the adhesive manufacturer.
Securing Heavier Shelves with No-Drill Techniques
While adhesives are great for many situations, some people need to hang heavier shelves and worry about how to install a floating shelf without drilling safely. For these cases, you need to think beyond simple adhesive strips.
One robust no-drill method involves using specialized tension poles or adjustable shelf units. These systems are designed to wedge firmly between two surfaces, like the floor and ceiling, or two opposing walls. They often have integrated shelving units or allow you to attach your own shelves.
This provides a very strong support system without any wall damage.
Another option is to use what are sometimes called “tension rod shelves.” These are essentially strong tension rods placed strategically, with a shelf board resting on top. For example, in a corner of a room, you could install two tension rods, one slightly above the other, and then place a shelf on the upper rod. This creates a layered shelving unit that is very secure and damage-free.
For very heavy items, you might even consider specialized non-damaging wall hooks that use a different type of grip, like a screw-in anchor that’s designed to be removed cleanly. However, these are less common and may still leave minor marks.
Weight Comparison: Adhesives vs. Tension Systems
| Method | Typical Weight Capacity (per support point/system) | Suitability for Heavy Shelves |
|---|---|---|
| Heavy-Duty Adhesive Strips (e.g., Command) | 5-15 pounds | Limited; requires multiple points and careful weight distribution. |
| Construction Adhesive | 50+ pounds (depending on surface and application) | High, but permanent and potentially damaging upon removal. |
| Tension Poles/Systems | 20-100+ pounds (depending on pole strength and installation) | Excellent; designed for significant weight without wall damage. |
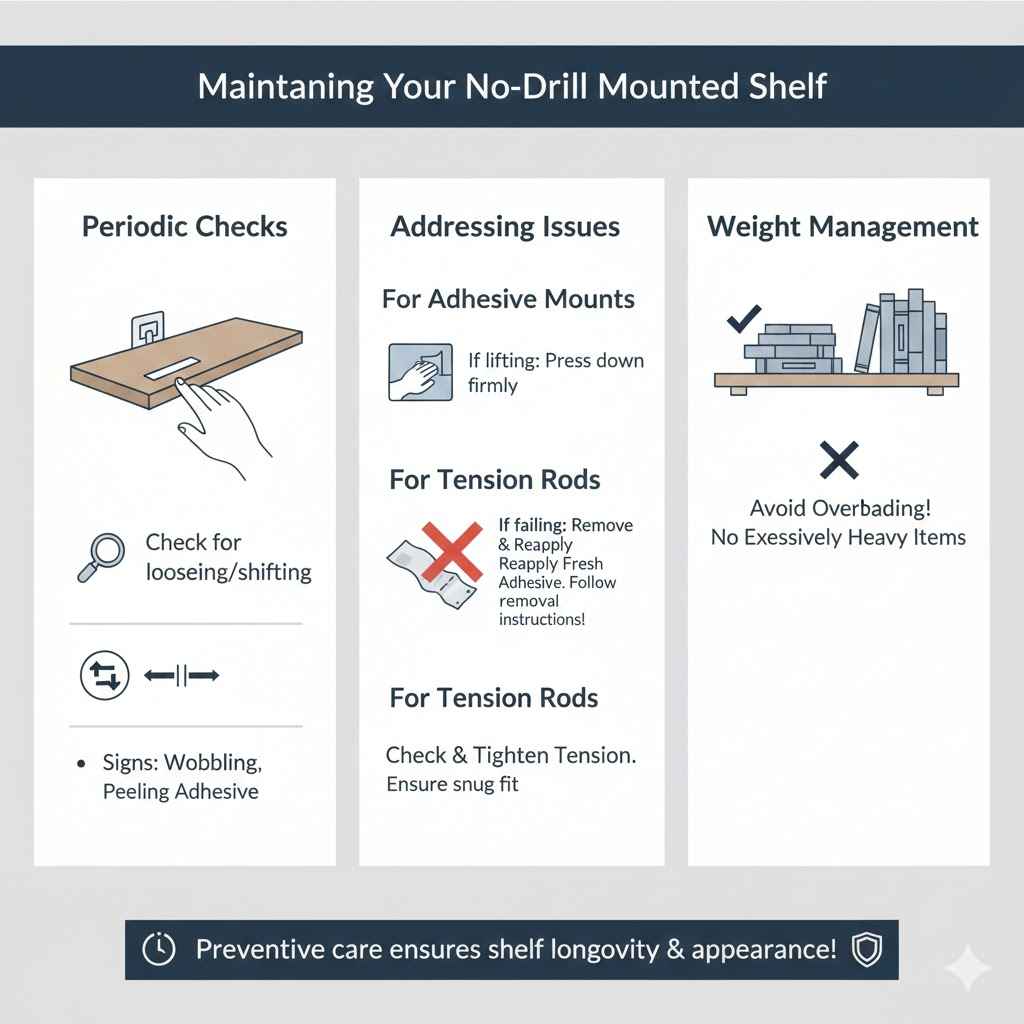
Maintaining Your No-Drill Mounted Shelf
Even with the best no-drill installation, it’s wise to maintain your shelf and its mounting system. Periodically check the shelf for any signs of loosening or shifting. If you notice any wobbling or if the adhesive seems to be peeling away, it’s time to address it.
For adhesive mounts, if you see a corner lifting, you might be able to press it back down firmly. However, if the adhesive has lost its stickiness or is peeling significantly, it’s best to remove the shelf completely and reapply fresh adhesive. Remember to follow the removal instructions carefully to avoid wall damage.
With tension rod systems, check the tension periodically. Over time, walls might settle slightly, or the rods could loosen. Ensure the poles remain snug and secure.
If you’re using a shelf that rests on tension rods, make sure it hasn’t shifted out of place.
Regularly inspect the items on your shelf as well. Overloading a shelf, even one mounted securely, can eventually put too much strain on the mounting system. Distribute weight evenly and avoid placing excessively heavy items on shelves not designed for them.
This preventive care helps ensure your shelves stay in place and look great for a long time.
Frequently Asked Questions
Question: Can I use regular double-sided tape to hang a floating shelf
Answer: Regular double-sided tape is generally not strong enough for most floating shelves. You need specialized heavy-duty mounting tapes designed to hold significant weight and bond well to wall surfaces.
Question: How do I know if my wall can handle an adhesive shelf
Answer: Most wall surfaces like drywall and plaster can support adhesive shelves if the correct products are used and weight limits are respected. Ensure the wall surface is clean, dry, and in good condition.
Question: Will adhesive damage my paint when I remove the shelf
Answer: Many adhesive products, like Command Strips, are designed for clean removal without damaging paint. However, following the specific removal instructions carefully is important. Older paint or textured surfaces might be more susceptible to damage.
Question: What is the maximum weight a no-drill shelf can hold
Answer: The maximum weight varies greatly depending on the method. Adhesives might hold 5-15 pounds, while robust tension systems can often support 50-100+ pounds.
Question: Can I install a floating shelf without drilling on a textured wall
Answer: Installing on textured walls can be challenging for adhesives. Smooth surfaces offer the best adhesion. For textured walls, you might need extra-strong adhesives or consider a tension-based system that doesn’t rely on surface grip.
Summary
Learning how to install a floating shelf without drilling is achievable with the right methods. You can use strong adhesives like heavy-duty mounting tape or specialized strips. Tension poles and rods also offer secure, damage-free solutions for heavier items.
Proper wall and shelf preparation is key for any no-drill method. Always check weight limits and follow product instructions for the best results and a stylish, secure display.