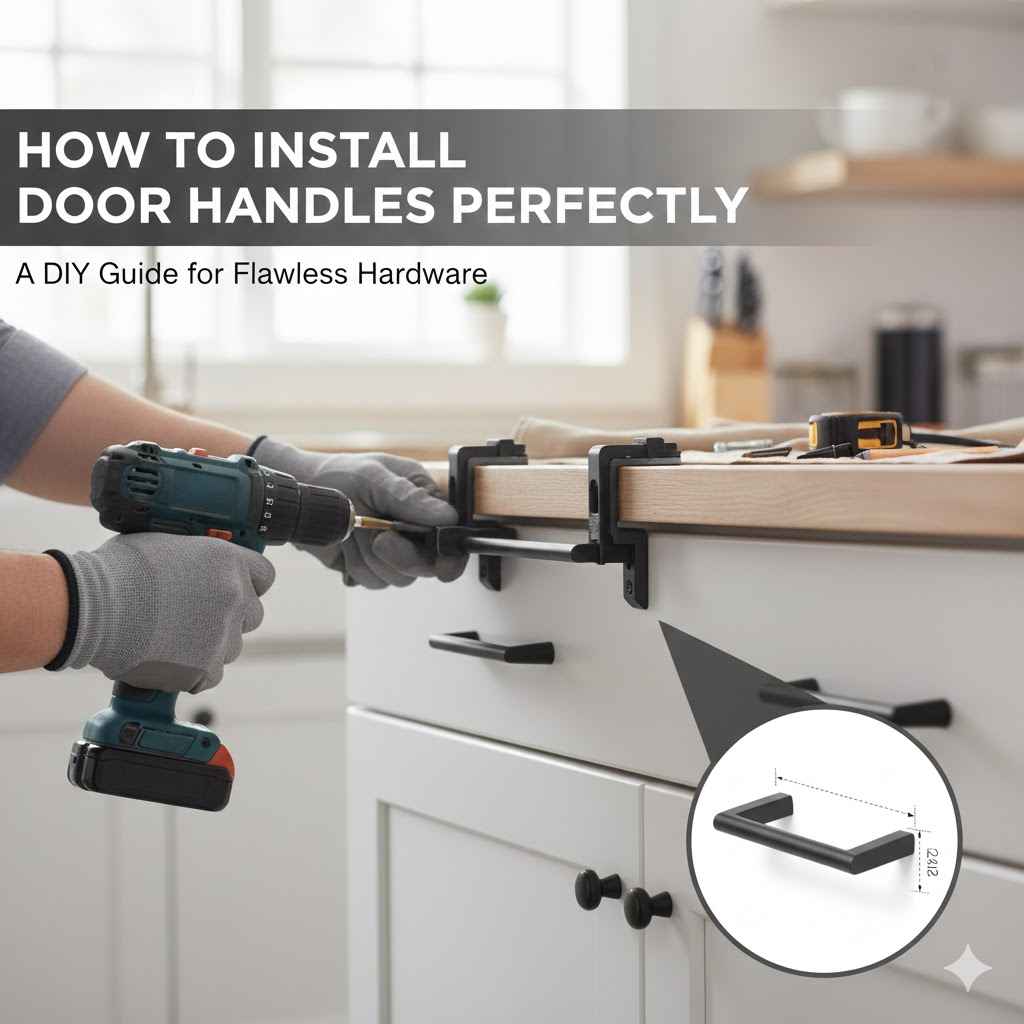
How to Install Cabinet Door Handles Perfectly
Putting cabinet door handles on might seem easy, but getting them just right can be tricky for beginners. You want them straight and even, and sometimes that’s harder than it looks! Don’t worry, though.
This guide makesHow to Install Cabinet Door Handles Perfectly super simple. We’ll walk you through every step so your cabinets look amazing. Get ready to learn how to make your kitchen or bathroom hardware look professionally installed.
Perfectly Aligning Cabinet Door Handles
Getting your cabinet door handles straight and centered is key to a polished look. This section covers the essentials for ensuring your new hardware looks fantastic. We’ll explore the tools you need and the basic methods to achieve that professional finish everyone wants.
It’s all about precision and a little bit of planning before you even pick up a drill. A well-placed handle makes a big difference.
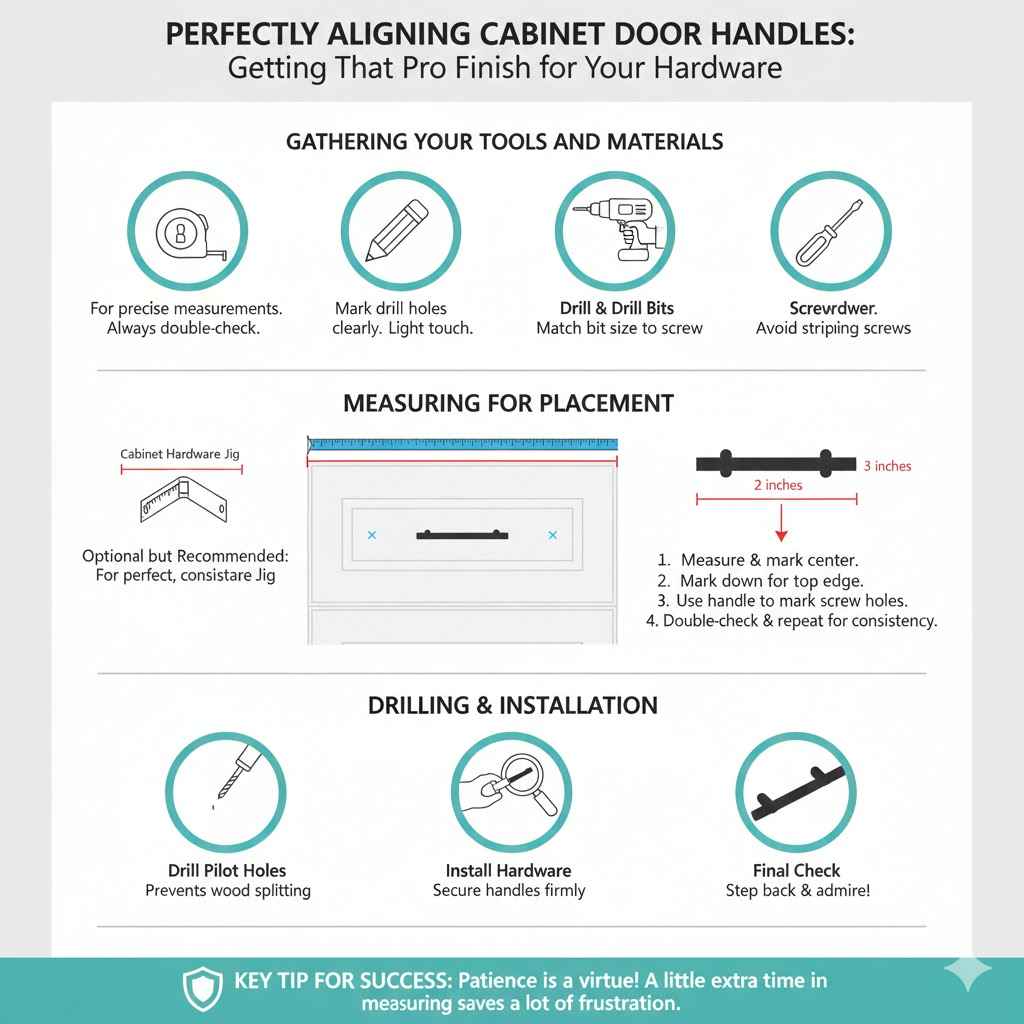
Gathering Your Tools and Materials
Before you start, having the right tools makes the job much smoother. You’ll need a few basic items that most homeowners already have. A tape measure is essential for accurate placement.
A pencil is used for marking drill points. A drill with appropriately sized drill bits is necessary for making the holes. You’ll also want a screwdriver that fits your handle screws.
Some people prefer a template or jig for extra accuracy, which can be very helpful.
Tape Measure: For precise measurements from edges and other hardware.
A tape measure is your best friend for this project. It helps you find the exact center of a drawer front or cabinet door, or measure the consistent distance from the edge. Without it, your handles could end up crooked or off-center, which is frustrating and looks unprofessional.
Always double-check your measurements.
Pencil: For marking drill holes clearly.
Use a sharp pencil to make clear marks. A light touch is best so you don’t damage the cabinet finish. These marks are where you’ll drill, so they need to be accurate and visible.
Drill and Drill Bits: To create the necessary holes for the screws.
The drill size depends on the screws that come with your handles. You might need a smaller bit for pilot holes or a bit that matches the screw diameter. Always check the screw size before drilling.
Using the wrong size can strip the holes or make them too large.
Screwdriver: To secure the handles.
A Phillips head or flathead screwdriver will work, depending on the screw type. Ensure it fits snugly to avoid slipping and damaging the screw head or your cabinet.
Cabinet Hardware Jig or Template (Optional but Recommended): For perfect, consistent placement.
A jig is a fantastic tool, especially if you have many cabinets or drawers. It’s a guide that helps you mark or drill holes at the exact same spot every time. This ensures all your handles line up perfectly across your kitchen or bathroom.
You can buy them or even make your own simple template from cardboard.
Measuring for Placement
Accurate measuring prevents crooked handles. For drawers, you’ll typically center the handle horizontally and place it a specific distance from the top edge. For doors, it’s often centered horizontally and a set distance from the top edge as well, or centered vertically if it’s a single handle.
Let’s say you want your drawer handles centered 2 inches down from the top of the drawer face. First, measure the width of the drawer face. If it’s 20 inches wide, the center is at 10 inches.
Mark that center point lightly with your pencil. Then, measure down 2 inches from the top edge at that center point and make another mark. This is where the middle of your handle will go.
If your handle has two screws, you’ll need to measure the distance between the screw holes on the handle itself. Let’s say they are 3 inches apart. You’d then mark your two screw hole locations 1.5 inches to the left and 1.5 inches to the right of your center mark, ensuring they are also 2 inches from the top edge.
Consistency is key. If you are installing hardware on multiple drawers, make sure the measurements are identical for each one. This might involve creating a simple paper template to trace.
This ensures that when you look at your cabinets, all the handles align perfectly.
Step-by-Step Guide to Installing Cabinet Door Handles
Now that you have your tools and your measurements, it’s time to actually put those handles on. This part is straightforward if you follow these steps carefully. We’ll cover marking, drilling, and attaching the hardware.
The goal is to make this process smooth and stress-free, giving you a great result.
Marking the Drill Holes
With your measurements ready, it’s time to mark exactly where you’ll drill. Use your pencil to make clear, small marks at the spots you’ve determined. If you’re using a jig, align it precisely with the edge of your cabinet door or drawer front and mark through its guide holes.
For a single-hole handle, like a knob, you’ll have one clear center mark. For a two-hole handle, like a pull, you’ll have two marks. Ensure these marks are level with each other and at the correct distance from the edges.
A common mistake is marking one hole and then trying to eyeball the second. It’s much better to measure the distance between the screw holes on the handle and then transfer that exact measurement to your cabinet door.
Consider the material of your cabinets. If you have a dark finish, use a light-colored pencil or chalk to make the marks visible. For light finishes, a regular pencil is fine.
The marks should be small and precise.
Drilling the Holes
Choose the correct drill bit size. It should match the diameter of the screws that will hold your handles. If you’re unsure, a good rule of thumb is to use a bit that’s just slightly smaller than the screw’s shank (the solid part without threads).
This creates a pilot hole that guides the screw and prevents the wood from splitting, especially in solid wood cabinets.
If you are drilling into a hollow-core cabinet door, be extra careful. Drill slowly and only go as deep as needed for the screw. You don’t want to drill through the other side of the door.
Some people place a piece of tape on their drill bit to mark the correct depth.
Drill straight down at each marked spot. Hold the drill firmly and keep it perpendicular to the cabinet surface. A wobbly drill can lead to angled holes, making it hard to attach the handle straight.
If you’re using a jig, it will help ensure your drill stays straight.
Attaching the Handles
Once the holes are drilled, take your screws and the handle. Insert the screws from the inside of the cabinet door or drawer front, pushing them through the holes you just drilled.
Align the handle on the outside with the protruding screws. Gently turn the screws by hand at first to catch the threads. Make sure the handle is sitting flush against the cabinet surface.
Once it feels snug, use your screwdriver to tighten the screws the rest of the way. Don’t overtighten, as this can strip the screw head or damage the cabinet finish.
For two-hole handles, attach one screw loosely, then the second. Then, go back and tighten both evenly. This helps ensure the handle sits flat and straight before it’s fully secured.
Check the handle’s alignment one last time before fully tightening.
Common Challenges and How to Solve Them
Even with careful planning, a few things can go wrong. One common issue is drilling through to the other side of the cabinet. To avoid this, put a piece of tape on your drill bit to mark how deep you need to go, or use a drill bit depth stop if you have one.
Another problem is misaligned holes. This is where using a jig or template is invaluable.
If you find a hole is slightly off, don’t panic. For a single-hole handle, you might be able to adjust the handle slightly to cover the error. For two-hole handles, if the holes are slightly too far apart, you may need to use larger screws or a different handle.
If they are too close, you might be able to carefully widen the holes slightly with a drill bit or reamer, but this requires care to avoid damaging the finish.
Stripped screw holes can happen. If a screw won’t tighten, you can try inserting a wooden toothpick or two into the hole, along with a little wood glue. Let it dry, then trim it flush and re-drill a pilot hole.
This reinforces the hole for the screw.
Advanced Tips for a Professional Finish
For those looking to go the extra mile, a few simple techniques can elevate the look of your cabinet hardware. These tips focus on perfection and long-term durability, ensuring your handles look great for years to come. Getting these details right makes a noticeable difference in the overall appearance of your cabinets.
Using Templates for Perfect Alignment
Templates or jigs are incredibly useful for ensuring every single handle is placed in the exact same spot. You can buy specialized cabinet hardware jigs at hardware stores. They often have adjustable guides and rulers, making it easy to set the correct position for any handle type and size.
Alternatively, you can create your own template from sturdy cardboard or thin plywood. Measure and mark your desired handle position on the template. Then, carefully drill holes through the template.
This template can then be used repeatedly on all your cabinets and drawers, guaranteeing that every handle is perfectly aligned and at the same height and distance from the edge. This consistency is what makes a professional installation stand out.
Dealing with Different Cabinet Materials
The type of cabinet material can influence how you install the handles. Solid wood cabinets are generally forgiving and can handle most installation methods. Particleboard or MDF cabinets, however, require a bit more care.
These materials are less dense and can strip more easily.
For particleboard or MDF, it’s highly recommended to use pilot holes that are slightly smaller than your screws. This helps the screw threads grip the material effectively. Some people also add a bit of wood glue to the pilot hole before inserting the screw for extra strength.
Avoid overtightening screws, as this can quickly damage the composite material.
If you have glass-front cabinets or doors with a laminate finish, you’ll need to be very careful not to chip or scratch the surface. Use masking tape around the drill area to protect the finish. For glass, you would typically need specialized drill bits designed for glass, and a lot of care to prevent breakage.
Choosing the Right Hardware
The style and size of your cabinet handles can dramatically change the look of your cabinets. When selecting new hardware, consider the overall style of your kitchen or bathroom. Modern kitchens might suit sleek, minimalist pulls, while a more traditional space might look great with ornate knobs.
Measure your existing hardware if you’re replacing it. The distance between the screw holes, known as the “center-to-center” measurement, is crucial. If you buy new pulls with a different center-to-center measurement than your old ones, you’ll likely need to drill new holes.
If you want to avoid drilling new holes, make sure to buy hardware with the same center-to-center measurement.
Consider the scale. For very large drawers or doors, a small knob might look out of place. Conversely, oversized pulls on small cabinets can overwhelm the design.
Think about how the hardware will look and feel in proportion to the cabinet surface. The weight and finish of the hardware also contribute to the overall feel and durability.
Maintenance and Longevity
Once your beautiful new handles are installed, a little care can ensure they stay looking great. Regularly clean your cabinet hardware with a soft, damp cloth. Avoid abrasive cleaners or scouring pads, as these can scratch or dull the finish.
For most metals, a mild soap and water solution is sufficient.
For hardware that tends to loosen over time (which can happen with heavy use), you can apply a tiny drop of clear nail polish or a thread-locking compound to the screws before tightening them. This acts as a mild adhesive to keep them from vibrating loose. However, be sure it’s something that can be easily removed if needed.
Check the screws periodically, especially in high-traffic areas like kitchen drawers, and tighten them if they start to feel loose. This simple maintenance helps preserve the look and functionality of your cabinet hardware.
Measuring and Calculating Handle Placement
Accurate measurements are the backbone of perfect handle installation. This section dives into the specifics of how to measure and calculate the exact spots for your hardware, ensuring everything aligns beautifully. We’ll cover common placements and how to adapt them.
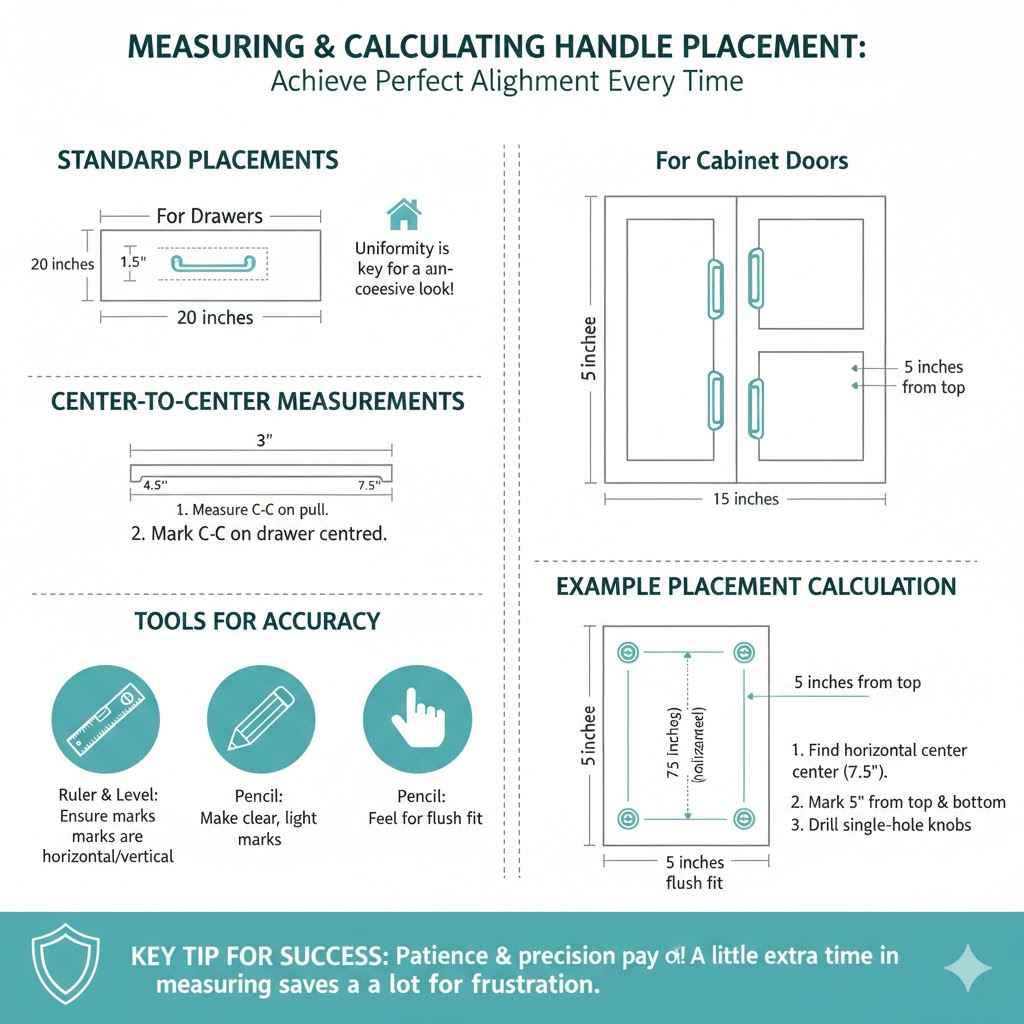
Standard Placements for Drawers and Doors
For most drawers, handles are centered horizontally. You measure the total width of the drawer face, find the midpoint, and mark it. Then, decide how far down from the top edge you want the handle.
A common distance is 1.5 to 3 inches, but this can vary based on the drawer height and your preference. For a two-hole pull, you’ll measure the distance between the screw holes on the pull itself (the center-to-center measurement) and mark those two points equidistant from your center vertical line.
Cabinet doors often follow similar principles. For doors with one handle, centering is key. For doors with two handles, they are typically placed one above the other.
In this case, you’d divide the door height into three equal sections, placing the top handle in the upper section and the bottom handle in the lower section, ensuring consistent spacing between them and from the top and bottom edges. Alternatively, they can be centered vertically on the door.
Consider the overall design. If you have a lot of cabinet doors and drawers, aiming for uniformity in placement across all of them creates a cohesive and professional look. For example, if your drawer handles are 2 inches from the top, make sure your upper cabinet door handles are also 2 inches from the top edge.
Calculating Center-to-Center Measurements
The “center-to-center” measurement is the distance between the exact centers of the screw holes on a cabinet handle or pull. This is vital when buying new hardware to ensure it will fit existing holes or to plan for new ones. Most manufacturers provide this measurement for their products.
If you are replacing hardware, measure the distance between the centers of the existing screw holes. If your new hardware has the same center-to-center measurement, you can likely use the existing holes. If the measurements differ, you’ll need to drill new holes.
Be prepared to fill old holes if the new hardware doesn’t cover them.
Let’s say you have a pull that is 4 inches long and has screw holes 3 inches apart (center-to-center). If you want this pull centered on a 12-inch wide drawer face, the midpoint is at 6 inches. You would mark your first hole 1.5 inches to the left of the 6-inch mark (at 4.5 inches from the edge) and your second hole 1.5 inches to the right (at 7.5 inches from the edge).
This places the 3-inch pull perfectly centered.
Using a Ruler and Level for Accuracy
While a tape measure is essential for overall measurements, a ruler can be helpful for fine-tuning. A clear ruler can make it easier to see your pencil marks. For ensuring your marks are perfectly horizontal or vertical, a small spirit level is invaluable.
Place the level on your ruler or directly on the cabinet surface to confirm that your lines and marks are true.
After marking your drill spots, place the level across the two marks for a two-hole handle. If the bubble is centered, your marks are perfectly level. This simple check can save you a lot of trouble later.
Similarly, check that your vertical marks are plumb by placing the level along that line.
Many hardware jigs come with built-in rulers and levels, streamlining this process. If you don’t have a jig, combining a good ruler with a spirit level gives you the precision needed for a professional result. Double-checking your marks with a level before drilling is a smart step.
Example Placement Calculation
Imagine you have a cabinet door that is 30 inches tall and 15 inches wide. You want to install two knobs vertically, one above the other. You decide you want the knobs to be 5 inches from the top and bottom edges, respectively, and they should be centered horizontally.
First, find the horizontal center of the door: 15 inches / 2 = 7.5 inches. Mark a faint vertical line at 7.5 inches from either side.
Now, measure 5 inches down from the top edge along this center line. Make your first mark. Next, measure 5 inches up from the bottom edge along the same center line.
Make your second mark. If your knobs have a single screw hole, these two marks are where you’ll drill. If your knobs are decorative and don’t have screw holes, you might center them at these points and mark the drill location from the back.
The distance between these two marks is now fixed and consistent.
For pulls, if you were installing two pulls vertically, you’d then measure the center-to-center distance of the pulls and adjust the spacing between your marks to accommodate them while maintaining the desired distance from the top and bottom. For instance, if the pulls have a 3-inch center-to-center measurement, you’d mark the first pull’s top hole 5 inches from the top edge, then the bottom hole of the first pull 3 inches below that, and so on for the second pull, ensuring the last pull’s bottom hole is 5 inches from the bottom edge.
Frequently Asked Questions
Question: What is the best way to ensure handles are perfectly straight?
Answer: Use a level after marking your drill points. Place the level across your marks to ensure they are perfectly horizontal before drilling. A hardware jig or template also greatly helps maintain straightness.
Question: How far should cabinet handles be from the edge?
Answer: A common distance is between 1.5 and 3 inches from the edge for drawers and upper cabinet doors. This can vary based on cabinet size and personal style. Always aim for consistency.
Question: What size drill bit should I use for cabinet handles?
Answer: Use a drill bit that matches the diameter of the screw shank. For most standard cabinet screws, this will be a bit slightly smaller than the screw itself to create a pilot hole that guides the screw and prevents splitting.
Question: Can I install handles on cabinets with holes that are too far apart?
Answer: If the existing holes are too far apart for your new handles, you might need to fill the old holes with wood filler or dowels and re-drill new ones. You could also look for handles with a longer center-to-center measurement.
Question: How do I avoid damaging my cabinet finish when drilling?
Answer: Place masking tape over the area where you plan to drill. This protects the finish from scratches. Drill slowly and carefully, and ensure your drill bit is sharp for a clean cut.
Summary
Installing cabinet door handles perfectly is achievable with careful measurement and the right tools. We’ve covered how to select hardware, use templates, accurately mark and drill holes, and attach your handles for a flawless look. Following these simple steps ensures your cabinets will have a polished, professional appearance, enhancing the overall beauty of your space.