How to Effortlessly Install a Cotter Pin: Ultimate Guide
To install a cotter pin, align the holes of the fastened objects and insert the pin through, then bend the ends in opposite directions to secure. When it comes to securing fastened objects, such as bolts or clevis pins, a cotter pin can be a reliable solution.
This small yet essential piece of hardware ensures that the connection remains intact, preventing any accidental loosening or disassembly. To install a cotter pin, start by aligning the holes of the fastened objects. Then, insert the pin through the aligned holes and bend the ends in opposite directions to ensure a secure fit.
This simple installation process provides added safety and peace of mind in various applications, making it an indispensable element in many mechanical and automotive systems.
Choosing The Right Cotter Pin
When it comes to installing cotter pins, choosing the right one is crucial for ensuring proper functionality and safety. With a variety of cotter pins available in the market, it is vital to understand the different types and select the proper size for your specific application. This guide will help you navigate through the process of choosing the right cotter pin, ensuring a secure and reliable installation. Let’s dive in!
Understanding Different Types
In order to choose the best cotter pin for your needs, it is essential to understand the different types available. Cotter pins come in various shapes and sizes, each designed for specific applications. Here are some common types:
- Extended Prong: These cotter pins have longer prongs that can be bent more easily, providing extra security. They are ideal for applications where movement or vibrations might cause the pin to dislodge.
- Standard Prong: This type of cotter pin is the most common and widely used. It features two prongs of equal length and is suitable for general applications where moderate strength is required.
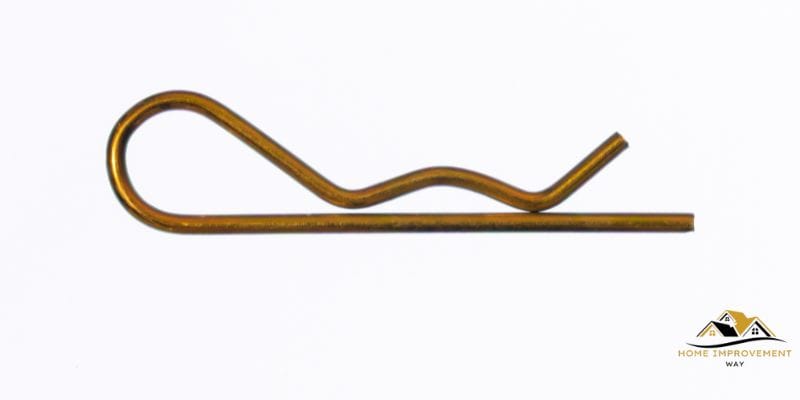
- Clinch Pin: Clinch pins, also known as “hairpin cotters,” have a loop at one end and are inserted through pre-drilled holes. They are commonly used for quick and temporary fastening.
Selecting the right type of cotter pin depends on the specific requirements of your application, such as stability, strength, and ease of installation.
Selecting The Proper Size
Choosing the proper size of the cotter pin is crucial for ensuring a secure fit. Using an incorrectly sized pin can compromise the integrity of the assembly and lead to potential accidents. Here’s how you can select the right size:
- Check the Hole Size: Measure the diameter of the hole intended for the cotter pin. Ensure that the pin you choose has a slightly larger diameter to allow for a secure fit.
- Consider the Shaft Diameter: Take into account the diameter of the shaft or the pin that the cotter pin will secure. The cotter pin should be able to pass through the hole and extend beyond the shaft to prevent it from sliding out.
- Verify the Prong Length: The prong length should be sufficient to fold back and secure the pin in place. It should not be too short, as it may not provide enough grip, or too long, which can impede installation.
By carefully considering these factors, you can select the proper size of cotter pin that fits securely and ensures the safety of your assembly.
Preparing The Material
When it comes to installing a cotter pin, proper preparation of the material is crucial. By ensuring that the material is ready for installation, you can increase the effectiveness and longevity of the cotter pin. In this section, we will guide you through the steps of preparing the material, including identifying the hole and measuring the depth.
Identifying The Hole
Before installing the cotter pin, you need to identify the hole where it will be inserted. This hole is usually located in a metal shaft or rod, and it serves as the anchor point for the pin. To identify the hole:
- Inspect the material carefully, looking for any pre-drilled holes or existing slots.
- If the hole is not readily visible, use a flashlight or magnifying glass to get a better view.
- Check the manufacturer’s instructions or consult a schematic if available, as they may provide guidance on the location of the hole.
By taking the time to properly identify the hole, you can ensure that the cotter pin is inserted into the correct location and that it will effectively secure the material.
Measuring The Depth
Once you have identified the hole, the next step is to measure its depth. Measuring the depth is crucial as it helps determine the length of the cotter pin that you will need. To measure the depth:
- Use a ruler or measuring tape to measure the distance from the surface of the material to the bottom of the hole.
- Ensure that your measurement is accurate by aligning the ruler or tape measure parallel to the hole.
- Record the measurement in millimeters or inches, depending on your preference and the unit of measurement specified by the manufacturer.
By measuring the depth accurately, you can select a cotter pin that is long enough to fully secure the material without being too long.
With the material now prepared by identifying the hole and measuring the depth, you are ready to move on to the actual installation of the cotter pin. The next section will guide you through the step-by-step process of inserting the pin securely.
Inserting The Cotter Pin
Properly inserting a cotter pin is essential to ensure the secure assembly of different mechanical components. This step-by-step guide will provide clear instructions on how to correctly insert a cotter pin to guarantee a reliable and safe installation.
Positioning The Pin
1. Locate the hole: Begin by identifying the hole where the cotter pin will be inserted. It should align with the slot or drilled hole in the nut, bolt, or other fasteners. Ensure the hole is clean and free from any dirt or debris.
2. Choose the correct pin: Select a cotter pin that is the appropriate size and length for the application. It should fit snugly in the hole without being too loose or too tight.
3. Align the pin: Place the bent end of the cotter pin through the hole, ensuring it is aligned with the slot or drilled hole in the fastener. If needed, use pliers to hold the pin and keep it in position.
Inserting The Pin Securely
1. Insert the pin through the hole: Gently push the straight end of the cotter pin through the aligned hole until the bent end emerges on the opposite side. Take care not to force the pin or bend it during insertion.
2. Bend the ends: After the pin is inserted, bend the ends in opposite directions to prevent it from slipping out. Aim for approximately a 90-degree angle to ensure a secure fit. Use pliers if necessary to achieve the desired angle.
3. Check for proper installation: Double-check that the cotter pin is seated securely in the hole and the bent ends are correctly positioned. Ensure there is no excess slack or play in the pin, as this could lead to instability or failure of the assembly.
4. Trim excess length if needed: If the cotter pin is too long and protrudes excessively, use wire cutters to trim the excess length. Be careful not to create sharp edges during the cutting process, as this could cause injury or damage to surrounding components.
By following these guidelines, you can confidently install a cotter pin and ensure the proper functioning and longevity of your mechanical assembly. Remember to always refer to the manufacturer’s instructions and guidelines specific to your application for the best results.
Bending And Securing The Pin
Now that you have successfully inserted the cotter pin into its designated hole, it’s time to ensure it stays in place securely. Bending and securing the pin properly is crucial to prevent any dislodgement or accidents. In this section, we will walk you through the essential steps to create a stable bend and ensure a tight fit for your cotter pin.
Creating A Stable Bend
Creating a stable bend in the cotter pin is the first step to secure it in place effectively. Follow these simple instructions to achieve a stable bend:
- Using a pair of pliers, grip the cotter pin close to the hole with one hand.
- With your other hand, hold the extended end of the pin firmly.
- Slightly angle the extended end away from you.
- Apply pressure evenly to begin bending the pin.
- Keep bending until the pin forms a stable, 90-degree angle to the hole.
This stable bend will prevent the cotter pin from rotating or becoming loose during use, providing the necessary stability for its intended purpose. Let’s move on to ensuring a tight fit.
Ensuring A Tight Fit
Ensuring a tight fit is crucial to maintaining the integrity of the cotter pin installation. To achieve this, follow these steps:
- Inspect the bent portion of the cotter pin to ensure it is seated correctly against the designated hole.
- If not properly aligned, use the pliers to adjust the position until it fits securely.
- Make sure the extended end of the pin is not interfering with any nearby components or mechanisms.
- Check for any signs of slack or movement in the cotter pin and adjust as necessary to achieve a snug fit.
By ensuring a tight fit, you can trust that the cotter pin will remain in place, providing the necessary safety and stability to the repaired or assembled structure.
Testing The Cotter Pin
Testing the cotter pin is an essential step to ensure its effectiveness in securing various mechanical connections. By performing these simple checks, you can guarantee that the cotter pin is correctly installed and will withstand the forces it will encounter during operation.
Checking For Movement
Before testing the strength of the cotter pin, it is crucial to ensure that there is no excessive movement or play in the connection it secures. Movement can indicate a loose or improperly threaded bolt or nut, which can compromise the cotter pin’s effectiveness. To check for movement:
- Tightly grip the connected parts and attempt to wiggle them.
- If any noticeable movement can be detected, tighten the bolt or nut until the connection becomes secure.
- Recheck for movement, ensuring that the connection remains solid without any signs of play.
In case the movement persists even after tightening, it may be necessary to evaluate the connection for potential damage or wear.
Verifying Its Strength
Ensuring the cotter pin is strong enough to withstand the anticipated forces is vital for the longevity and reliability of the connection. Here’s how you can verify the strength of the cotter pin:
- Check the manufacturer’s specifications for the appropriate strength rating of the cotter pin.
- Inspect the cotter pin for any signs of damage, such as bends, cracks, or corrosion.
- Ensure that the cotter pin is of the correct size and type for the application.
- If needed, consult an engineer or the equipment manufacturer for guidance on suitable alternatives.
By following these steps and ensuring the cotter pin is securely installed, you can have confidence in its ability to withstand the forces exerted on the connection.
Conclusion
To summarize, installing a cotter pin is a simple process that ensures the safety and stability of various mechanical components. By following the step-by-step guide mentioned earlier, you can easily secure nuts, bolts, and other fixtures in place. Remember to choose the appropriate size and style of the cotter pin, and always double-check your work to guarantee a reliable and durable installation.
With practice, you will become proficient in utilizing cotter pins effectively and efficiently. Happy pinning!